Now that the CDC is officially recommending cloth face coverings to help control the spread of novel coronavirus, a bounty of free sewing patterns has cropped up for them online. I decided to try out a few of the free ones to compare ease-of-sewing, fit, and comfort. (There are also plenty of no-sew options too, but just remember that knitted fabrics like t-shirts have huge holes and are less effective than a tightly woven fabric like quilting cotton.)
Test subjects
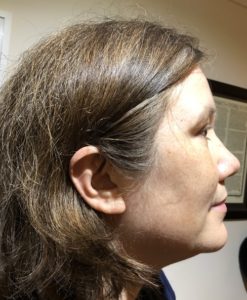
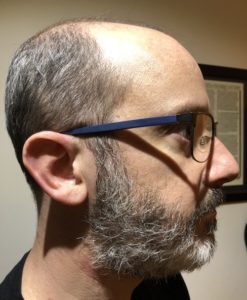
For these experiments, I’m testing fit and comfort on both myself and the Snook. Our head circumference is the same: 58.5cm / 23in. However, our head shape is very different as you can see from the profiles below. My maternal grandmother is Korean, and my face is wider and flatter with a relatively small nose. The Snook is of Italian and Welsh heritage, and he has — as he puts it — “a man nose.” He also wears spectacles, whereas I mostly wear contact lenses in public. I’ve got lots of hair; he doesn’t… but he does have a beard.
Florence Face Mask from Freesewing
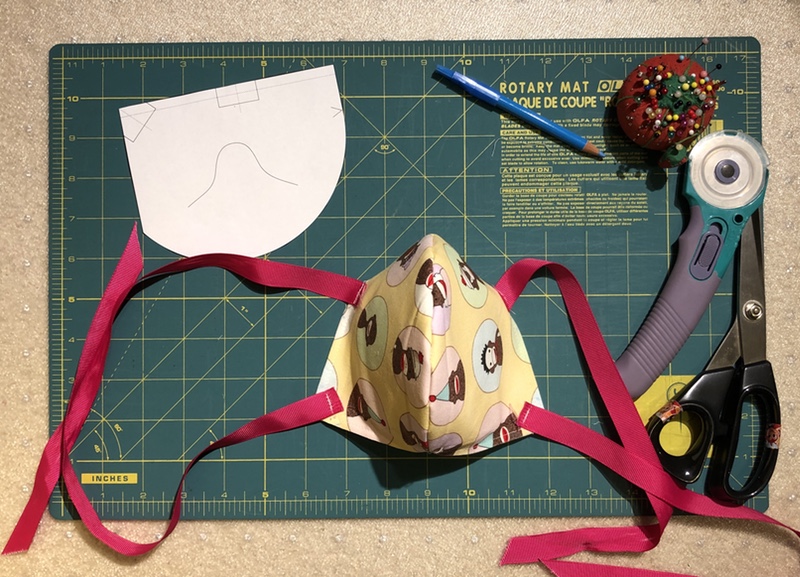
Freesewing is a super cool website where you can upload your measurements and generate completely custom-fit PDF patterns from it. I’ve used it in the past to make two shirts for the Snook. The creator Joost added the Florence Face Mask on March 1 and I bookmarked it right away. The only measurement it uses is your head circumference, and there’s only a single pattern piece to cut.
This was very, very quick to make up. I used two pieces of quilting cotton — the black novelty fabric on the outside, and a plain white for the lining. The straps are made up of some cotton webbing I had in my stash. I liked the neat method of attaching the straps so you don’t have any raw edges exposed, and the topstitching makes it nice. This has no inner filter (just the two layers of cotton), so it’s fairly light and easy to breathe through.
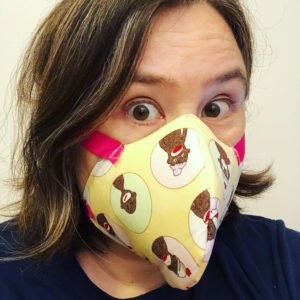
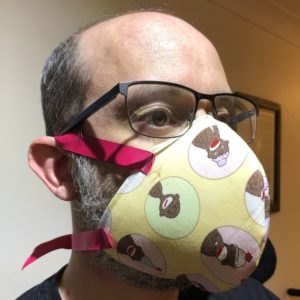
In terms of fit, the face part of this one fits me great. It does, however, make me feel like Shredder from the Ninja Turtles. I’m not a huge fan of ribbon ties though, as they tend to slip down my big round head and mess up my hair. (You can see that it’s already falling down and smooshing the top of my ear.) However, this one didn’t fit the Snook at all, and he said he felt like he needed more room for his nose. It just didn’t fit tightly around his face.
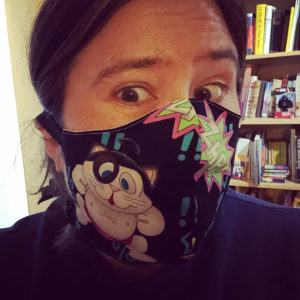

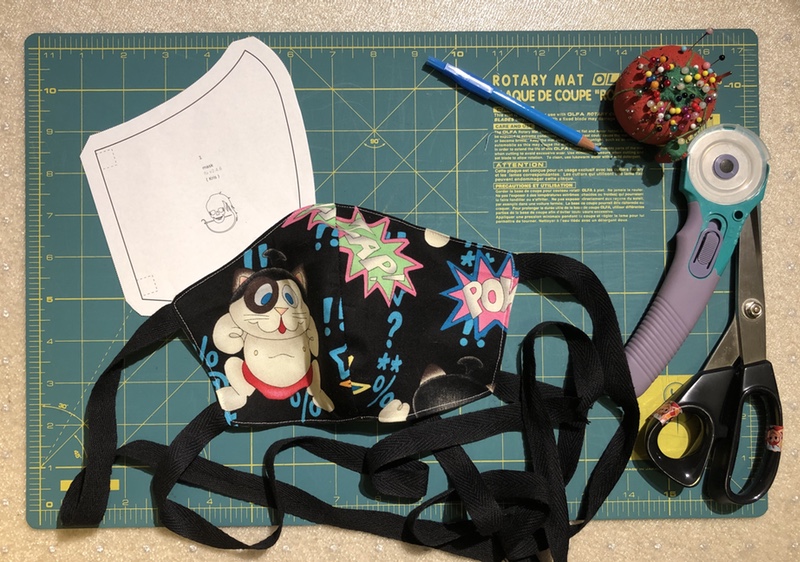
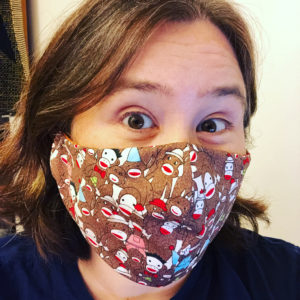
Olson Face Mask from Maker Health
I spotted this mask on Kelly Ferguson’s Instagram and she kindly pointed me to the pattern, which is from Maker Health. It comes in both adult and kids’ sizes, and what’s really cool is that it has a sort of pocket where you can insert a filter.
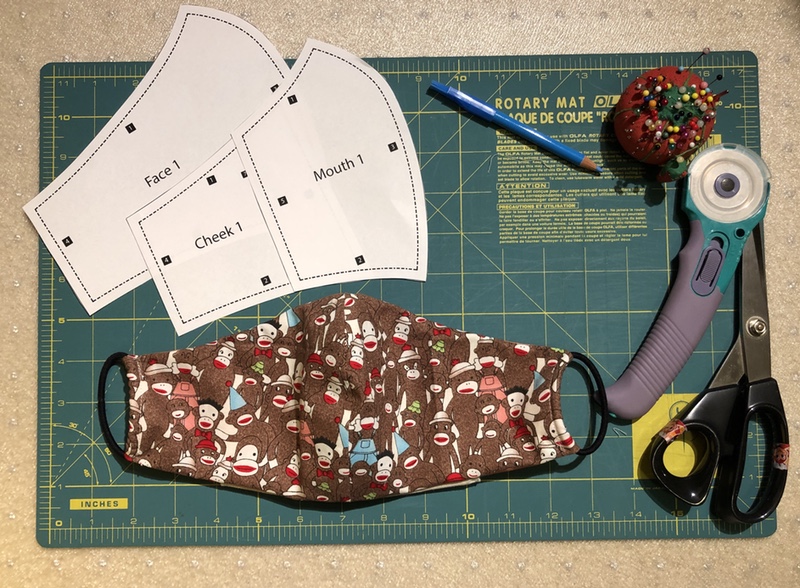
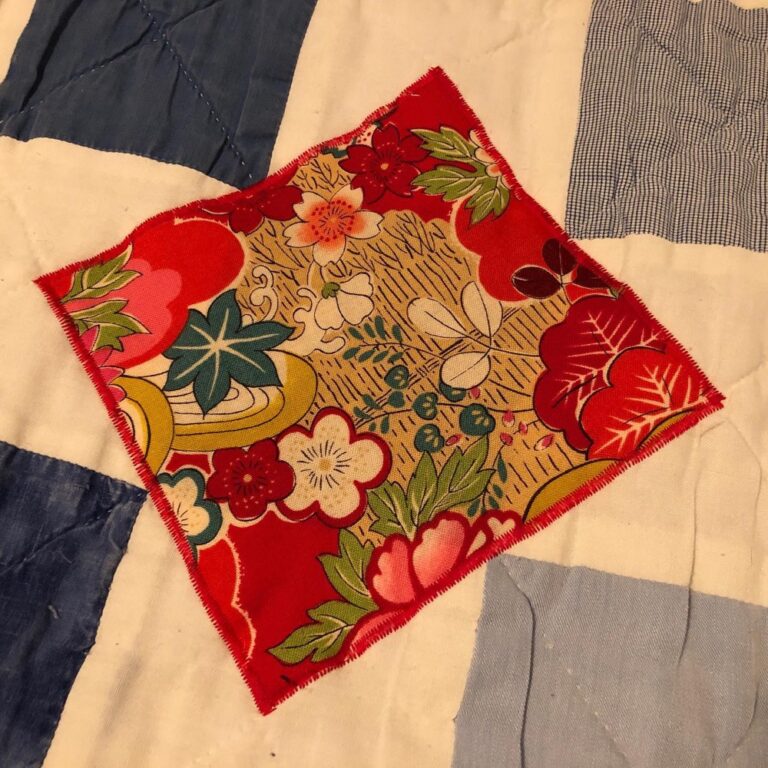
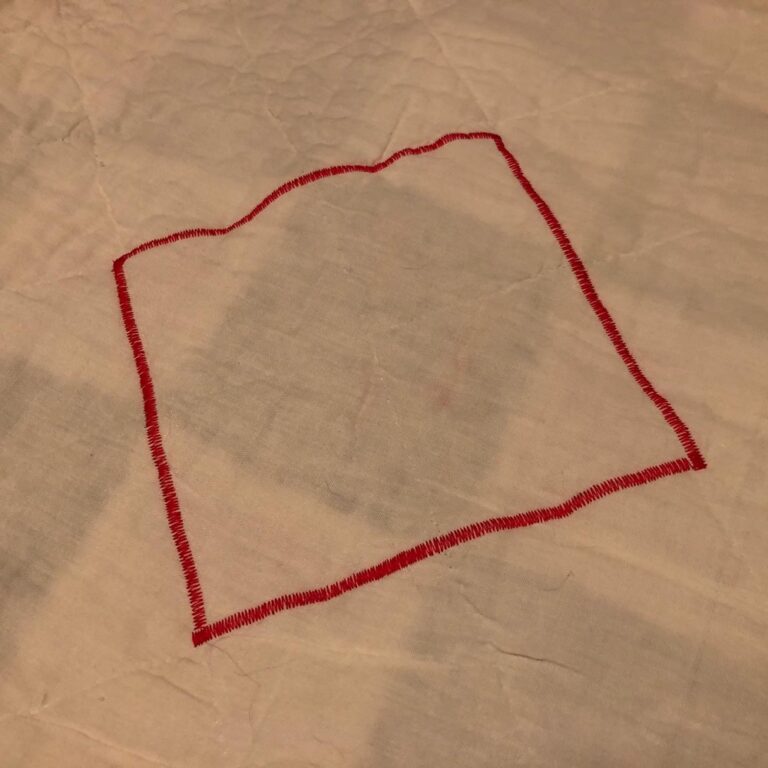
I was surprised when I printed this out to see it involves a full six pattern pieces. However, upon inspection I realised they’d just mirrored them for the two sides, so you can get away with printing just a single piece for the face, cheek, and mouth. (Basically – two pages instead of four. Either fold your fabric before cutting or flip the piece over before you cut the second one. Save some trees!) I used three different quilting cottons for this one: the sock monkey print for the outside, and two solid colours for the inside. This one took the longest to put together, just because you have to hem the overlapping pieces for the inside pocket. That said, it’s still pretty easy. Instead of ribbons, this one uses hair elastics that you secure over your ears.
The Olson Mask fit on my face is very similar to the Fu Mask, and I find it very comfortable to wear. I wasn’t sure about the hair elastics, but they’re awesome. They hold it just right and it doesn’t screw up my hair! However, the Snook had much the same fit problems with this one as he did with the previous. It just isn’t fitting flush to his face around his nose at all. Additionally, the elastics I used are too small for his ears (?!) so he didn’t enjoy wearing it.

Ragmask from Jean Whitehead, Matt Gardner, and Loren Brichter
I saw Ragmask linked somewhere recently and loved the lo-fi concept. This isn’t fancy; it’s about churning out masks as quickly as you can. There’s only one size and one pattern piece.
True to the website, Ragmask is optimised for speed of construction. The aim isn’t perfection but rather “good enough.” I used a single piece of quilting cotton (which gets folded over double) along with a piece of fairly stiff interfacing as the “filter.” The seam down the middle is left raw on the inside, as is the bottom edge along your chin. I used some salvaged ribbon for the ties. The really ingenious bit of this design is that you create a channel that you feed a bit of wire into, and you then form that around your nose. (I used a bit of plastic coated clothes hanger.) That creates a much tighter seal around the nose. It will, however, create trouble when you go to wash it, as you’ll have to remove the wire or it’ll rust. (Their Twitter mentions working on a version to make this easier.)
Because I put the interfacing in this one, it made it fairly stiff and “beak-like.” That’s nice when you’re wearing it, as it stands away from your mouth a bit. The fit on this one is okay for me, but I just don’t enjoy the ribbons/ties around the head. The perfectionist in me is also slightly offended by raw edges, even though I get why it is. That said, this one was the Snook’s favourite! It actually fit nicely around his nose (under his specs) and all the way under his chin.
Final verdict
Look, this is all down to the size, shape, and weirdness of your own head and what you feel comfortable in. All of these are easy to make and do the job. Because I like the elastic over the ears better than ties, I’m going to be making more of the Olson Masks for me. (I’ve also just had an idea that should allow me to add an easily removable nose wire to the Olson to make it fit even better!) And because of his “man nose,” I’ll be making more of the Ragmasks for the Snook. Whatever you do, please stay home as much as you can and stay safe. ❤️