You all thought I was kidding, didn’t you? Say goodbye to the AWS dresses! (Silver lining – you’re going to have an opportunity to own a piece…) 👗✂️🫣

Craft projects of mine
You all thought I was kidding, didn’t you? Say goodbye to the AWS dresses! (Silver lining – you’re going to have an opportunity to own a piece…) 👗✂️🫣
One of the hardest skills for new knitters to master is recognising and fixing errors. If you catch something quickly, you may be able to just un-knit (or “tink“) the last few stitches and fix it. But if you spot it a few rows later and you can’t face the thought of tinking all those stitches, you’ve really only got a few options: you can pull the needle out and rip several rows, but then you’ve got to pick all the live stitches back up. This can take a while, and depending on how thick/thin and fuzzy/smooth your yarn is it can be a real chore. (If you’re knitting anything complicated like lace where you have a high change of screwing something up, it’s highly recommended to put in lifelines every so often.) The other commonly used option is the nuclear one – ripping out the whole project and starting over. If you’re near the beginning, this may well be the fastest method.
But there is another way. Let me illustrate.
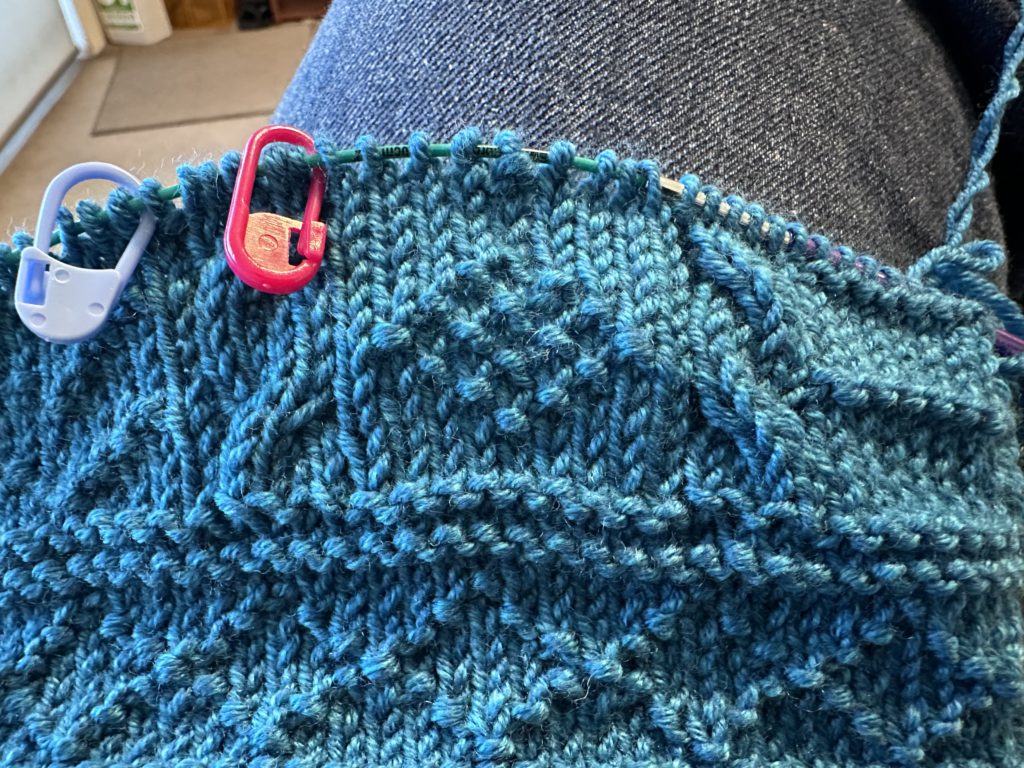
I spent a big chunk of hours yesterday working on a baby sweater. The body is stocking stitch, and then the top half has a pattern with columns of cables and garter stitch motifs. Here’s the photo I took at the end of the day:
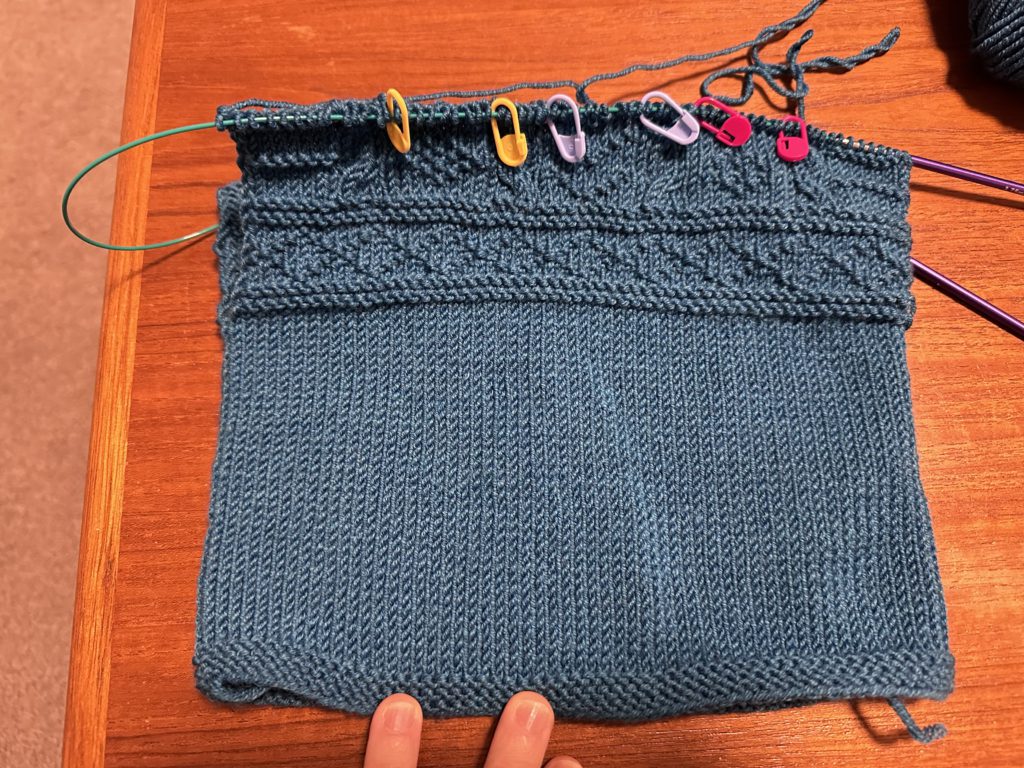
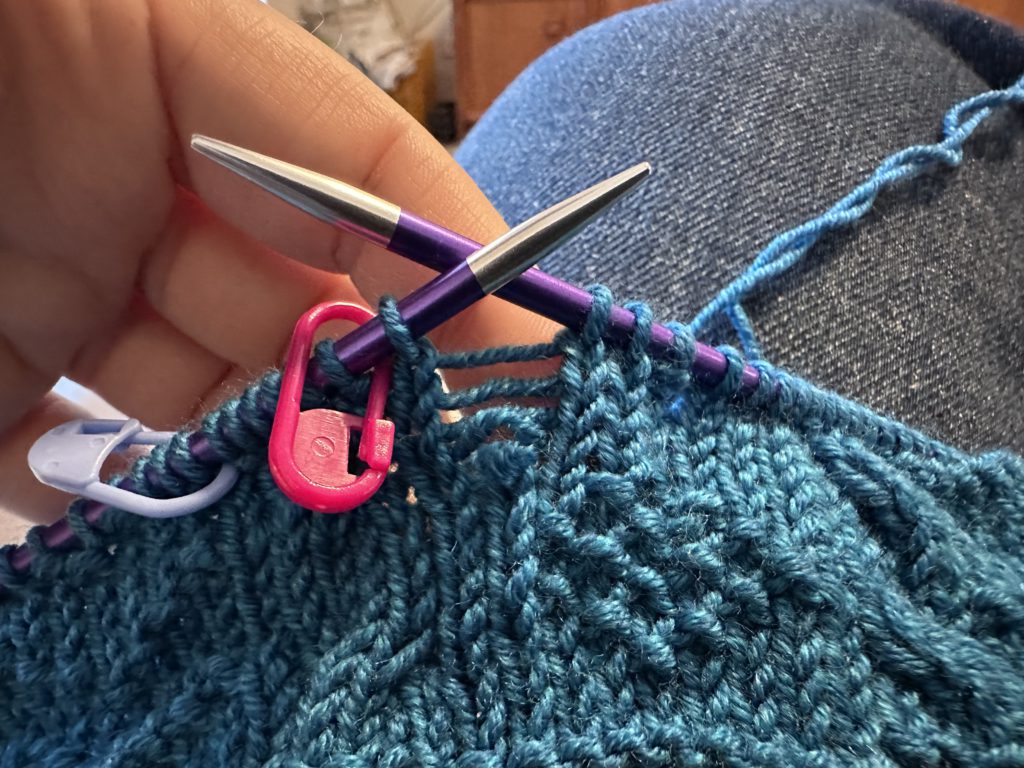
When I was looking at the photo, I suddenly realised I’d screwed up one row of the pattern. Can you spot the mistake? Here I’ve isolated the two diamond motifs, outlined by the yellow and red stitch markers:
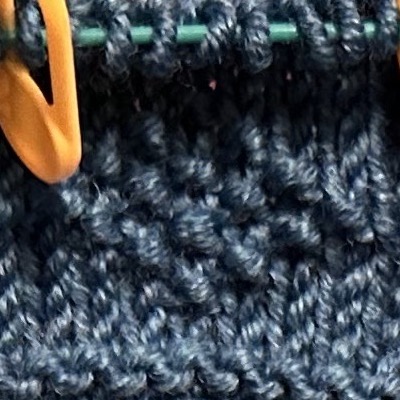
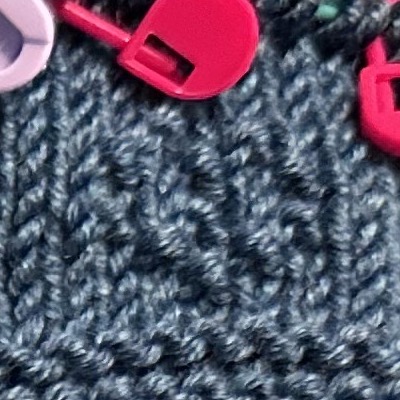
Even if you’re not a knitter, you can probably spot that they don’t match. I’ve somehow missed 4 purl stitches right through the middle of the motif on the right, which include the points at either side of the diamond.
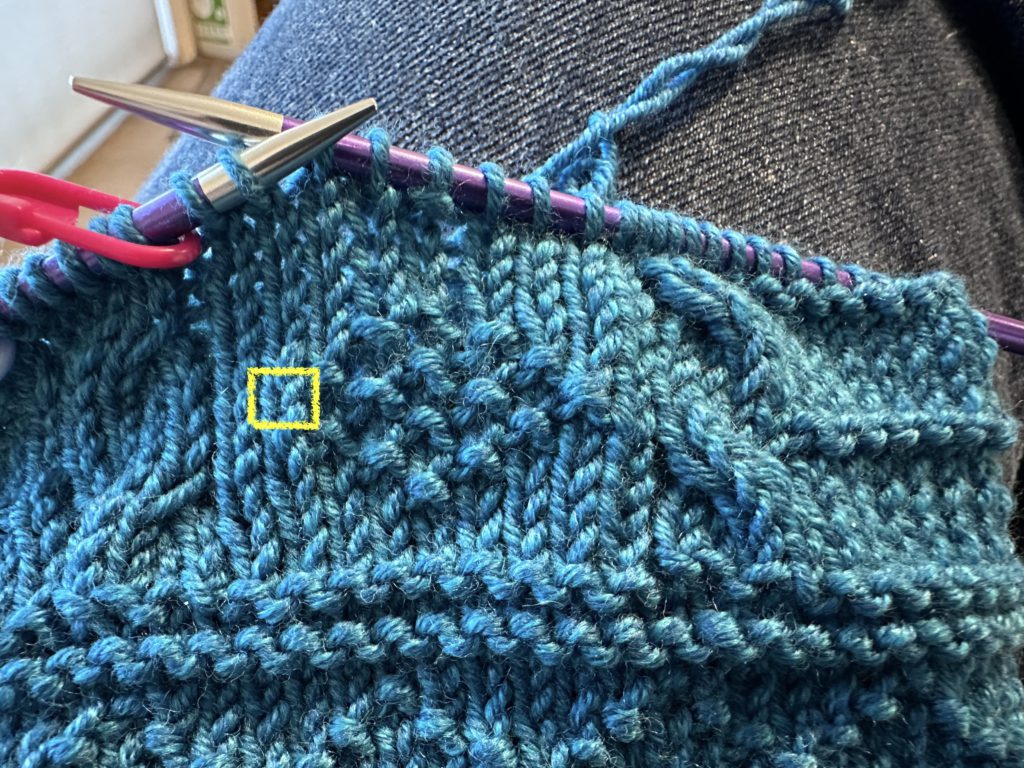
The error occurred like 8 rows back, and while this yarn (Morris & Sons Empire 8ply in Aquamarine) would be relatively easy to pick up if I frogged those rows, reknitting the motifs would be a pain… and I’d be just as likely* to make a mistake again. So I decided instead to use the surgical method of dropping just the columns of stitches with the missing purls to correct them.
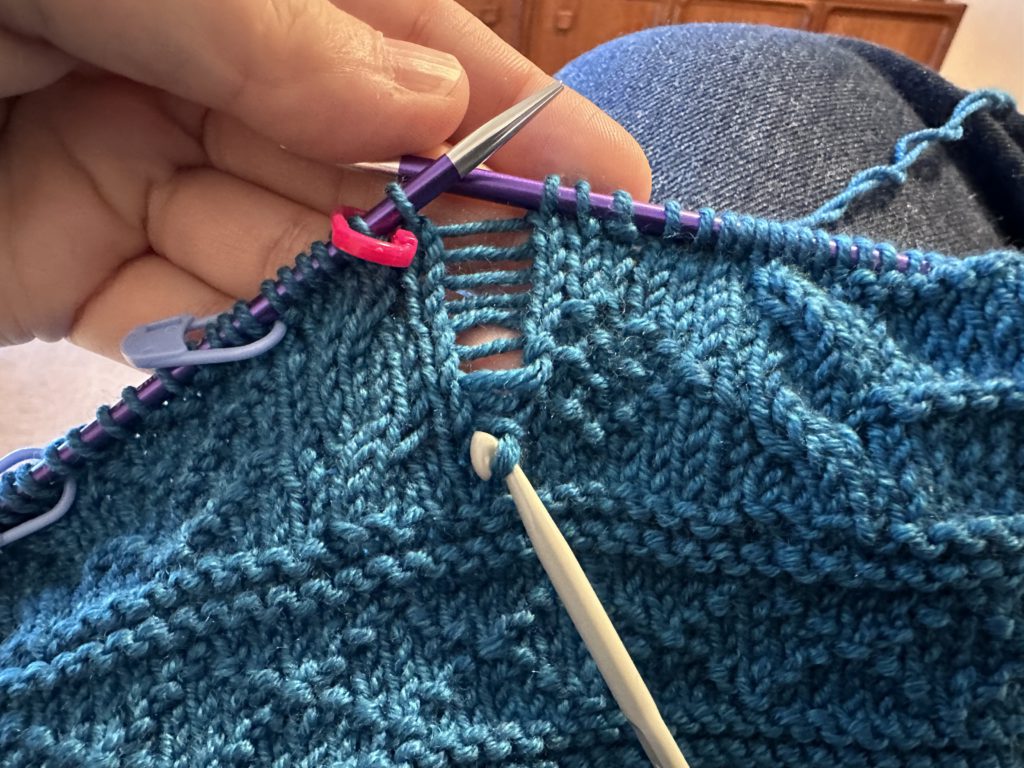
I don’t think this technique has a pithy name like tinking or frogging, but it’s often called “laddering down”. To illustrate, I’ve fixed 3 out of the 4 missing purls already and this photo shows me ready to correct the last one, the missing point of the diamond on the left. I’ve highlighted it in yellow. That knit stitch (looks like a V) should be a purl (looks like a horizontal bump). I’ve also shuffled my stitches around so that the column of stitches with the error is at the end of my left needle.
Now it’s time to drop that stitch and allow it to “ladder down” to the spot of the error. (It’s called laddering because each row you undo leaves a horizontal bar.) This wool likes to stick to itself, so I encouraged it where needed with the use of a spare needle.
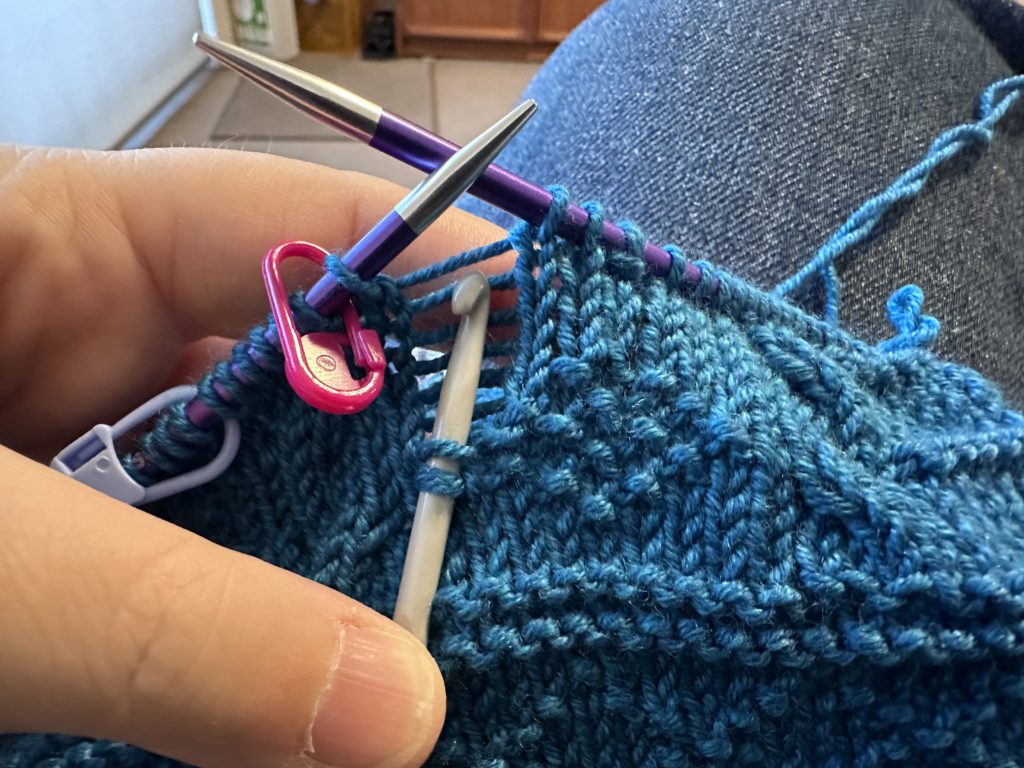
And here it is, down to the spot of the error. I’ve caught the live stitch that needs to be fixed with a crochet hook.
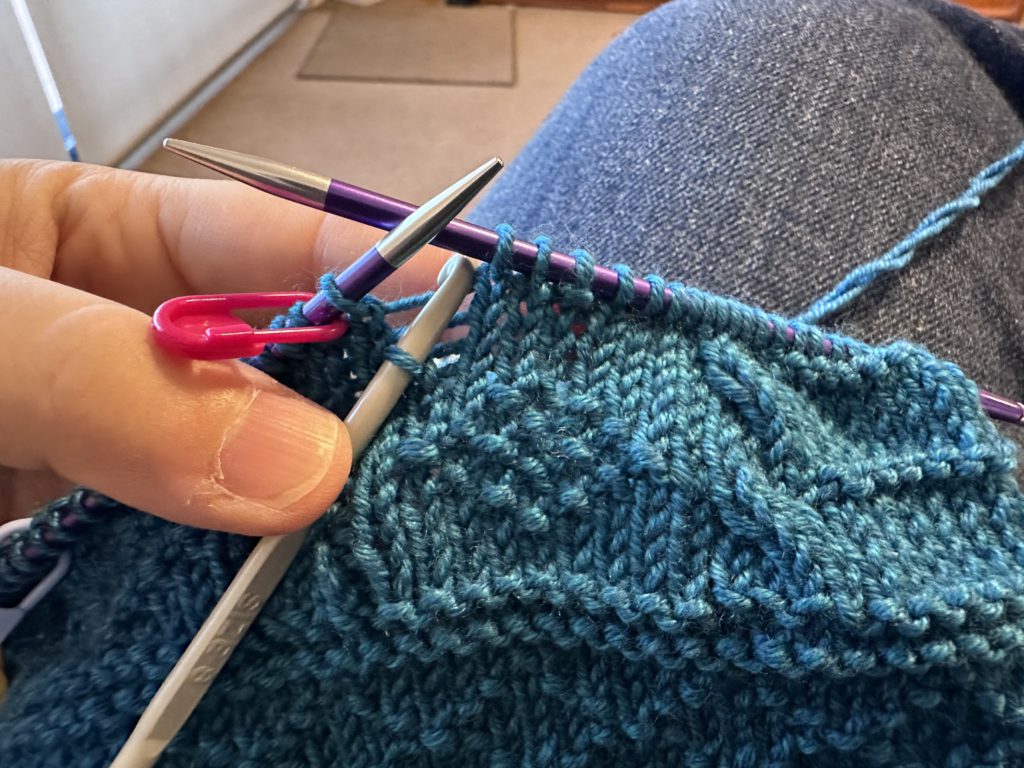
Now it’s just a matter of changing this knit to a purl, and then working my way back up the ladder again. For each stitch, you pull the lowest rung of the ladder through the current live stitch. For knits, you go in from the front and pull the ladder through from the back. For purls, you come in through the back and pull the ladder through from the front. You can use spare needles for this, but a crochet hook makes it really fast. (The photo below looks like I’m about to knit the stitch, but rest assured I moved the hook around to purl instead.)
Here it is halfway along, showing the corrected purl and then the column of knit stitches above:
I made a short video showing the last couple stitches:
And here’s the completed motif after the repairs:
The only tricky bits are making sure you don’t drop down too many rows, and ensuring you don’t skip any rungs of the ladder on your way back up. I’ve even used this method to fix miscrossed cables! (Just drop down all the cable stitches, catch the live stitches on a spare needle, rearrange them correctly for the cross, and then ladder each one back up.) This technique can result in some wonky tension either side of the repaired column of stitches, but I find that a couple tugs on the work will fix it (and it’ll resolve itself during blocking anyway).
Much faster than tinking or frogging!
* The reason I made the mistake is that the damn pattern is an older one and it’s written out row-by-row without a chart. A chart would have taken up way less space and allow me to visually check for errors must easier. 😠 But this is something I’ve ranted about in the past…
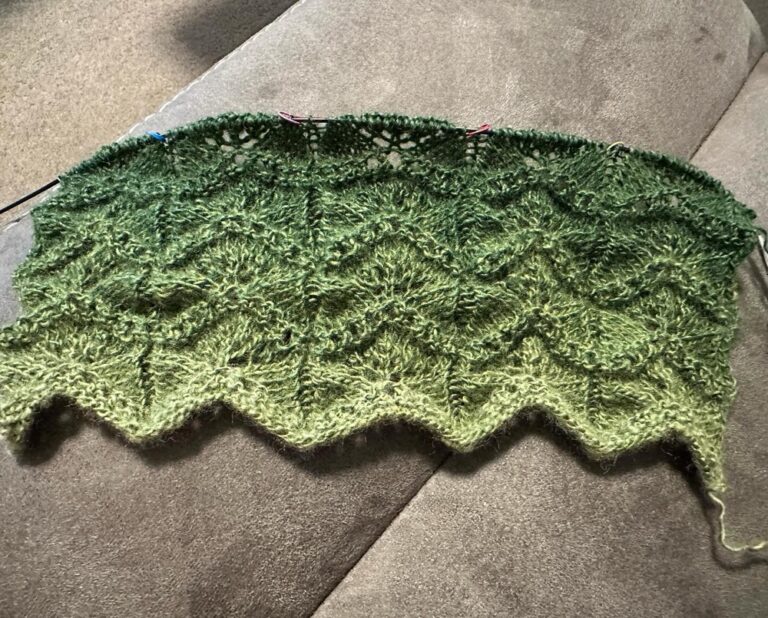
I frogged my gradient scarf for the 3rd time and started over. I’m still not sure what this yarn wants to be. This pattern is meant to look like gingko leaves, and I’m liking it so far! #knitting 🧶

You didn’t think I forgot about the Oscars, did you? With one week to go, I’m happy to announce the fifteenth (semi-)annual Web-Goddess Oscar Contest has officially launched! 🎉
Time to put on Dua Lipa so you can dance the night away with Barbie and Ken…
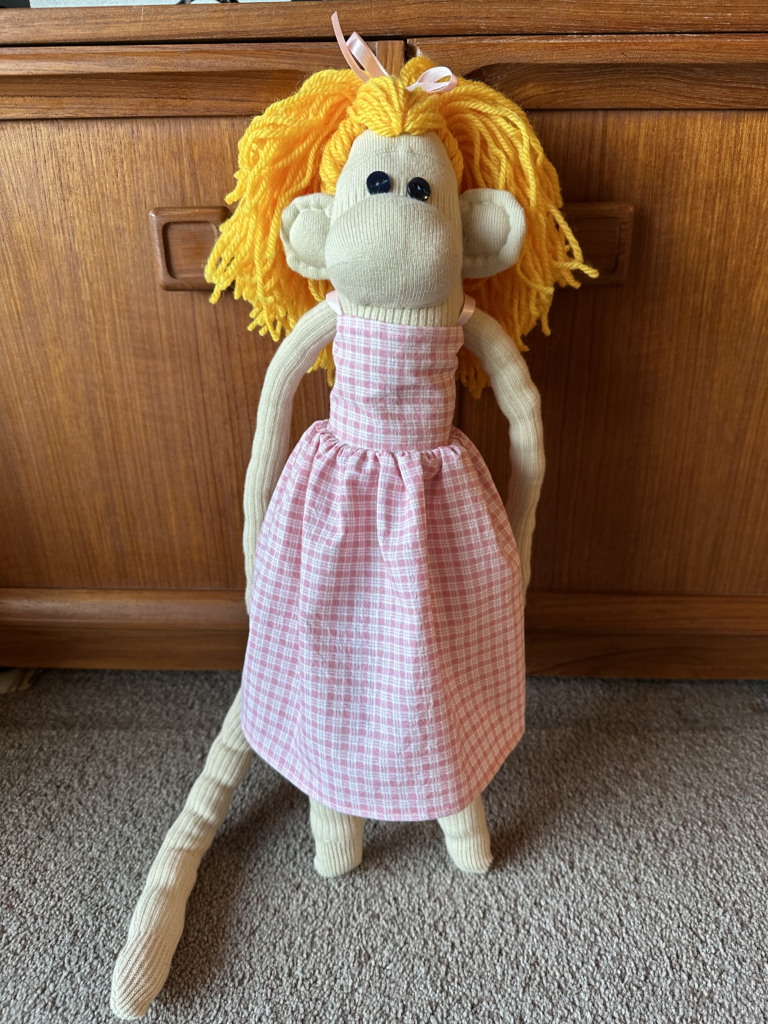
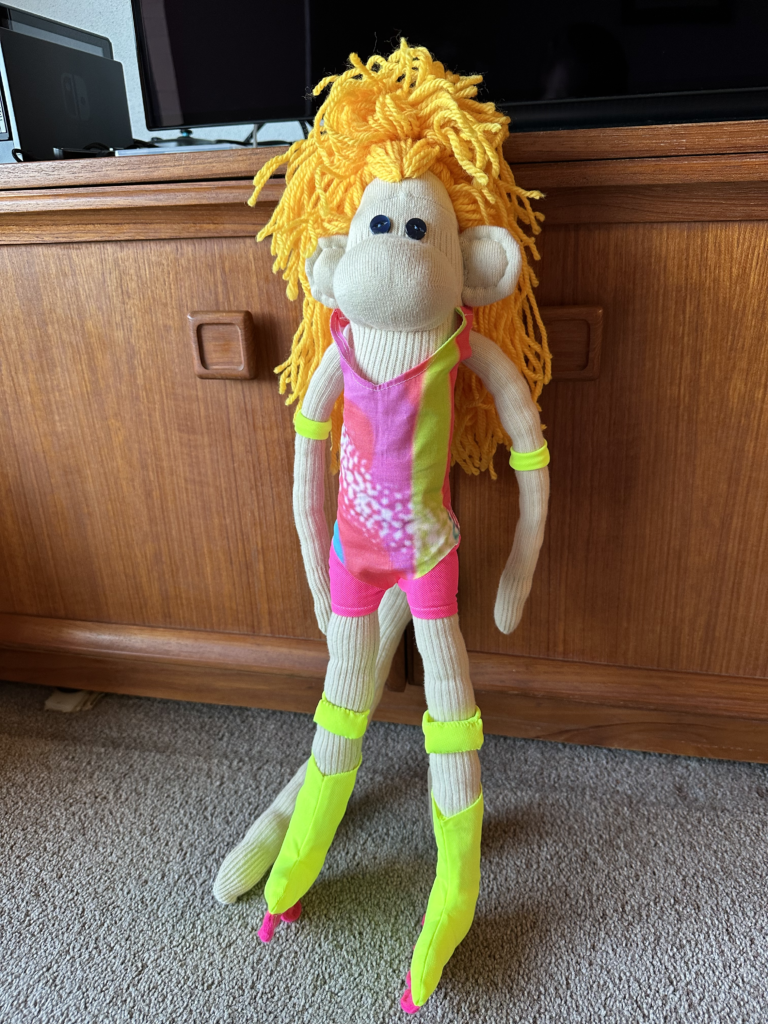
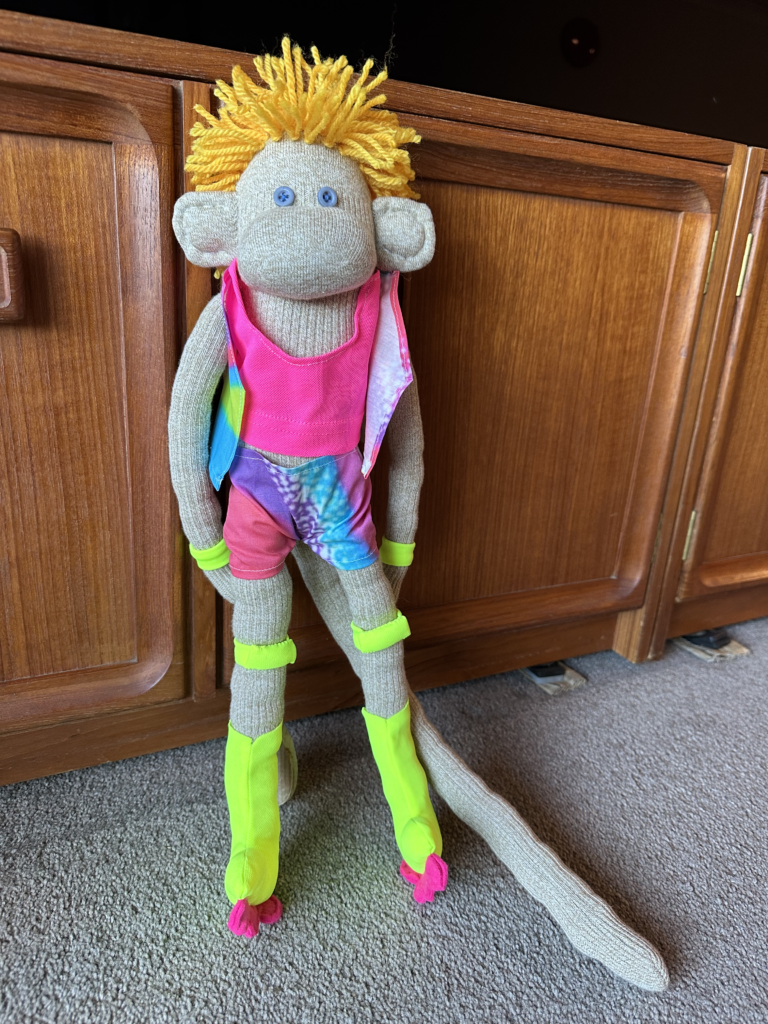
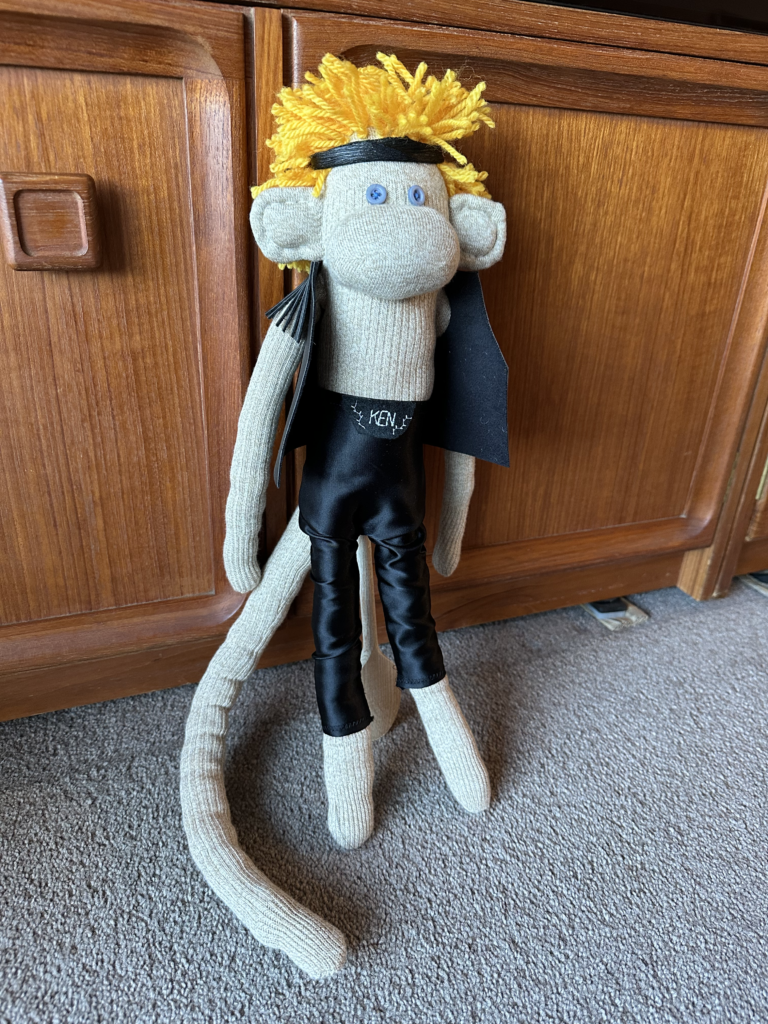
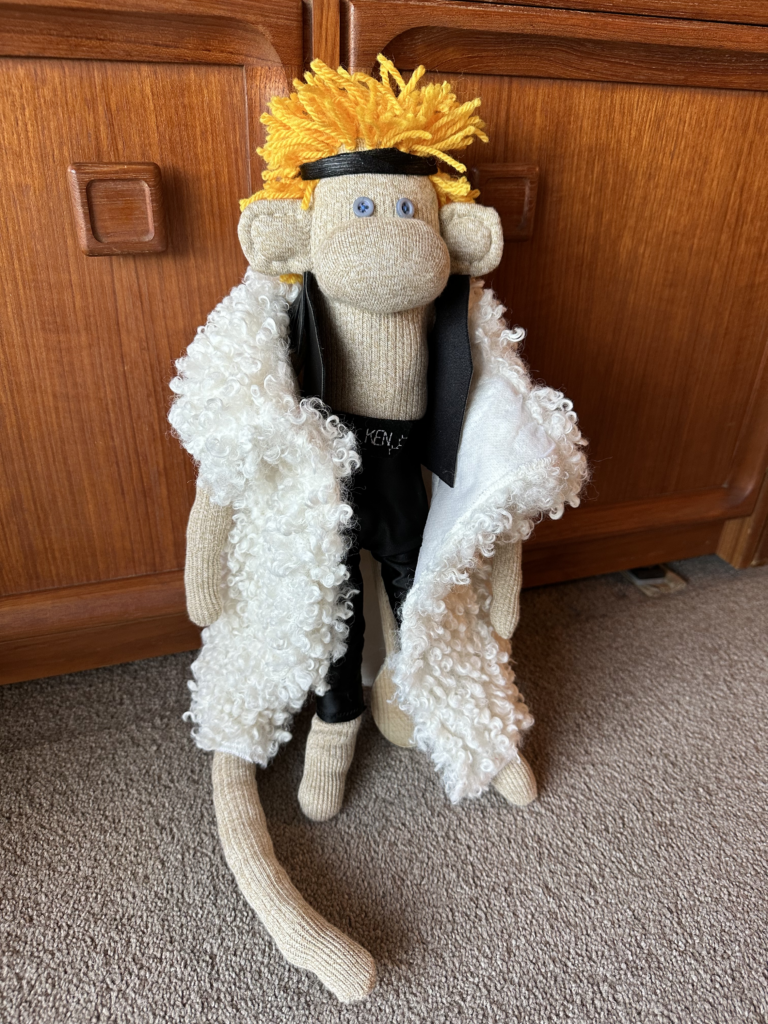
This year you get two monkeys, each of which have two outfits. Barbie has her iconic pink gingham outfit from the start of the movie, as well as her Venice Beach rollerblading kit. Ken has his rollerblading kit too, as well as his Mojo Dojo outfit complete with custom fanny pack and fringed vest. And if you’re going to do a patriarchy, of course you need a fur.
Contest results: Congrats to Shilpa Anand, who got 12/13 predictions correct and tied with 3 other people for the top spot. It then went to the In Memoriam tiebreaker, where Shilpa managed to guess the EXACT number – 51. CONGRATULATIONS SHILPA!
More monkey construction info: The monkeys each have blue button eyes and (lots of) yarn hair. For the rollerblading outfits, why yes, that is the exact psychedelic neon print from their movie outfits, thank you for noticing! I found it on Spoonflower and had a fat quarter printed, which was more than enough. For the neon pink and yellow fabric, I bought some cheap high-vis shirts at Kmart and cut them up. Ken’s vest is made of fake leather from an old handbag, and his mohair coat is a Kmart cushion that I disassembled.
Twenty-one years ago (😱), I thought it would be fun to run a contest and give away a sock monkey. I then kept that up for 10 years running, and you can see the history of my creations below. These days I only do it when the inspiration strikes…
2022 – Spider-Monkeys
2021 – Schitt’s Creek Sock Monkeys
2019 – Freddie Monkcury
2013 – The Avenger Monkeys
2012 – The Monkey with the Dragon Tattoo
2011 – Black Swan and White Swan ballerina monkeys
2010 – Sparkly Emo Vampire Sockmonkey playset
2009 – Batman and Joker monkeys
2008 – Striking Writer Monkey
2007 – Trio of Dream Monkeys
2006 – Gay Sock Monkey Cowboys
2005 – Soctopus
2004 – Plain sock monkey
2003 – Oscar the Sock Monkey
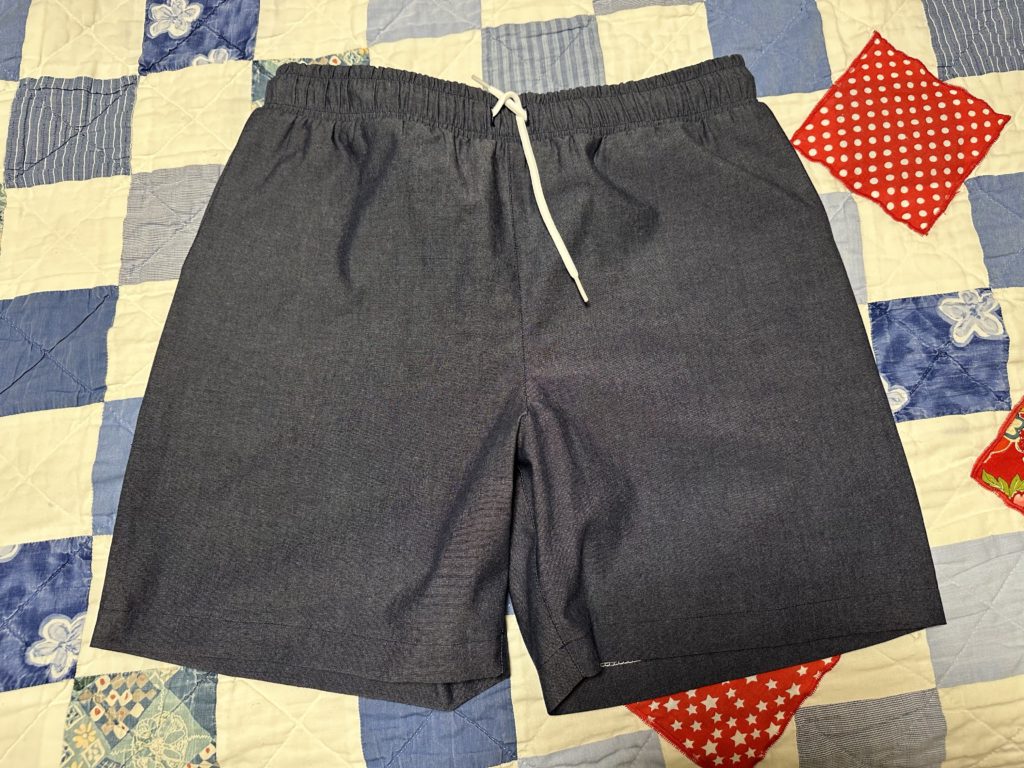
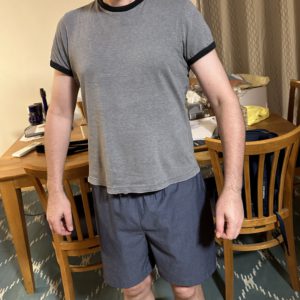 I had such fun making Rodd’s Trigg Shorts for New Year’s Eve that I decided to make another pair. I’ve had this chambray in my stash for a few years, thinking it might make a nice pair of shorts. And guess what? It does!
I asked the Snook if I needed to make any size adjustments, and the only thing he asked for was a slightly bigger waistband when fully stretched out (like when he’s pulling them on). Consequently I made the same size as before – size D – but this time I extended the waistband piece by about an inch. (So I added around 2″ in total.) I still cut my elastic the same length, which meant that I just needed to stretch it a bit more when sewing. As you can see, you can’t really tell at all but it makes it a little stretchier. The only other change I made was to use machine-sewn buttonholes for the waist tie, rather than metal eyelets.
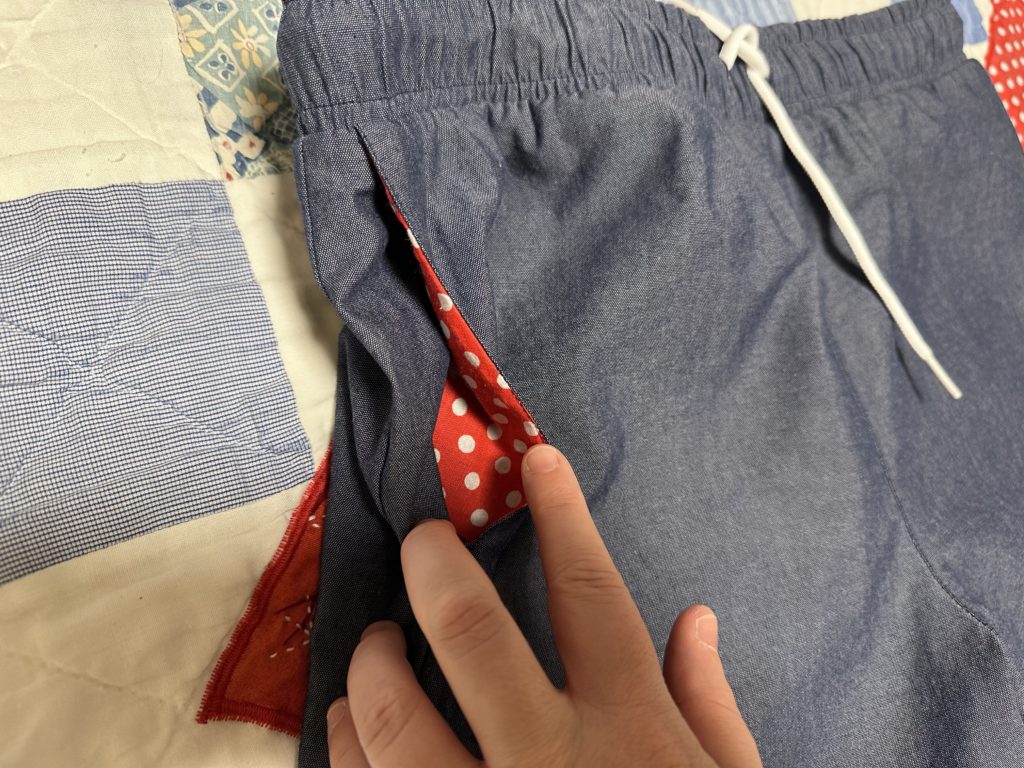
I decided to get a little whimsical with the pocket bags and used some red polka dot from my stash. Cute, huh?
 I’ve had some fun combining LEDs with textiles before, most notably with my Canva Three Commas Cushion and my light-up CampJS beanie. Both of them required laborious hand-sewing though, so I was very excited to see Steph’s newest project – GlowStitch LEDs. These use conductive tape rather than thread, and can therefore be machine sewn. AMAZING! I’ve backed the crowdfunding campaign, and I can’t wait to get them and have a play. I especially liked Steph’s project log where she talks about all the decisions along the way, the mistakes she made, and the lessons she’s learned. Very cool…

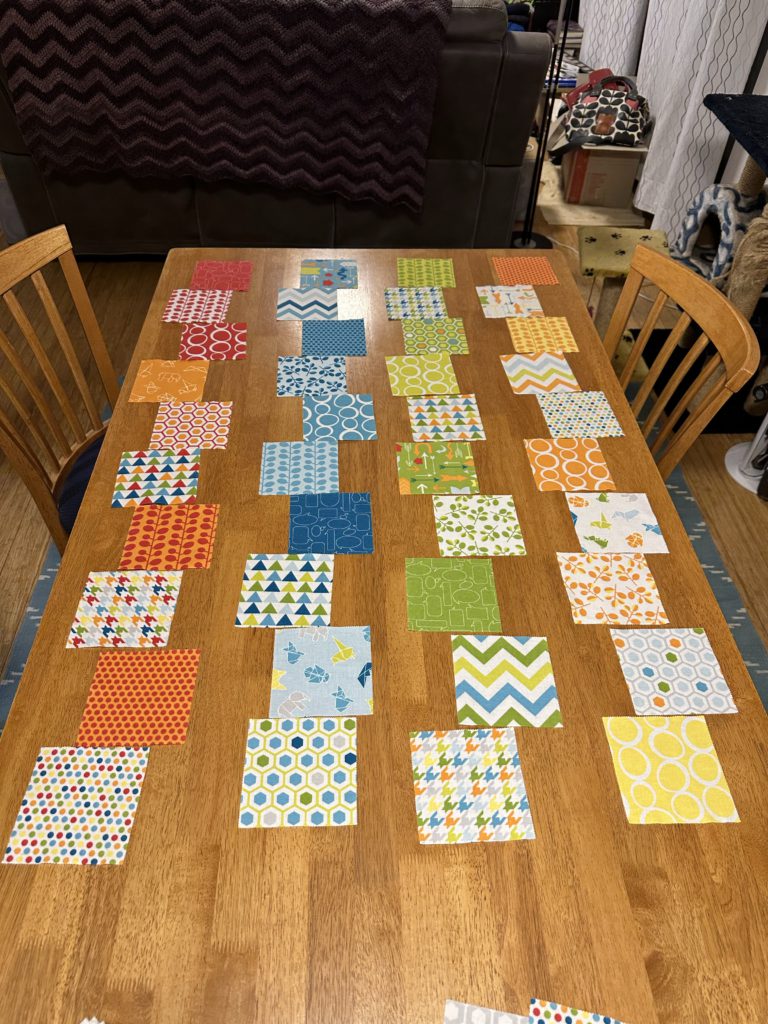
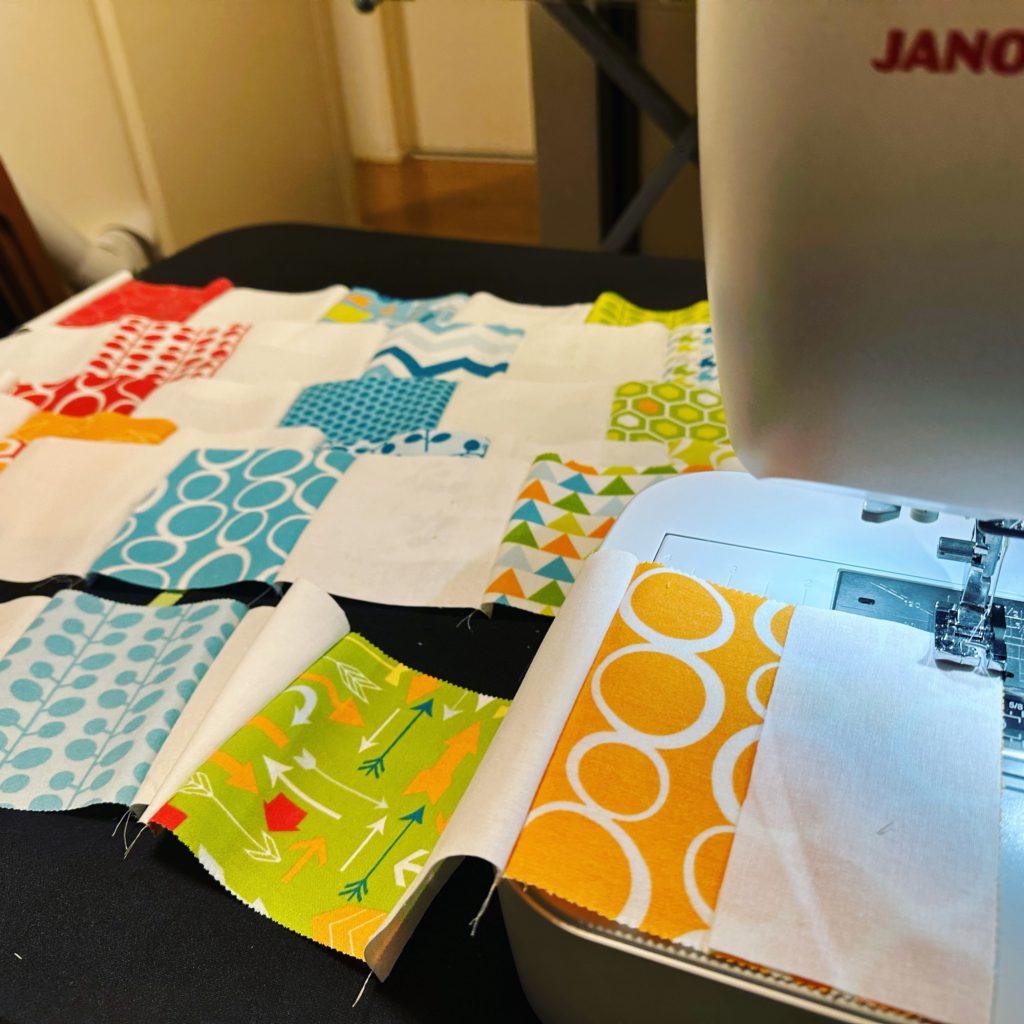
My dear friends Josh and Jamie welcomed their new baby son Taos this year, and I decided that I wanted to make him a little quilt. I’ve had this Moda Fabrics “Mixed Bag” Brushed Cotton charm pack in my stash for a long time, and I realised it would be perfect for a little one. (A charm pack is a set of precut 5”x5” fabric squares, all from the same fabric line so they coordinate.) I started googling to get inspiration and spotted this Building Blocks pattern. I realised that I didn’t even need the pattern; I could just design my own using the same idea.
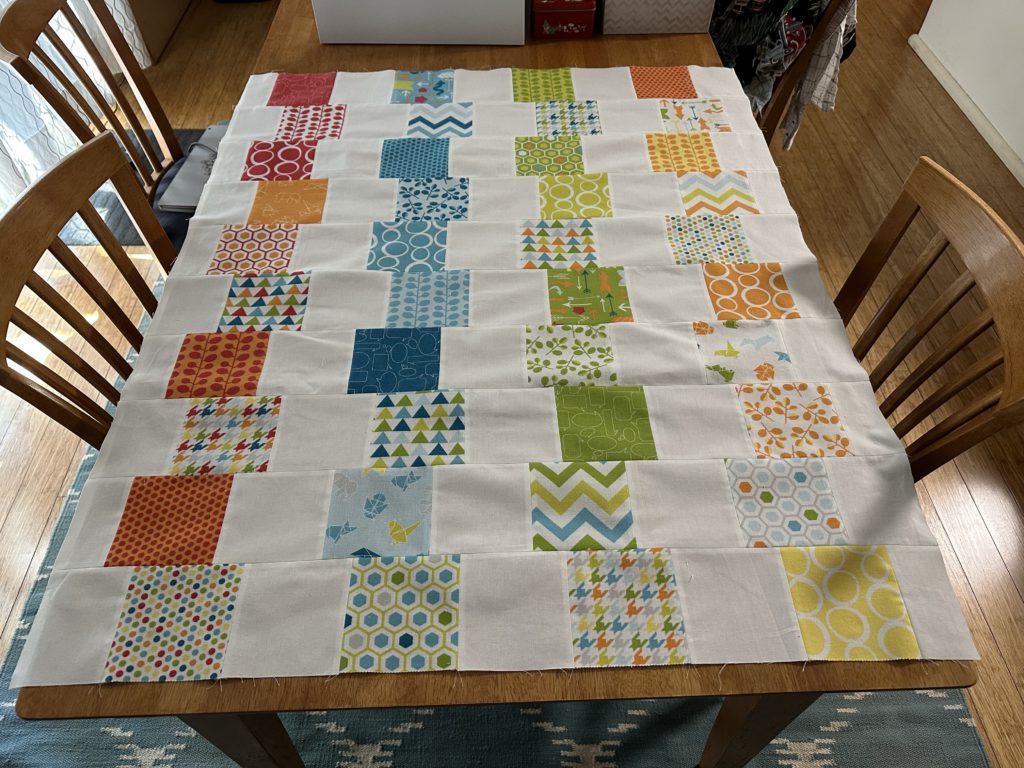
I settled on a design of 4 columns of 10 blocks each against a white background. I played with a few different layouts on my dining room table and got Rodd to give his opinion. I decided to go with the one on the left here, which was organised vertically by colour.

Piecing the quilt top was very quick! I used a plain white cotton for the background, which contrasted nicely with the brushed texture of the blocks. I sewed it together in horizontal rows, making sure each alternating row was offset by using a half block at the beginning or end.
Once I had all the rows done, I simply joined them all together. Charm packs certainly made the process go faster. I had the whole thing put together in less than a day!
The back side of the quilt was more challenging. I thought it would be fun to use another fabric from the line, but it’s so old that I could find very little of it available online. I finally found one of the zigzag prints at the Remnant Warehouse; it’s not brushed but it’s fine. I still had 2 squares left over from the charm pack so I decided to break it up. I inserted a row of white along with the two squares and a plain one with some embroidery. This meant I got to do some playing around with the fancy computerised features of my machine…
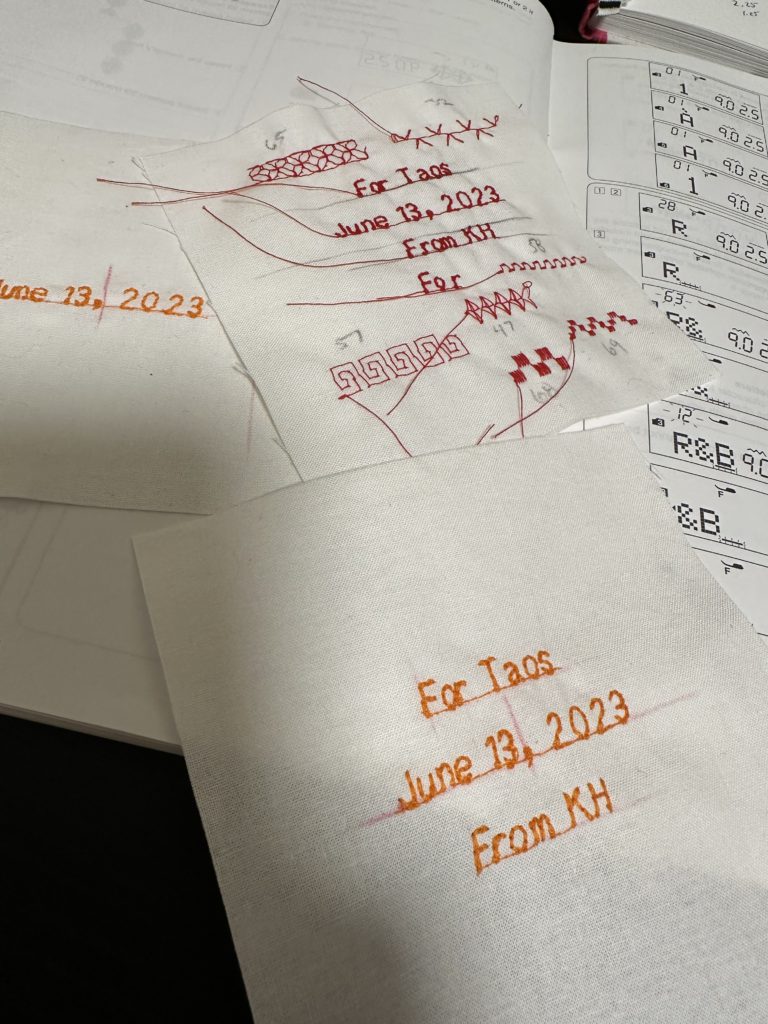
It was a lot of fun, even if the final version still came out a little crooked. I figure that gives it charm. 🙂
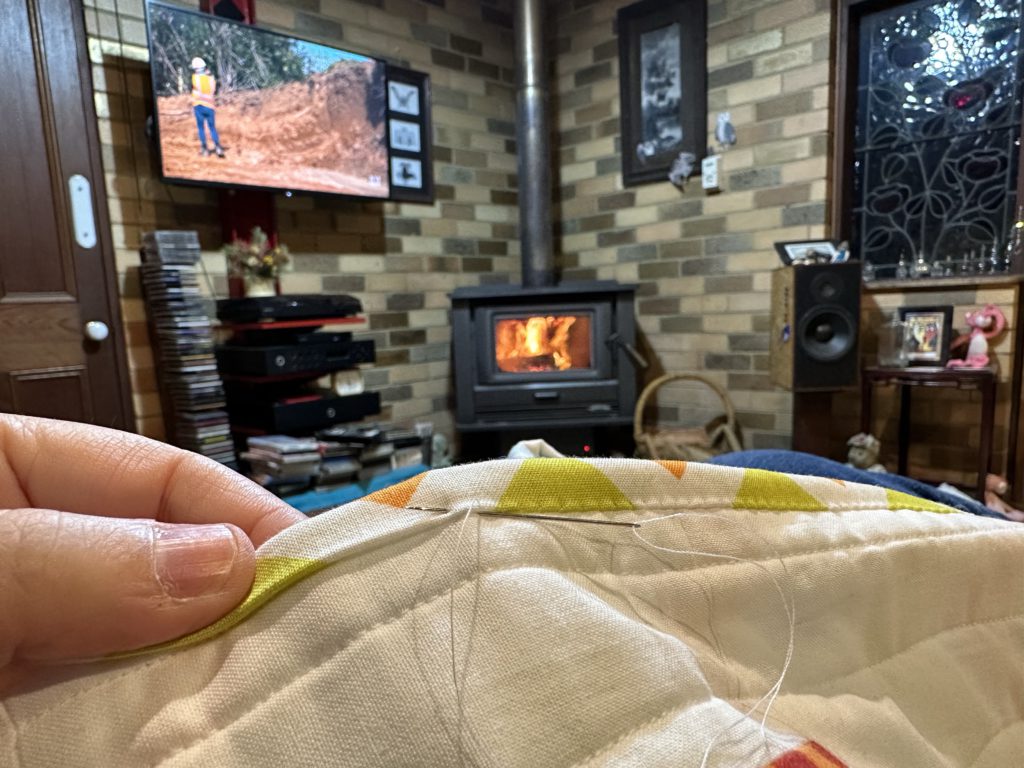
For the quilting, I sandwiched the front and back with a thin cotton wadding. (It’s too warm in Sydney for anything else.) I decided on long vertical lines but I deliberately made them a bit wonky and wandering. I thought that tied in nicely to the “wobbly blocks” theme I had going on. Then I used more of the backing fabric for the binding around the edge. I had fun doing the final slip-stitching by hand up at the Snook homestead in front of the fire.
Here’s the final quilt front:

And the back (I put a little “handmade” label on as well):

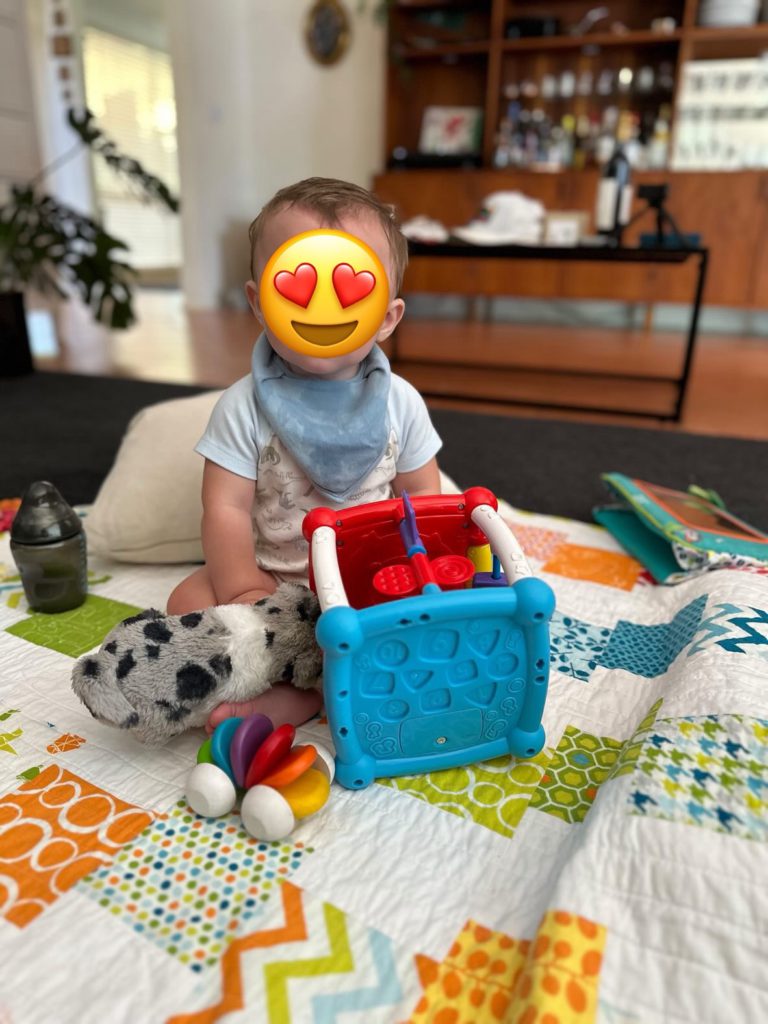
We met up with Josh and Taos in November and I got to give them the quilt. I told Josh my Mom’s standard Quilt Gift Rule: it comes with lifetime repairs, but only if you actually use it! Josh later sent me a photo showing baby Taos having a play on his new blanket. ❤️

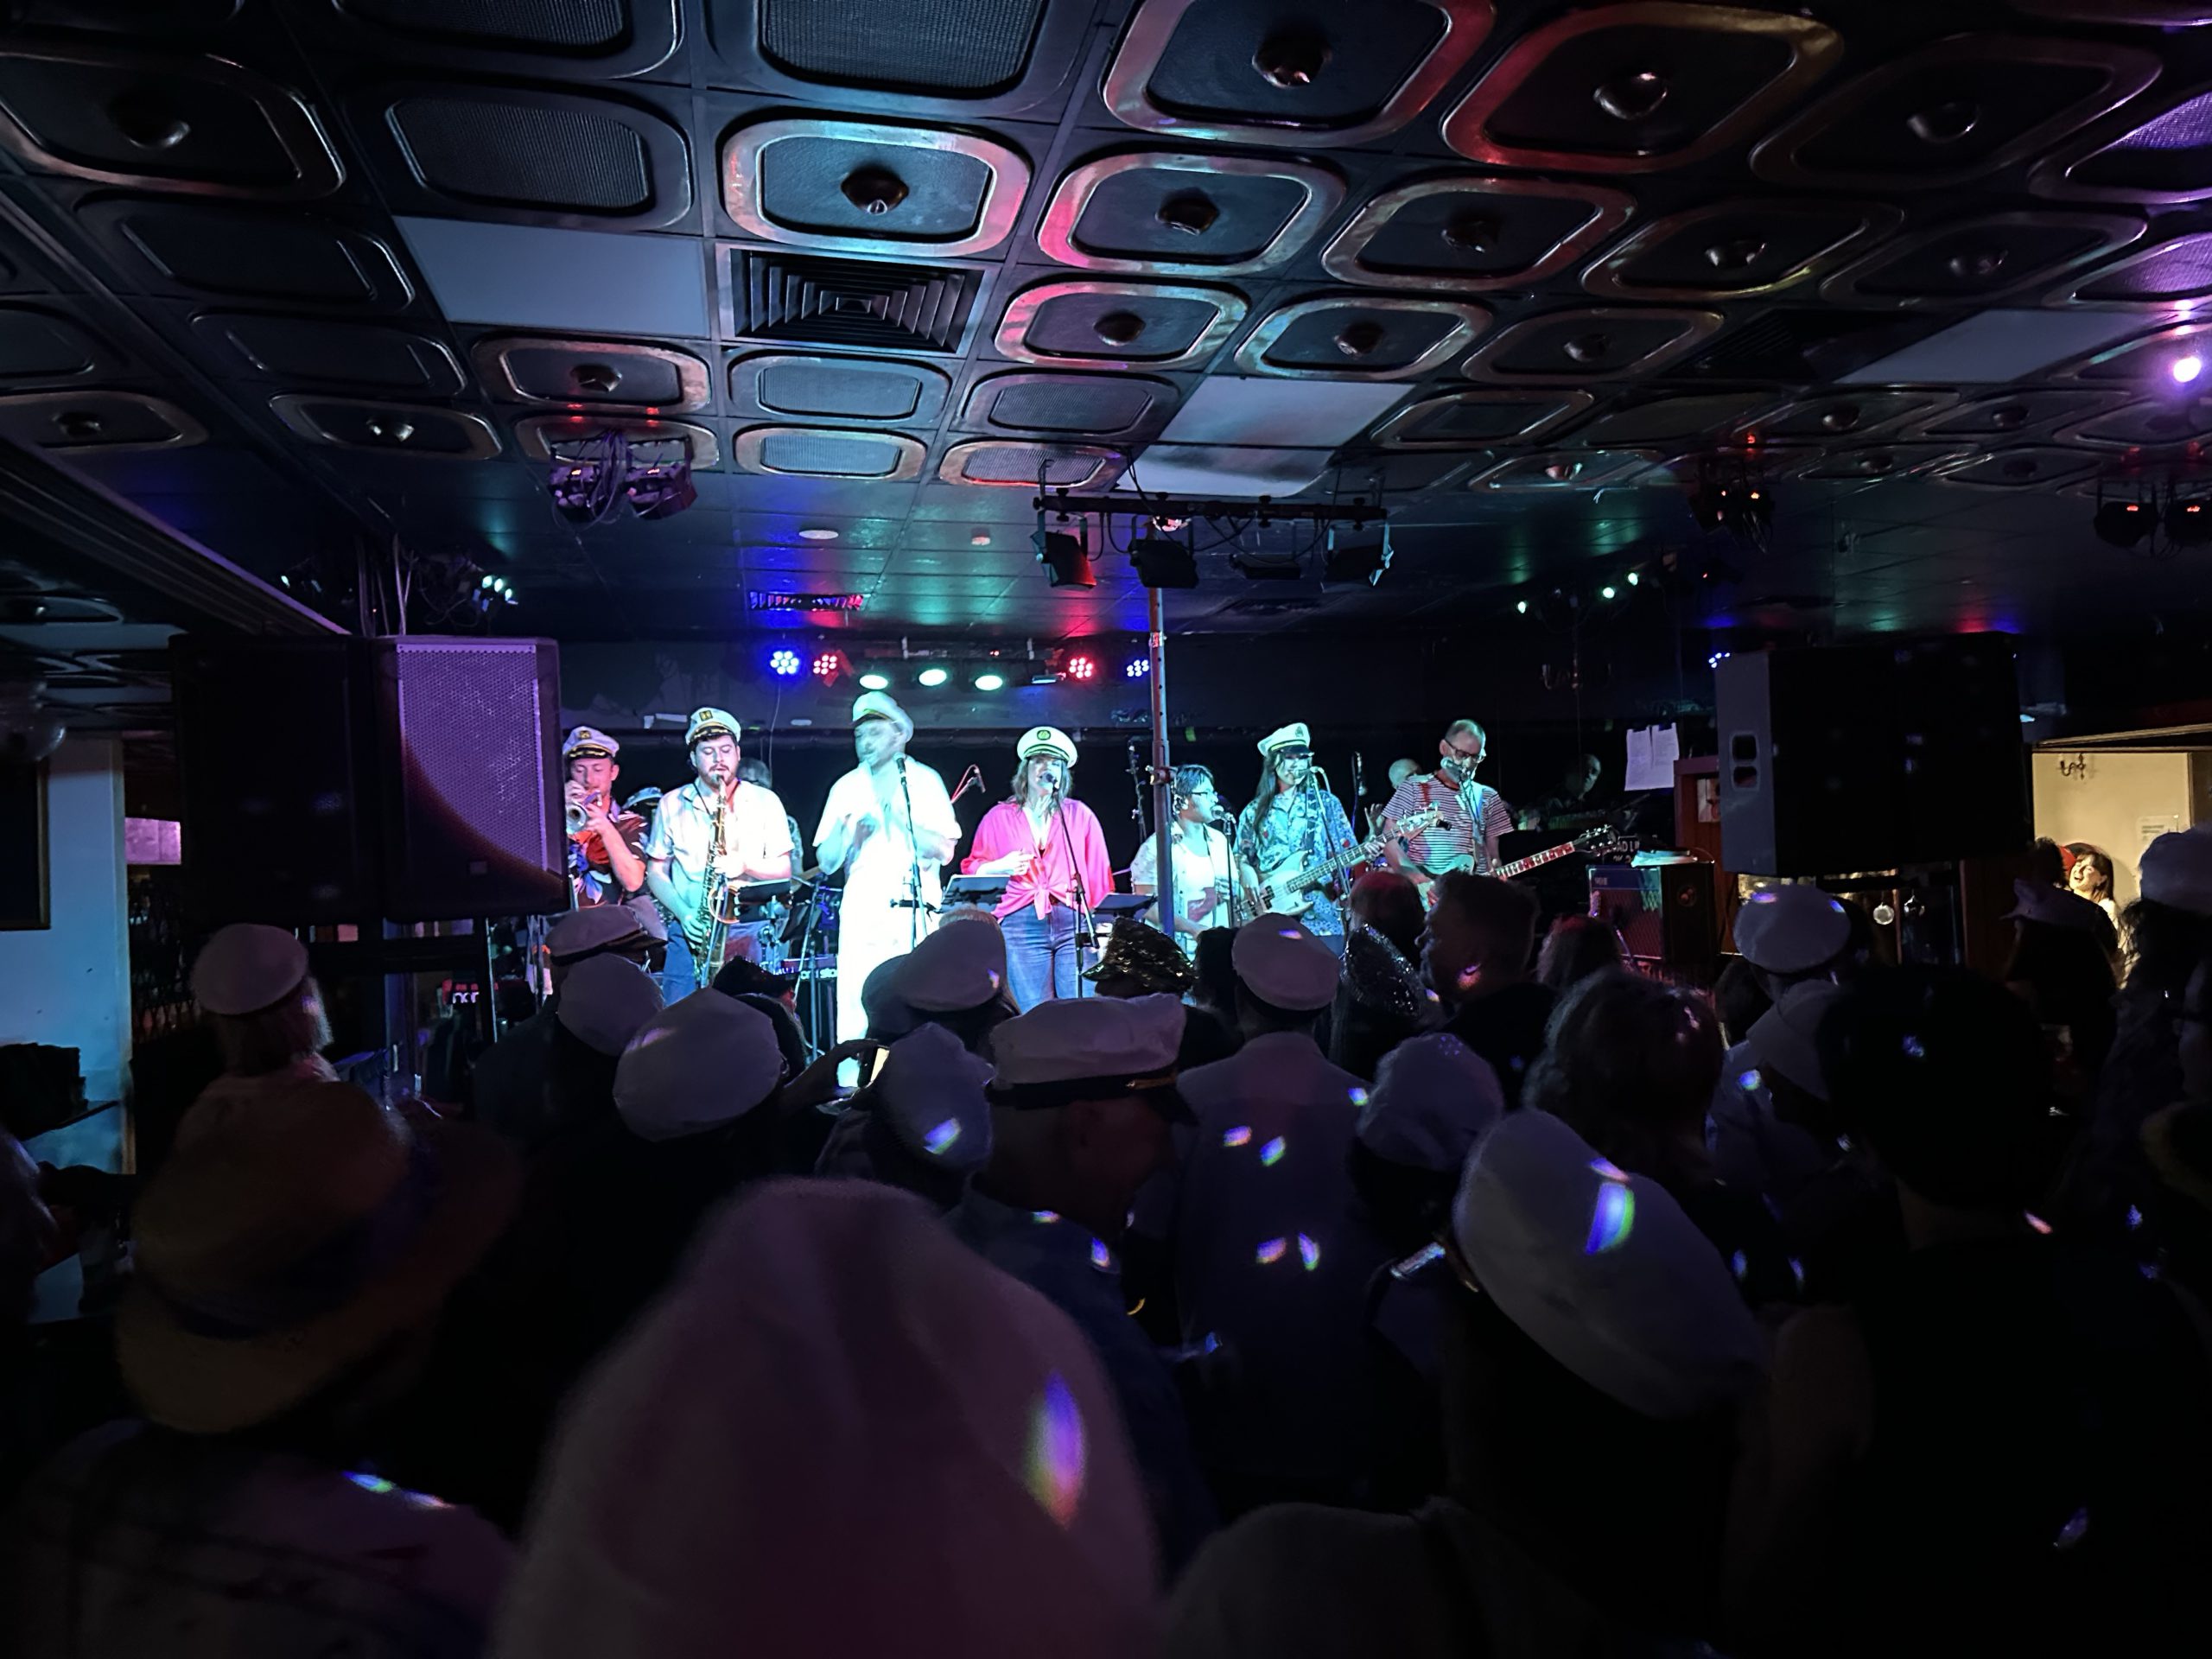
Happy 2024! We spent the evening at the Marrickville Bowlo with our friends Jody, Alayne, and Meredith watching Smooth Sailing ring in the new year with yacht rock classics of the 70s and 80s…
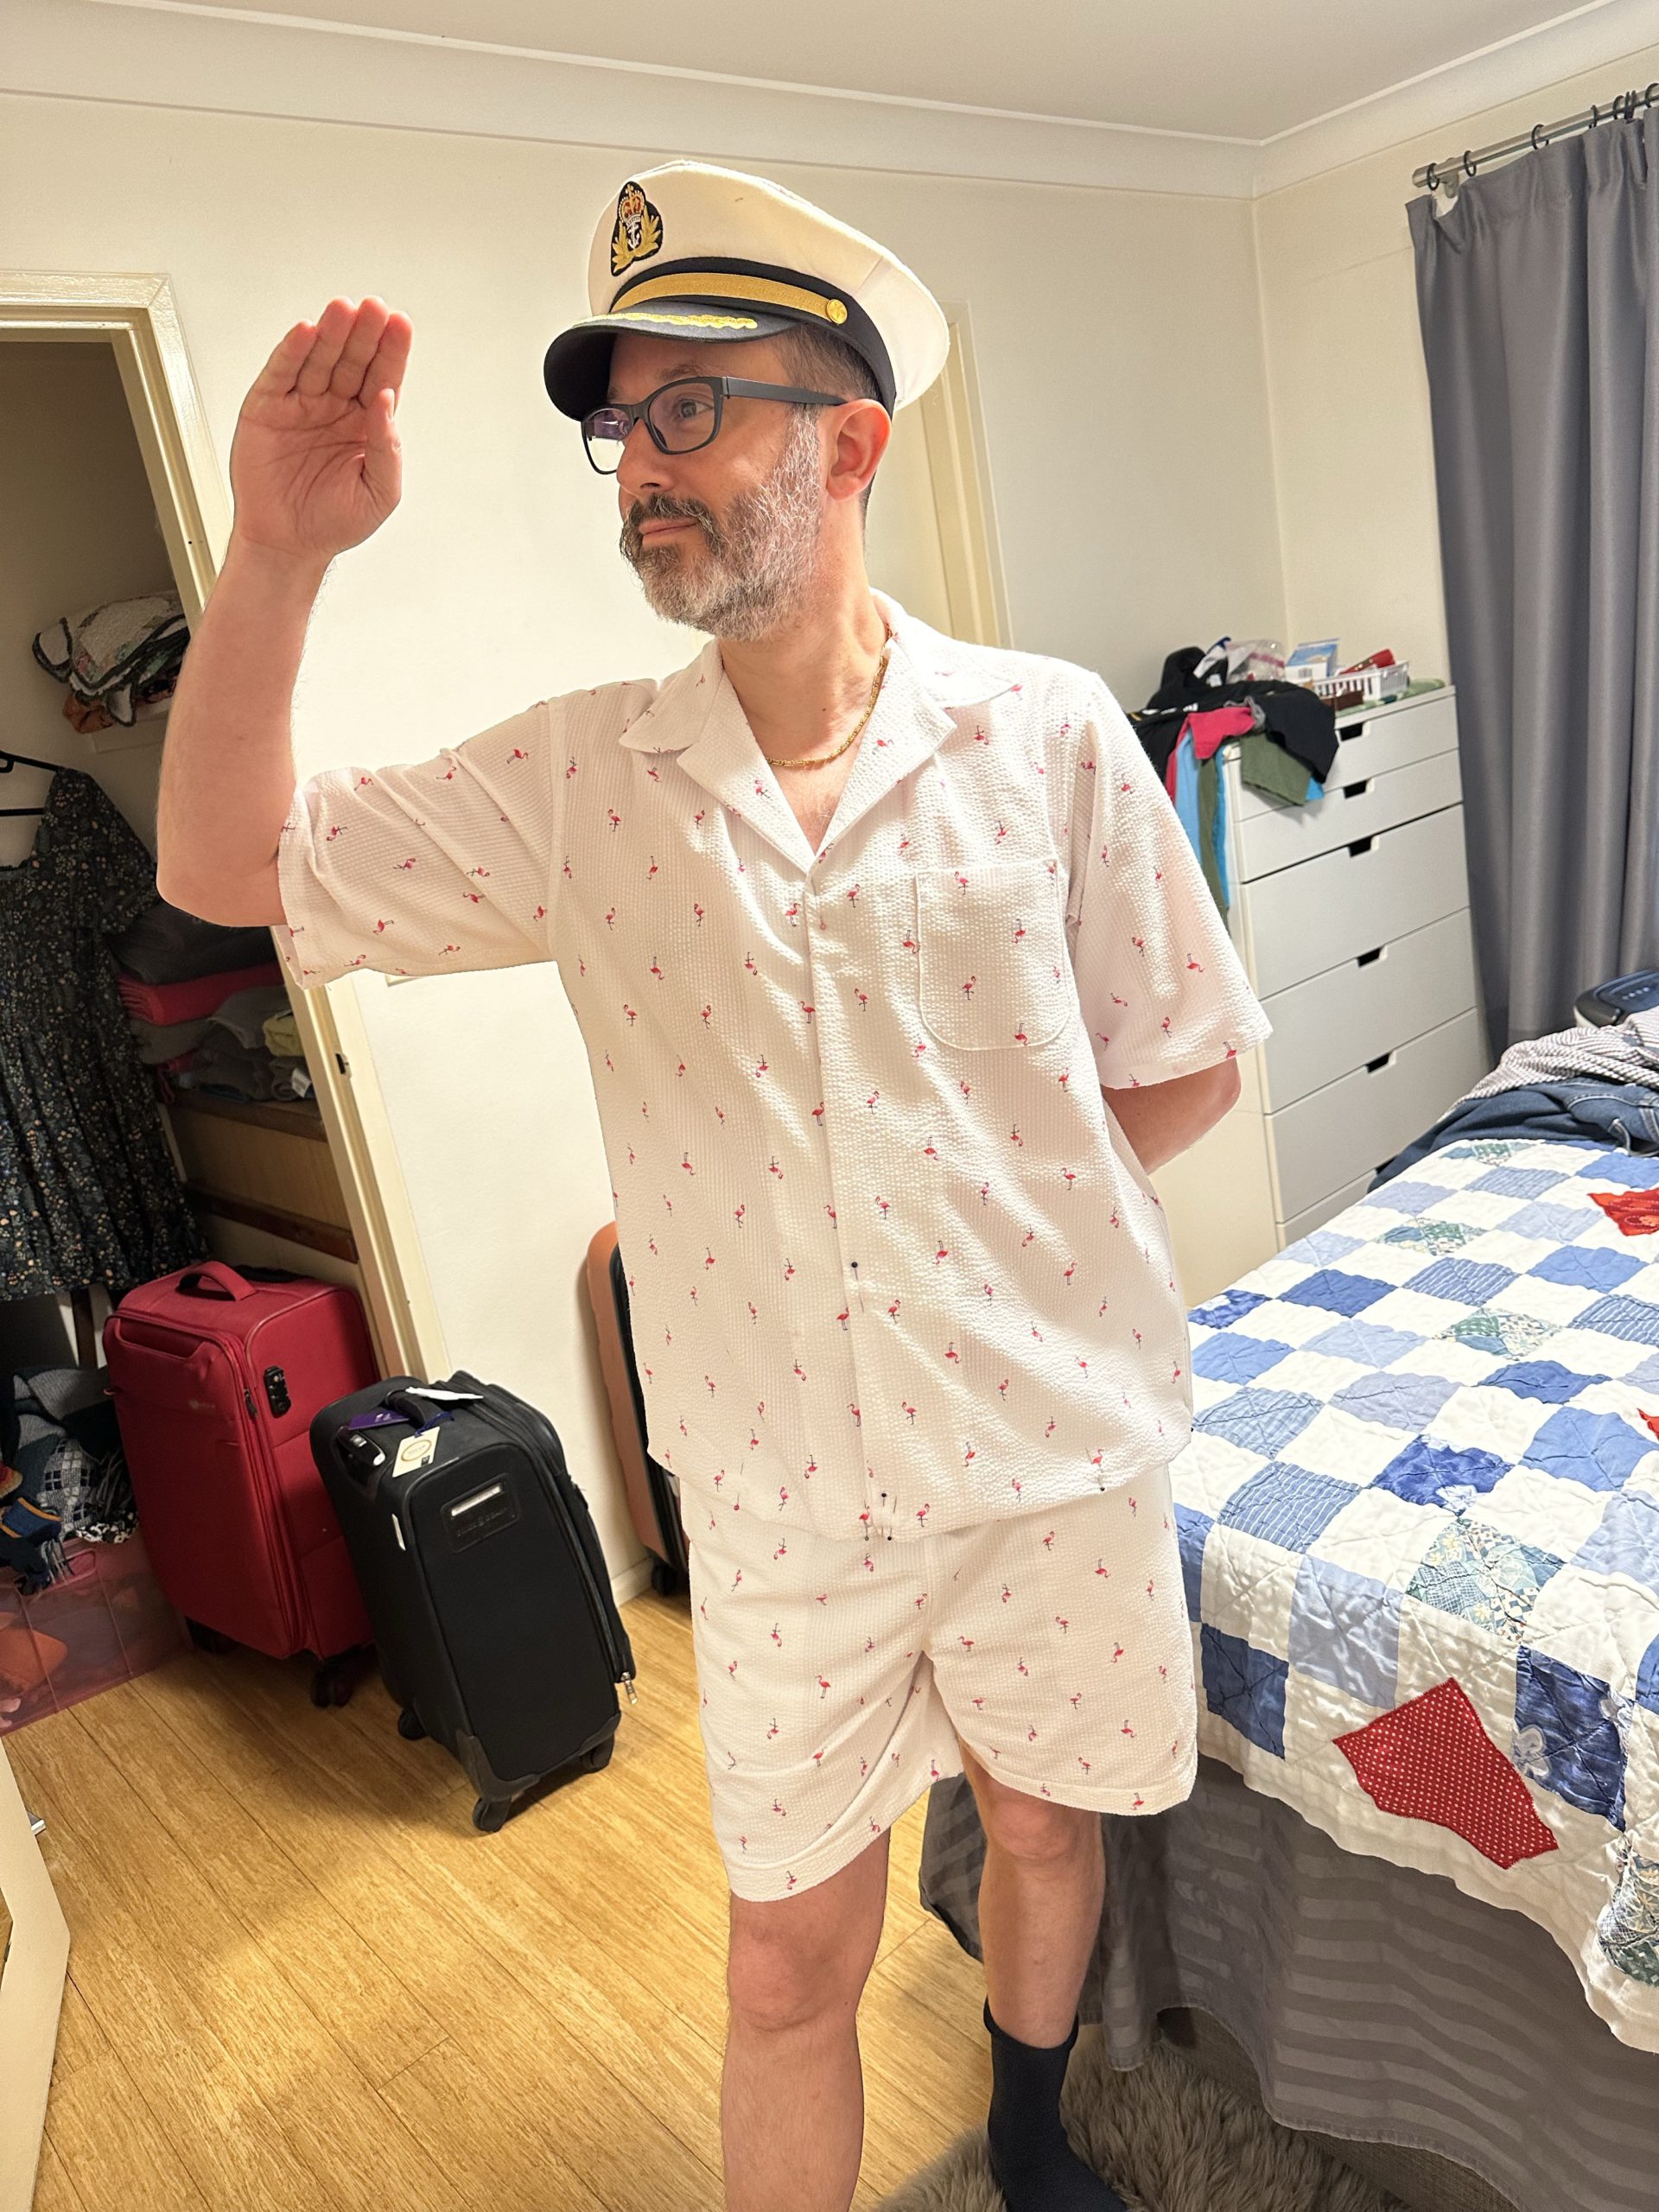
Of course, I had to make us special outfits for the occasion. I’ve been wanting to make Rodd a matching short set for some time (inspired by Taika Waititi’s pineapples), and I happened to have the perfect fabric in my stash (courtesy of my mother): Robert Kaufman’s Seersucker Coastal Print with tiny pink flamingoes. For the shirt, I used my tried and tested Seamwork Negroni pattern, just straightening the side seams and grading out a size at the waistline for some extra roominess. For the shorts, I used the Trigg Shorts pattern and modified them to have a full lining (because the seersucker was a bit see-through). I used some plain white cotton to sew a version without any pockets, and then inserted that into the seersucker before joining on the waistband. Worked great!
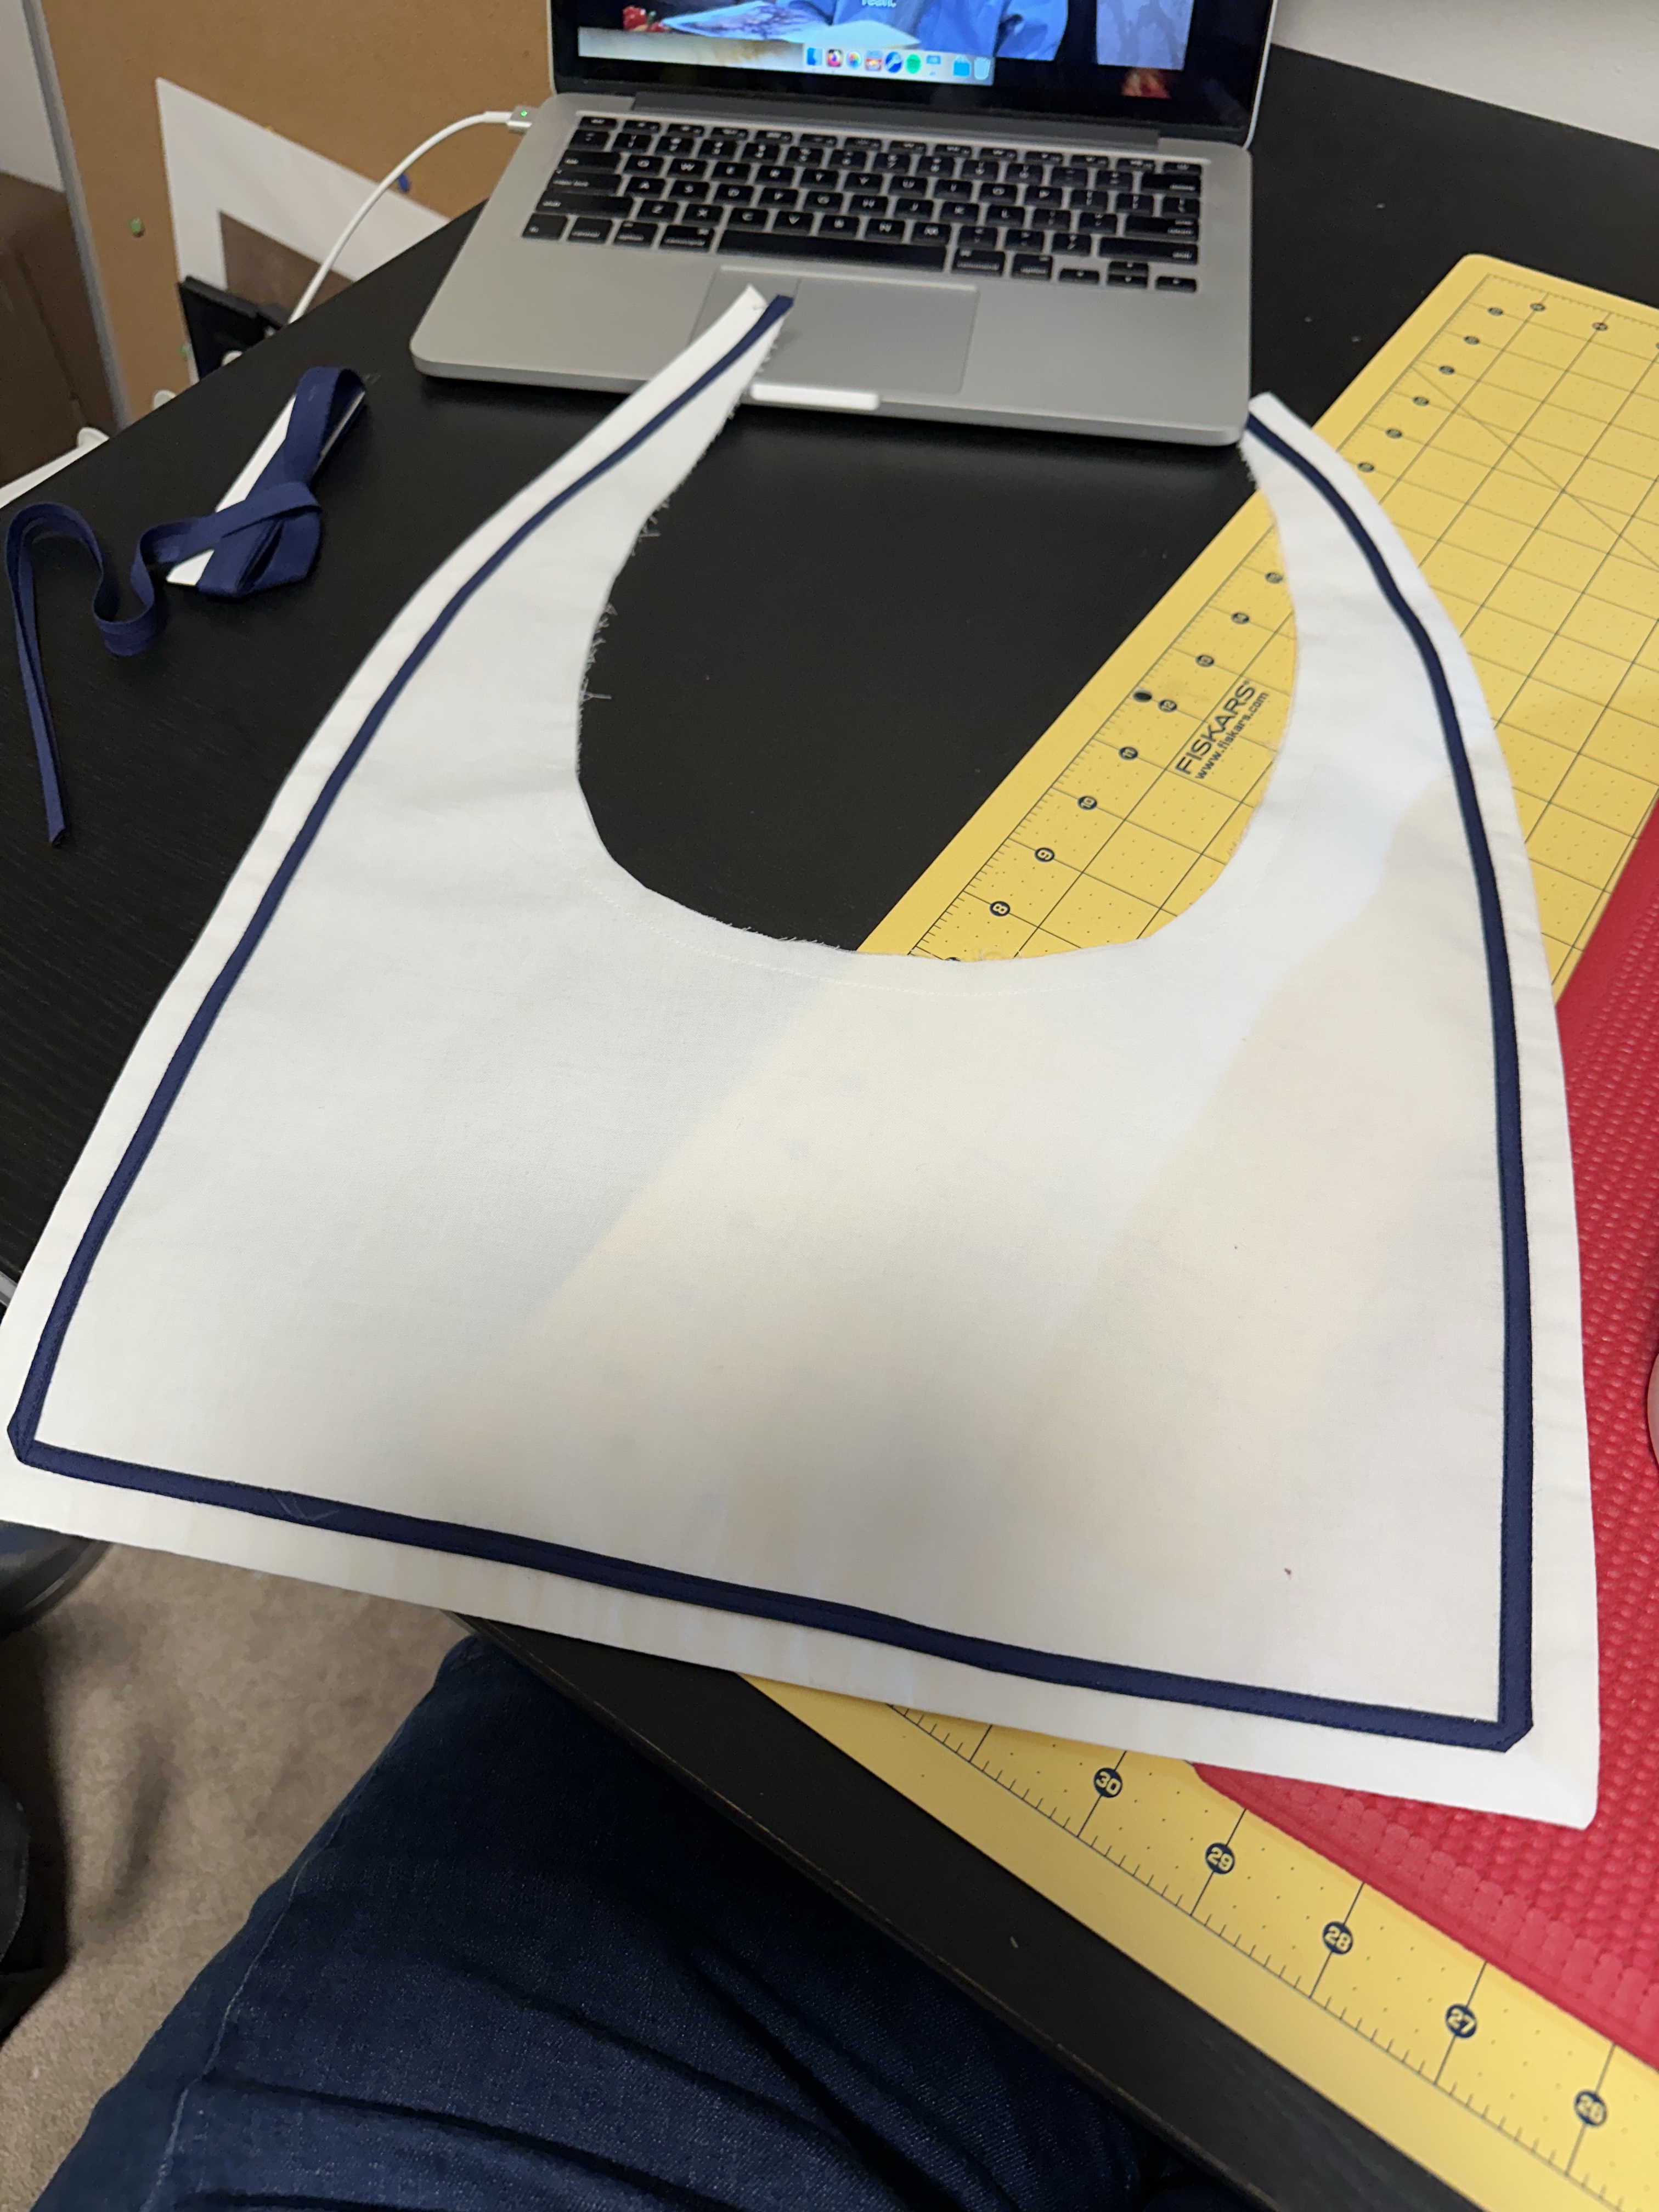
For my outfit, I decided to go literal with the Charm Mariner Top. This was my first time sewing princess seams, so I wisely opted to make a muslin first with an old bedsheet. I’m glad I did, because the fit was Not Great. Turns out that Charm revised their sizing a few years back, and they have two separate ranges now: the old one from 2-20, and the new one from 18-34. I happen to fall in the overlap. My first muslin was using the new range, so I decided to try the old one for comparison. That second one was better, but still needed some tweaks. I ended up removing half an inch at the top of each shoulder, and half an inch in width at the underarm as well. Not gonna lie – it was a fiddly pattern and I felt clueless as I tried to figure out how to improve it. Happily, the end result more than justified all my efforts:
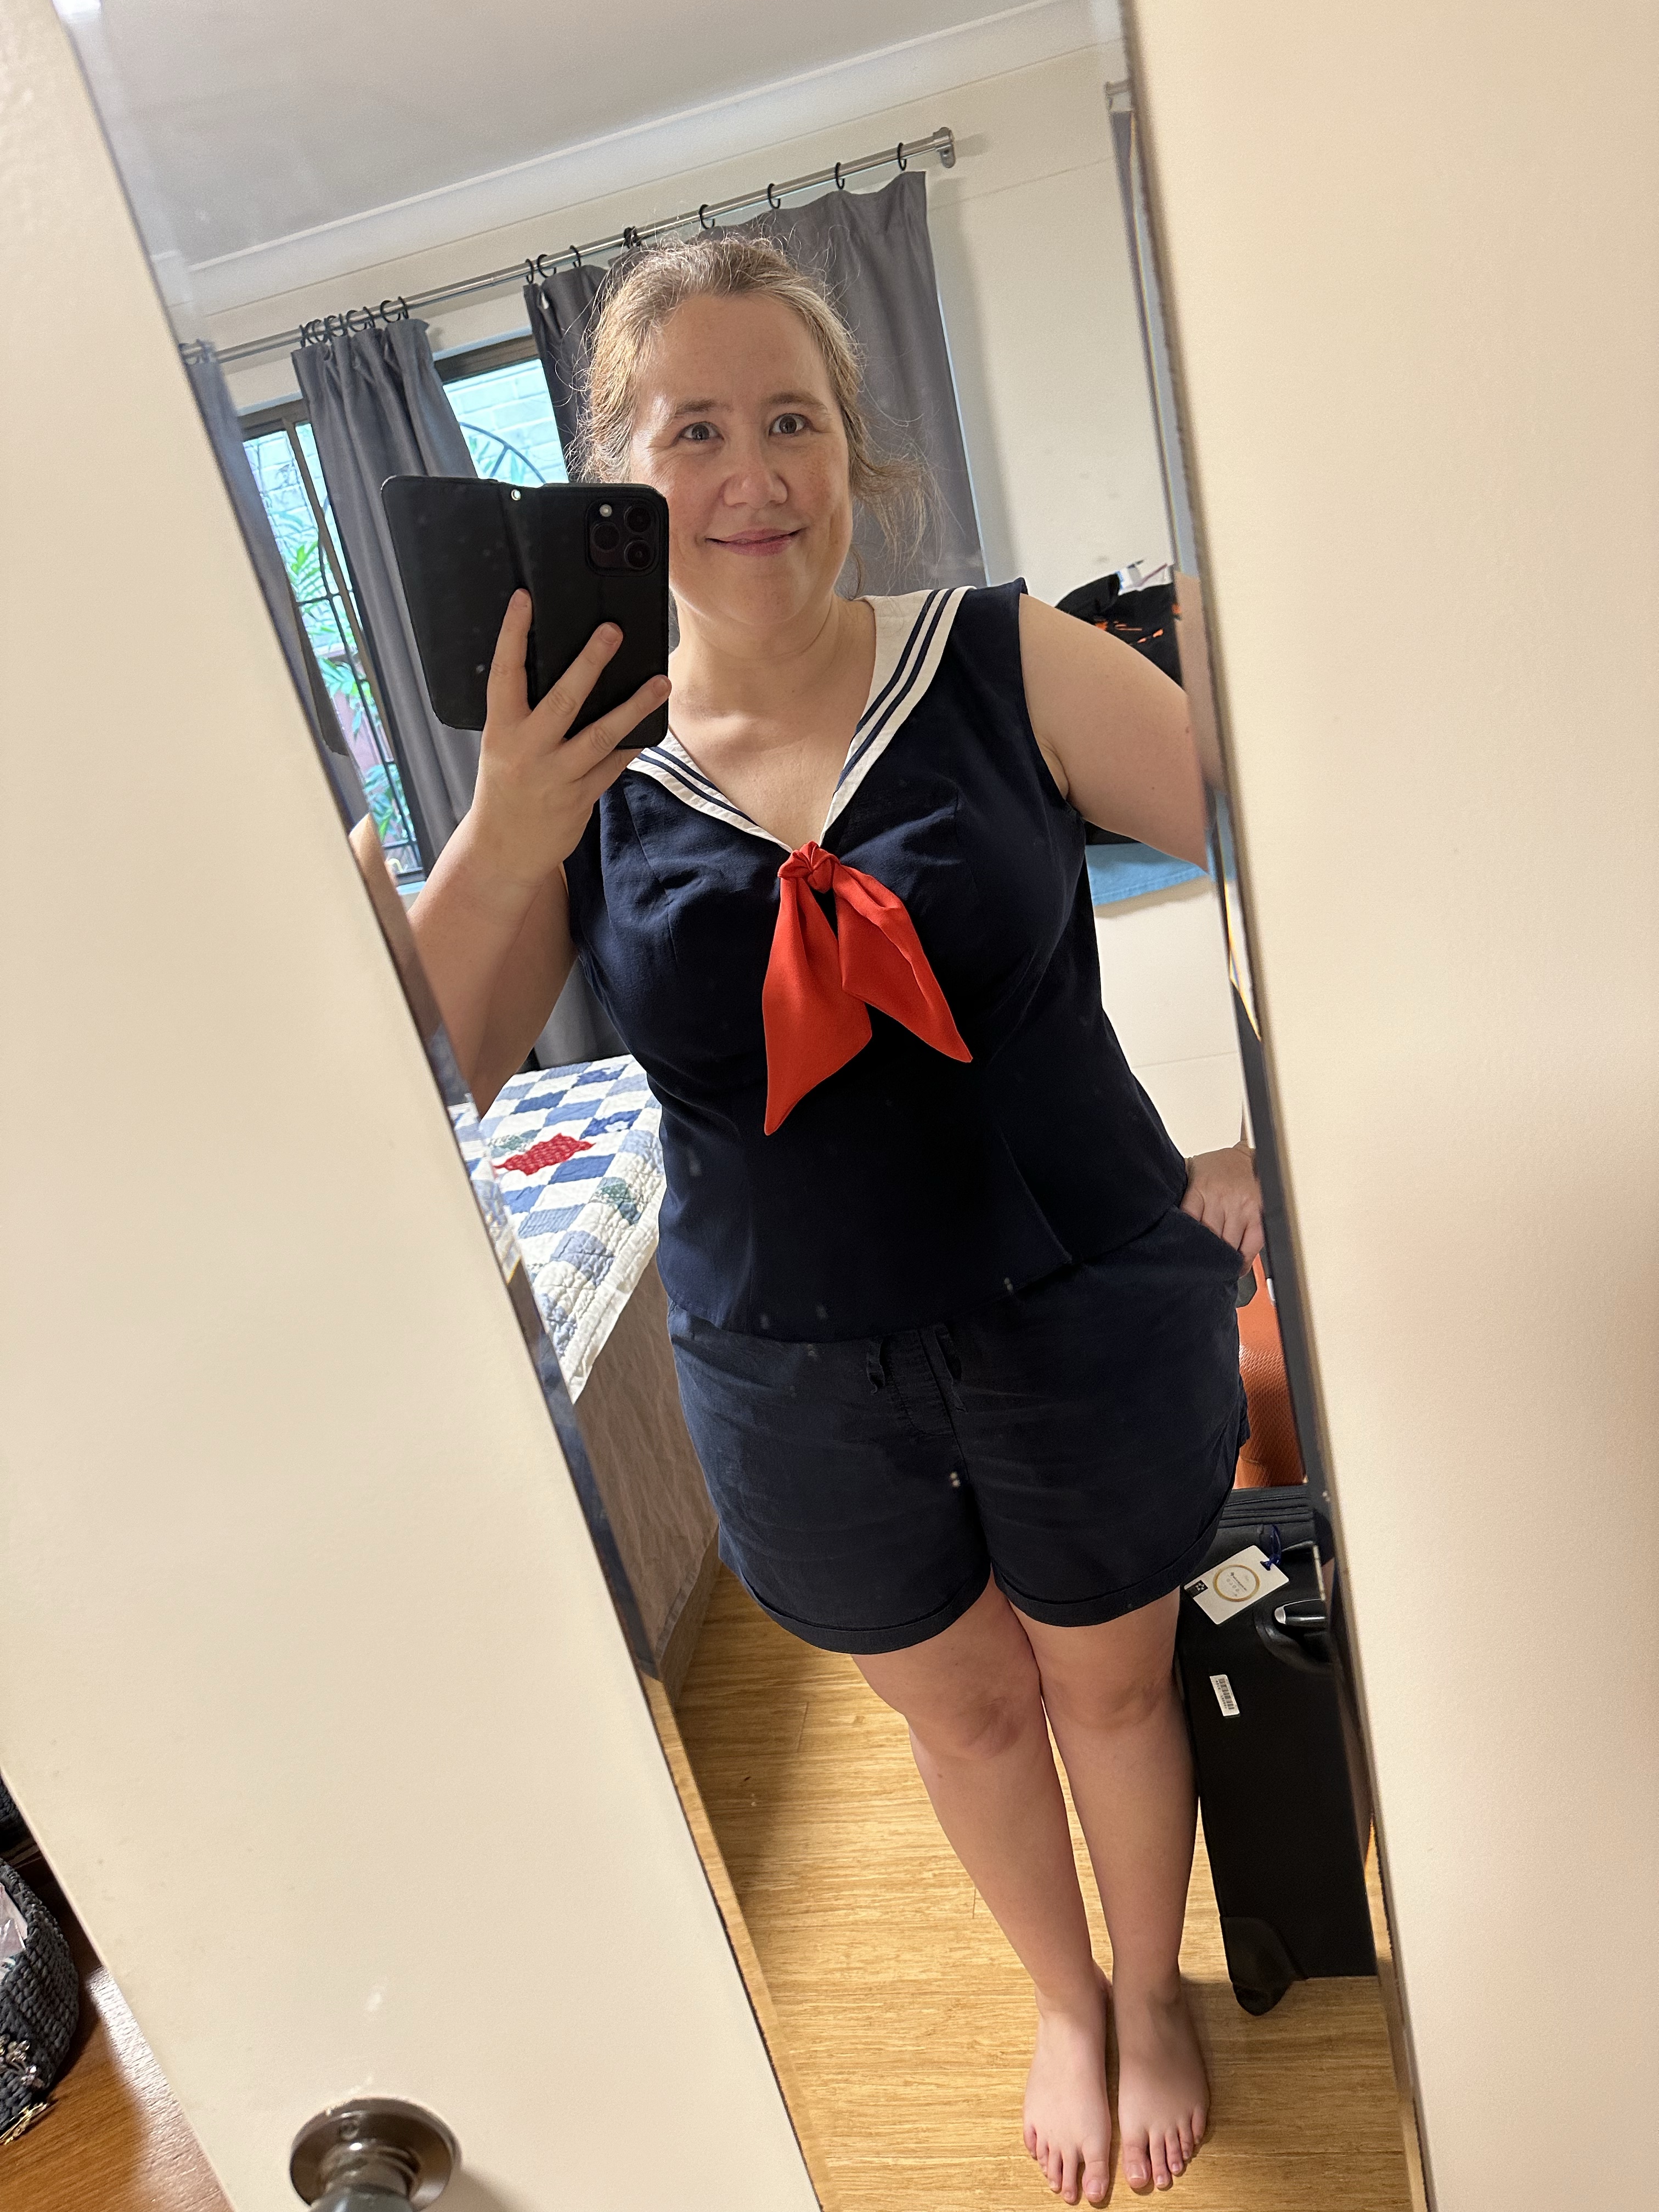
The fabric for the top is a navy cotton piqué I got at the Fabric Store, and I LOVE it. It’s woven but had a lovely thickness and drape to it. For the collar, I used white cotton lawn (sandwiched with some interfacing). You’re meant to use ribbon for the decoration, but I realised I had some navy bias binding that would work perfectly. I simply folded it in half and then edge stitched two rows around the edge. Here’s a photo halfway through, when I realised it was going to look awesome…
The red knot tie is a piece of actual silk that we found in the remnant box for $10. It was quite sheer so I used a double layer of it. Once I knotted it, I sewed a safety pin onto the back so I could pin it to the shirt. That way I can take it off for laundering. I paired the top with a pair of navy shorts from Uniqlo.
Aren’t we cute?!

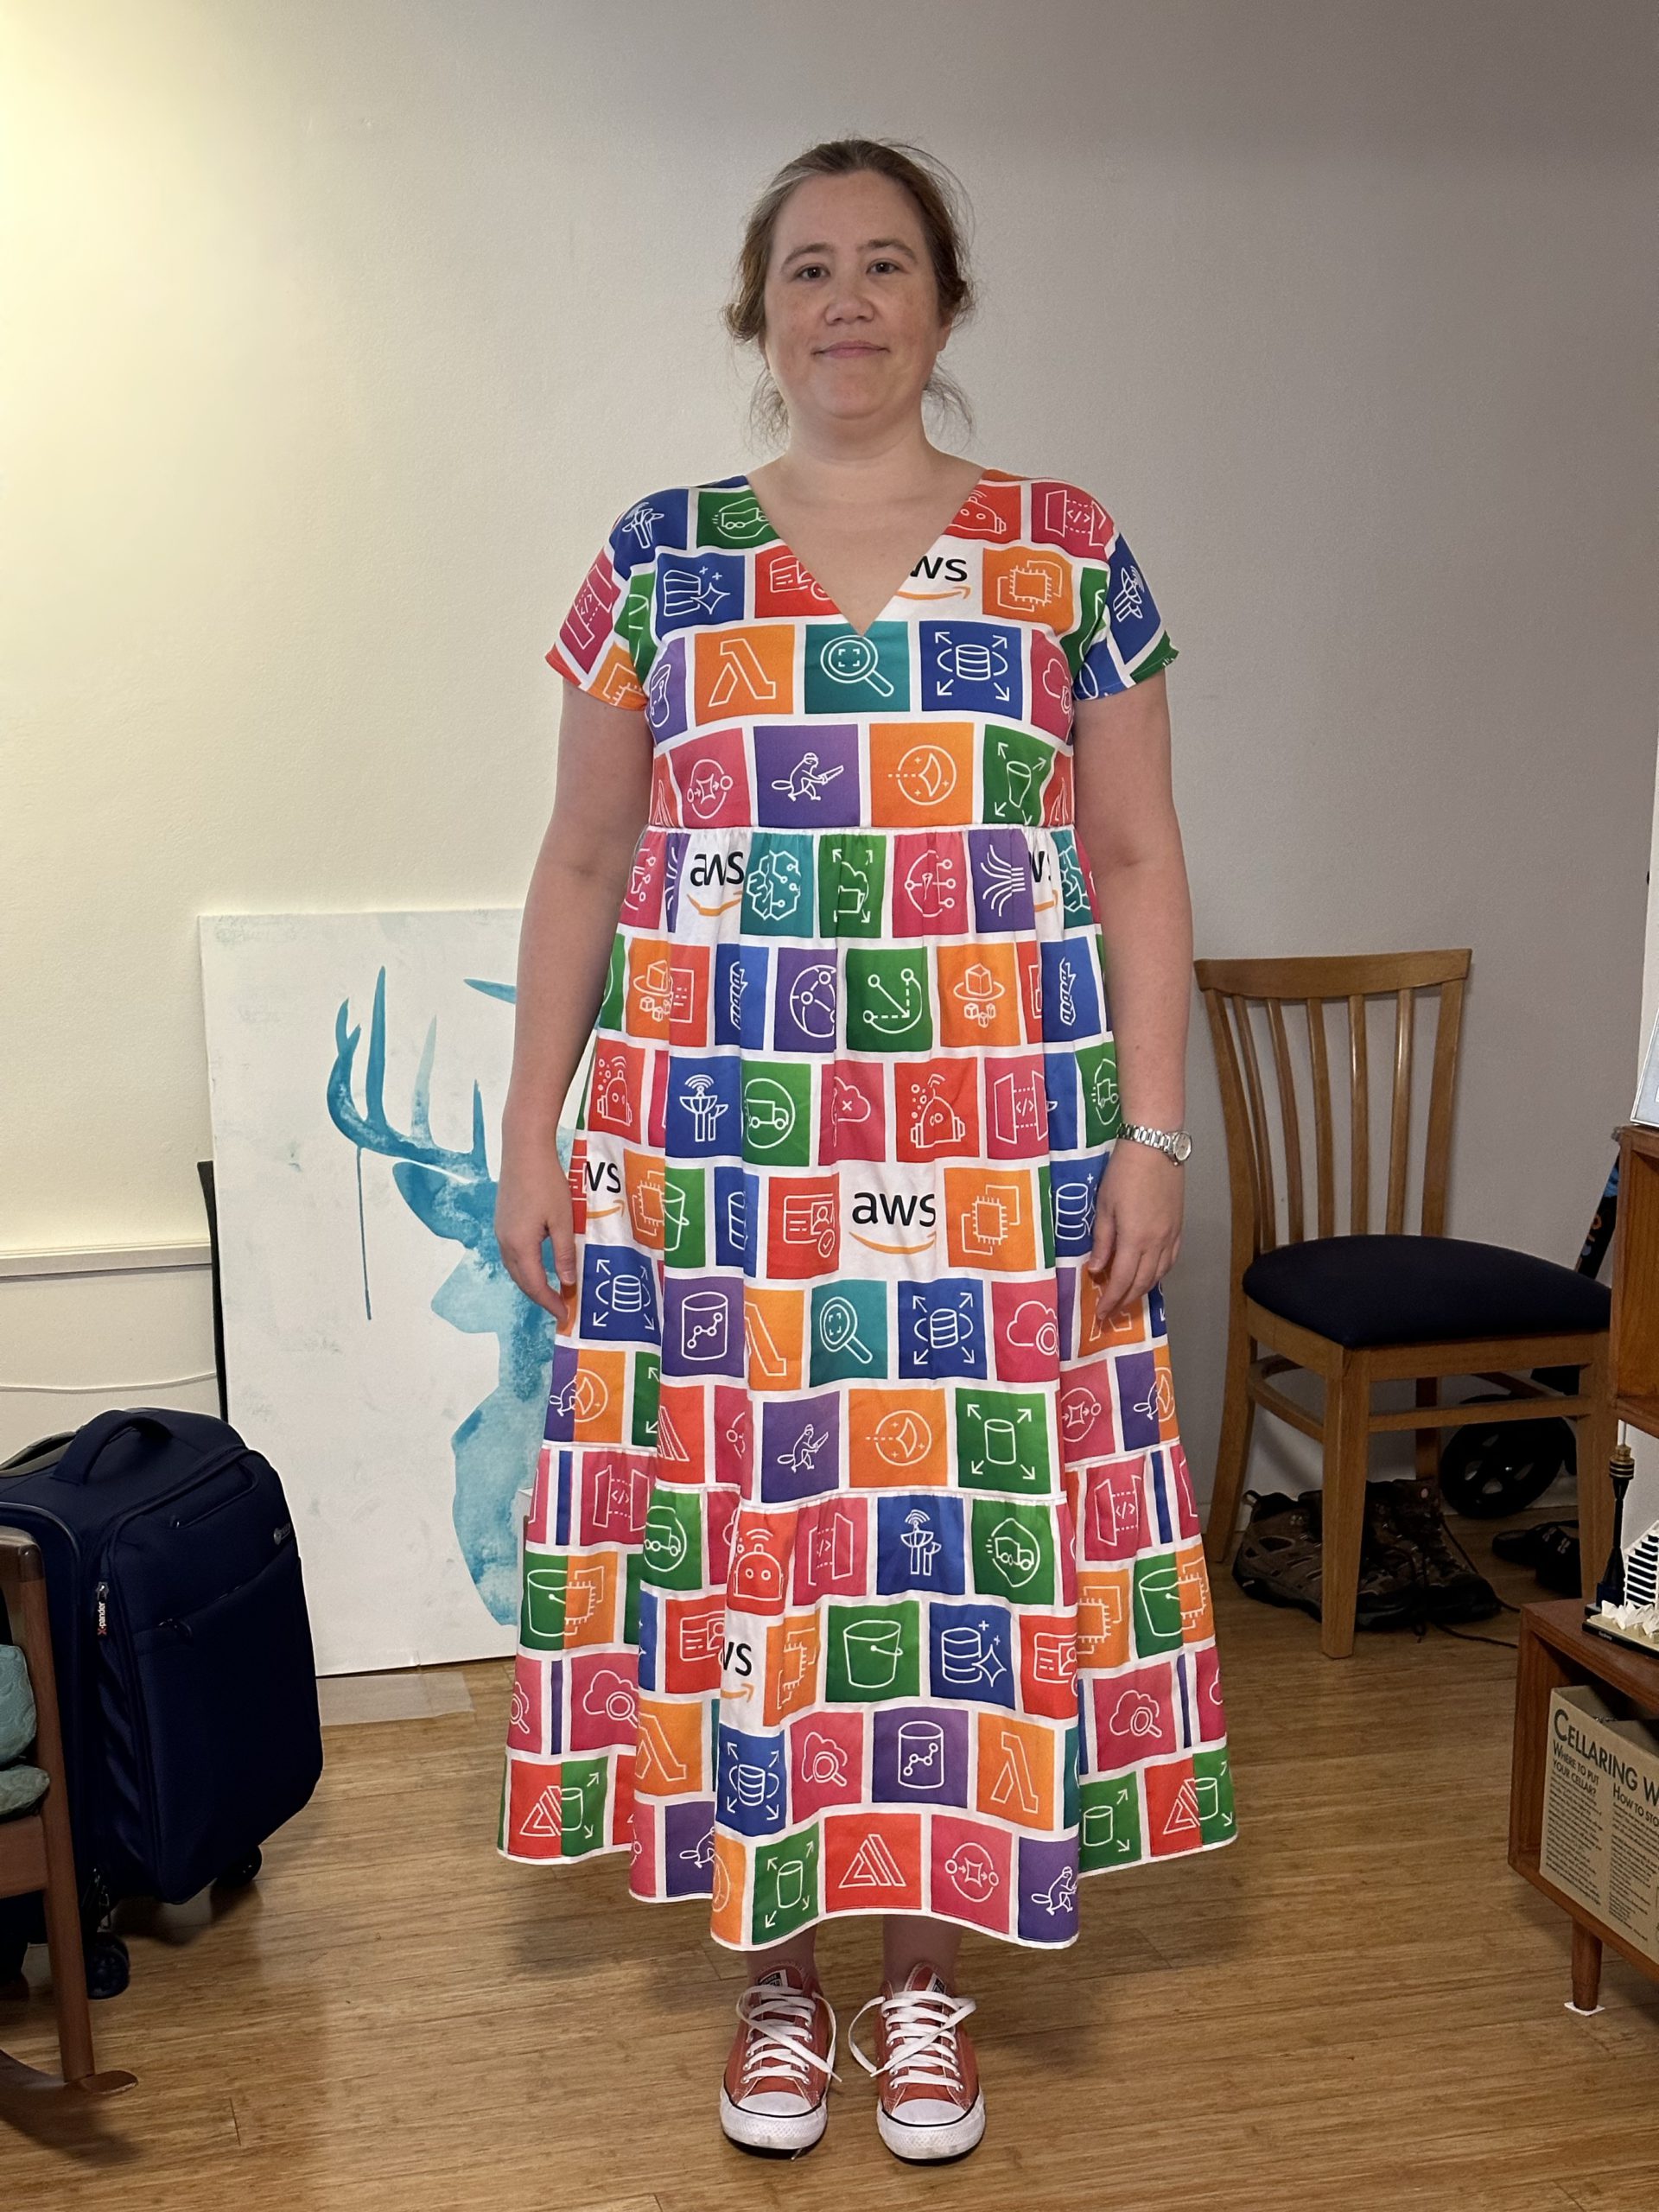
If you’ve met me at a tech event in the past 5 years, there’s a good chance that I was wearing my AWS dress.

This was something I made in 2018 to celebrate and thank everyone that donated to Frocktober that year. The fabric was designed by me and printed by Spoonflower (4yds of Cotton Poplin Ultra), and the dress itself was a Colette Rue. I made my own piping for the waist panels. The fit on the Rue is/was notoriously weird though, and I struggled to get a version that fit me and would sit where I wanted it to. In the end, the bust is rather baggy and the shoulders are so wide I have to use fashion tape to stick them to my bra straps. (And I have wide shoulders!) I also wasn’t thrilled with the fabric, which wrinkles easily and looks a bit like bedsheets. But everybody seemed to get a big kick out of it, so I continued to break it out for AWS events over the subsequent years. I even got a selfie in it with Amazon CTO Dr. Werner Vogels!
 This past February, I went to Singapore to co-present a big keynote for one of our AWS Innovate events. To my surprise and delight, my colleague Ethan handed me a special t-shirt to wear. How cute is that? It’s got a little illustration of me in the dress! I later asked him for the original image file, and I had some stickers made up to hand out at events. This thing was really taking on a life of its own.
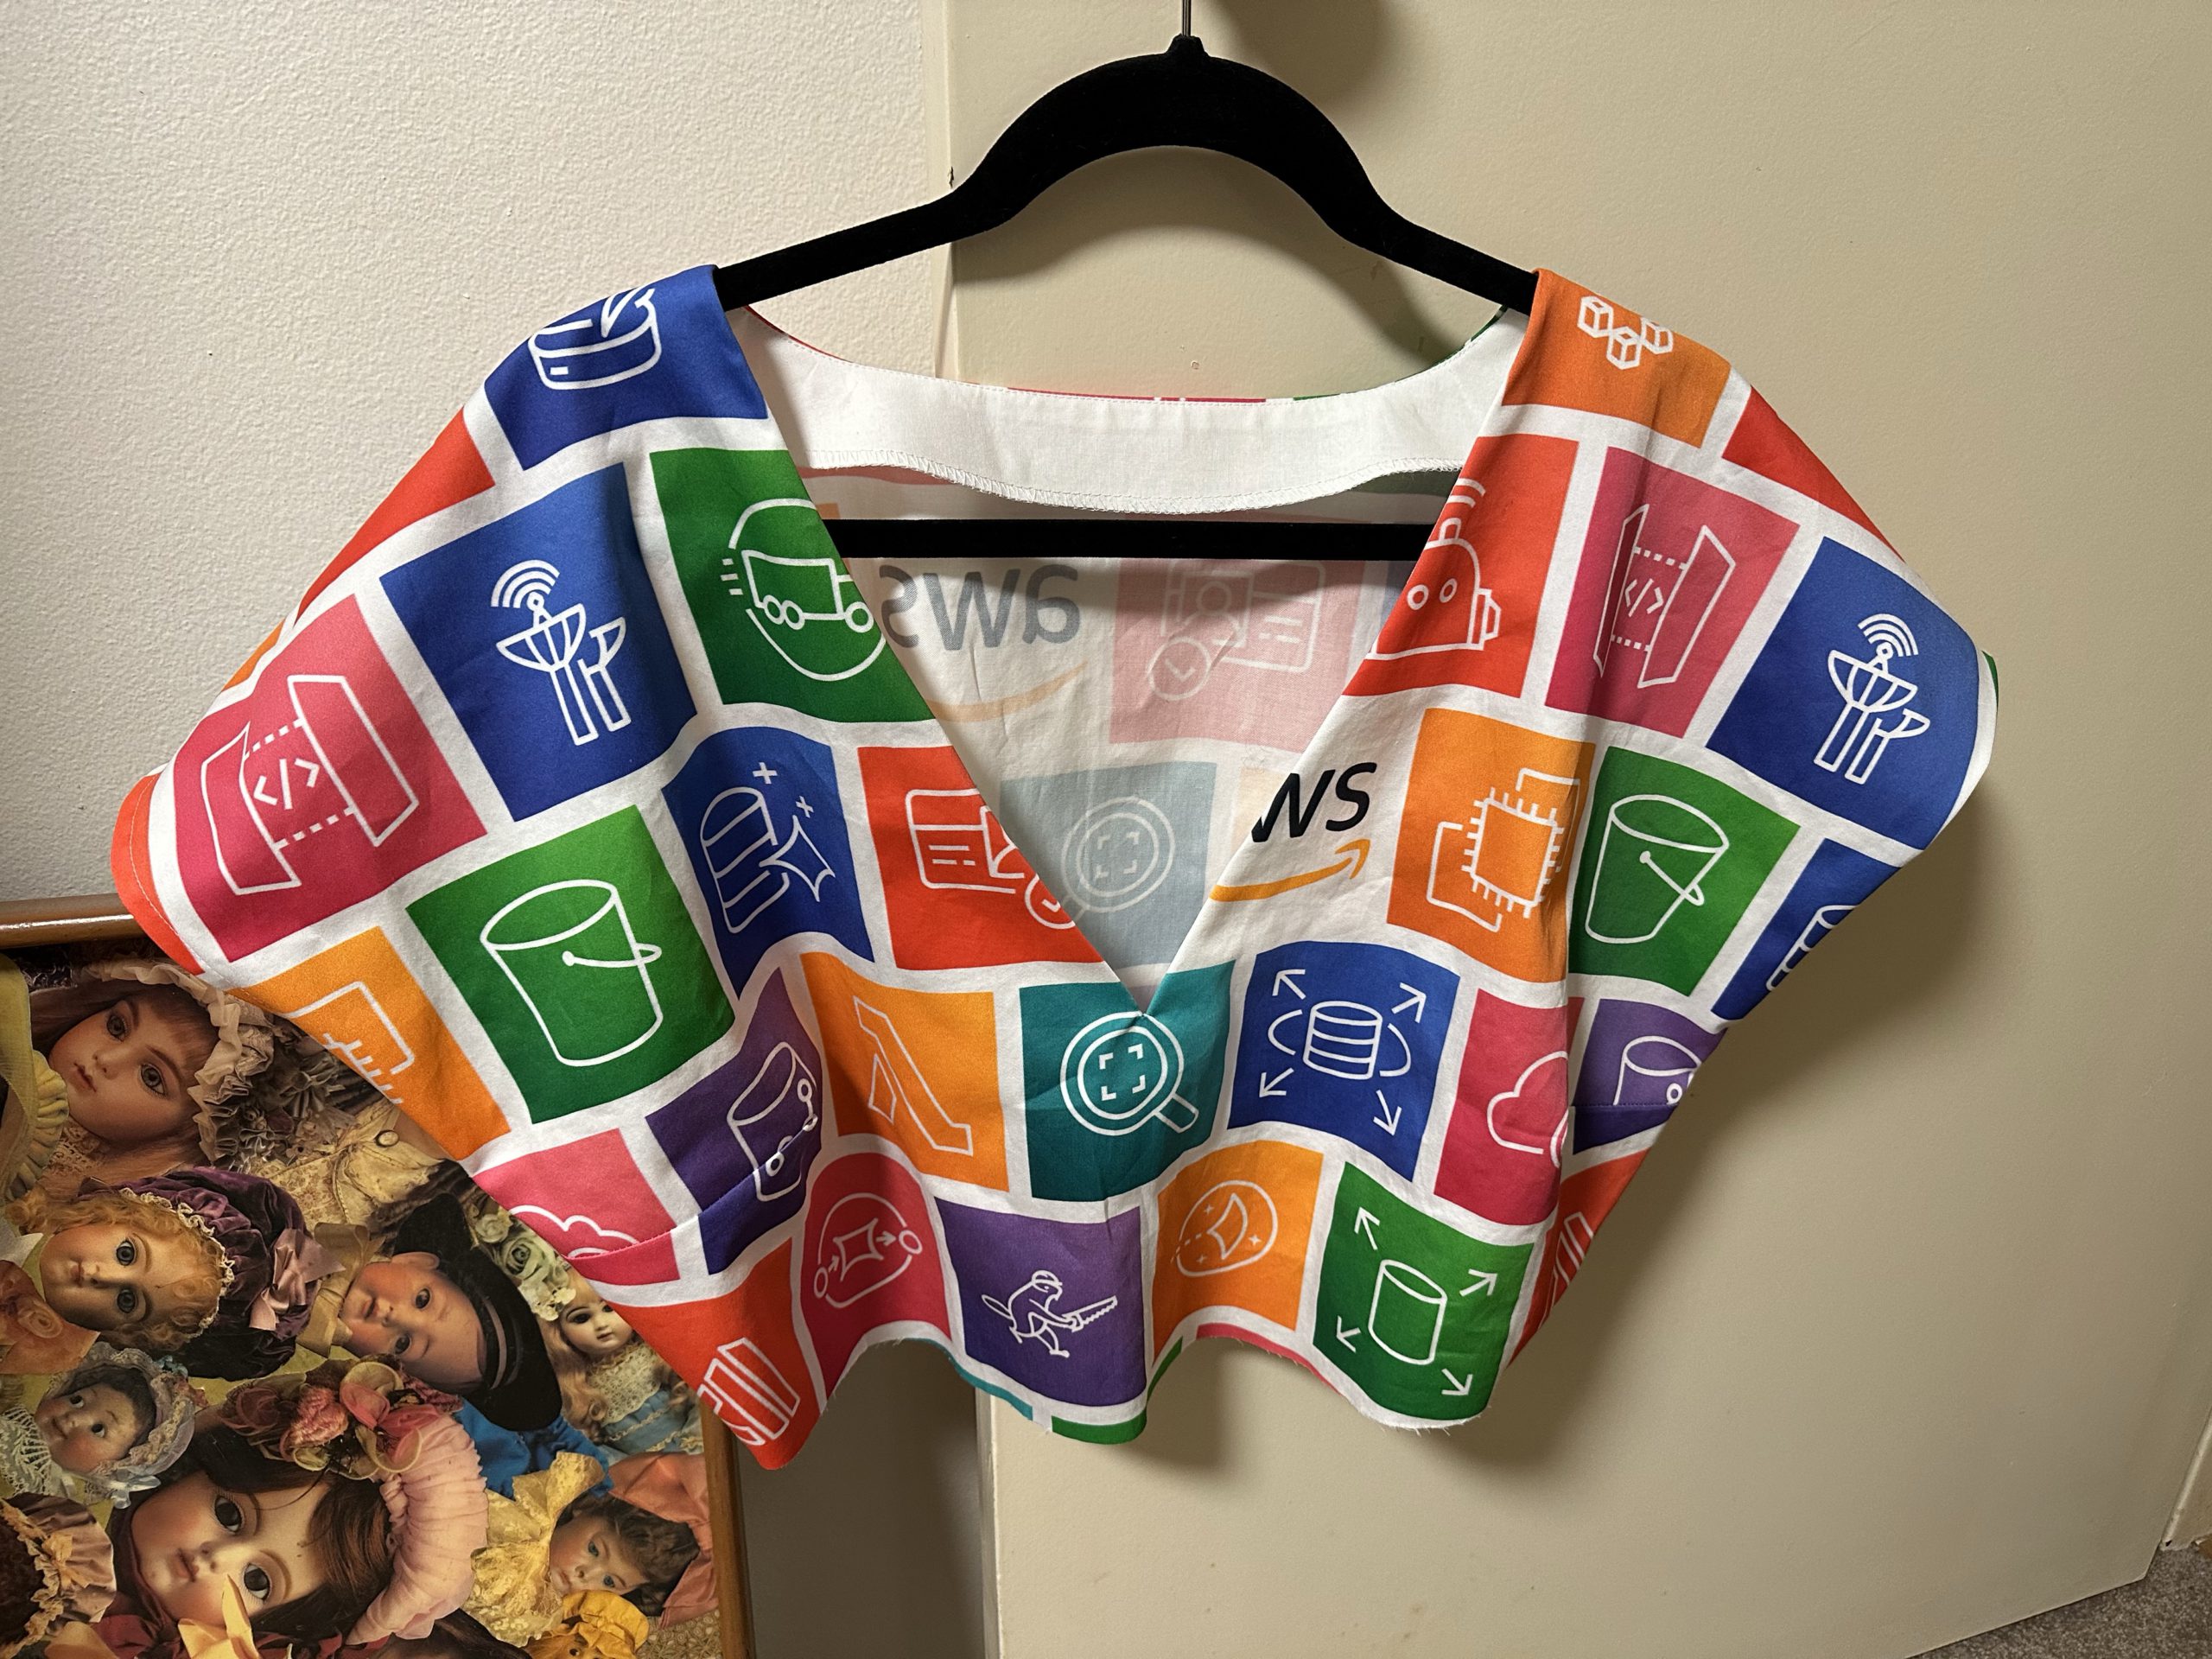
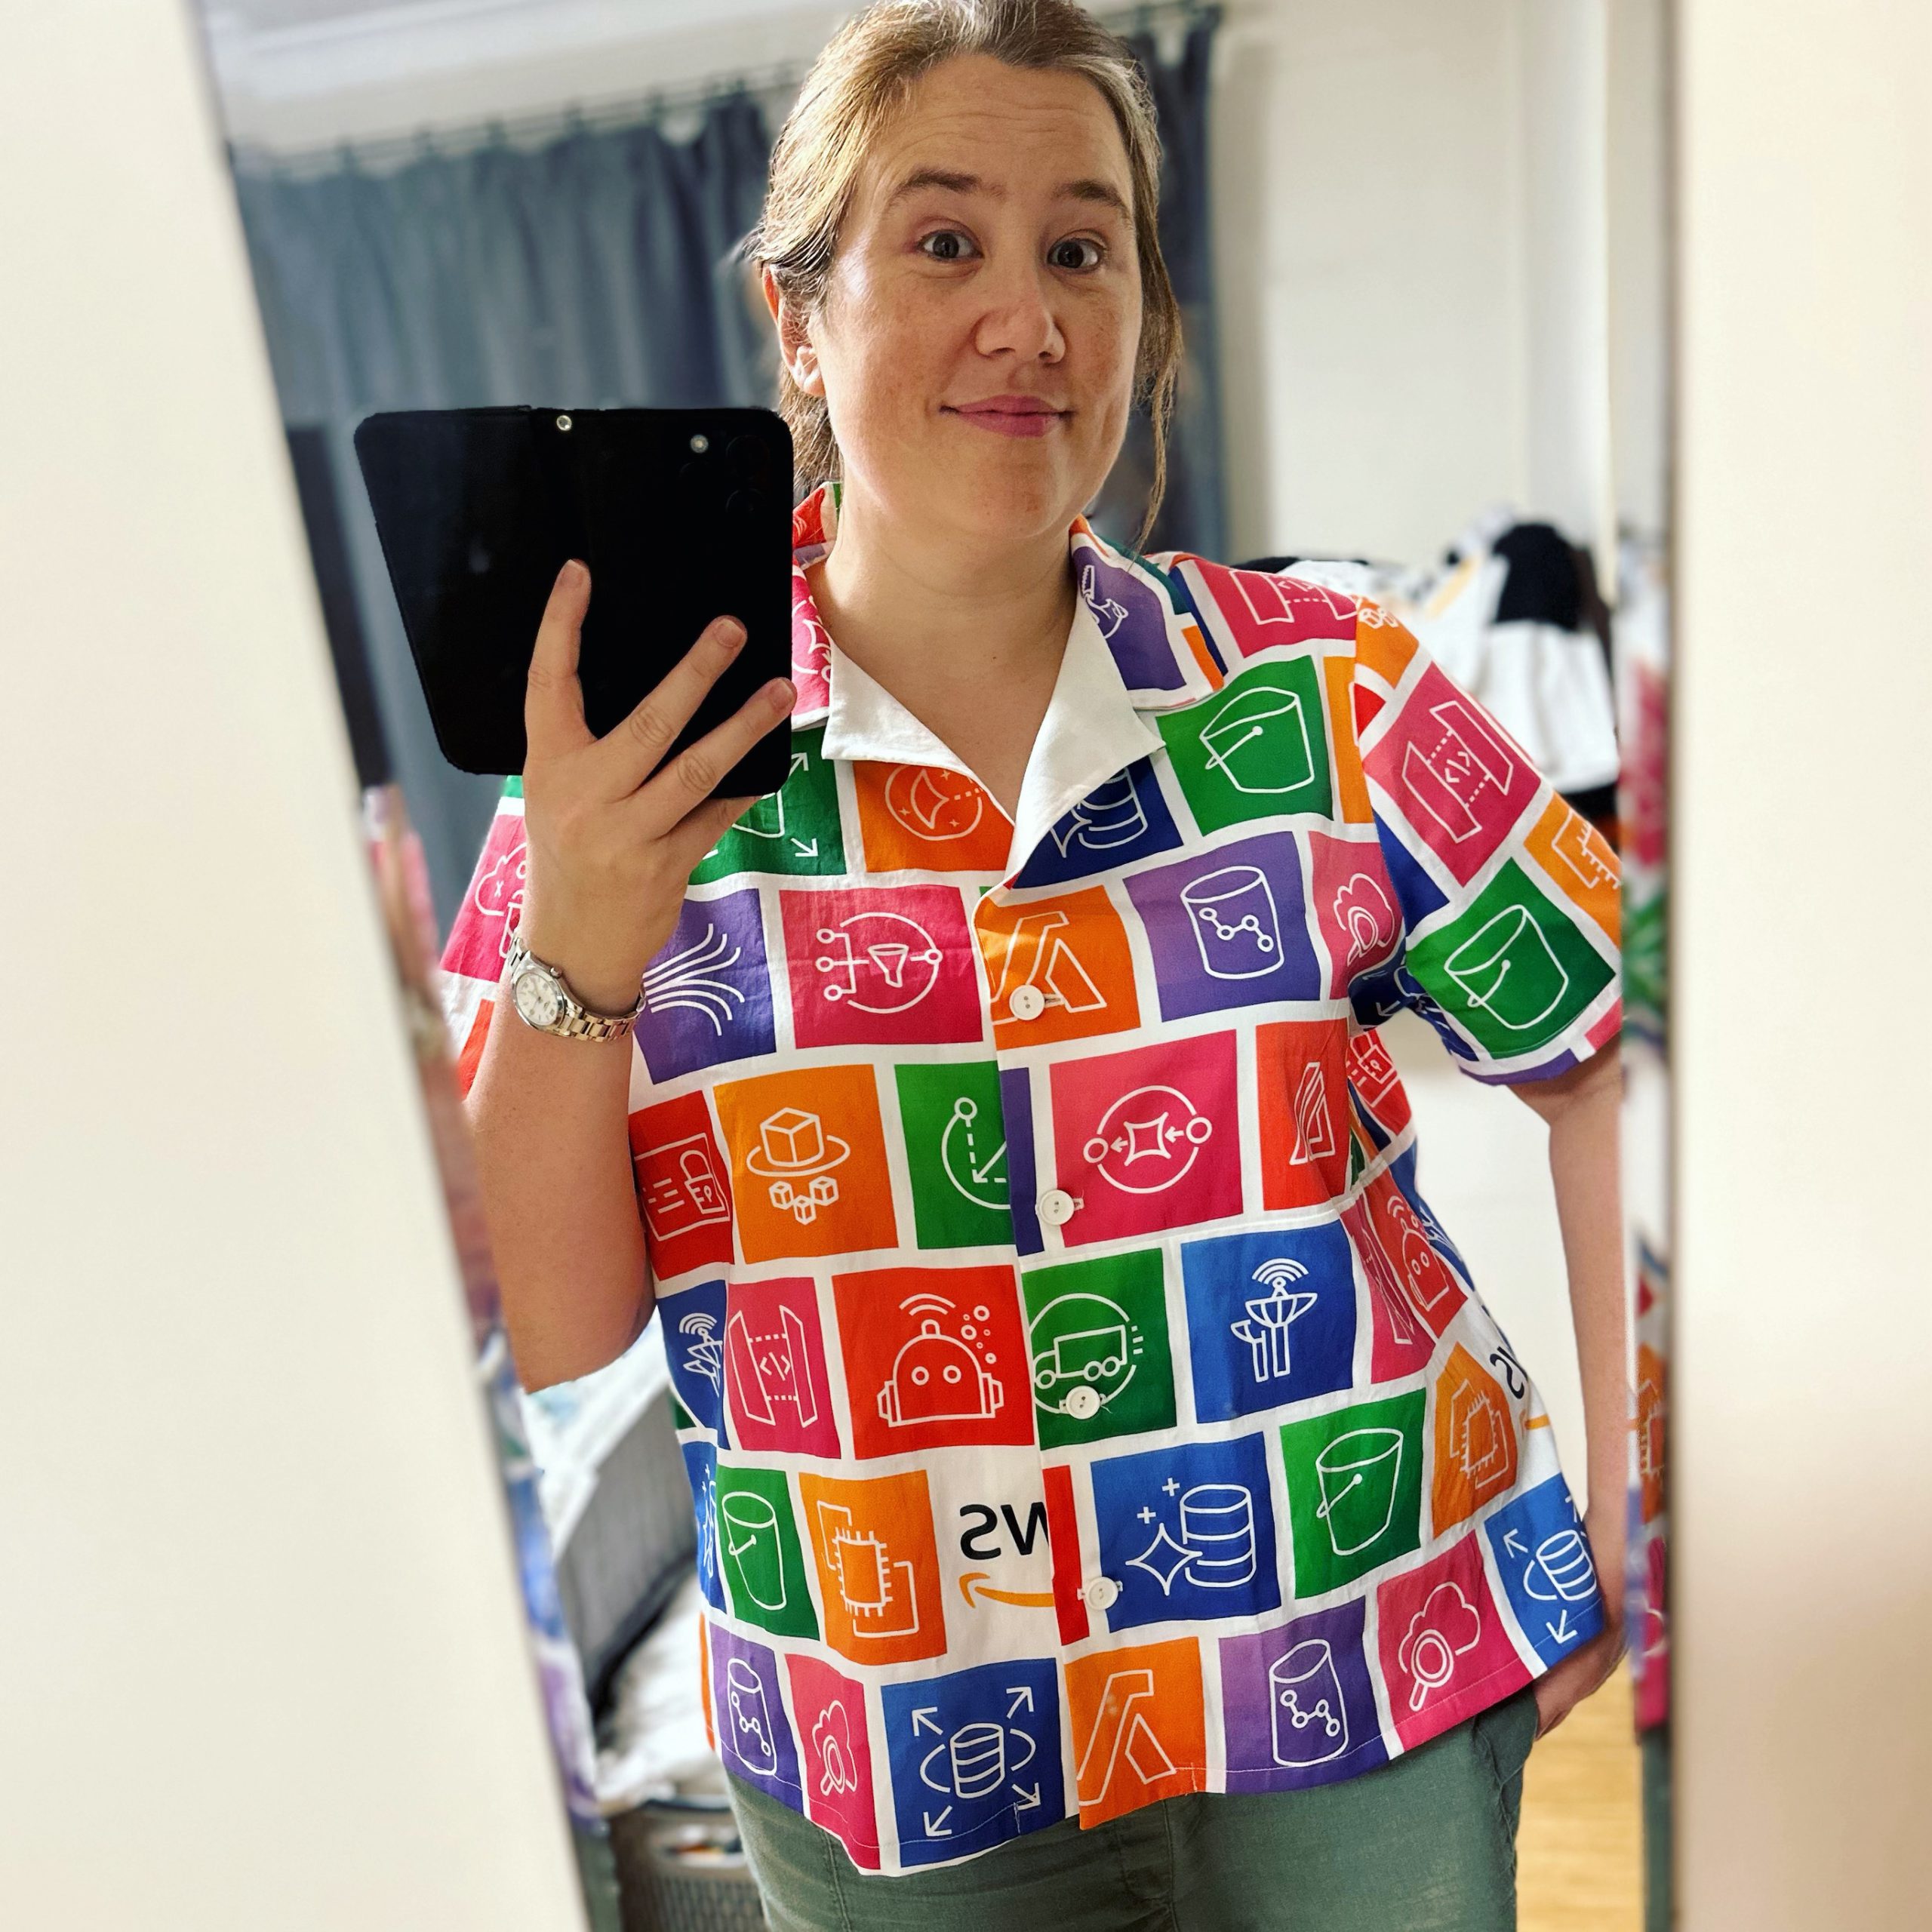
That said – I was tired of the white, and I felt like it was past time for a new version. So I created a new design using 28 AWS service icons, arranged in a brick formation along with the AWS logo. I picked icons for my favourite services as well as ones that I thought just looked cool, and with a goal of getting a nice range of colours. Then I sent it off to Spoonflower to get printed onto 5 meters of their Organic Cotton Sateen fabric. It’s a heavier weight with almost a shine to it, thanks to the thicker weave. (Note: I found though that it’s very easy to create a visible snag when pinning, so I tried to only pin through the white bits where it’s less noticeable. Using better pins would probably help too, I think.)
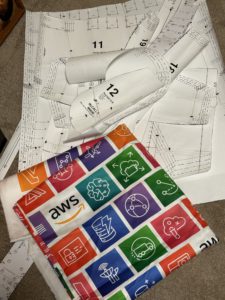 Once I had the fabric, it was time to choose a design. I had deliberately purchased enough to make a full skirt if I wanted, and I thought for a while about doing some sort of retro style shirt dress. (I’ve had my eye on McCalls 6696 for a long time now.) But once I had all the pattern pieces printed out*, I realised that it was a bad choice. Any style that involved lots of seaming or shaping would either distort the printed icons, or result in me spending hours trying to line things up perfectly. I needed a simpler design that would show off the print to maximum effect. After a lot of research, I landed on the Seamwork Benning. It’s a loose and comfortable fit, with a simple shape (mostly rectangles) and not too many seams. No need for a zipper, and YAY RUFFLES!
*If you don’t sew or haven’t bought a pattern in decades, you might not realise that you can now buy patterns as PDFs! I’m a big fan, though it does mean you have to spend the first hour gluing all the pages together…
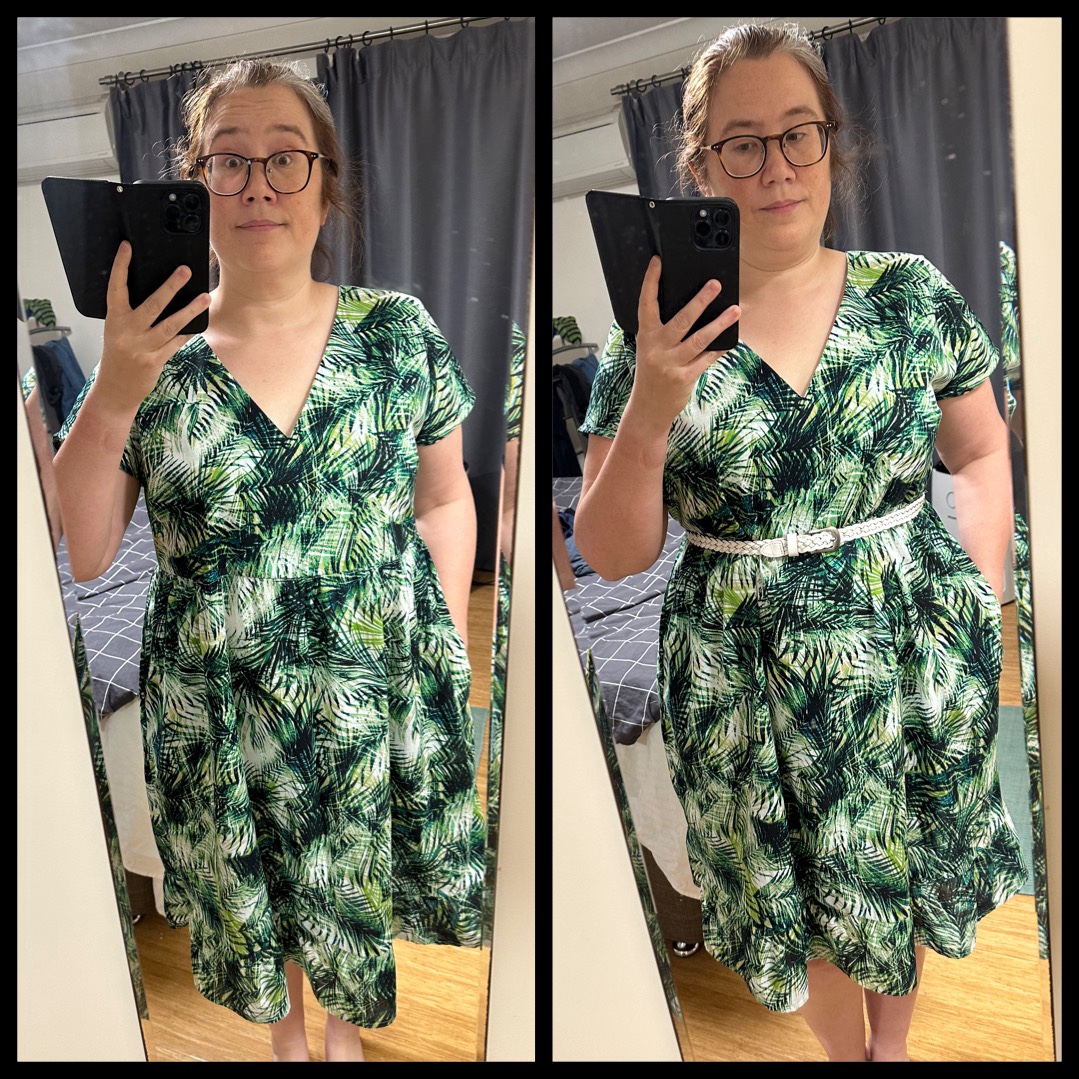
I wisely decided to create a prototype first to make sure I had the size correct, and that I understood all the steps. I used some random tropical light cotton fabric I had in my stash. I didn’t have quite enough meterage for the full version so I shortened the bottom ruffle. It was a quick project… but the shape ended up pretty sack-like on me. It looked better with a belt for waist definition, but the style isn’t actually meant to be belted. This showed me that I definitely needed to go down a size in the real version!
So finally it was time to start the real version. I spent a lot of time laying out the pattern pieces. I needed to make sure the icons weren’t upside-down, and I carefully adjusted the placement so that the two horizontal seams (at the waist and the second ruffle) would fall between rows of icons and thus not cut any in half. I also ensured that the repeat would be properly maintained the whole way down the dress. I actually overthought this a bit, as I also tried to make sure the horizontal pattern would be correct… before realising that the gathers for the ruffles would mess that up regardless.
Once I had the fabric cut out, it was time to assemble the bodice. There is a side bust dart to provide a little shaping. This dress is not fully lined, but instead has a simple facing around the neckline. This is like a partial lining, a bit of fabric that is sewn around the neck opening and then flipped to the inside. This gives you a nice finish around the neck and helps the garment to lie flat. I used some white cotton from my stash, along with some iron-on interfacing to give it a little extra weight. As you can see in the photo, I used my overlocker machine to finish the bottom edge of the facing.
One of the advantages of this design is that the sleeves are “cut-on,” meaning they’re part of the bodice so you don’t have to sew them on separately. So once you’ve sewing the shoulders together and attached the facing, you can go ahead and hem the sleeves and finish the side seams. I decided to be fancy and use French seams, just to challenge myself and to give a nicer finish. This way all the raw edges are fully encased on the inside of the garment.
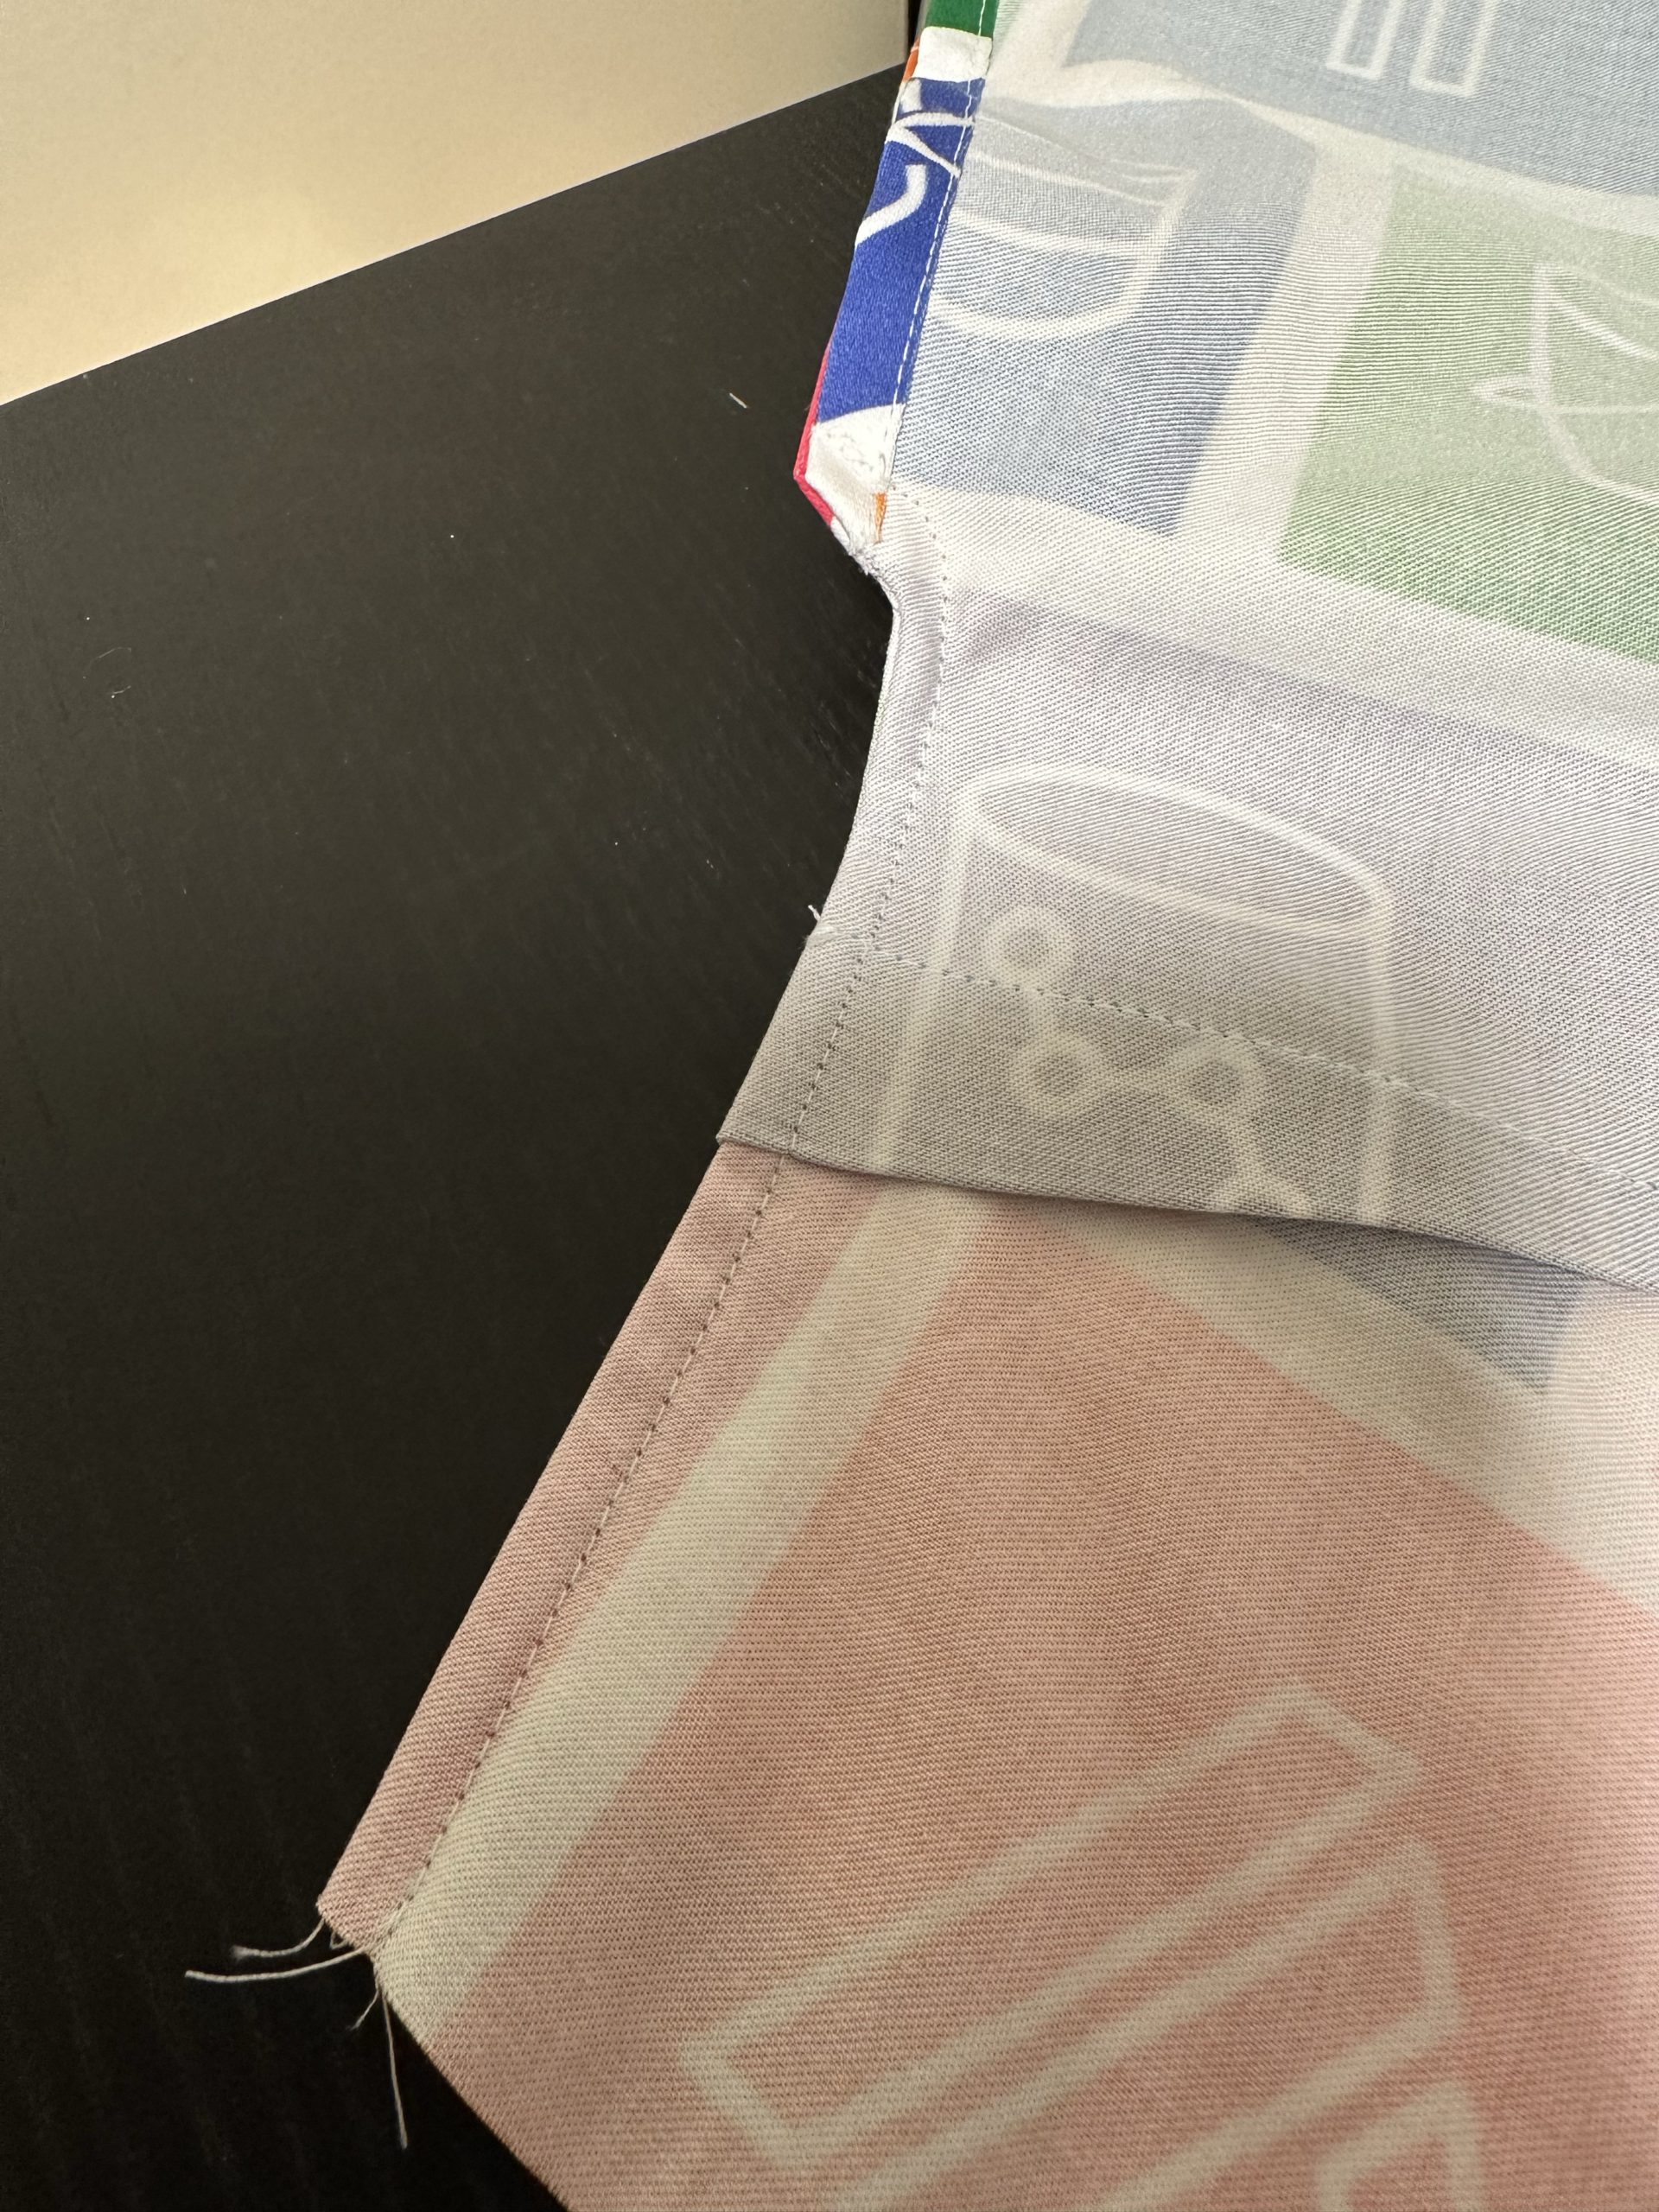
And with that, the bodice is done! You can see that the facing wants to flip out a bit, despite my understitching. I think this is something I just need to practice more.
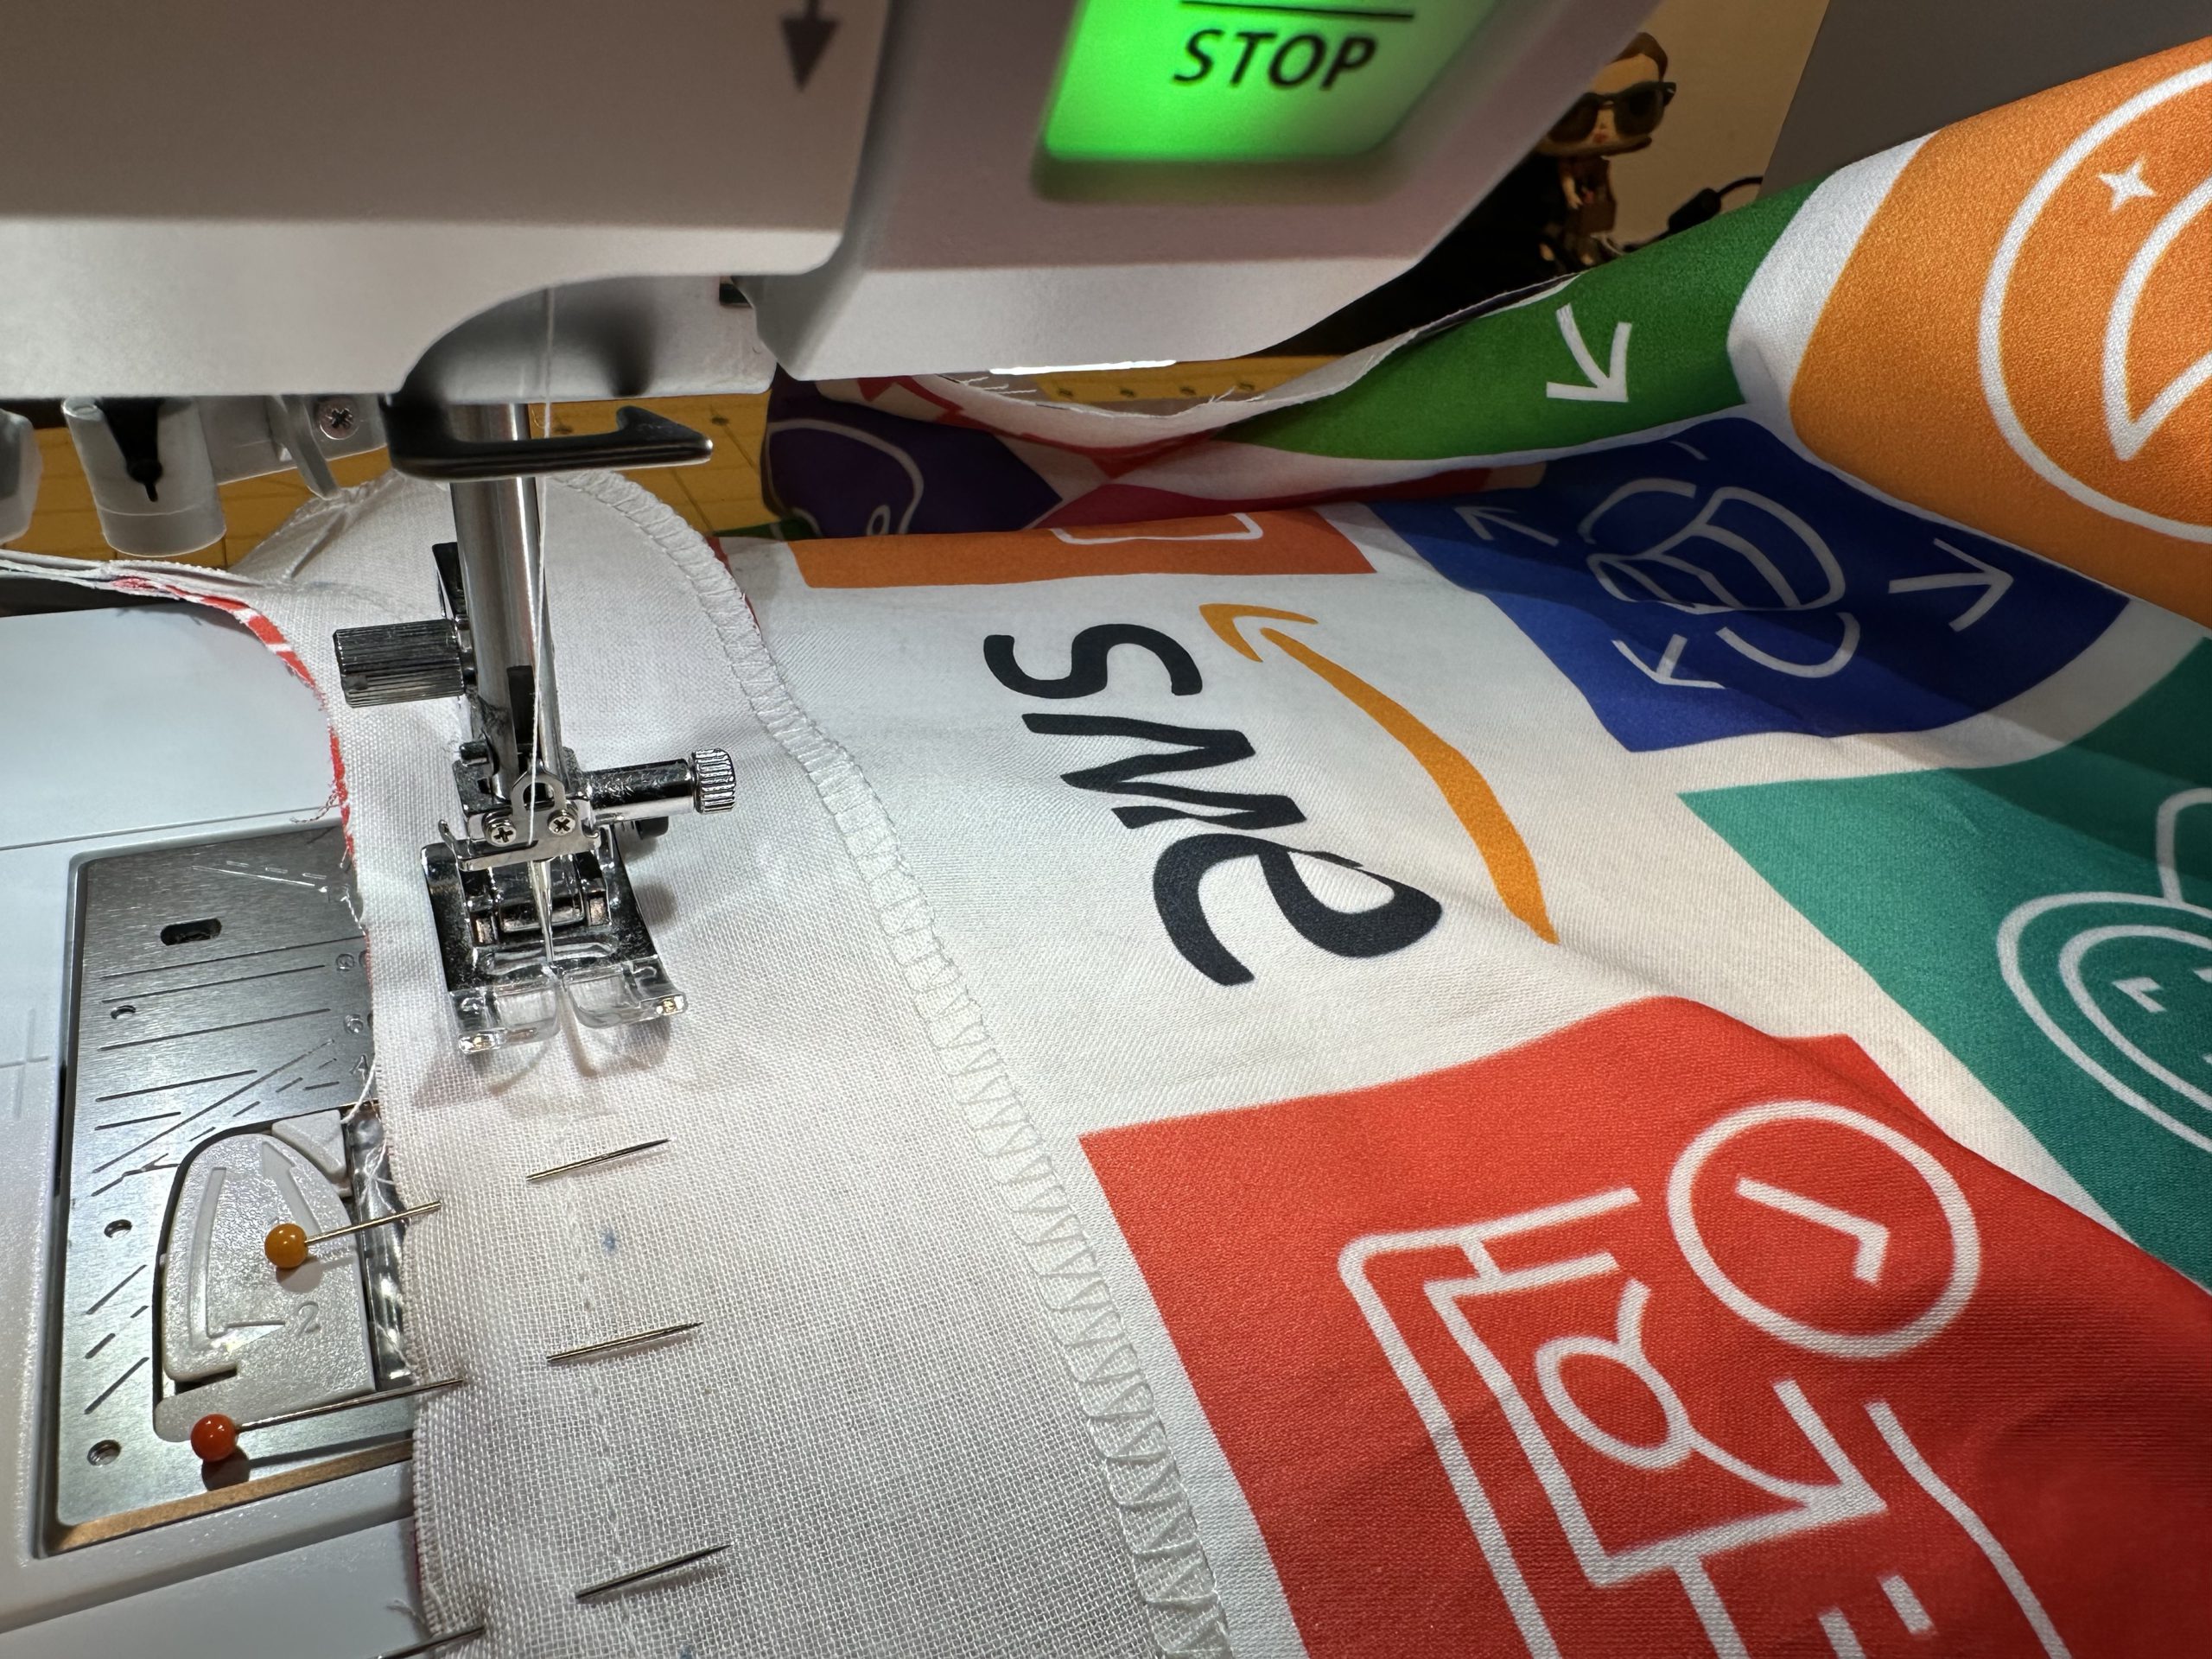
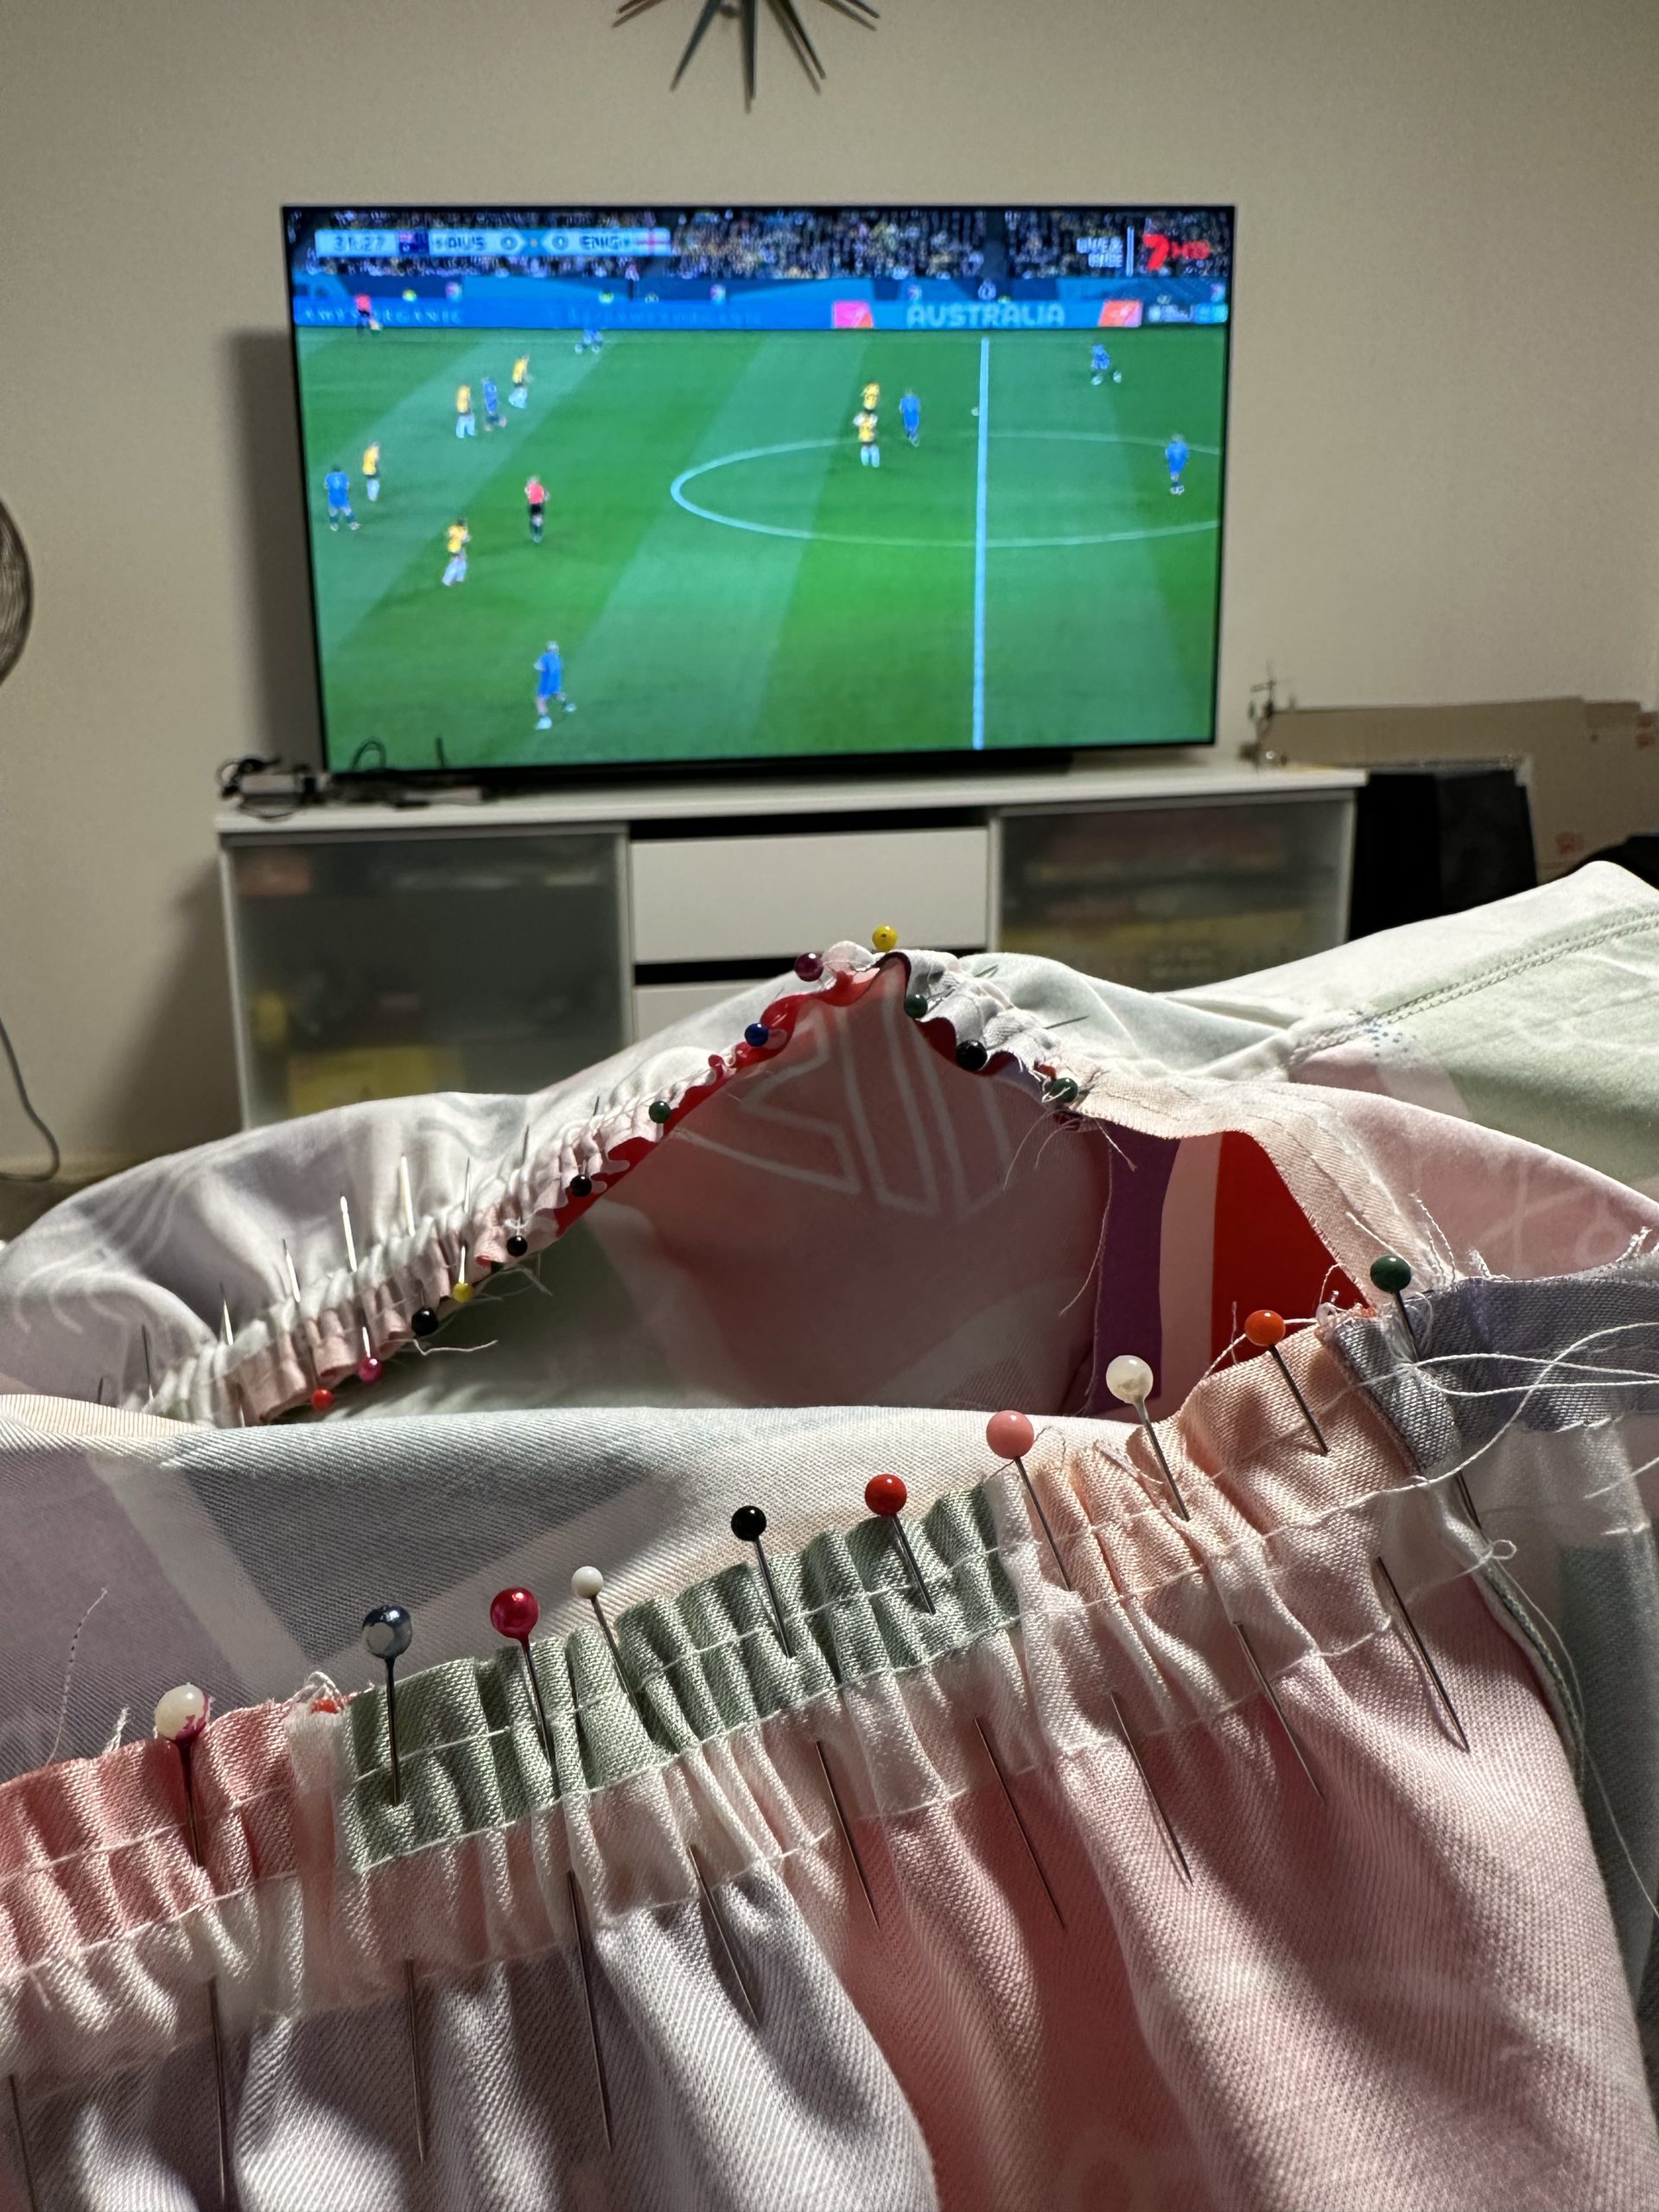
The next step was to assemble the skirt. The middle section has the pockets (of course it has pockets!), so I again French seamed those and inserted into the side seams. For each ruffle, you run a few rows of basting stitches and then pull those tails to create the gathers. I was really paranoid about my gathers being even, so I used a LOT of pins.
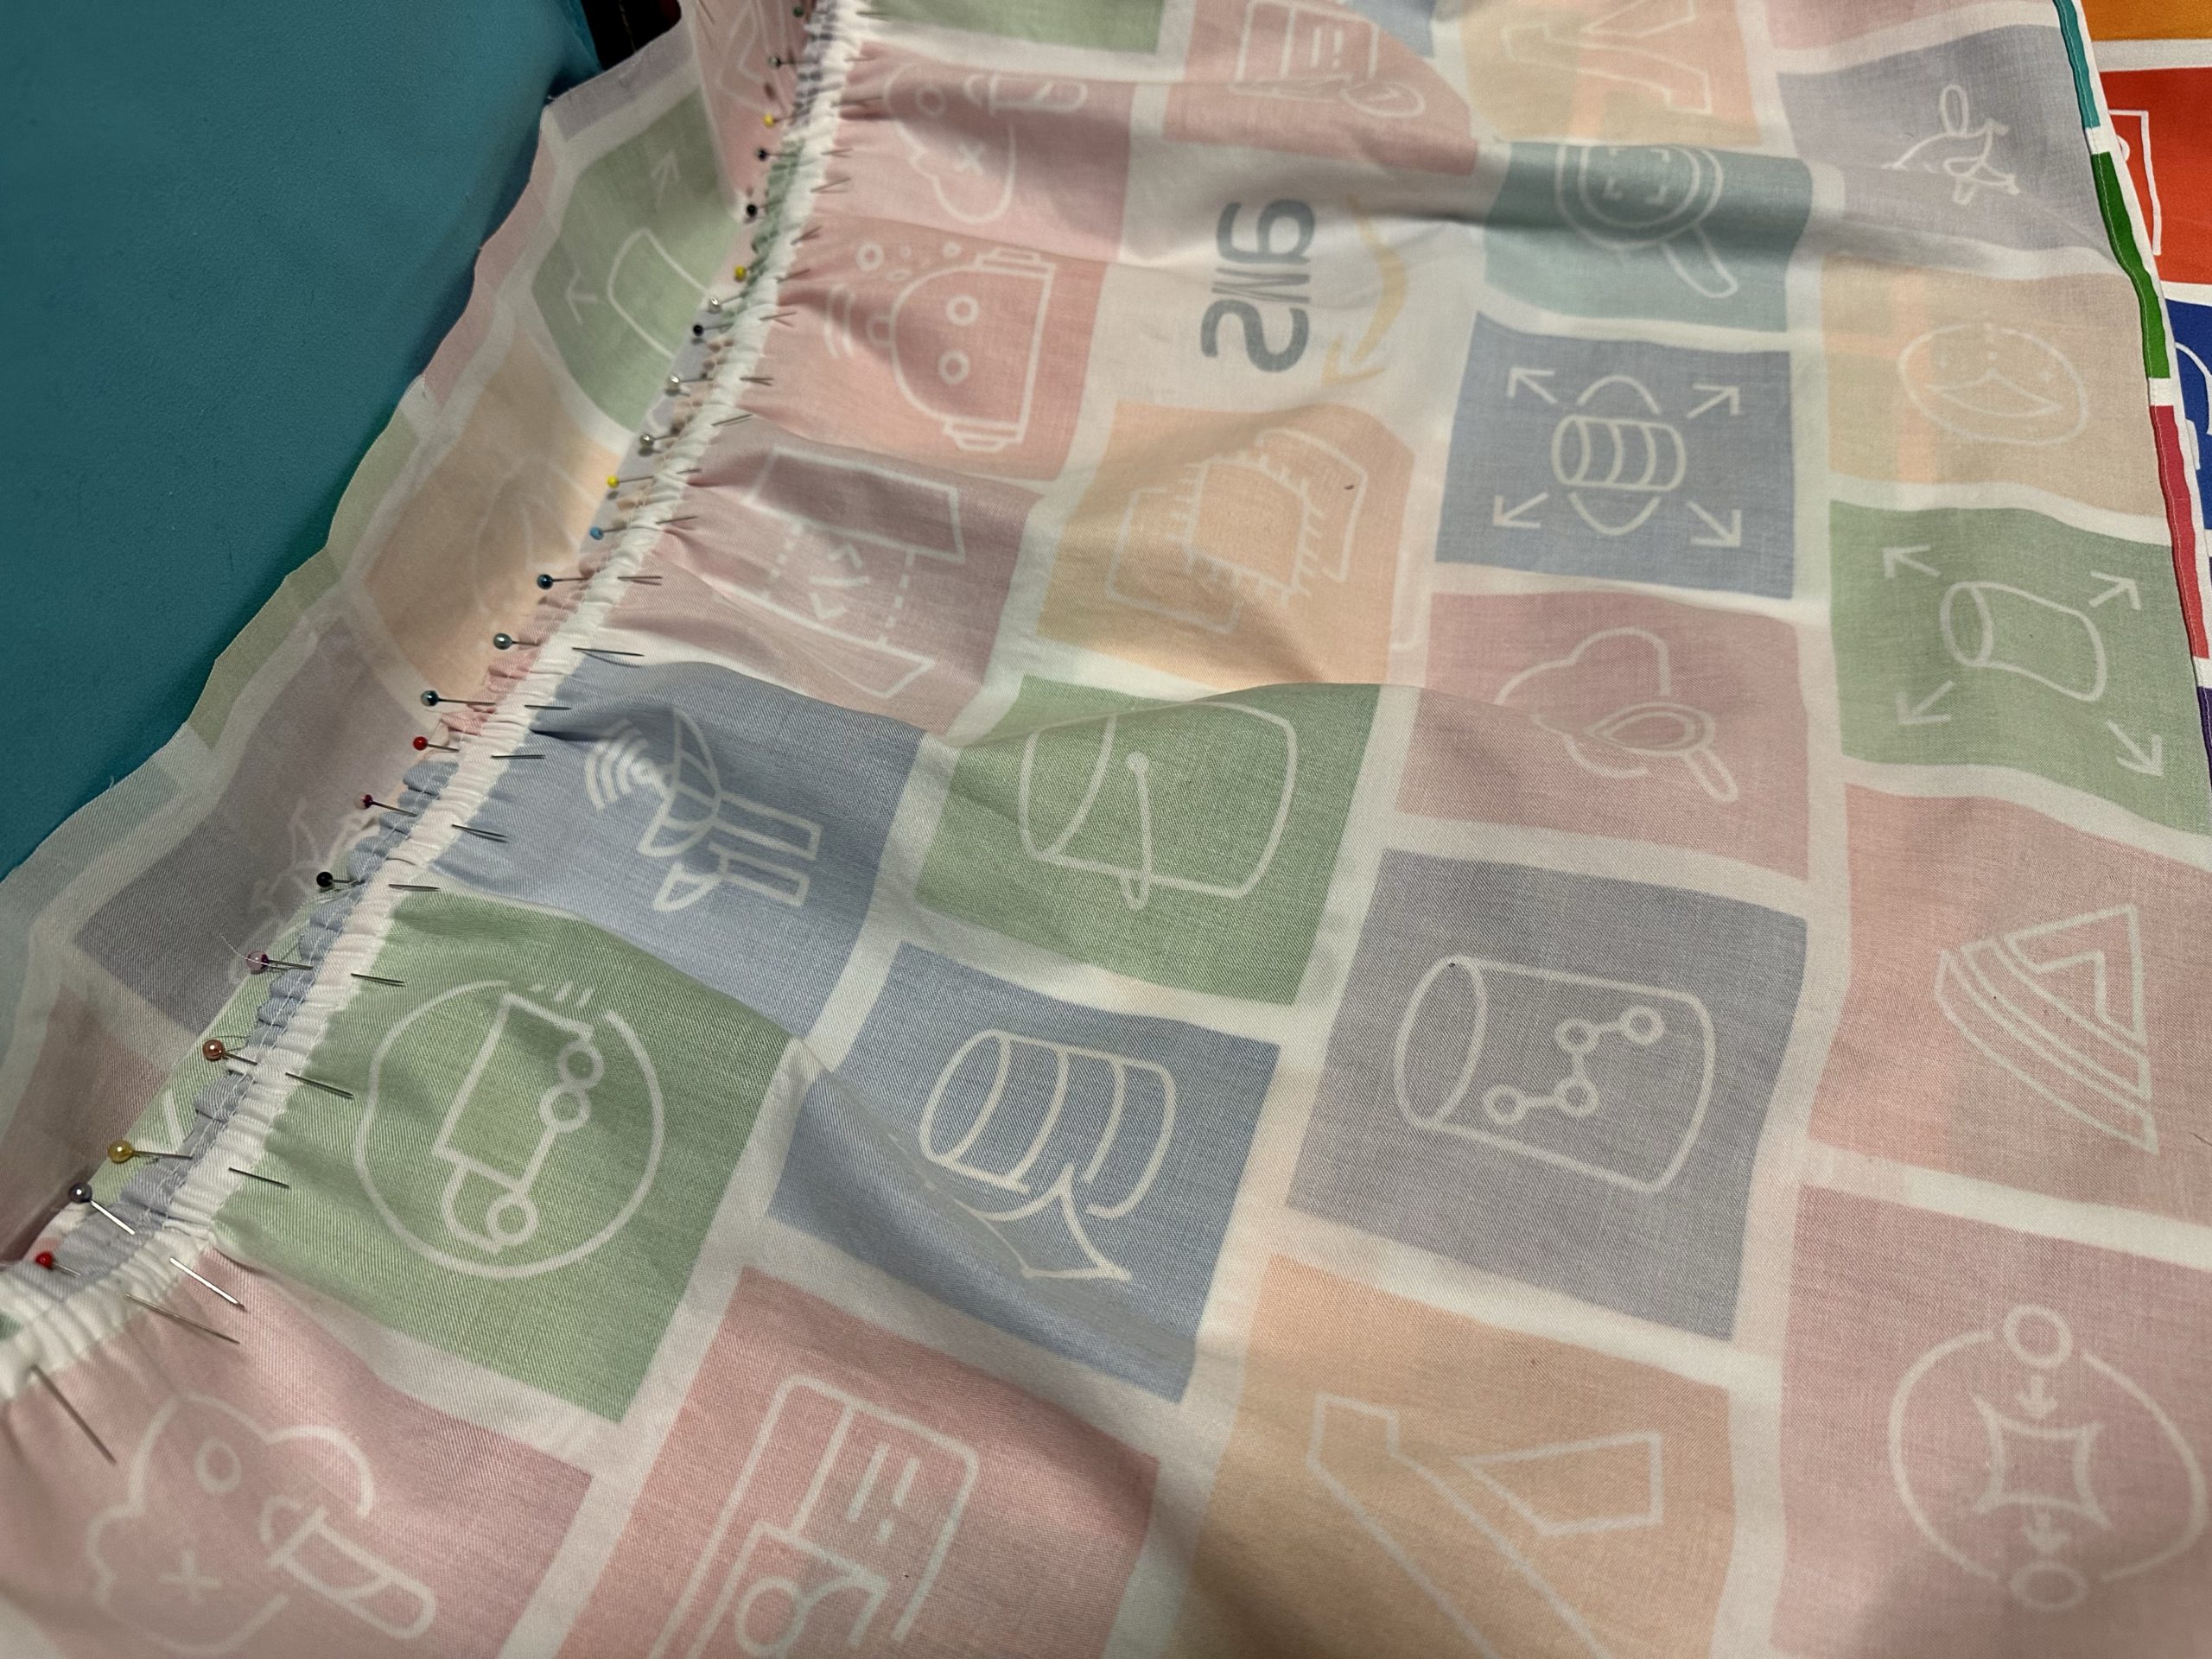
Yeah, these seams took a long time to sew. I made a little video.
Once the first ruffle seam was finished, I used the overlocker to finish the raw edges. Then I had to do another even longer one for the bottom ruffle!
Then all that was left was a quick hem, and it was ready to try on. The moment of truth…
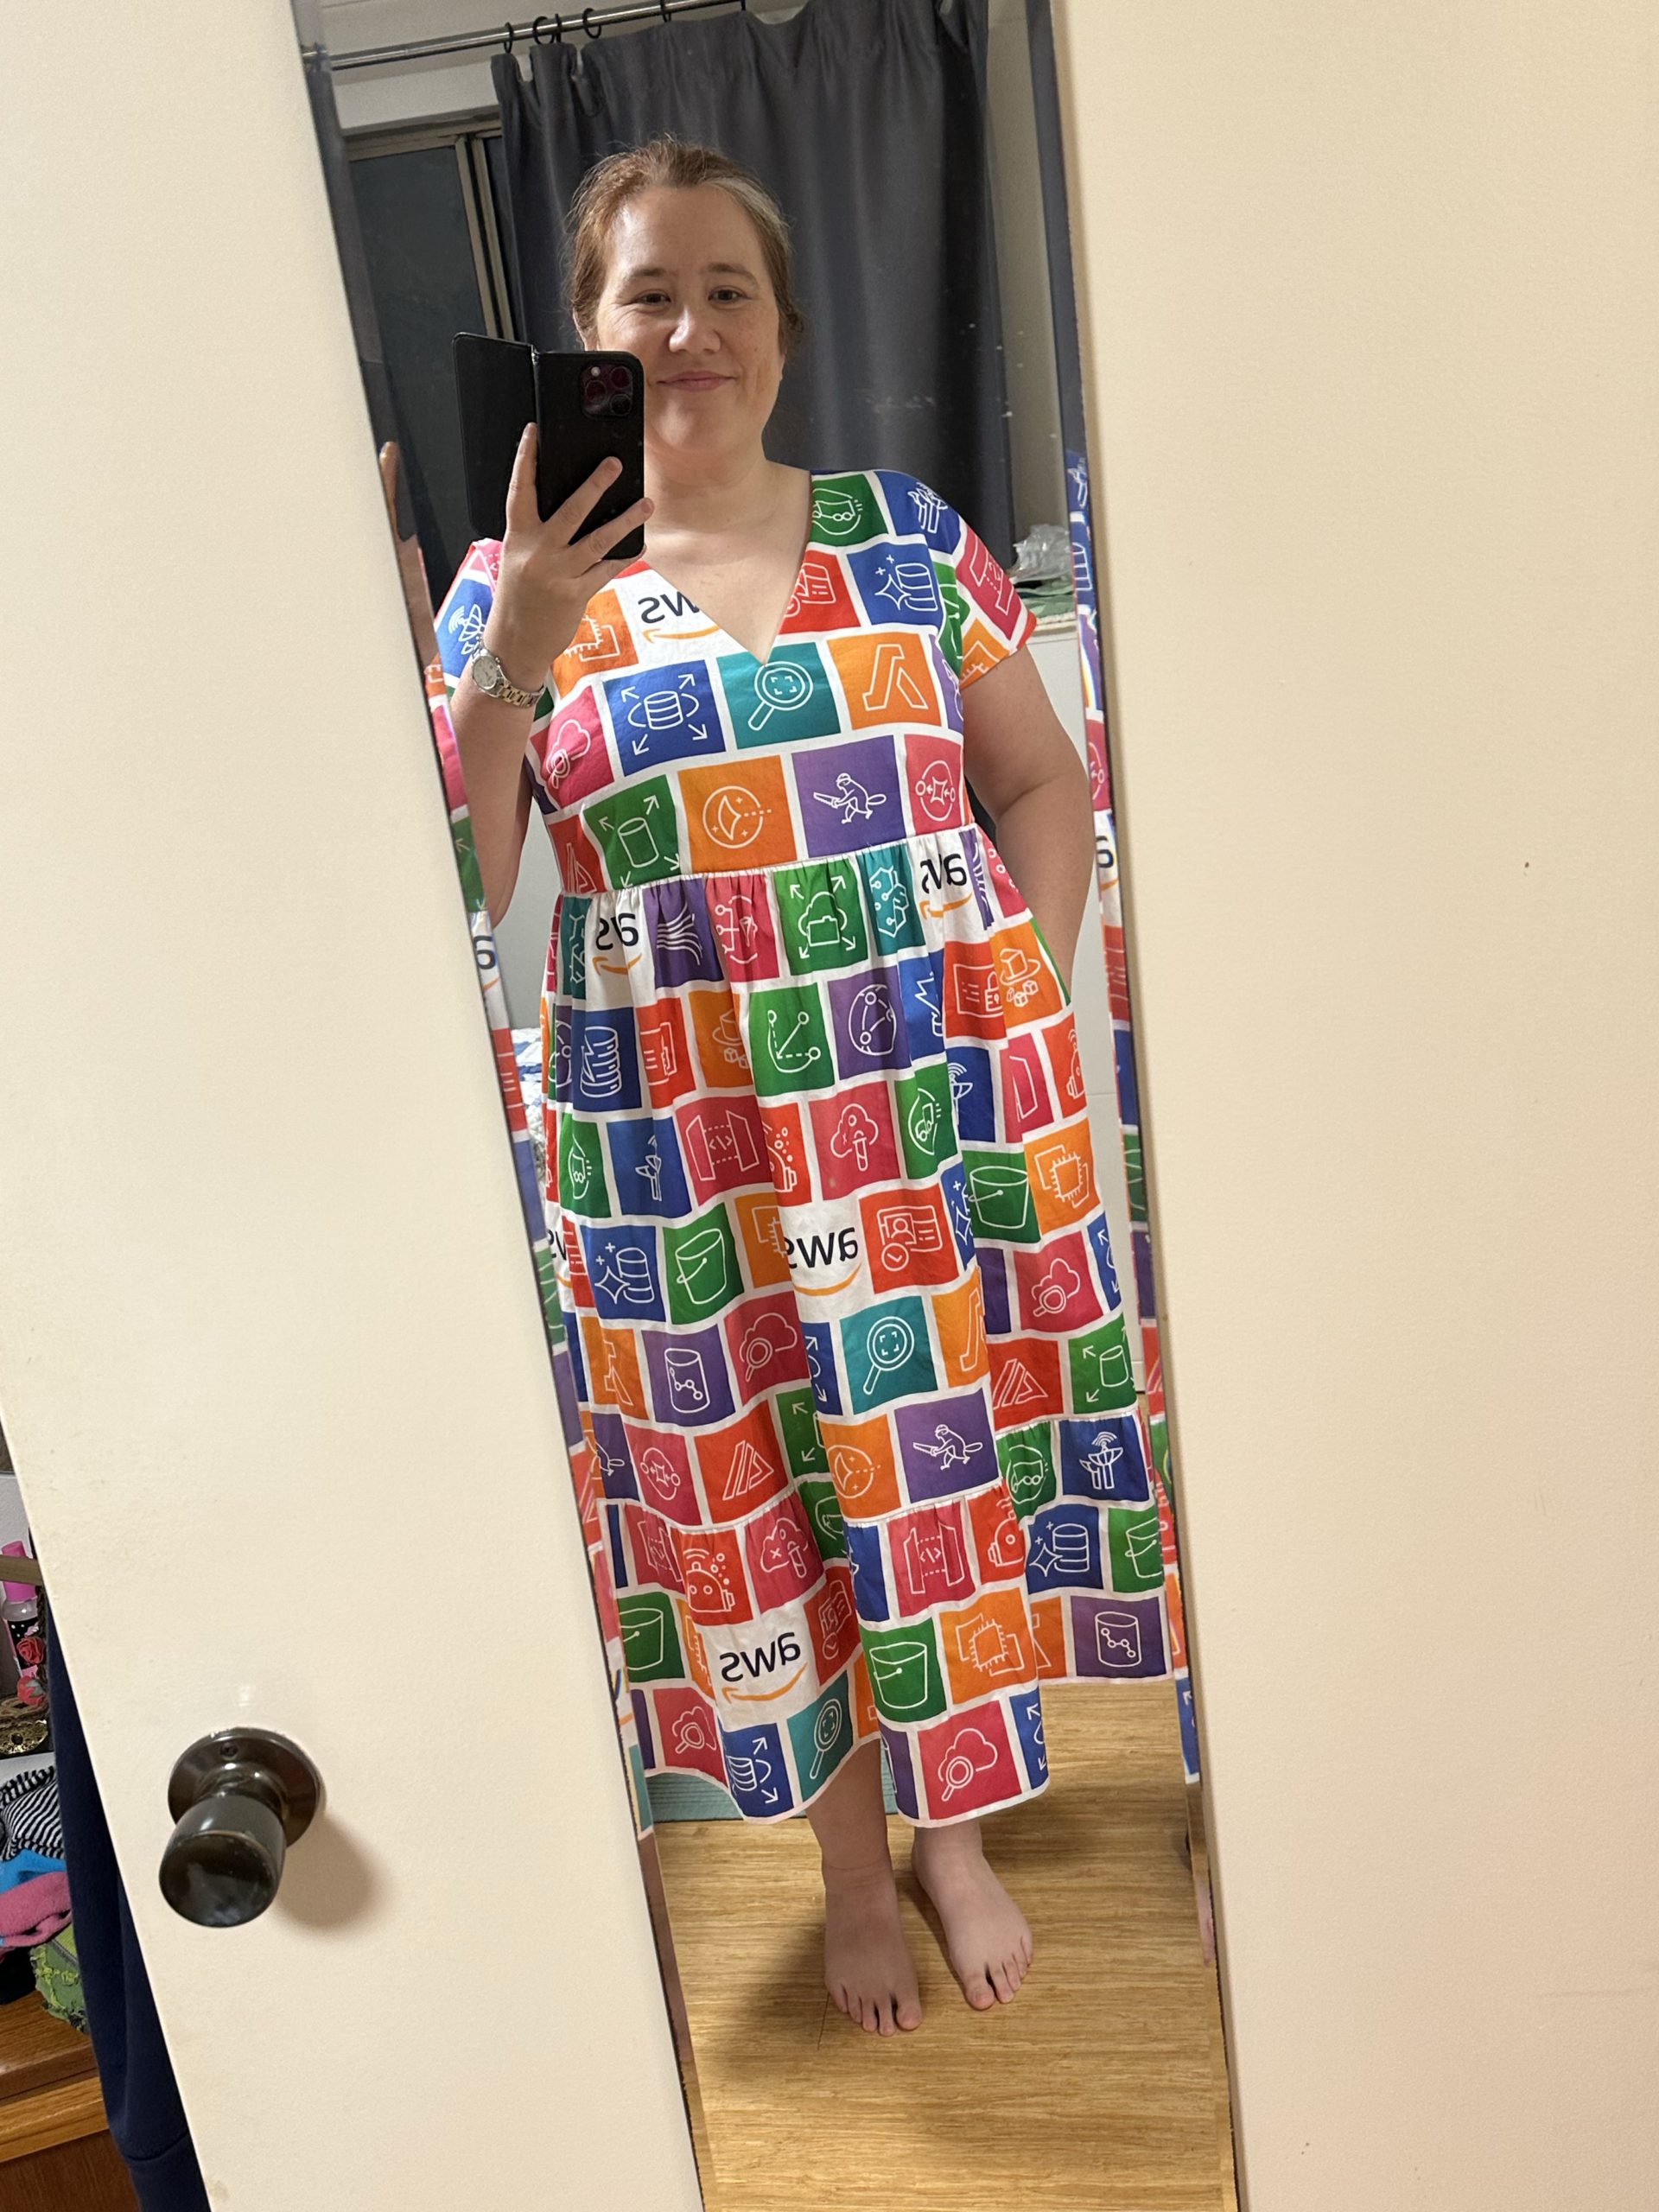
Hm. I was pleased with my sewing and finishing skills, but not so much with the fit. Even going down a size, it was still giving less “breezy summer dress” and more “giant Victorian nightgown.” I decided to shorten the bottom ruffle by chopping off the bottom row of icons. I also performed some very delicate surgery on the waist seam. I carefully unpicked just the center portion of the front waistband and created two small matching vertical darts, each of which took in 1/2″. Then I redistributed the ruffles and resewed the seam. That meant I took out an additional 1″ at the front, which is subtle but really helps it look less like a tent. Much better!
After finishing the dress, I still had a fair bit of the fabric left… and I decided that I needed to craft some accessories. That’s when I discovered SneakerKit. This company will sell you everything you need to make your own pair of shoes! While most folks use them to make leather shoes, I could see on Instagram that many people were also creating fabric shoes. I ordered my kit from Maker’s Leather Supply in Australia, along with a packet of the metal eyelets.
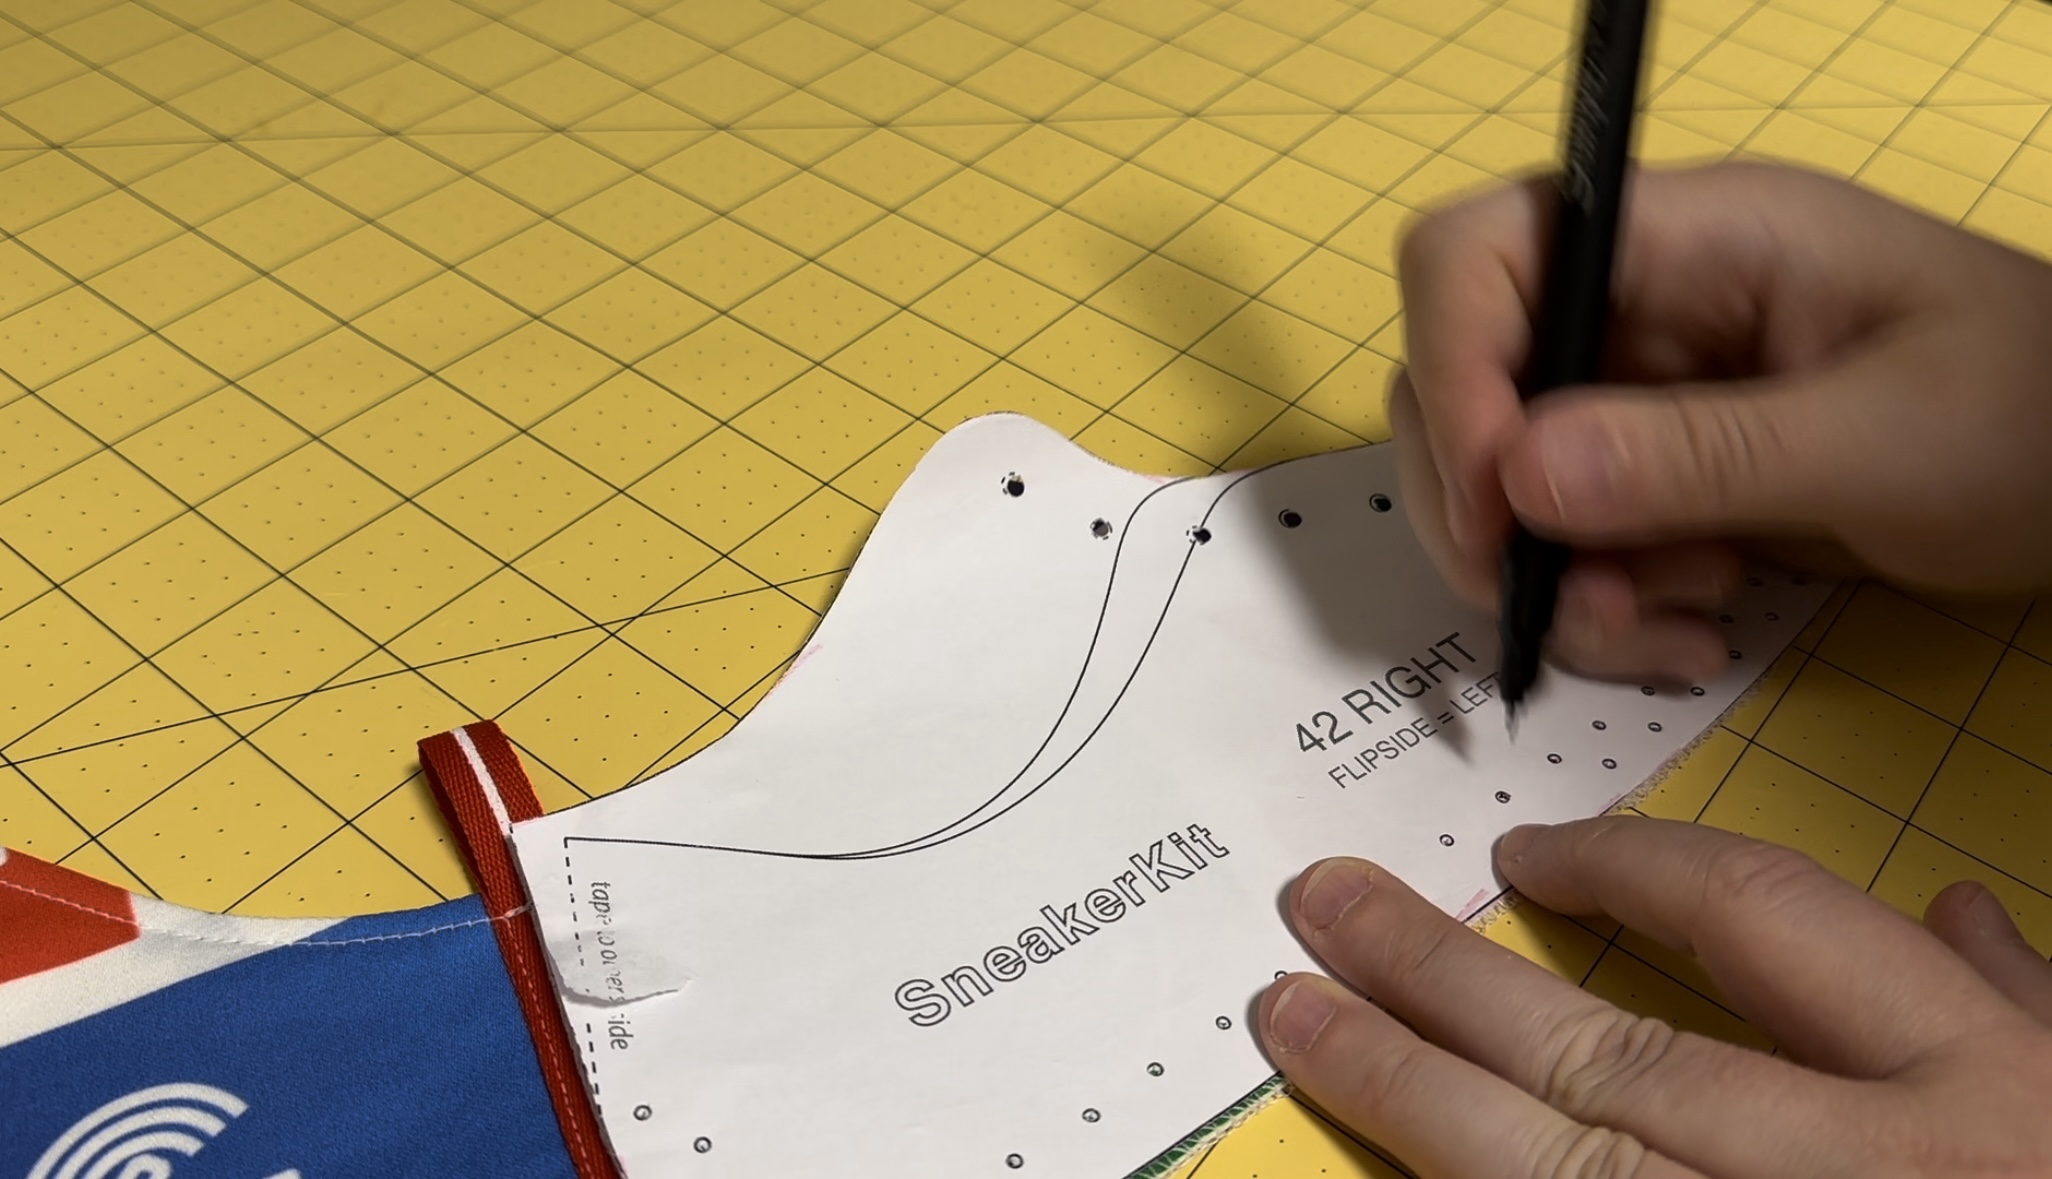
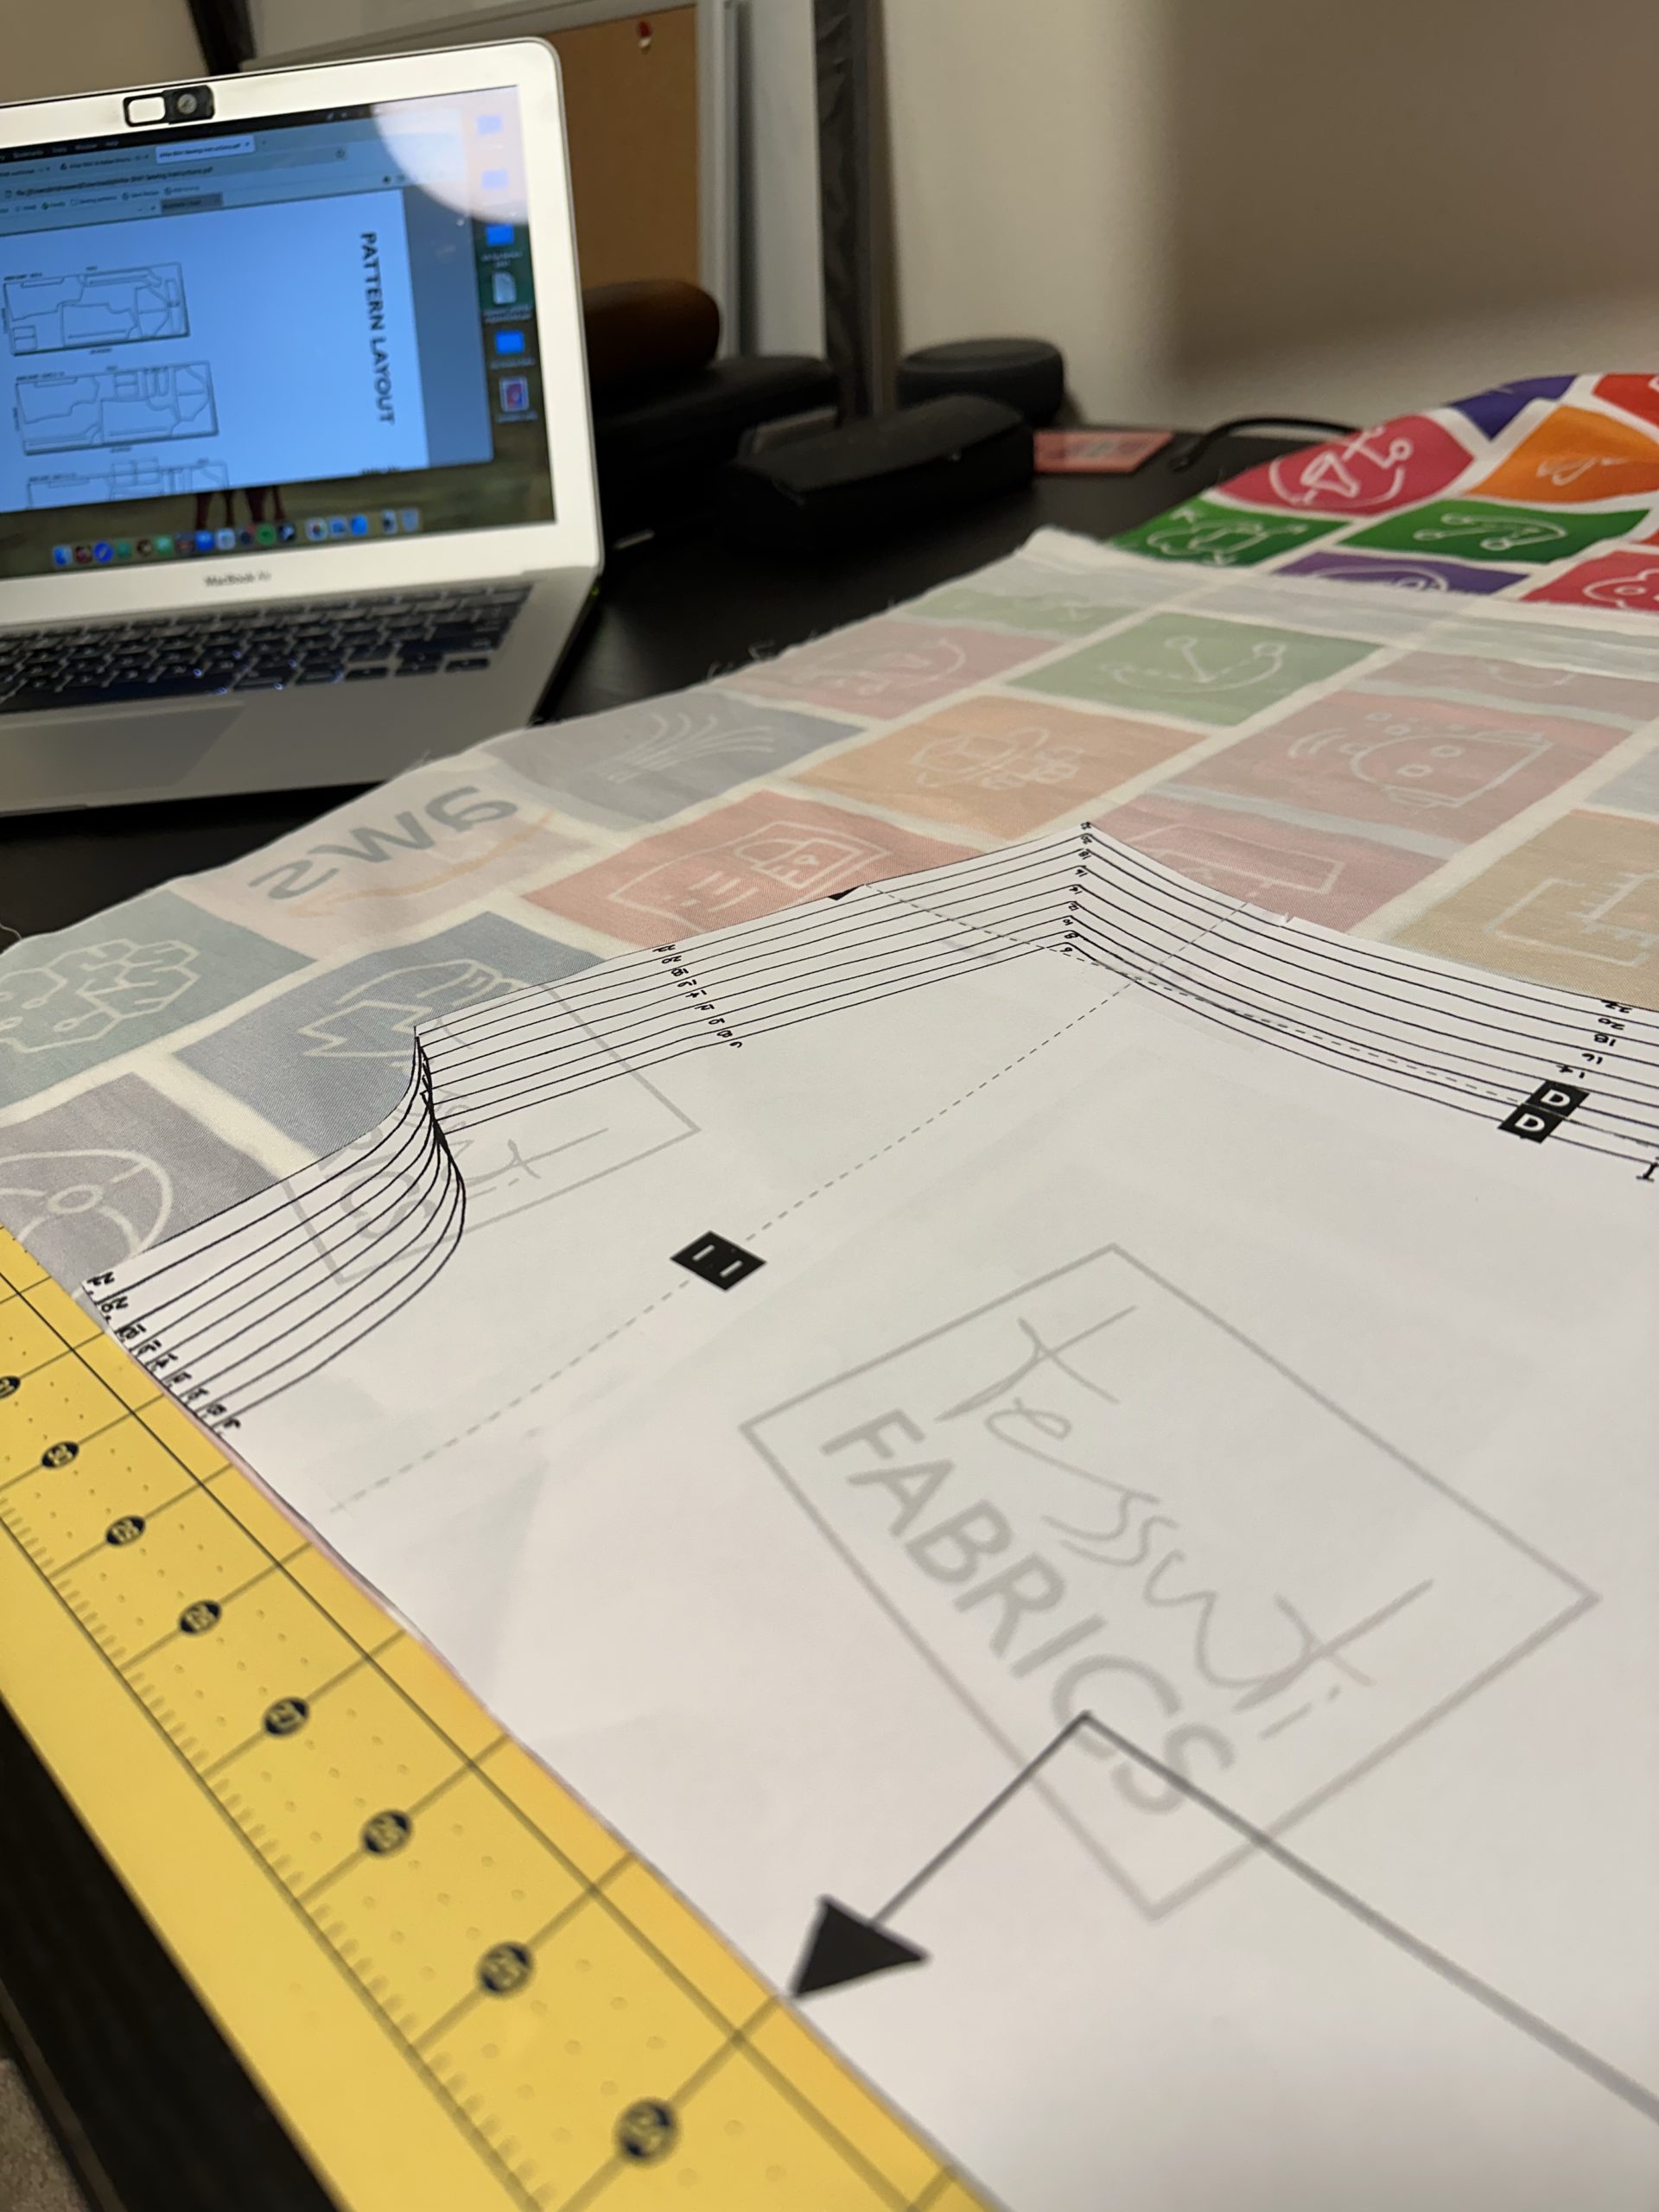
The first step is to prepare your pattern. I downloaded the Classic 3 in 1 and chose the high-top. Then I had to cut out my pieces.
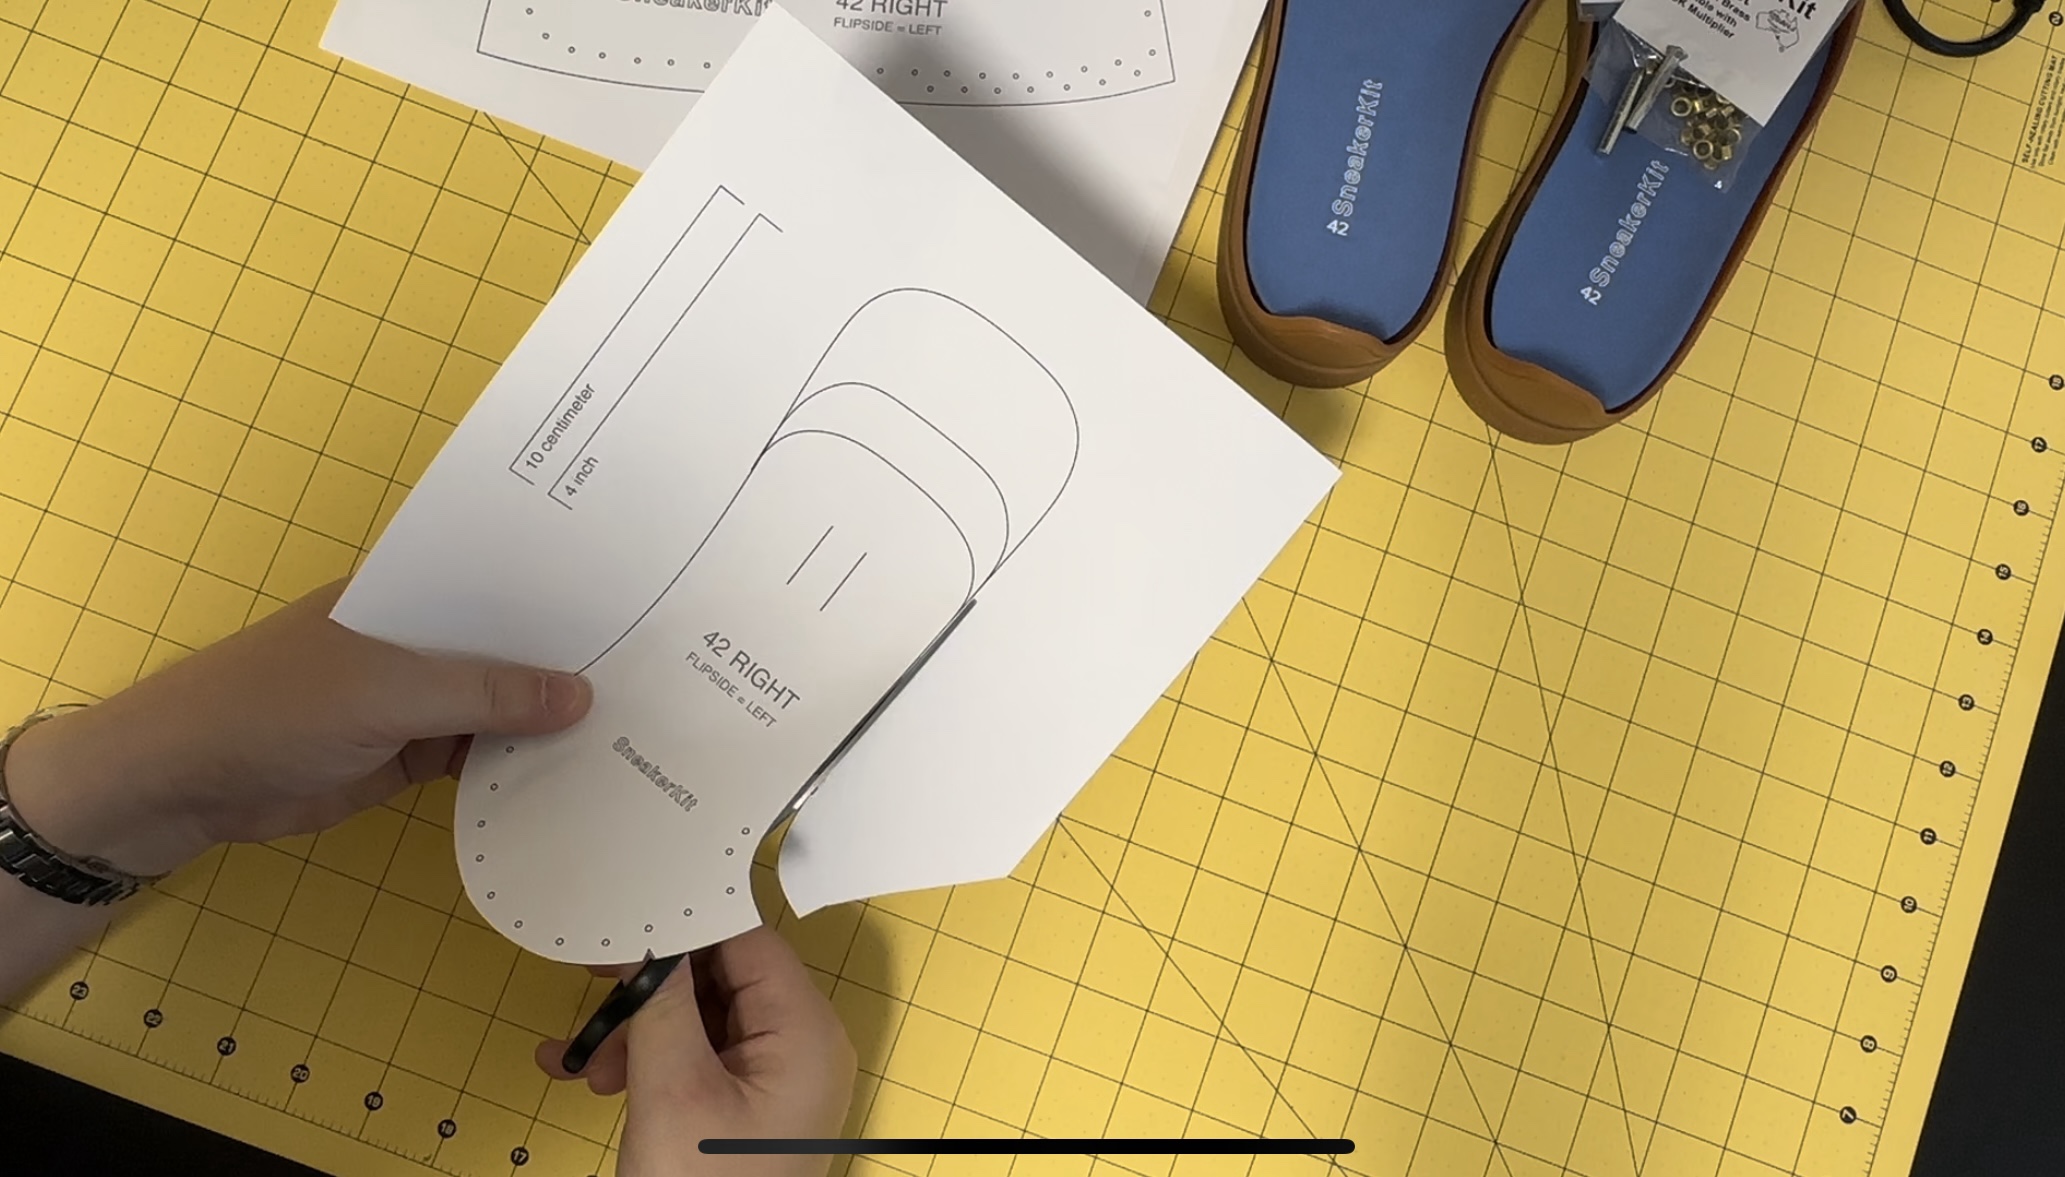
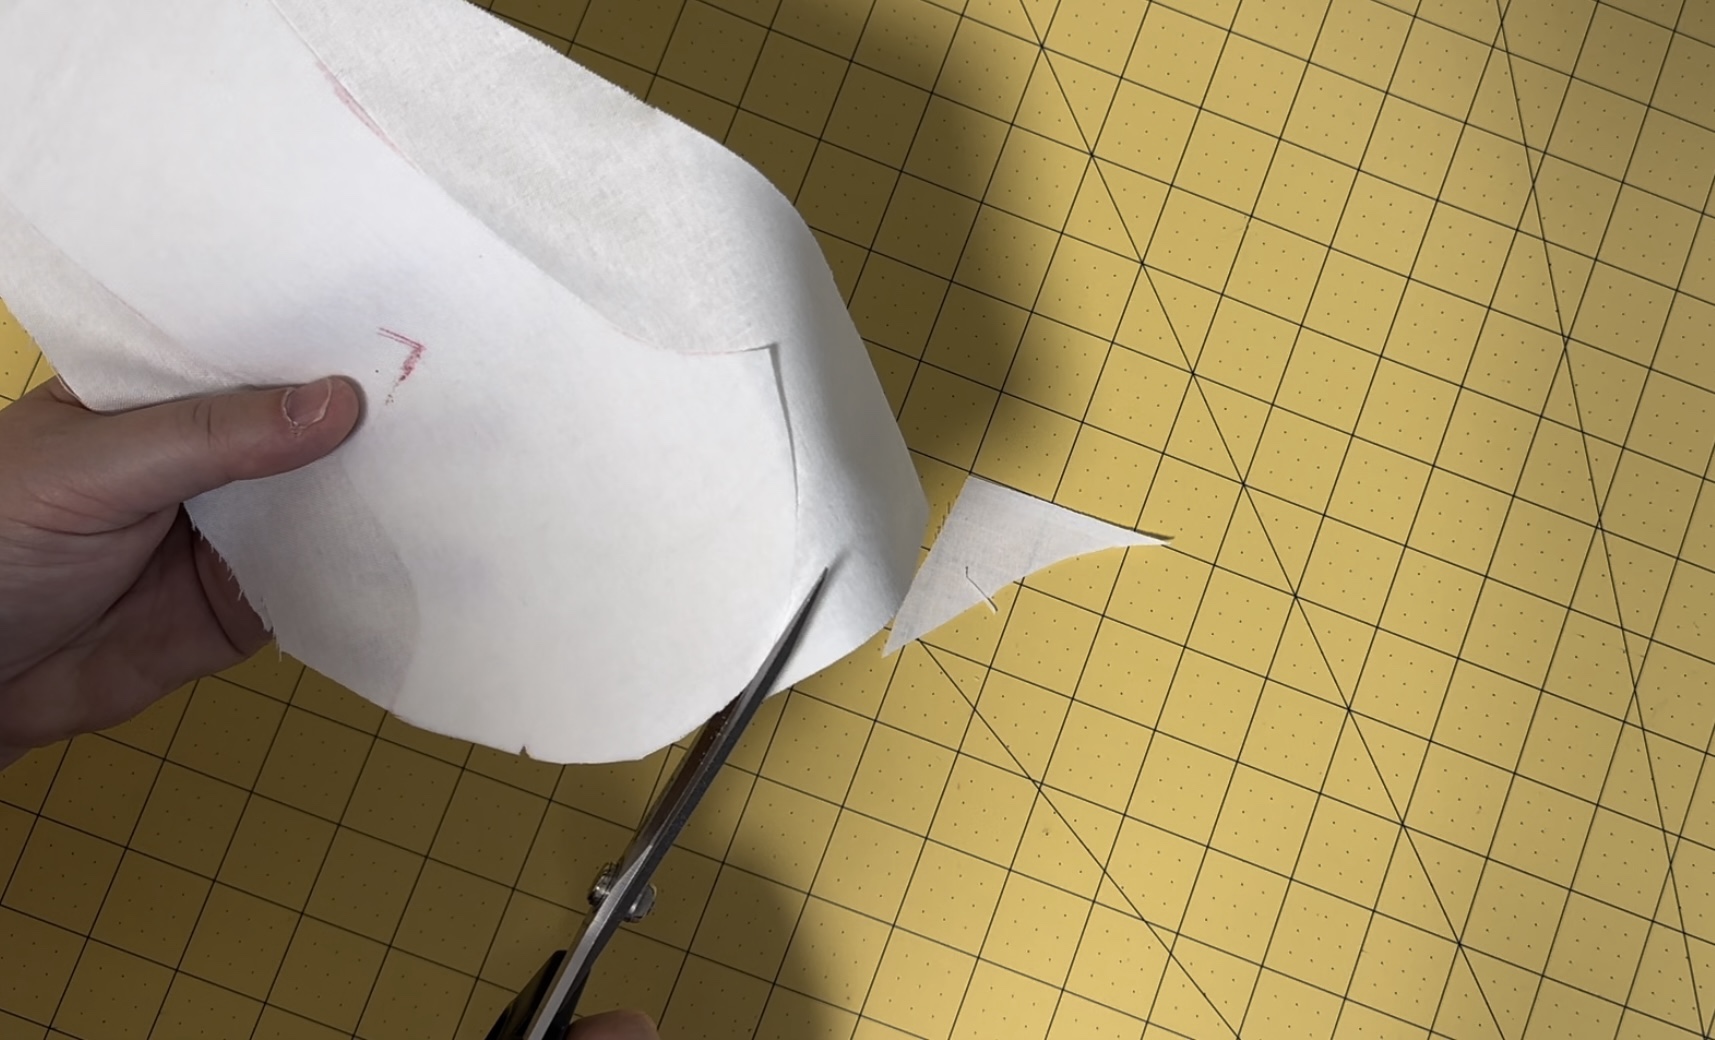
The SneakerKit site has really good instructions, but they’re intended for working with leather. To use fabric, I had to do some research and figure things out myself. Most of the blogs I’d read about making fabric shoes suggested using some very thick interfacing to help stiffen the sides. So my next step was to trace my pieces onto my thick iron-on interfacing. I used a bit of masking tape to join the two side pieces together at the heel. You have to remember to flip each pattern piece over to create the mirror-image piece for the other foot. (I marked mine with L and R to keep track.)
Next I cut out the interfacing pieces.

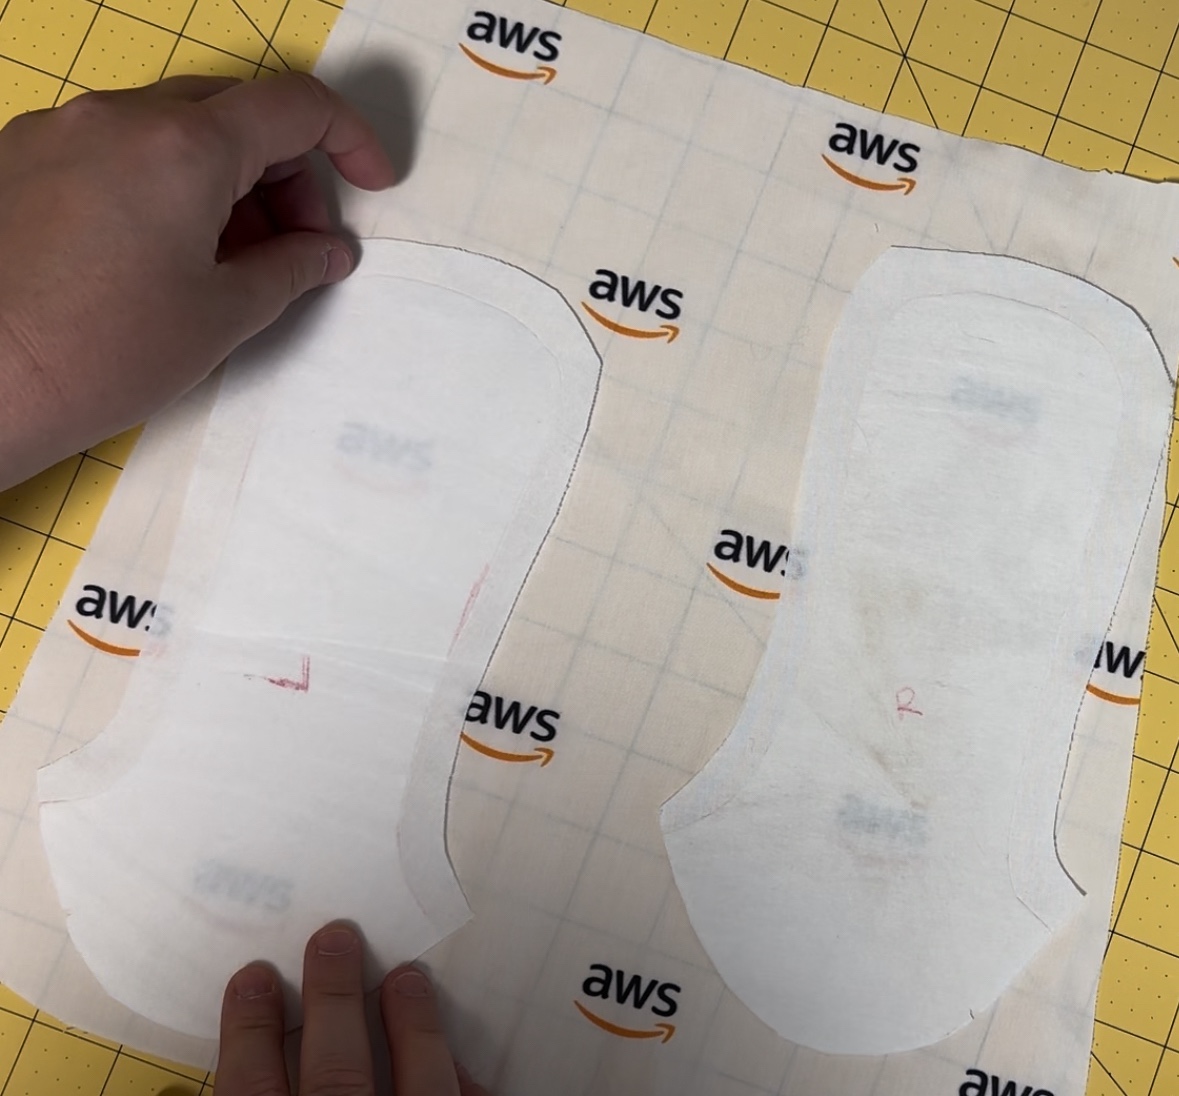
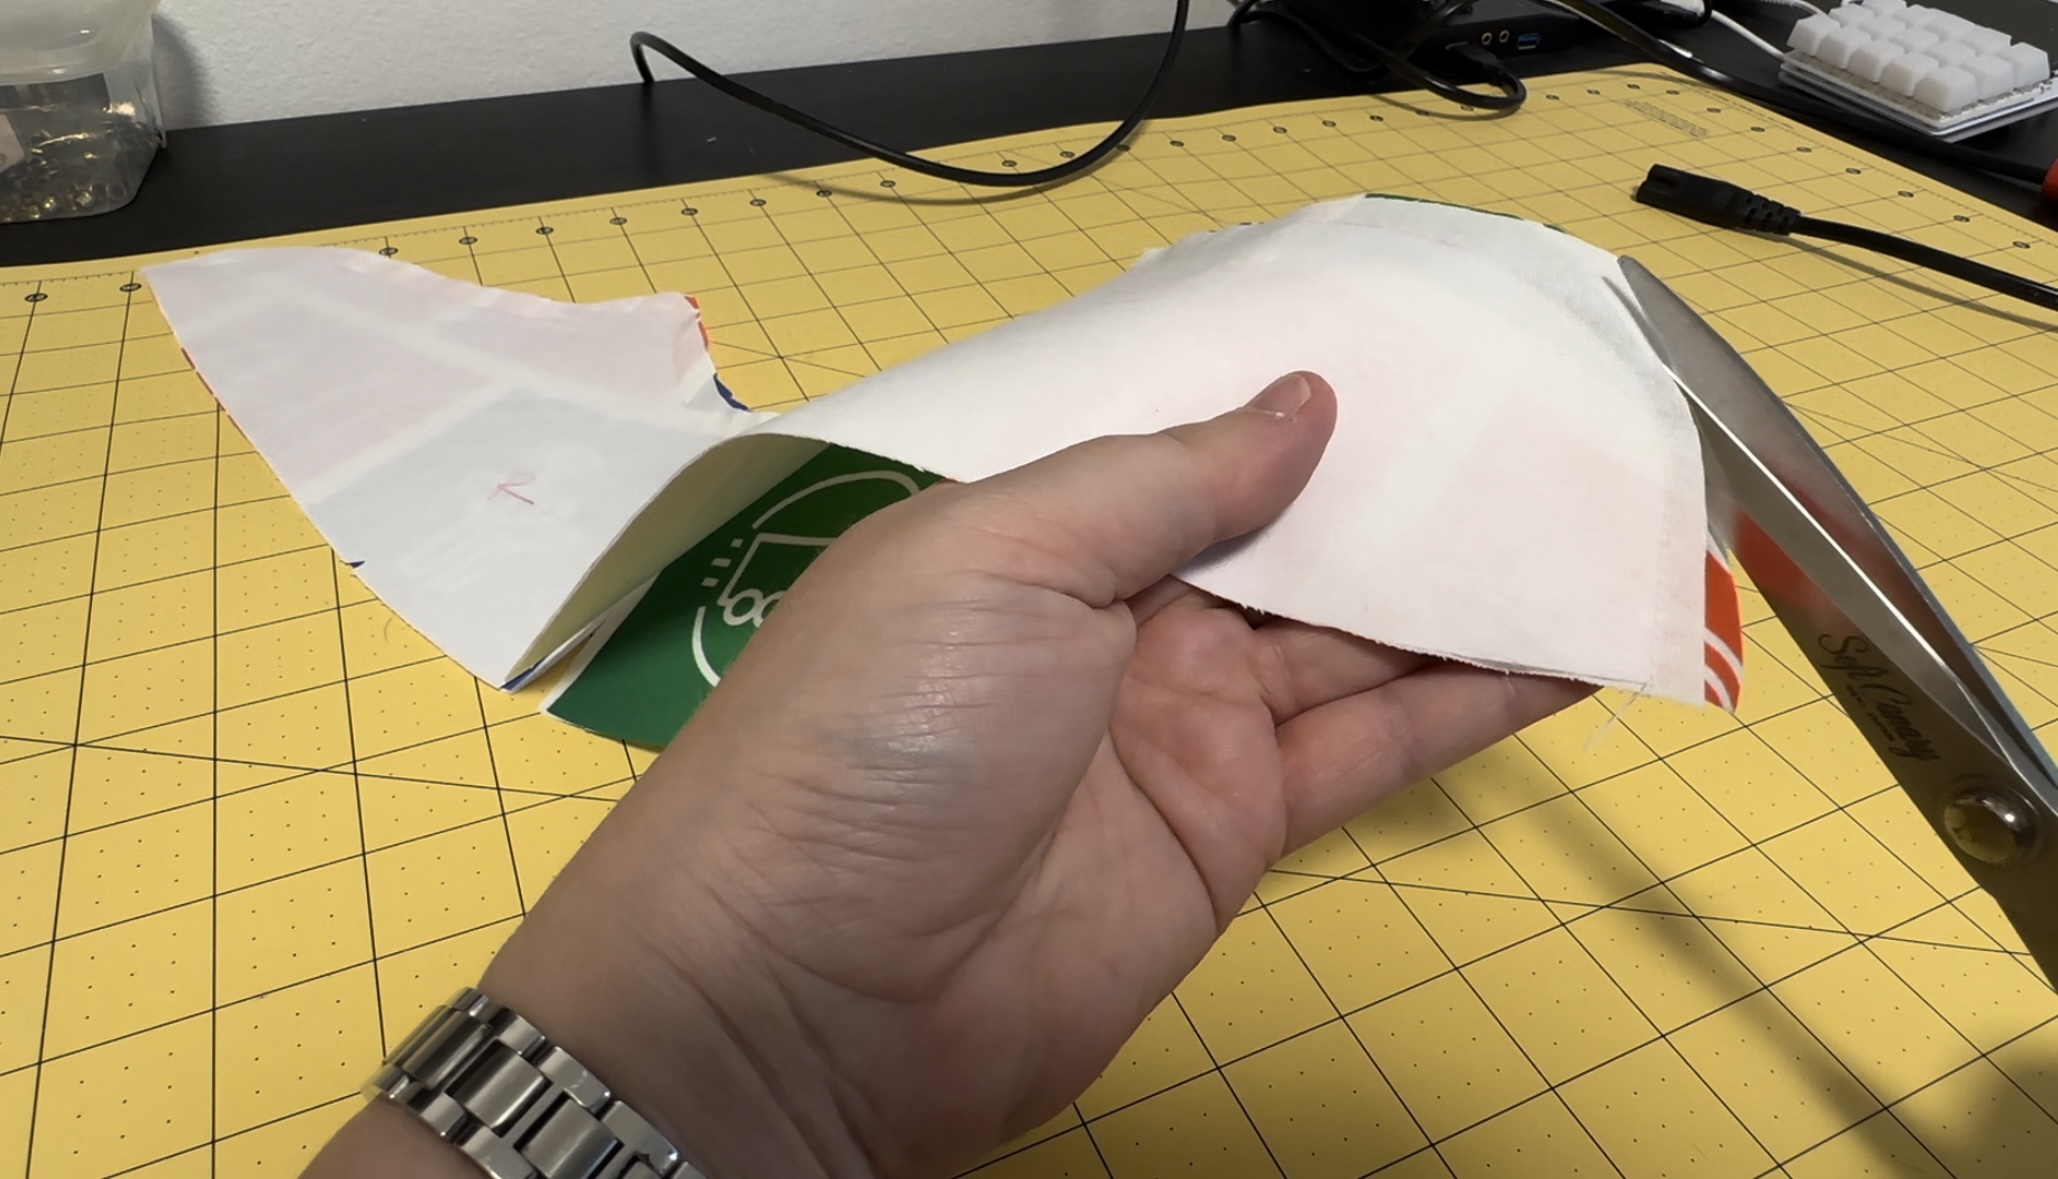
I decided that the insides of my shoes would just be white fabric. So I took the interfacing the ironed it to white cotton, and then cut out around the interfacing. Note: I left 1/4″ excess along every edge that would be sewn to use as seam allowance. (You can see this better on subsequent photos.)
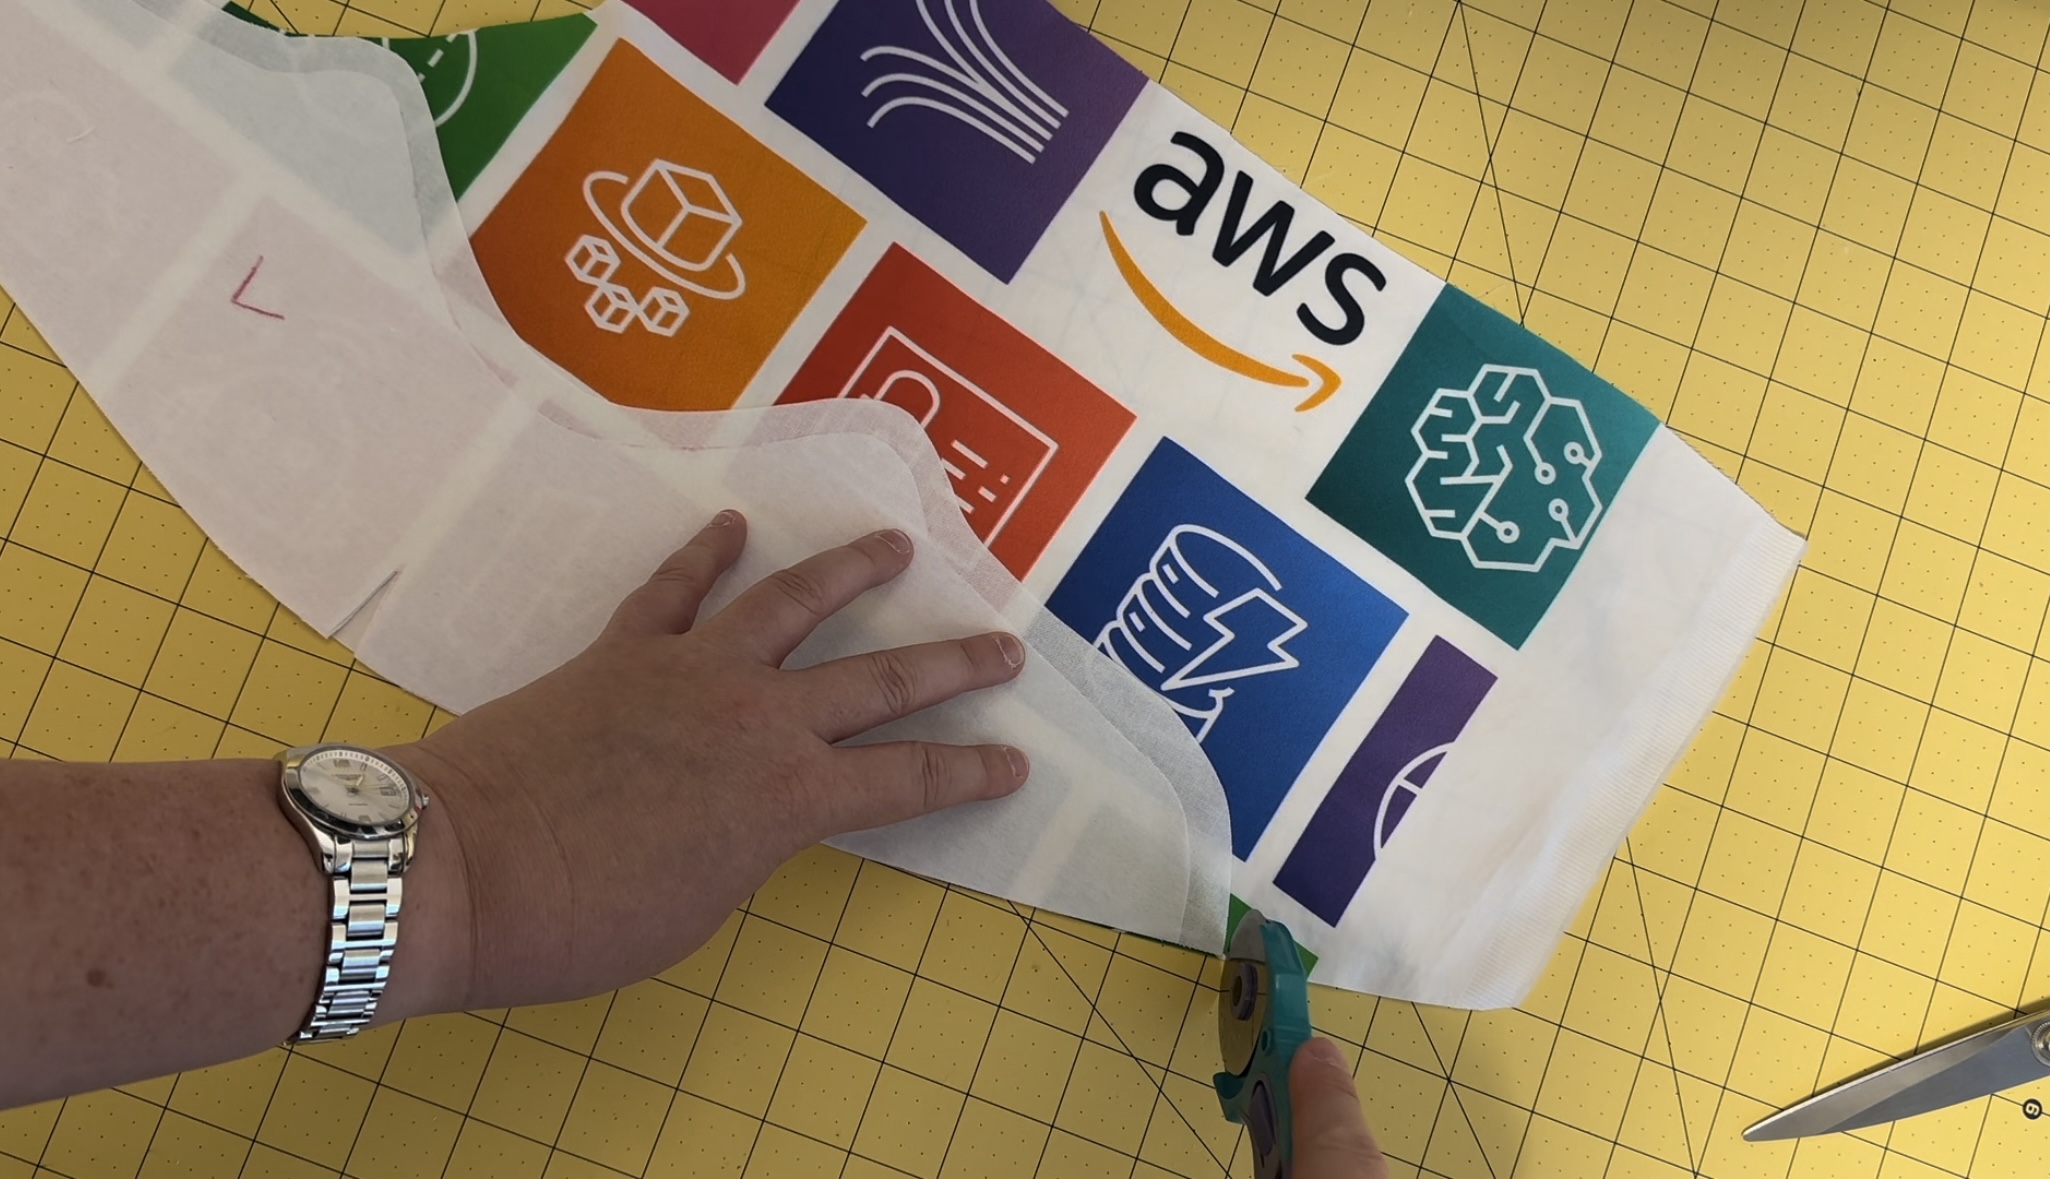
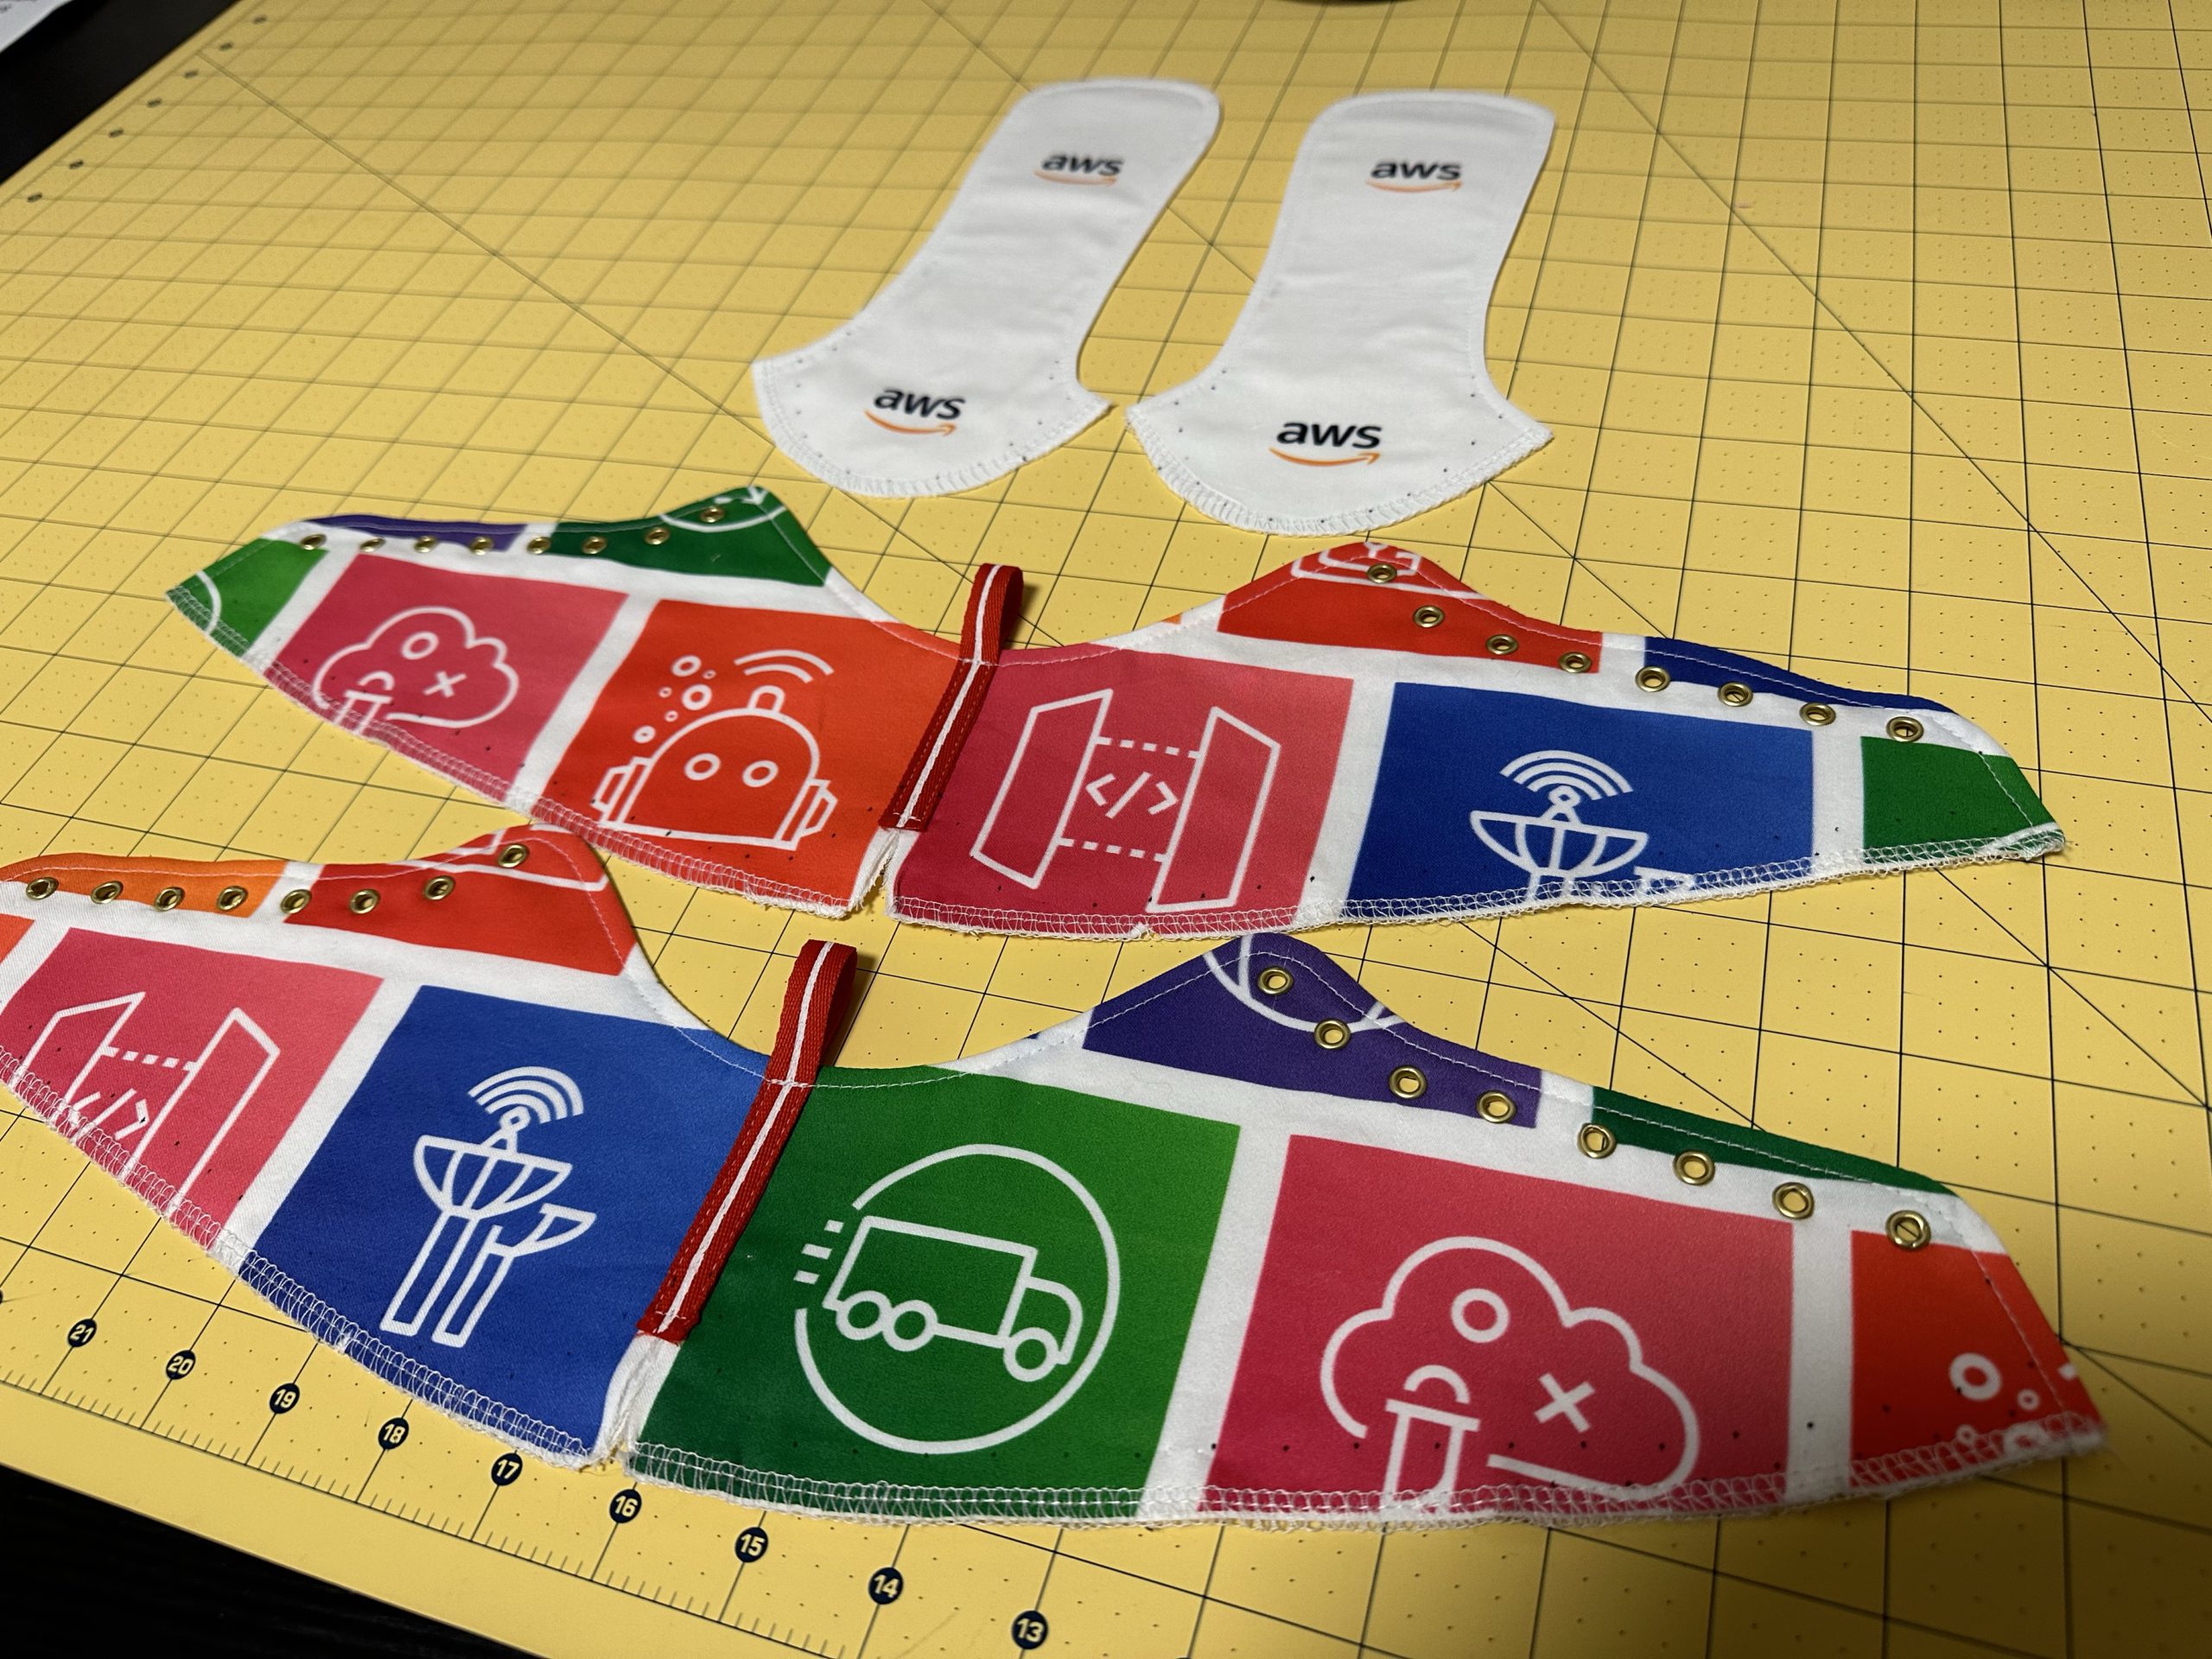
I then used the interfaced lining pieces to cut out the exterior fabric. For the tongues, I decided to use some of the leftovers from my v1 dress, and I tried to line up the pieces so the AWS logo would be nicely visible on the toebox. Once I had them placed, I cut them out.
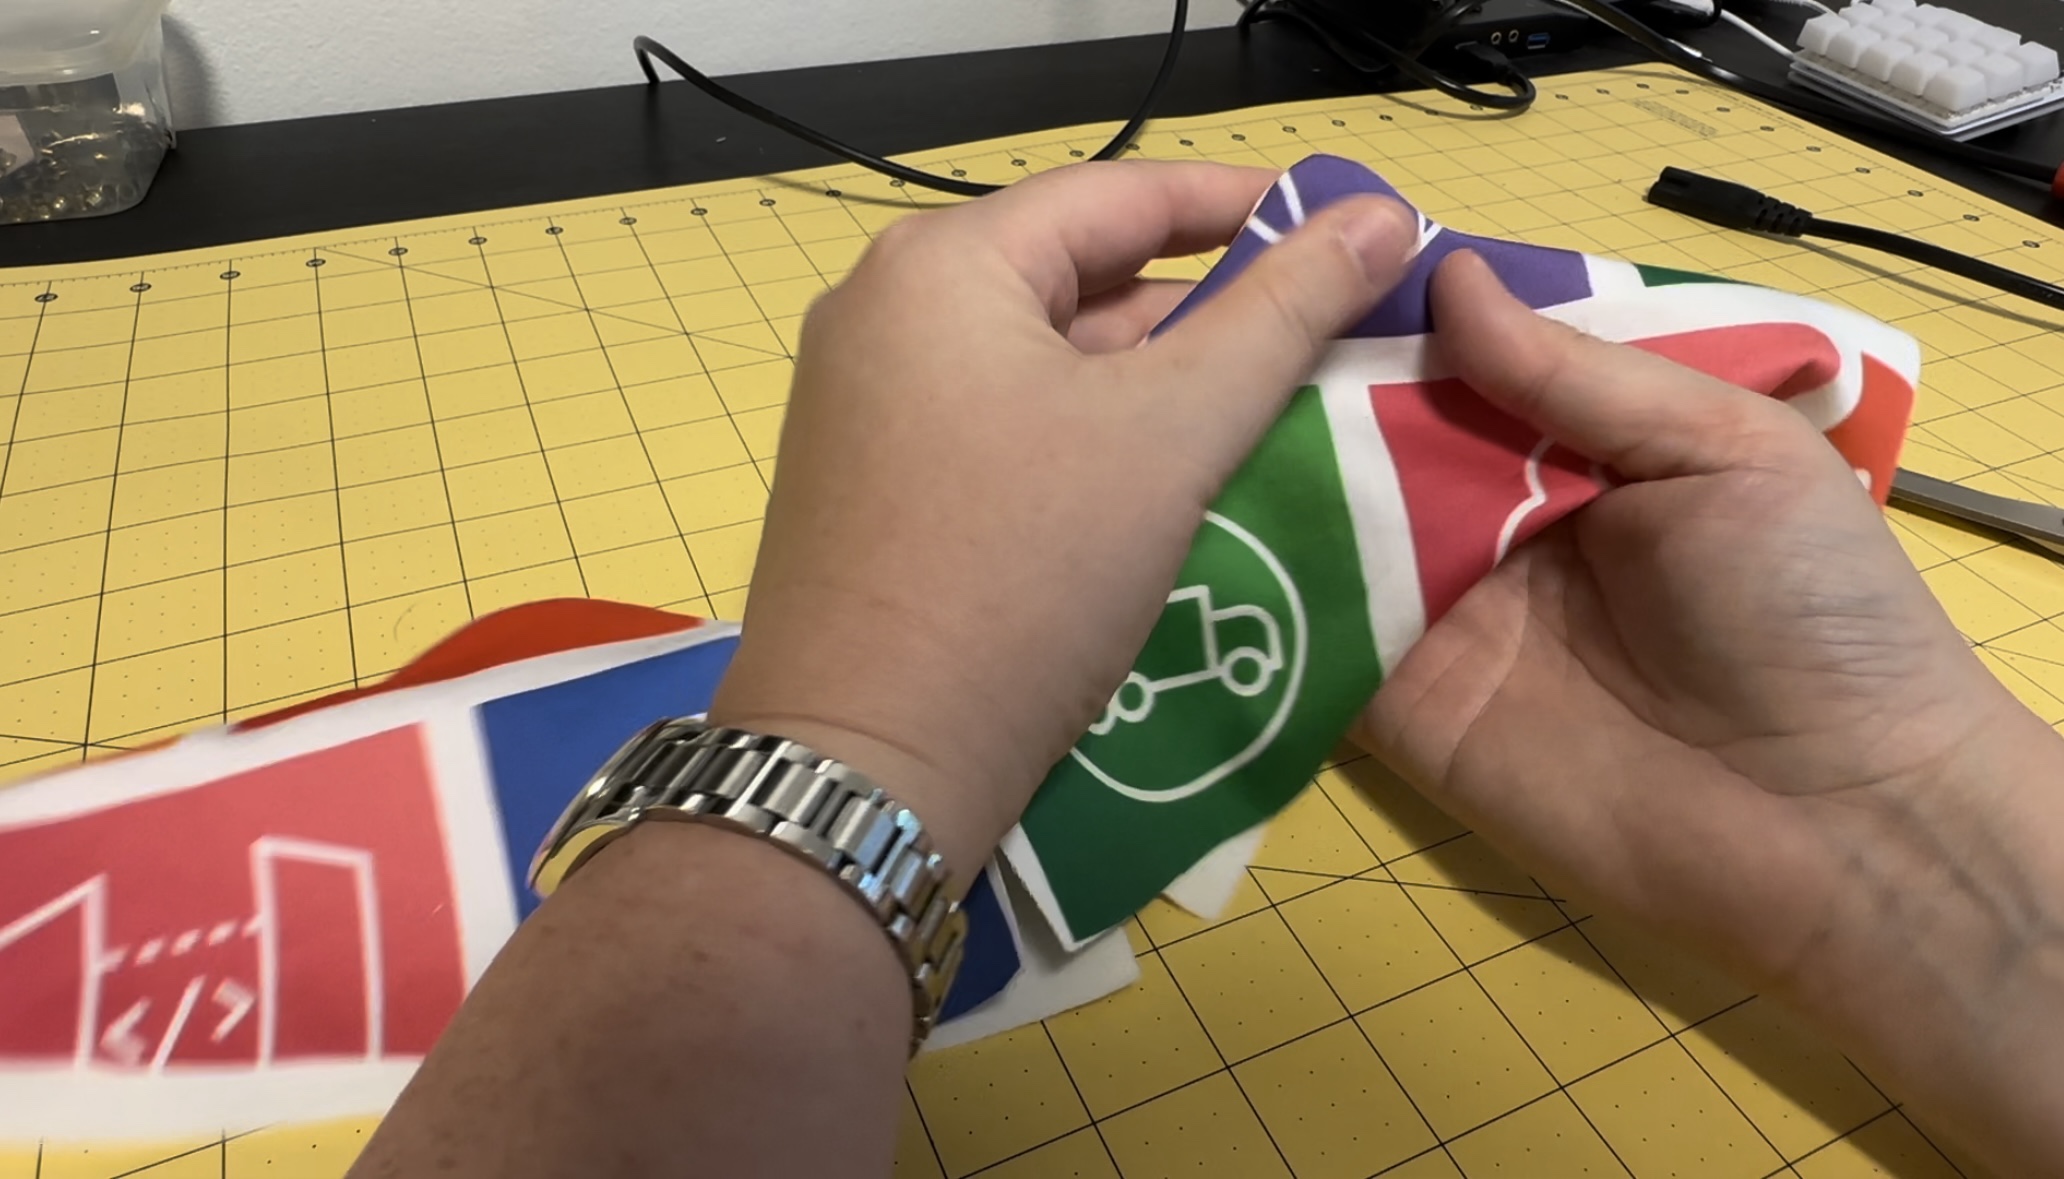
For the side pieces, I made sure to line the heels up exactly between two icons so I could ensure both shoes looked the same.
Now it’s time to sew! I sewed each piece together going just around the edge of the interfacing. (All of the bits along the bottom of the shoe are left open so you can turn them inside out afterwards.)
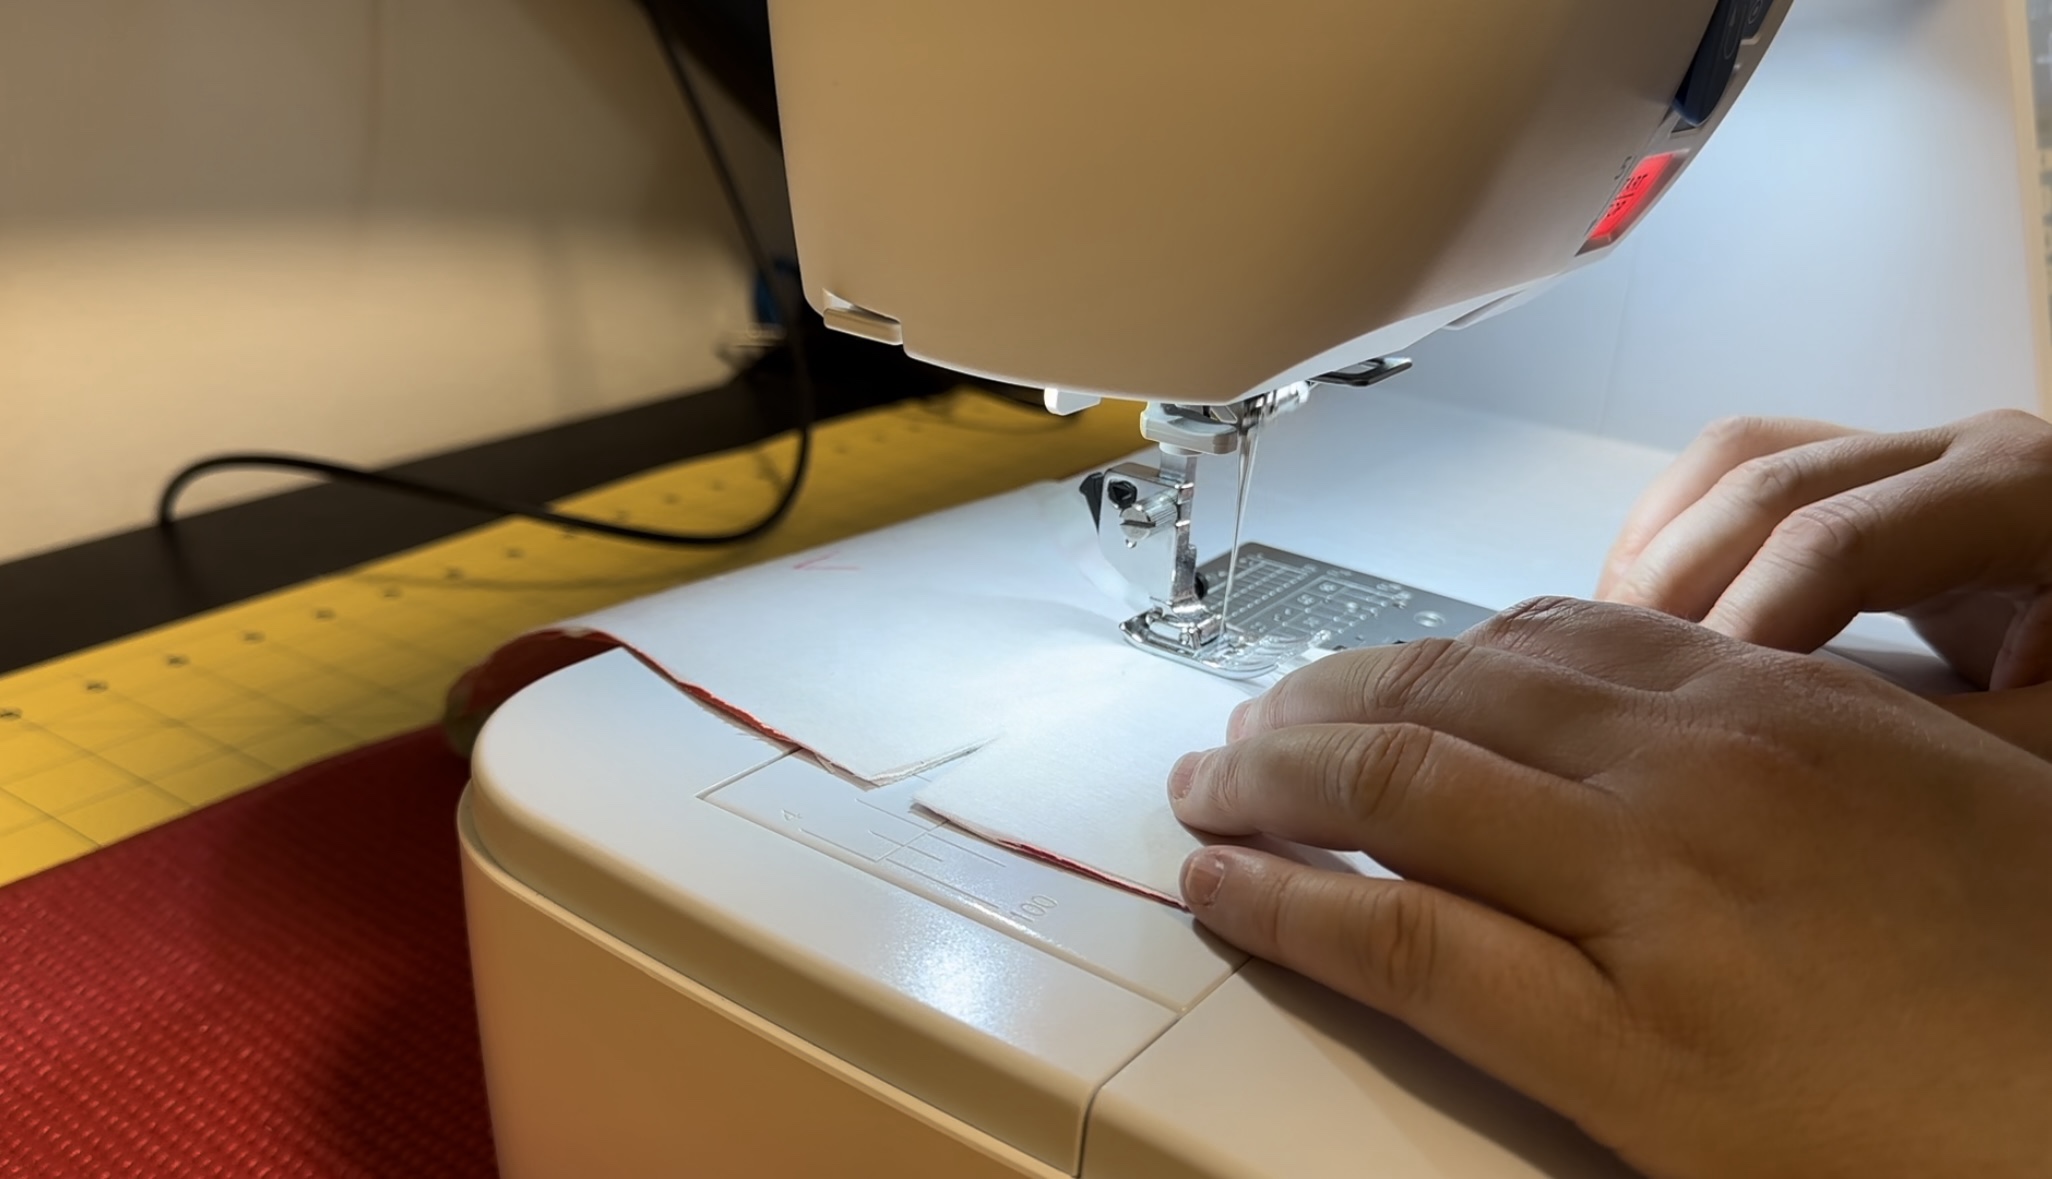
Then I trimmed down the lining piece seam allowance by half just to make it lie flatter when I turned it inside out.
And then I turned each piece out and gave it a good press to make sure it was flat and all the corners were properly turned out.
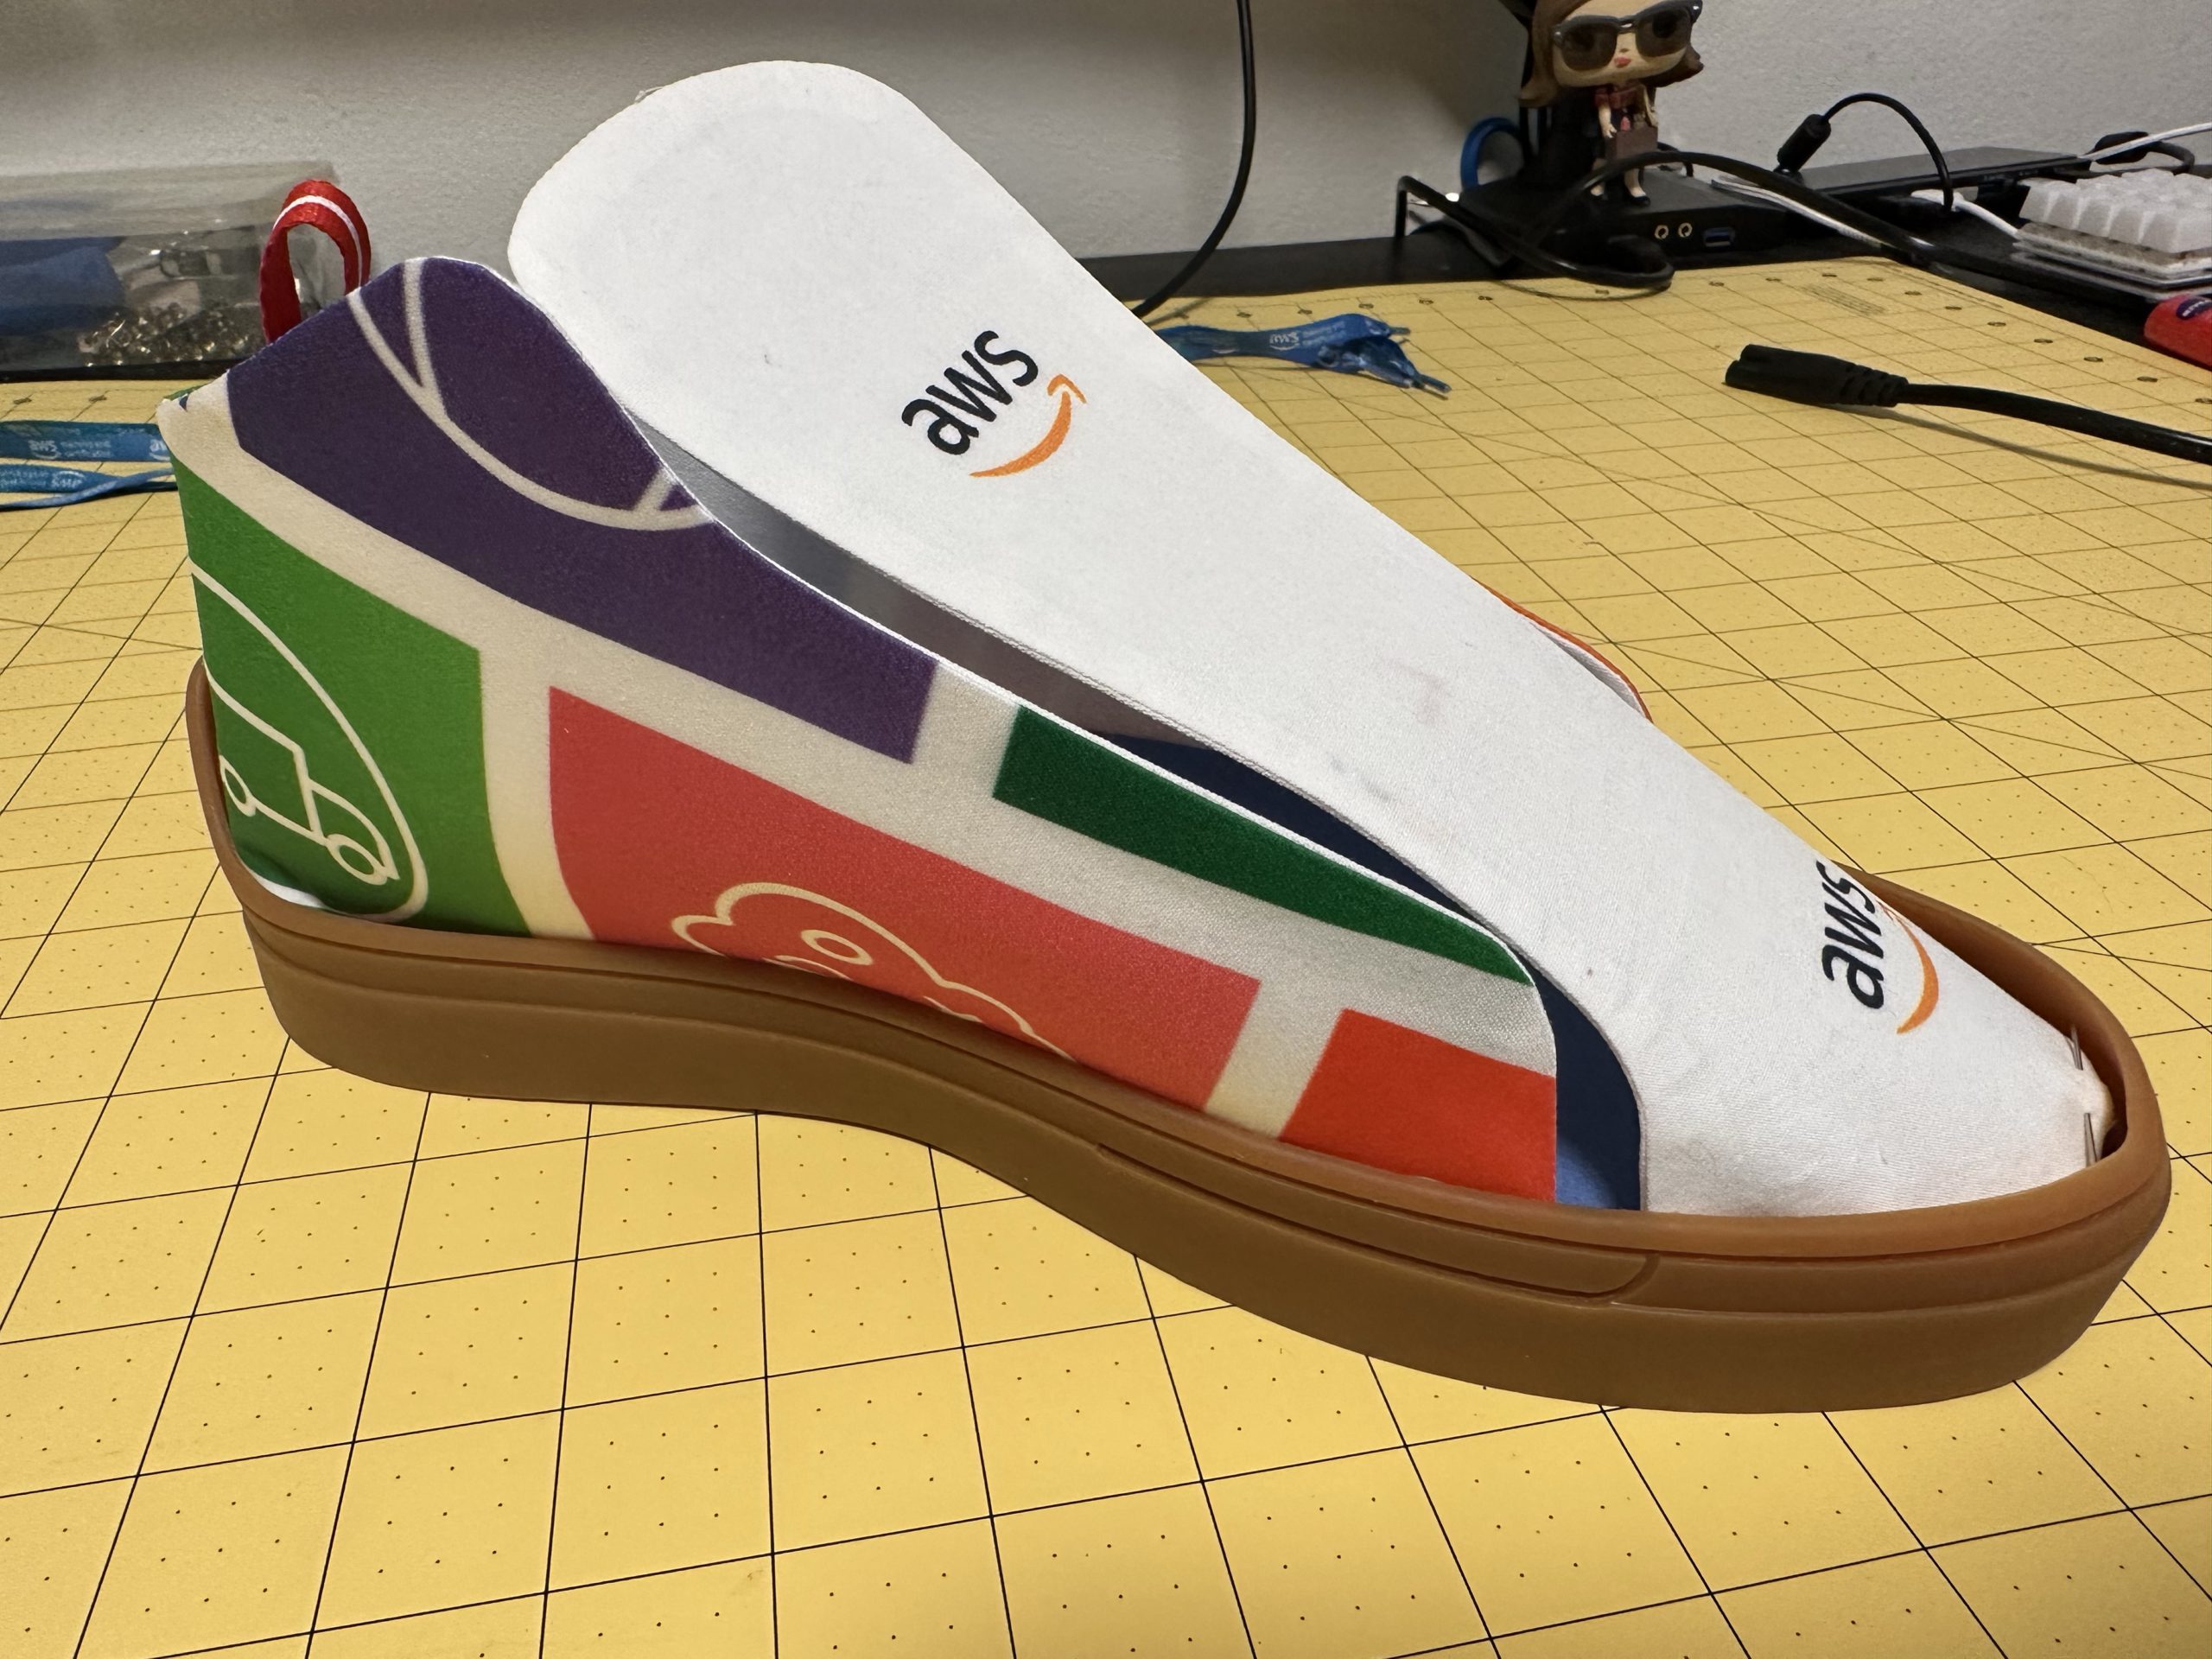
I placed the pieces on the rubber soles just to get an idea of what they were going to look like. Hey, this is pretty good!
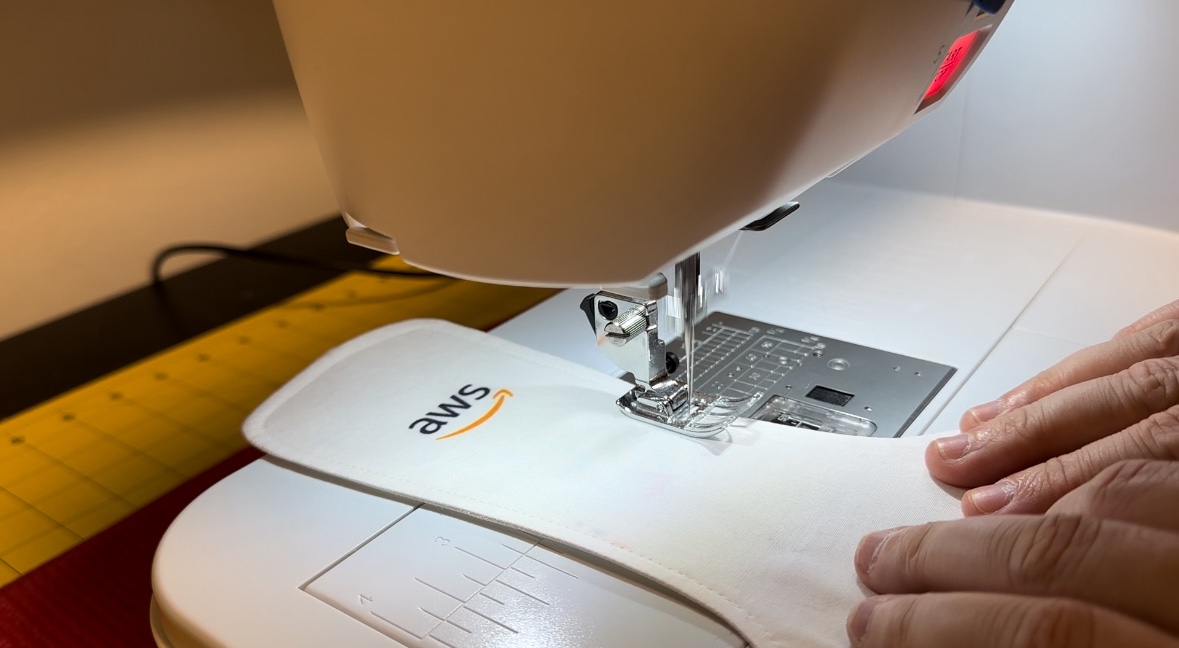
I decided to some topstitching around each piece. This means I sewed a decorative line 1/4″ from the edge around the tongue and each side piece. (Again, I left the bottom edges unfinished.)
For the side panels, I discovered I had some red ribbon that would work perfectly for the loop at the heel (to help you pull them on). I cut out appropriate length, doubled it over, and sewed it down as I was doing the topstitching. (You can see it in the photo below.) Then I used the overlocker to close off the bottom of each piece. Later I went back and sewed down the edges of the ribbon to make sure it was extra secure.

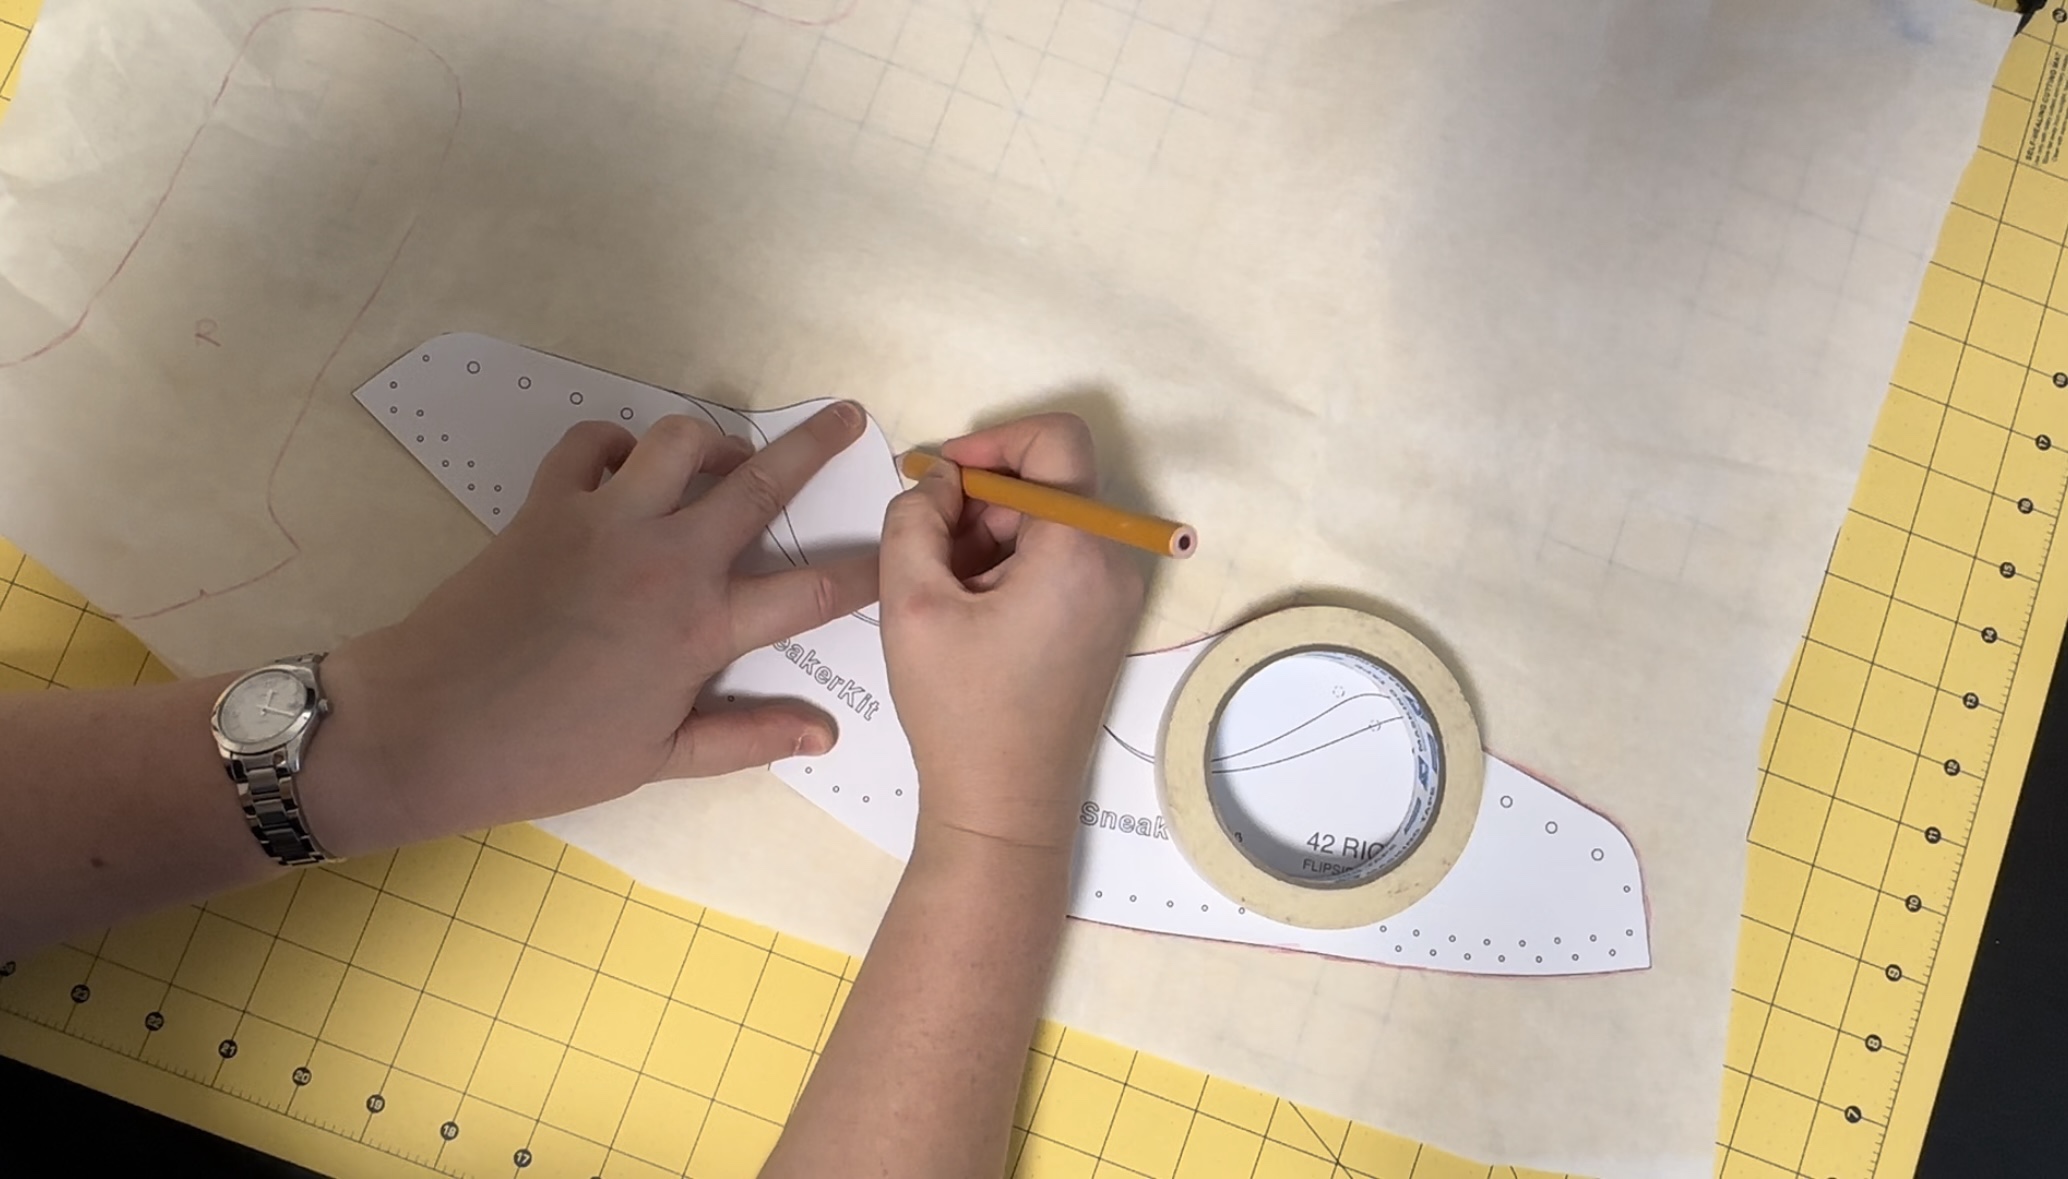
The pattern has a LOT of little holes marked on the sides that need to be transferred to the fabric pieces. I started by using an awl (a very pointy tool) to poke holes in the paper pieces, using some cardboard to protect my worktop.
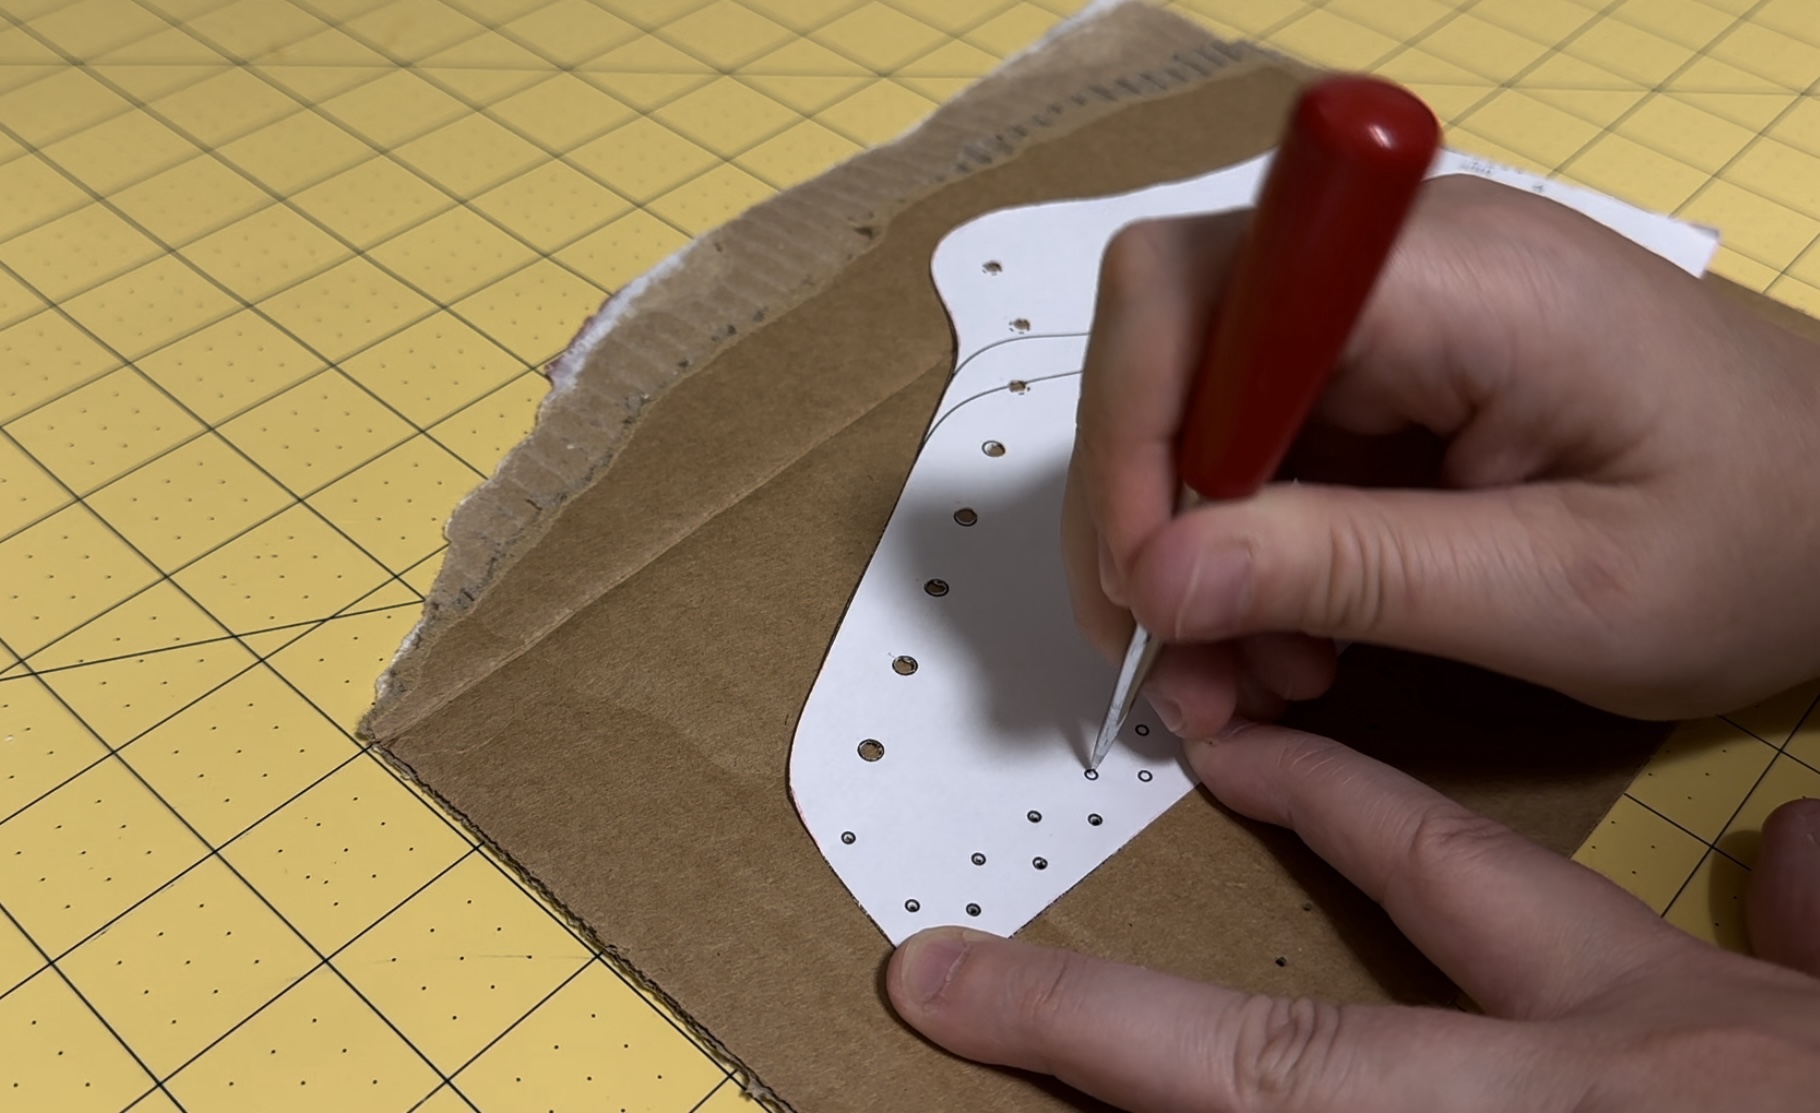
Then I placed the paper piece on the fabric panel and used a pen to make the placement of the holes.
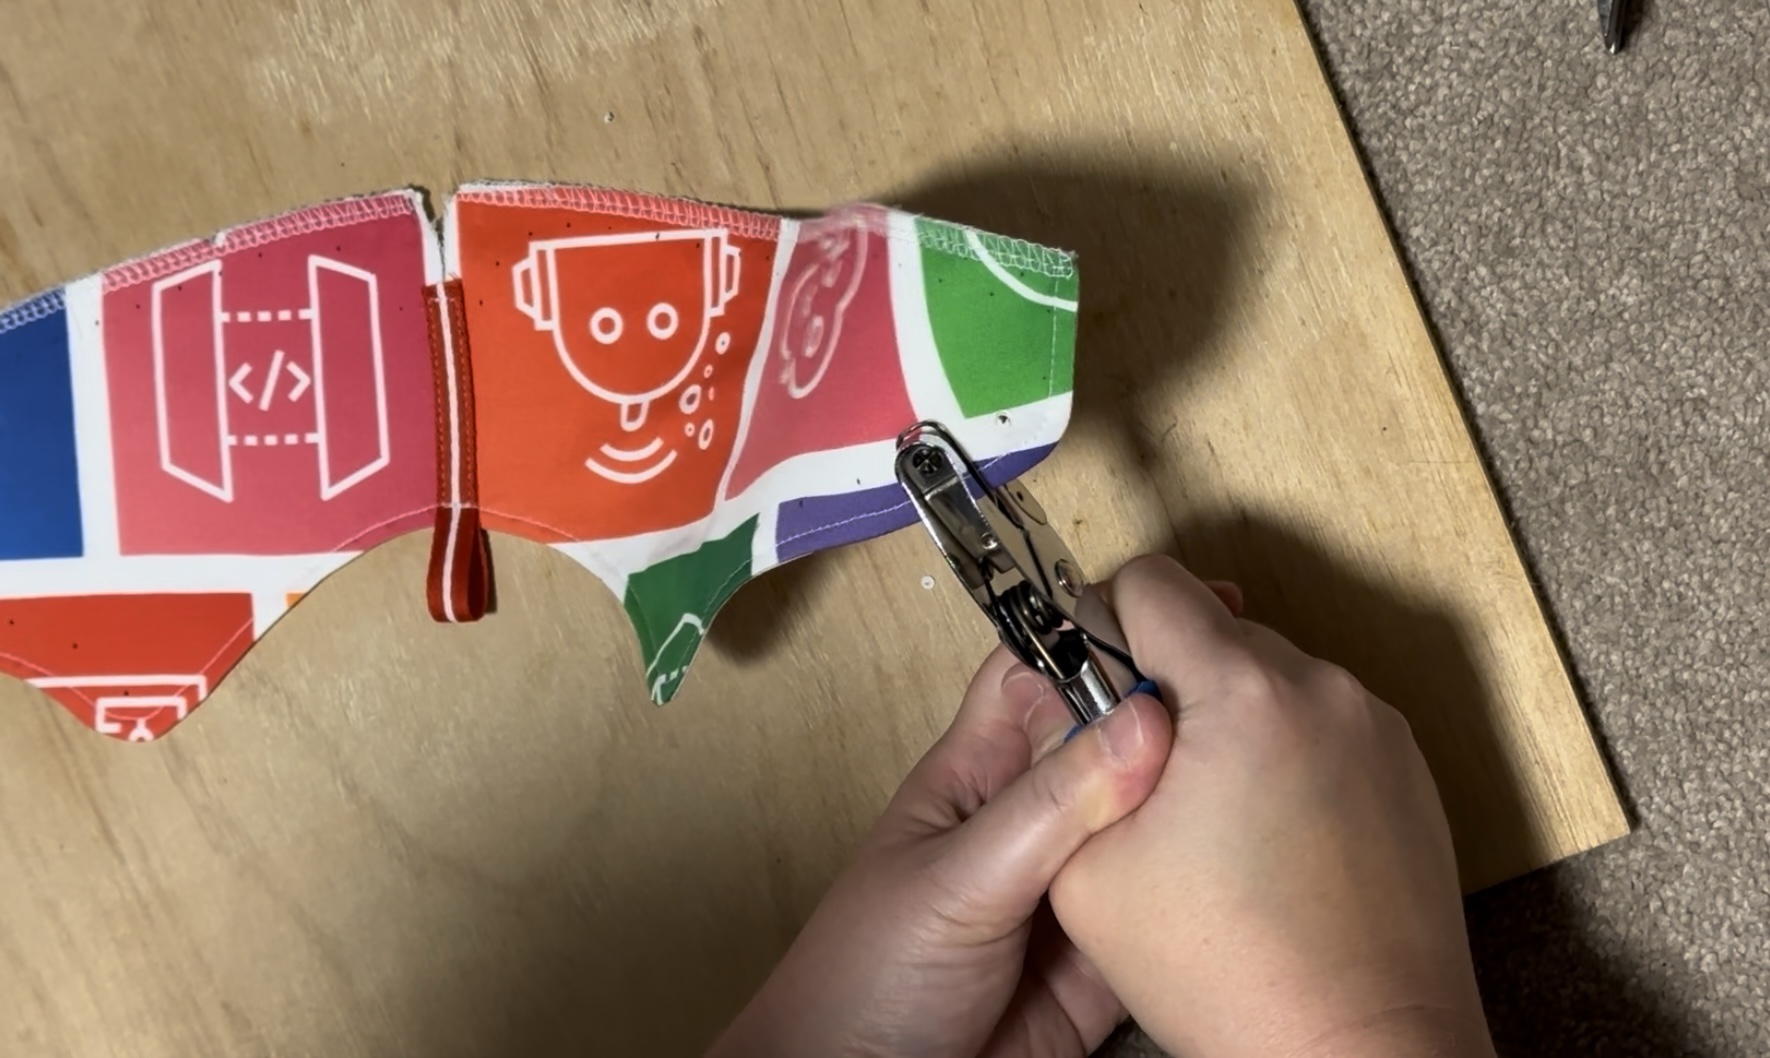
For the laces, I didn’t have the recommended tool for cutting the holes and setting the eyelets. Instead I used a regular paper holepunch to make the holes, which thankfully were the right size. It actually worked pretty well! Occasionally it had trouble completely cutting out the hole, but I was able to use the awl and some scissors to fix it up.
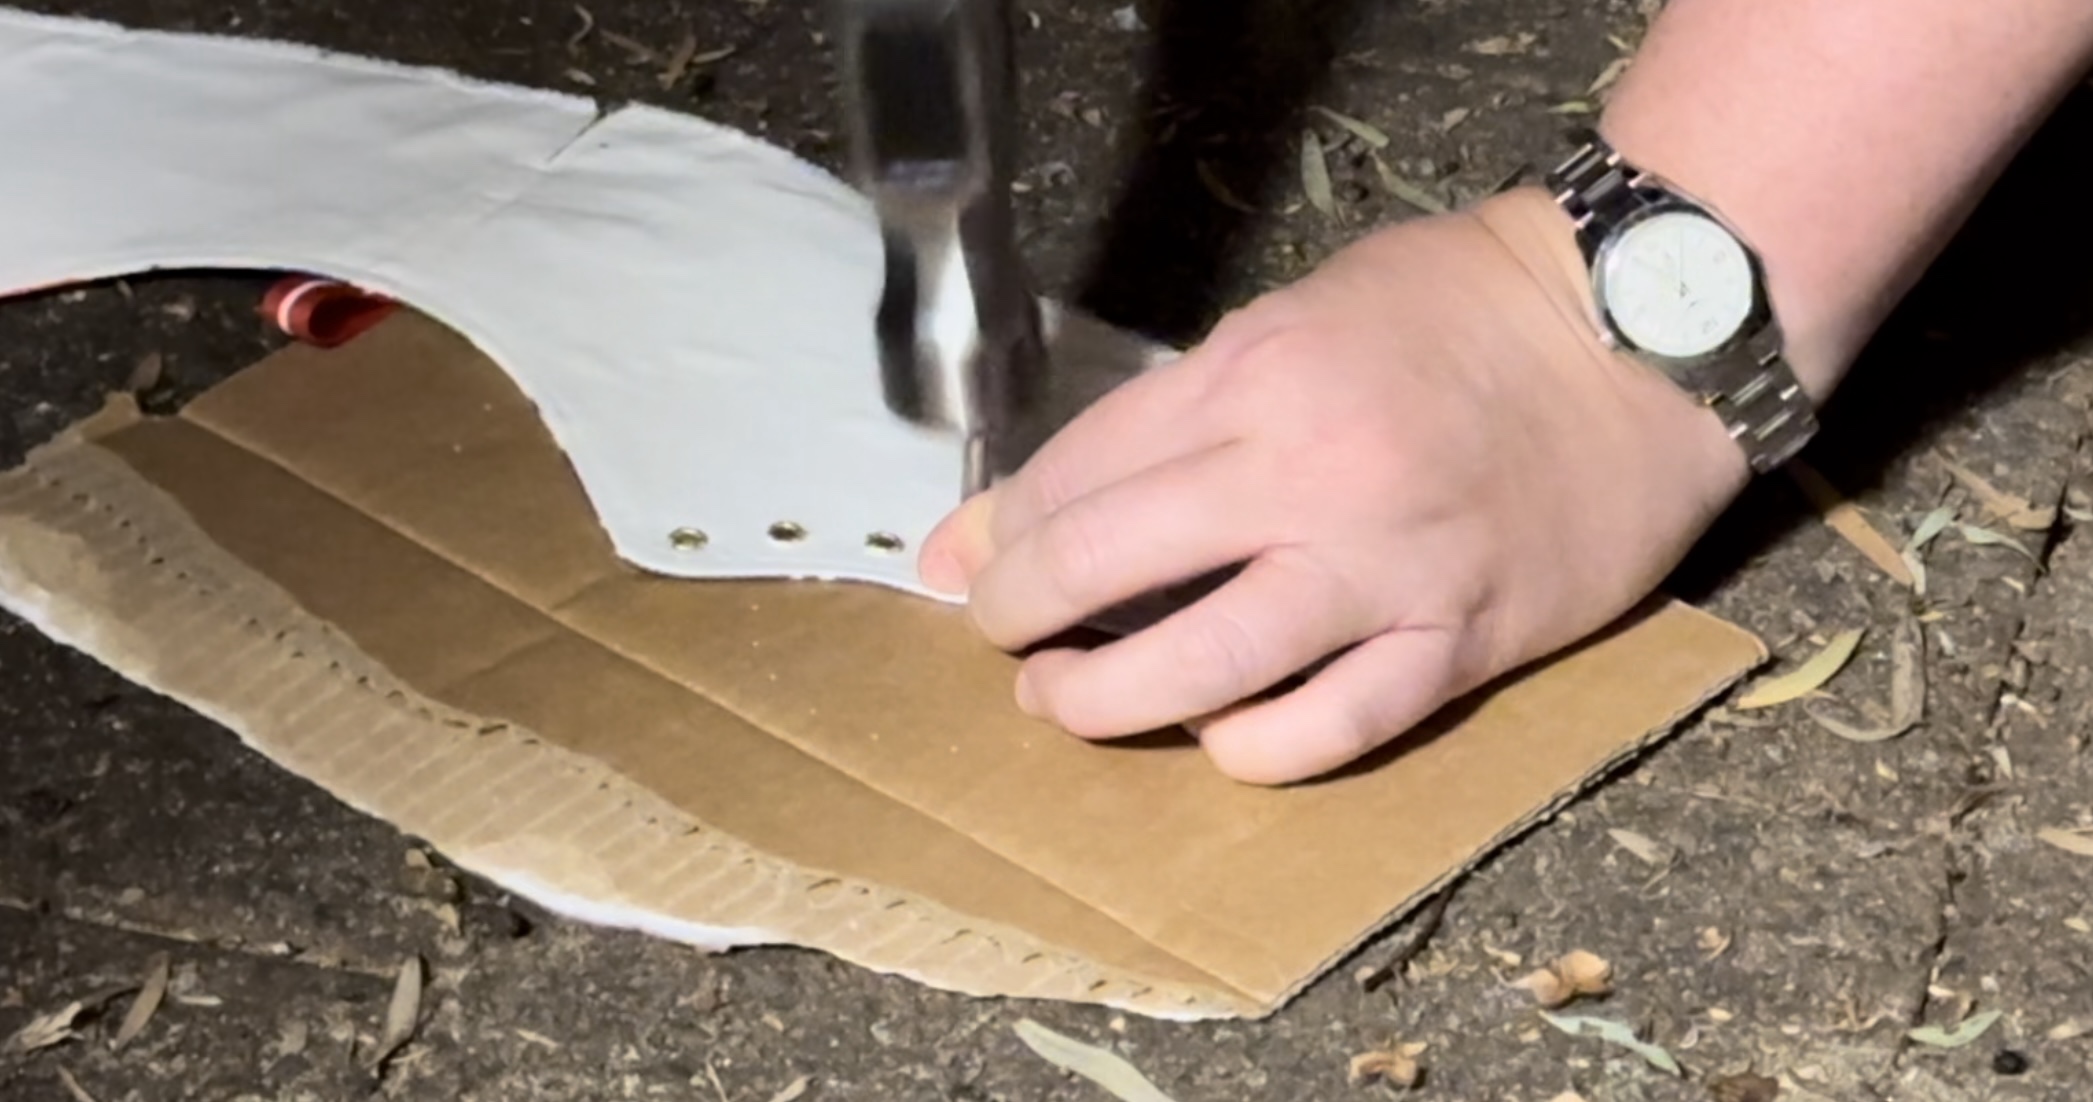
To set the eyelets, if you don’t have the tool you can use a hammer. I’ve done this in the past and had a couple of the little hammer tools in my craft box. I tried it in the house on a piece of plywood, but I needed something a bit firmer. I ended up doing it outside on the pavement, with a bit of cardboard to keep the fabric from getting dirty. I only mangled one of the eyelets, which necessitated using needle-nosed pliers to peel back the little bits and remove it to try again. So do your best not to screw any of them up!
With that, all of the pieces were complete and ready to be sewn onto the soles!
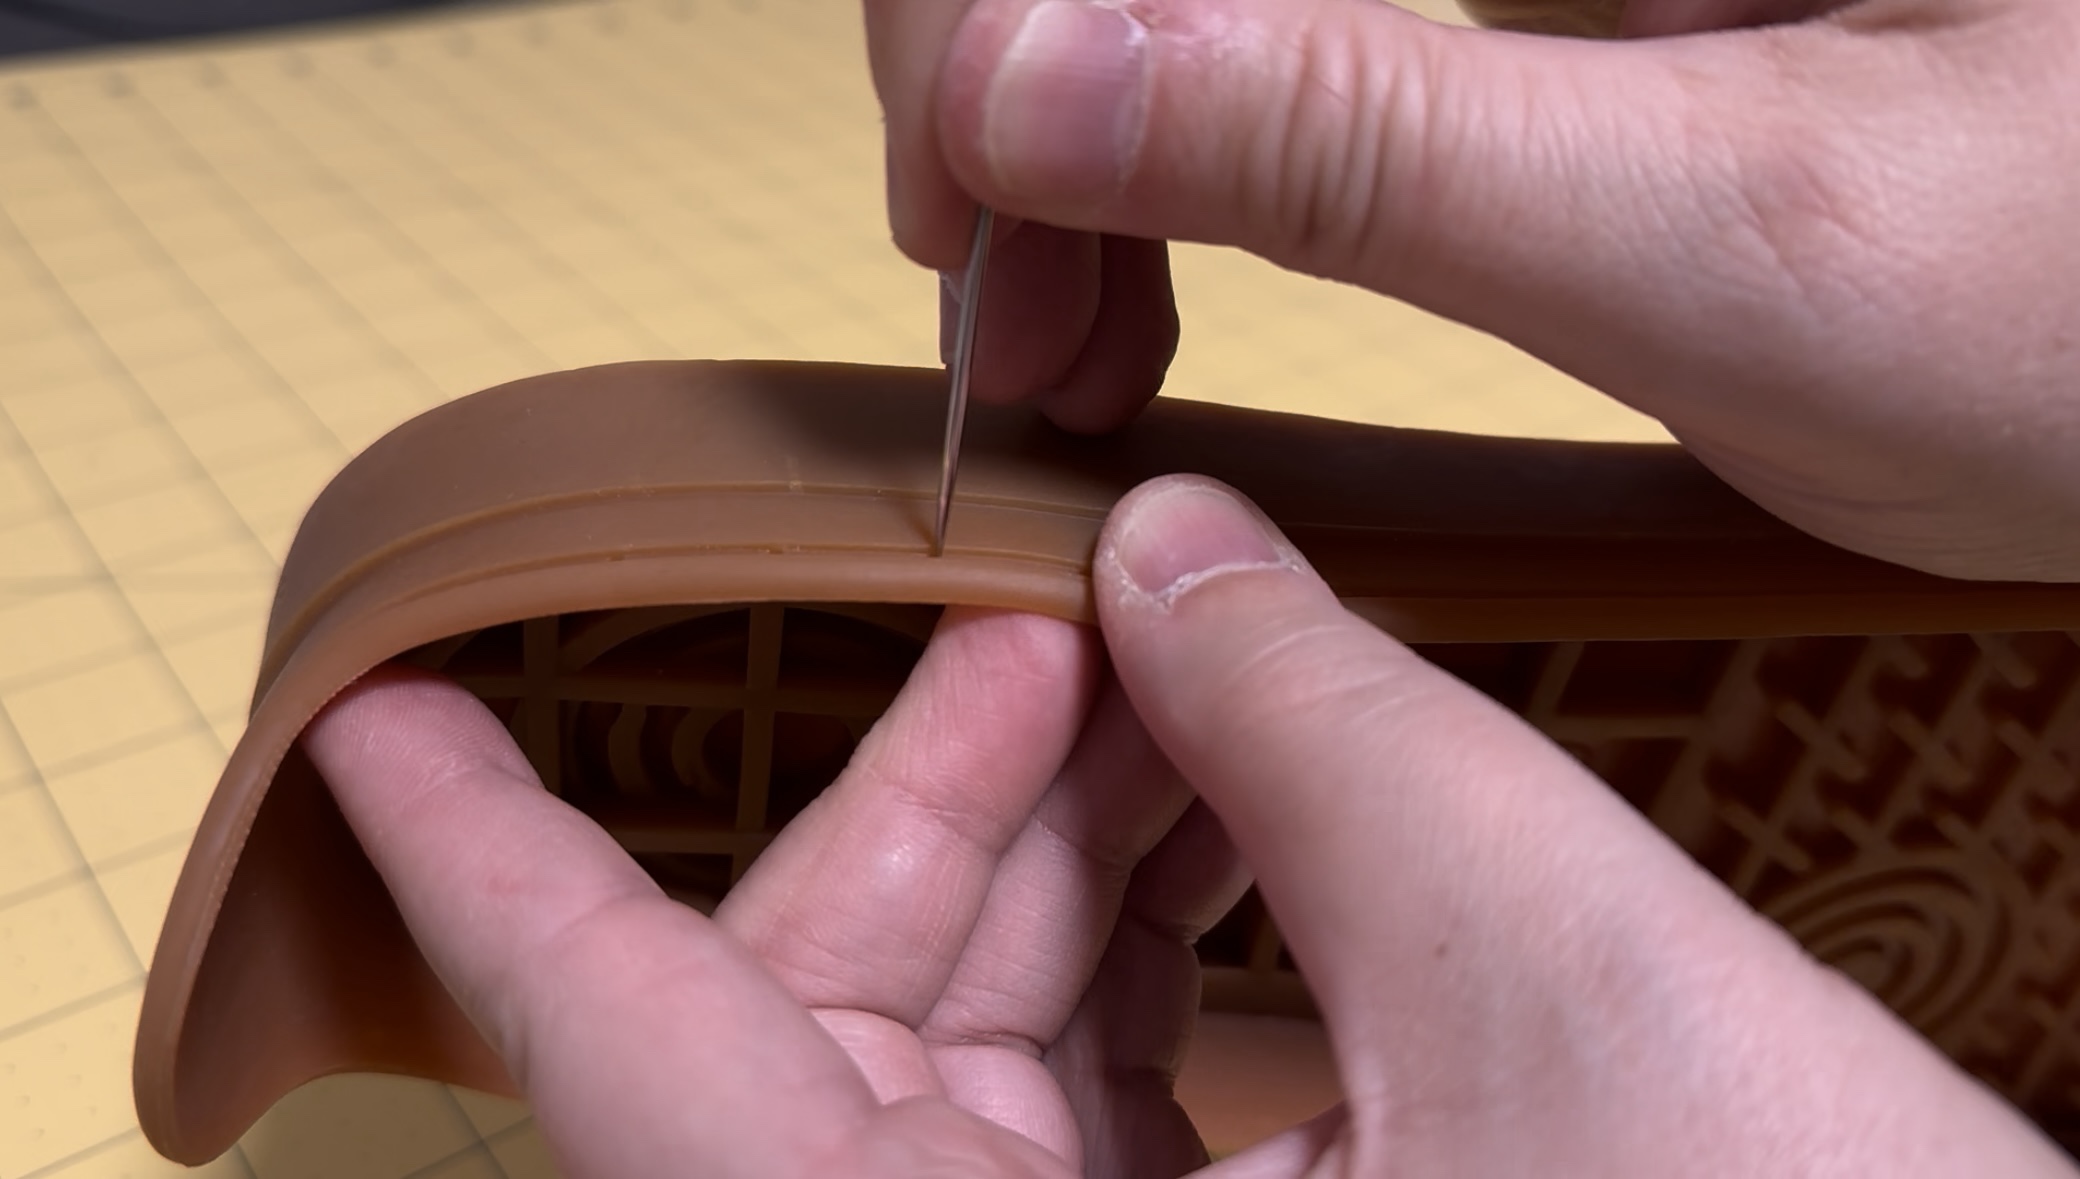
The rubber soles have holes marked around the edges, but you need to use a thick, sharp needle to pierce through and open them up. Note: sewing through rubber is really, really tiring on your hands! I had to take frequent breaks.
Now it’s time to sew the pieces to the sole. The SneakerKit comes with heavy waxed thread and a long sharp needle to help you out. I had to watch the video many times to make sure I was doing it correctly. (There’s a very specific order you’re meant to sew the holes in.) As you work your way around, you sew on the tongue as well.
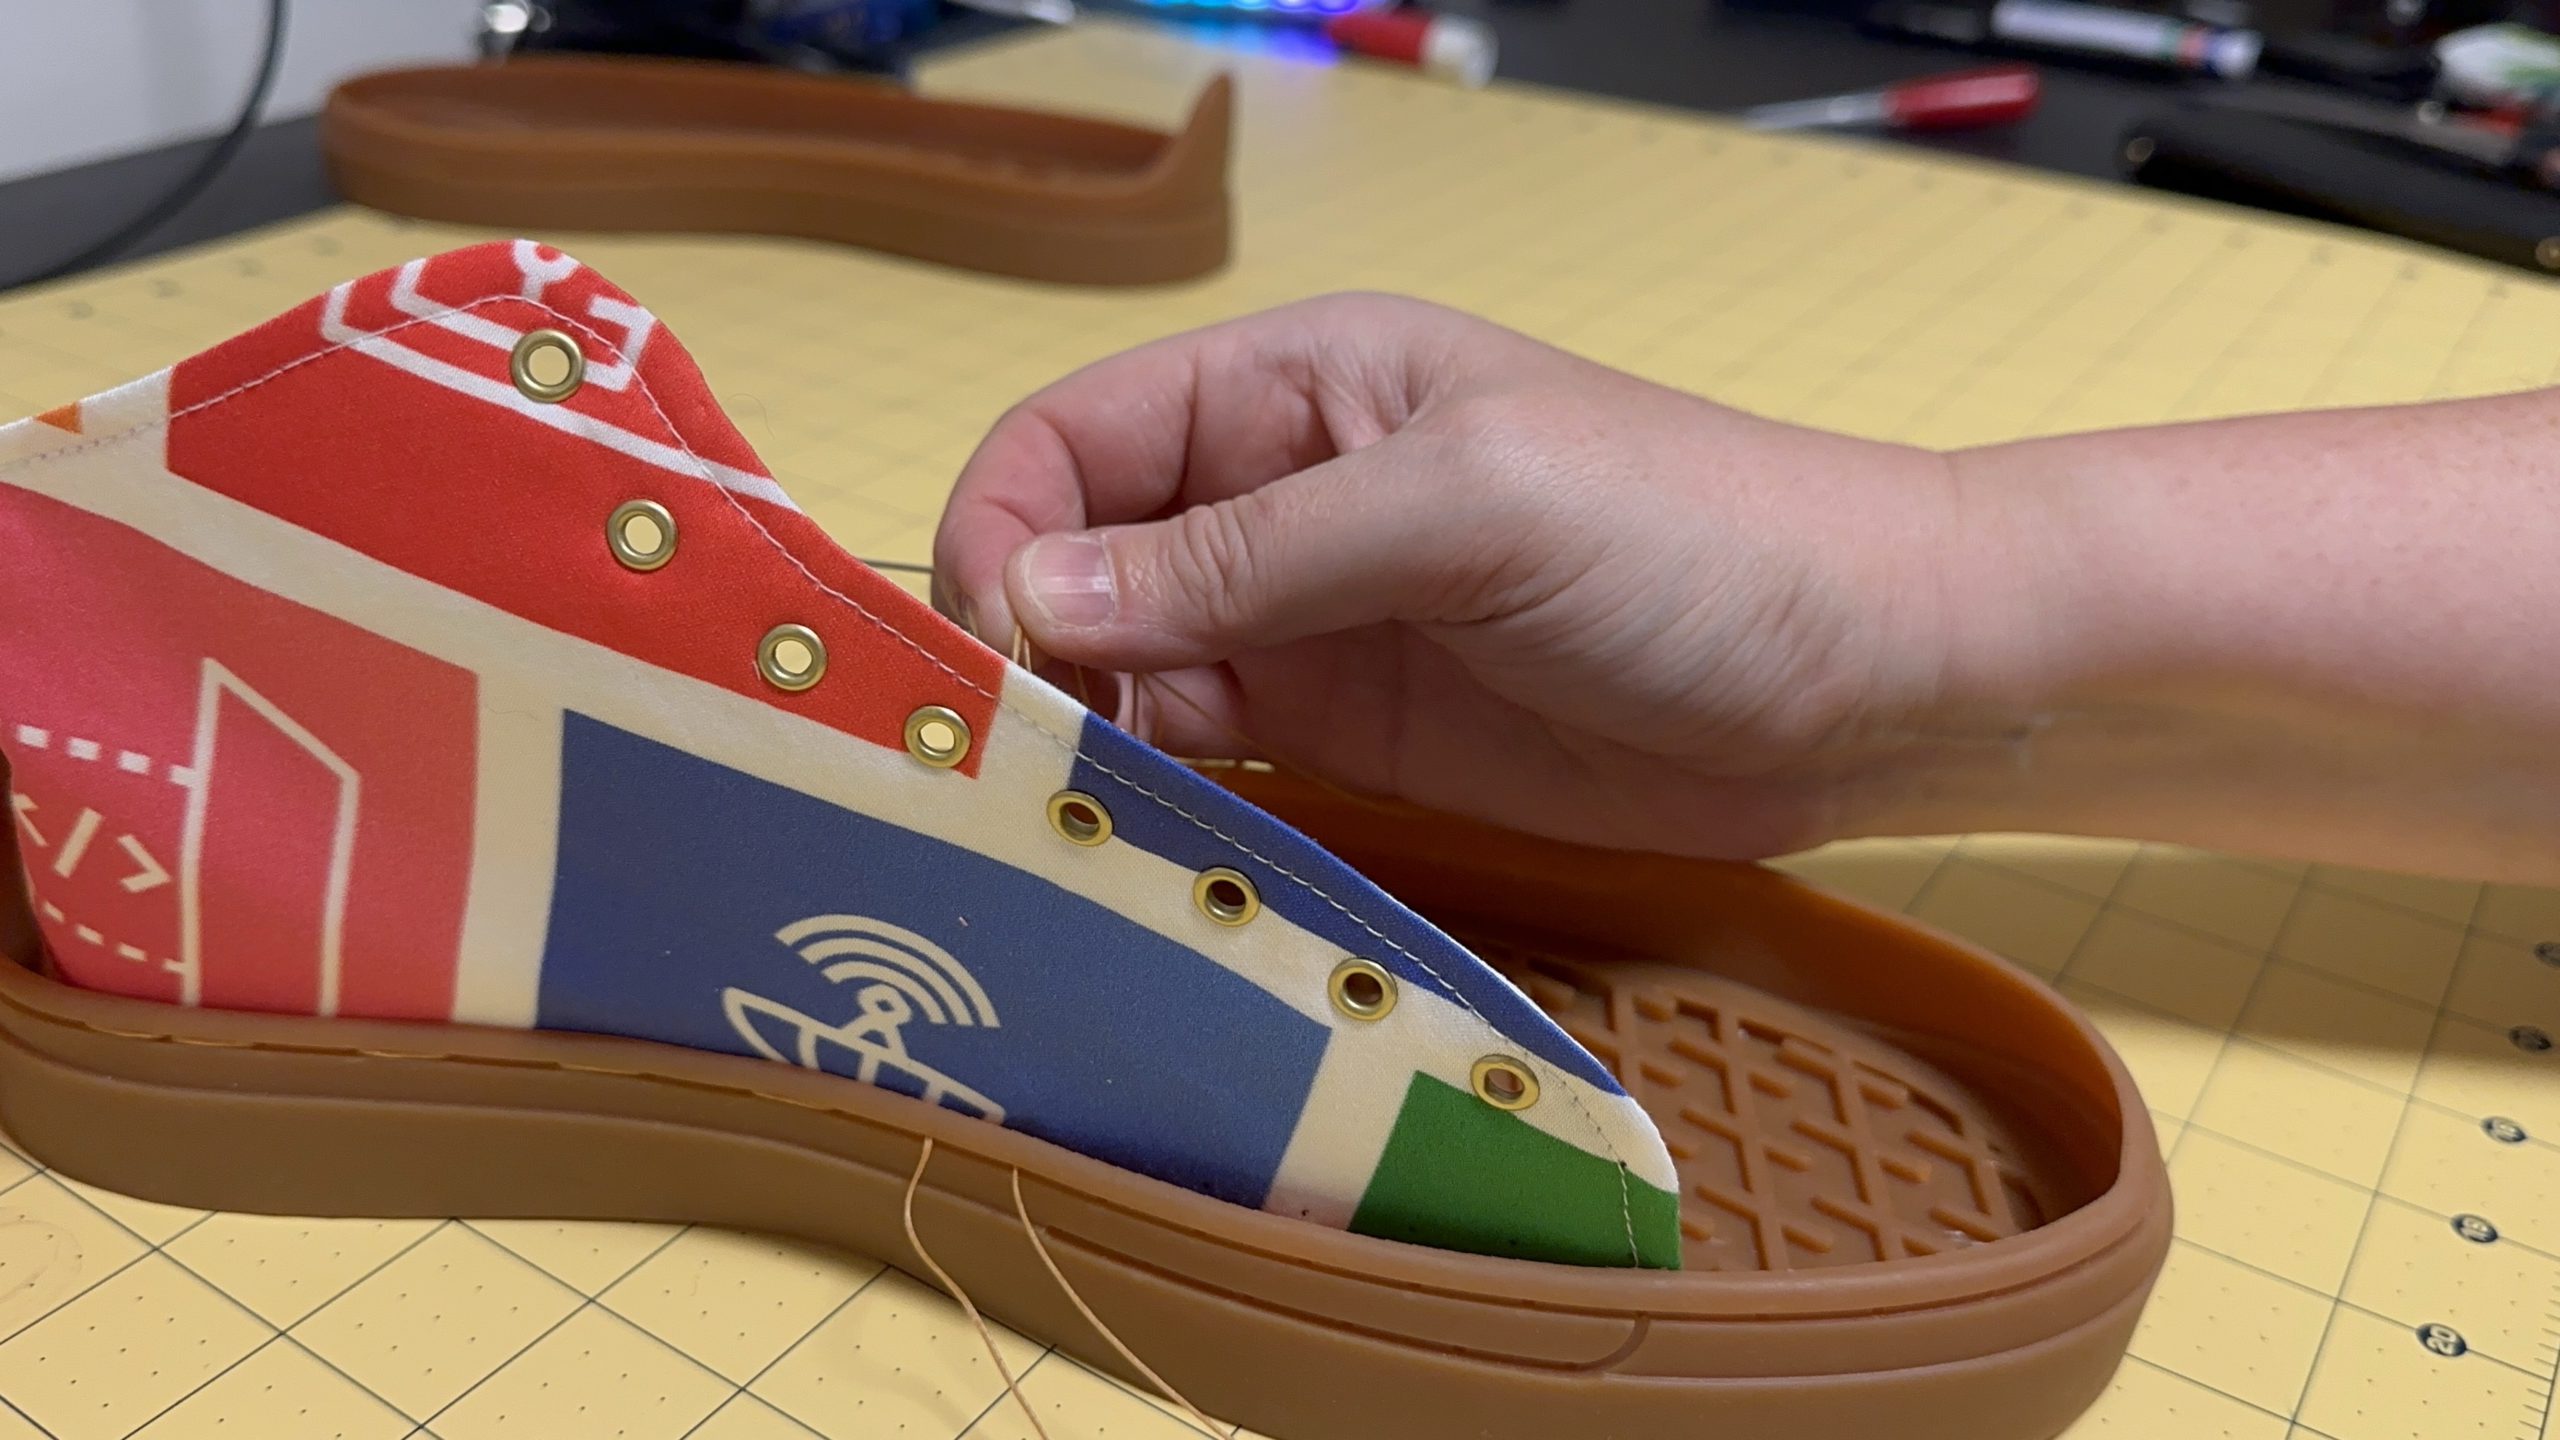
Again, this is murder on your hands. I found that even with pre-poking the holes, they were hard to find in the rubber and for every stitch I had to dig around to find it.
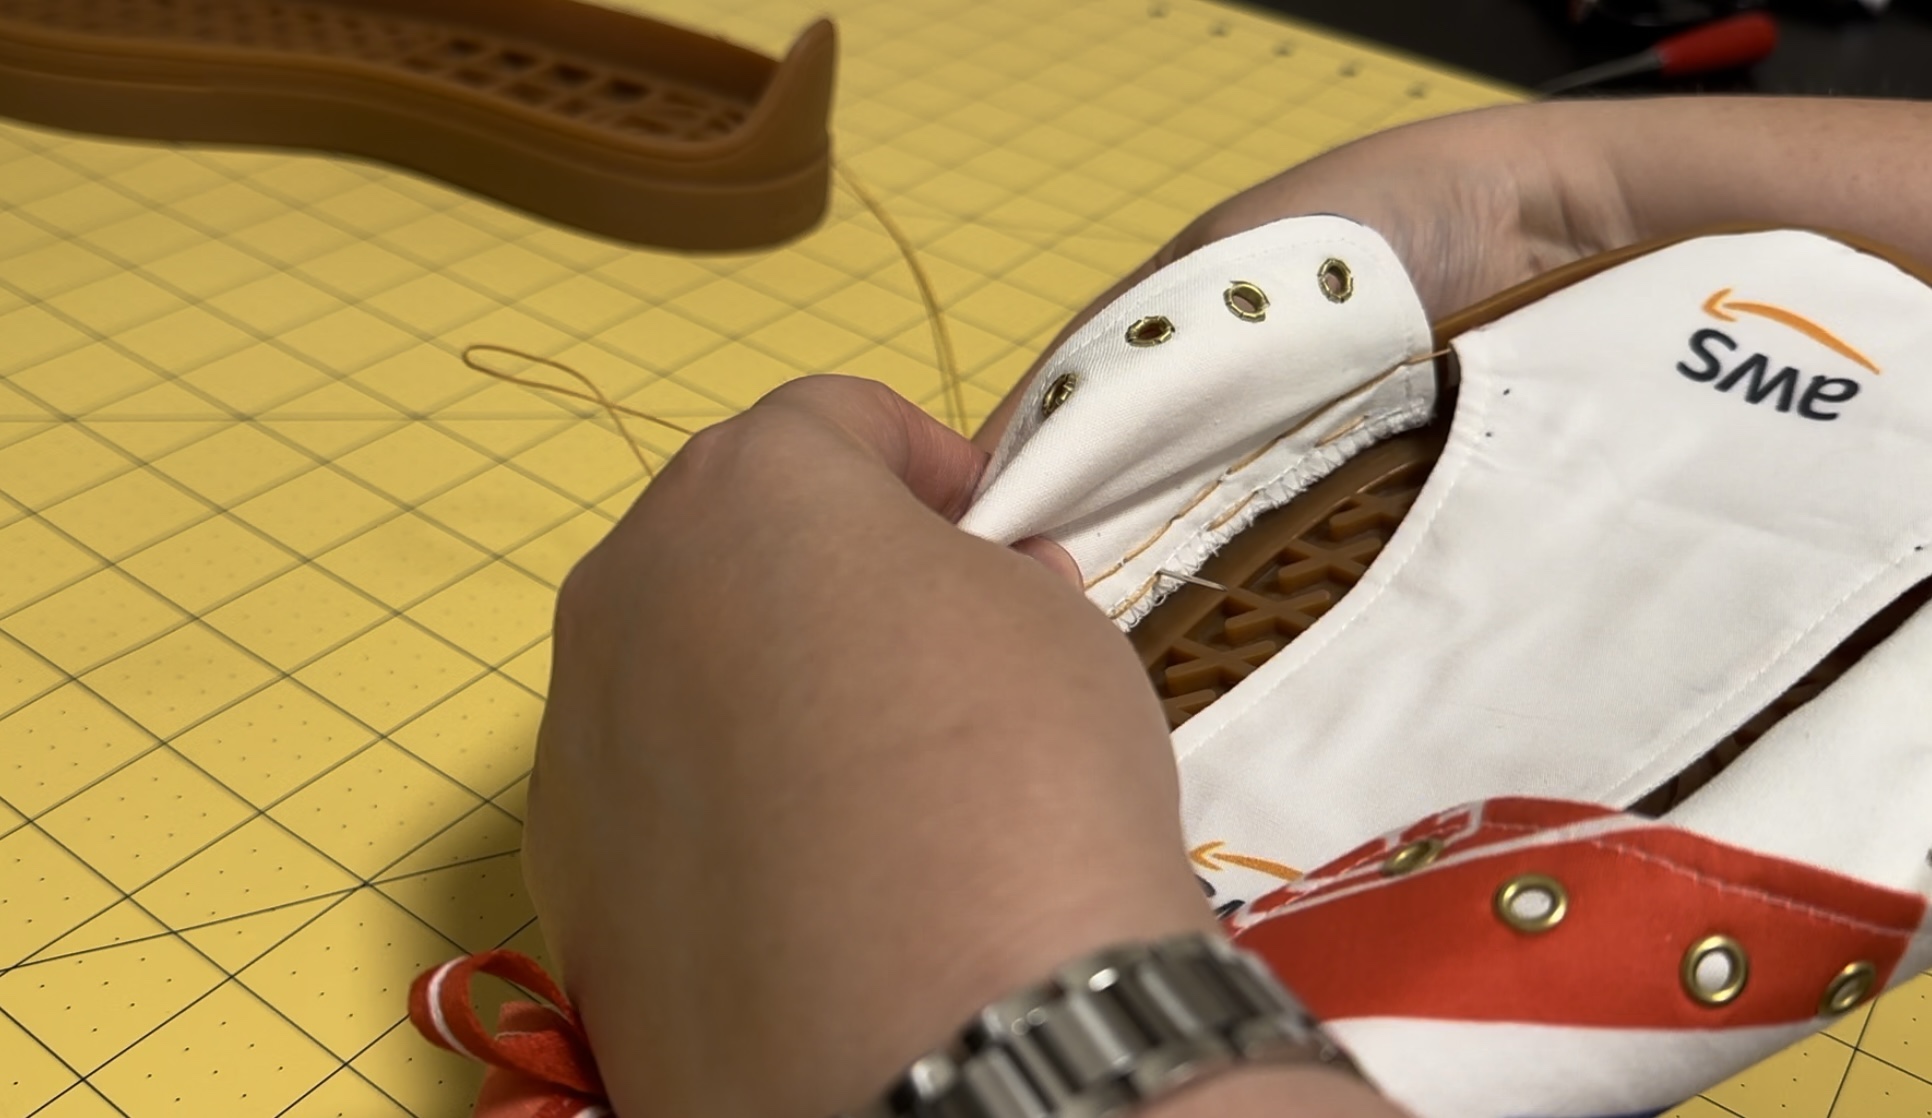
When you finish the stitching, have to use a lighter to melt the threads on the inside. Then you simply put in the insole, lace them up, and you’re done! (Well, except there’s a whole other shoe to assemble. 😩)
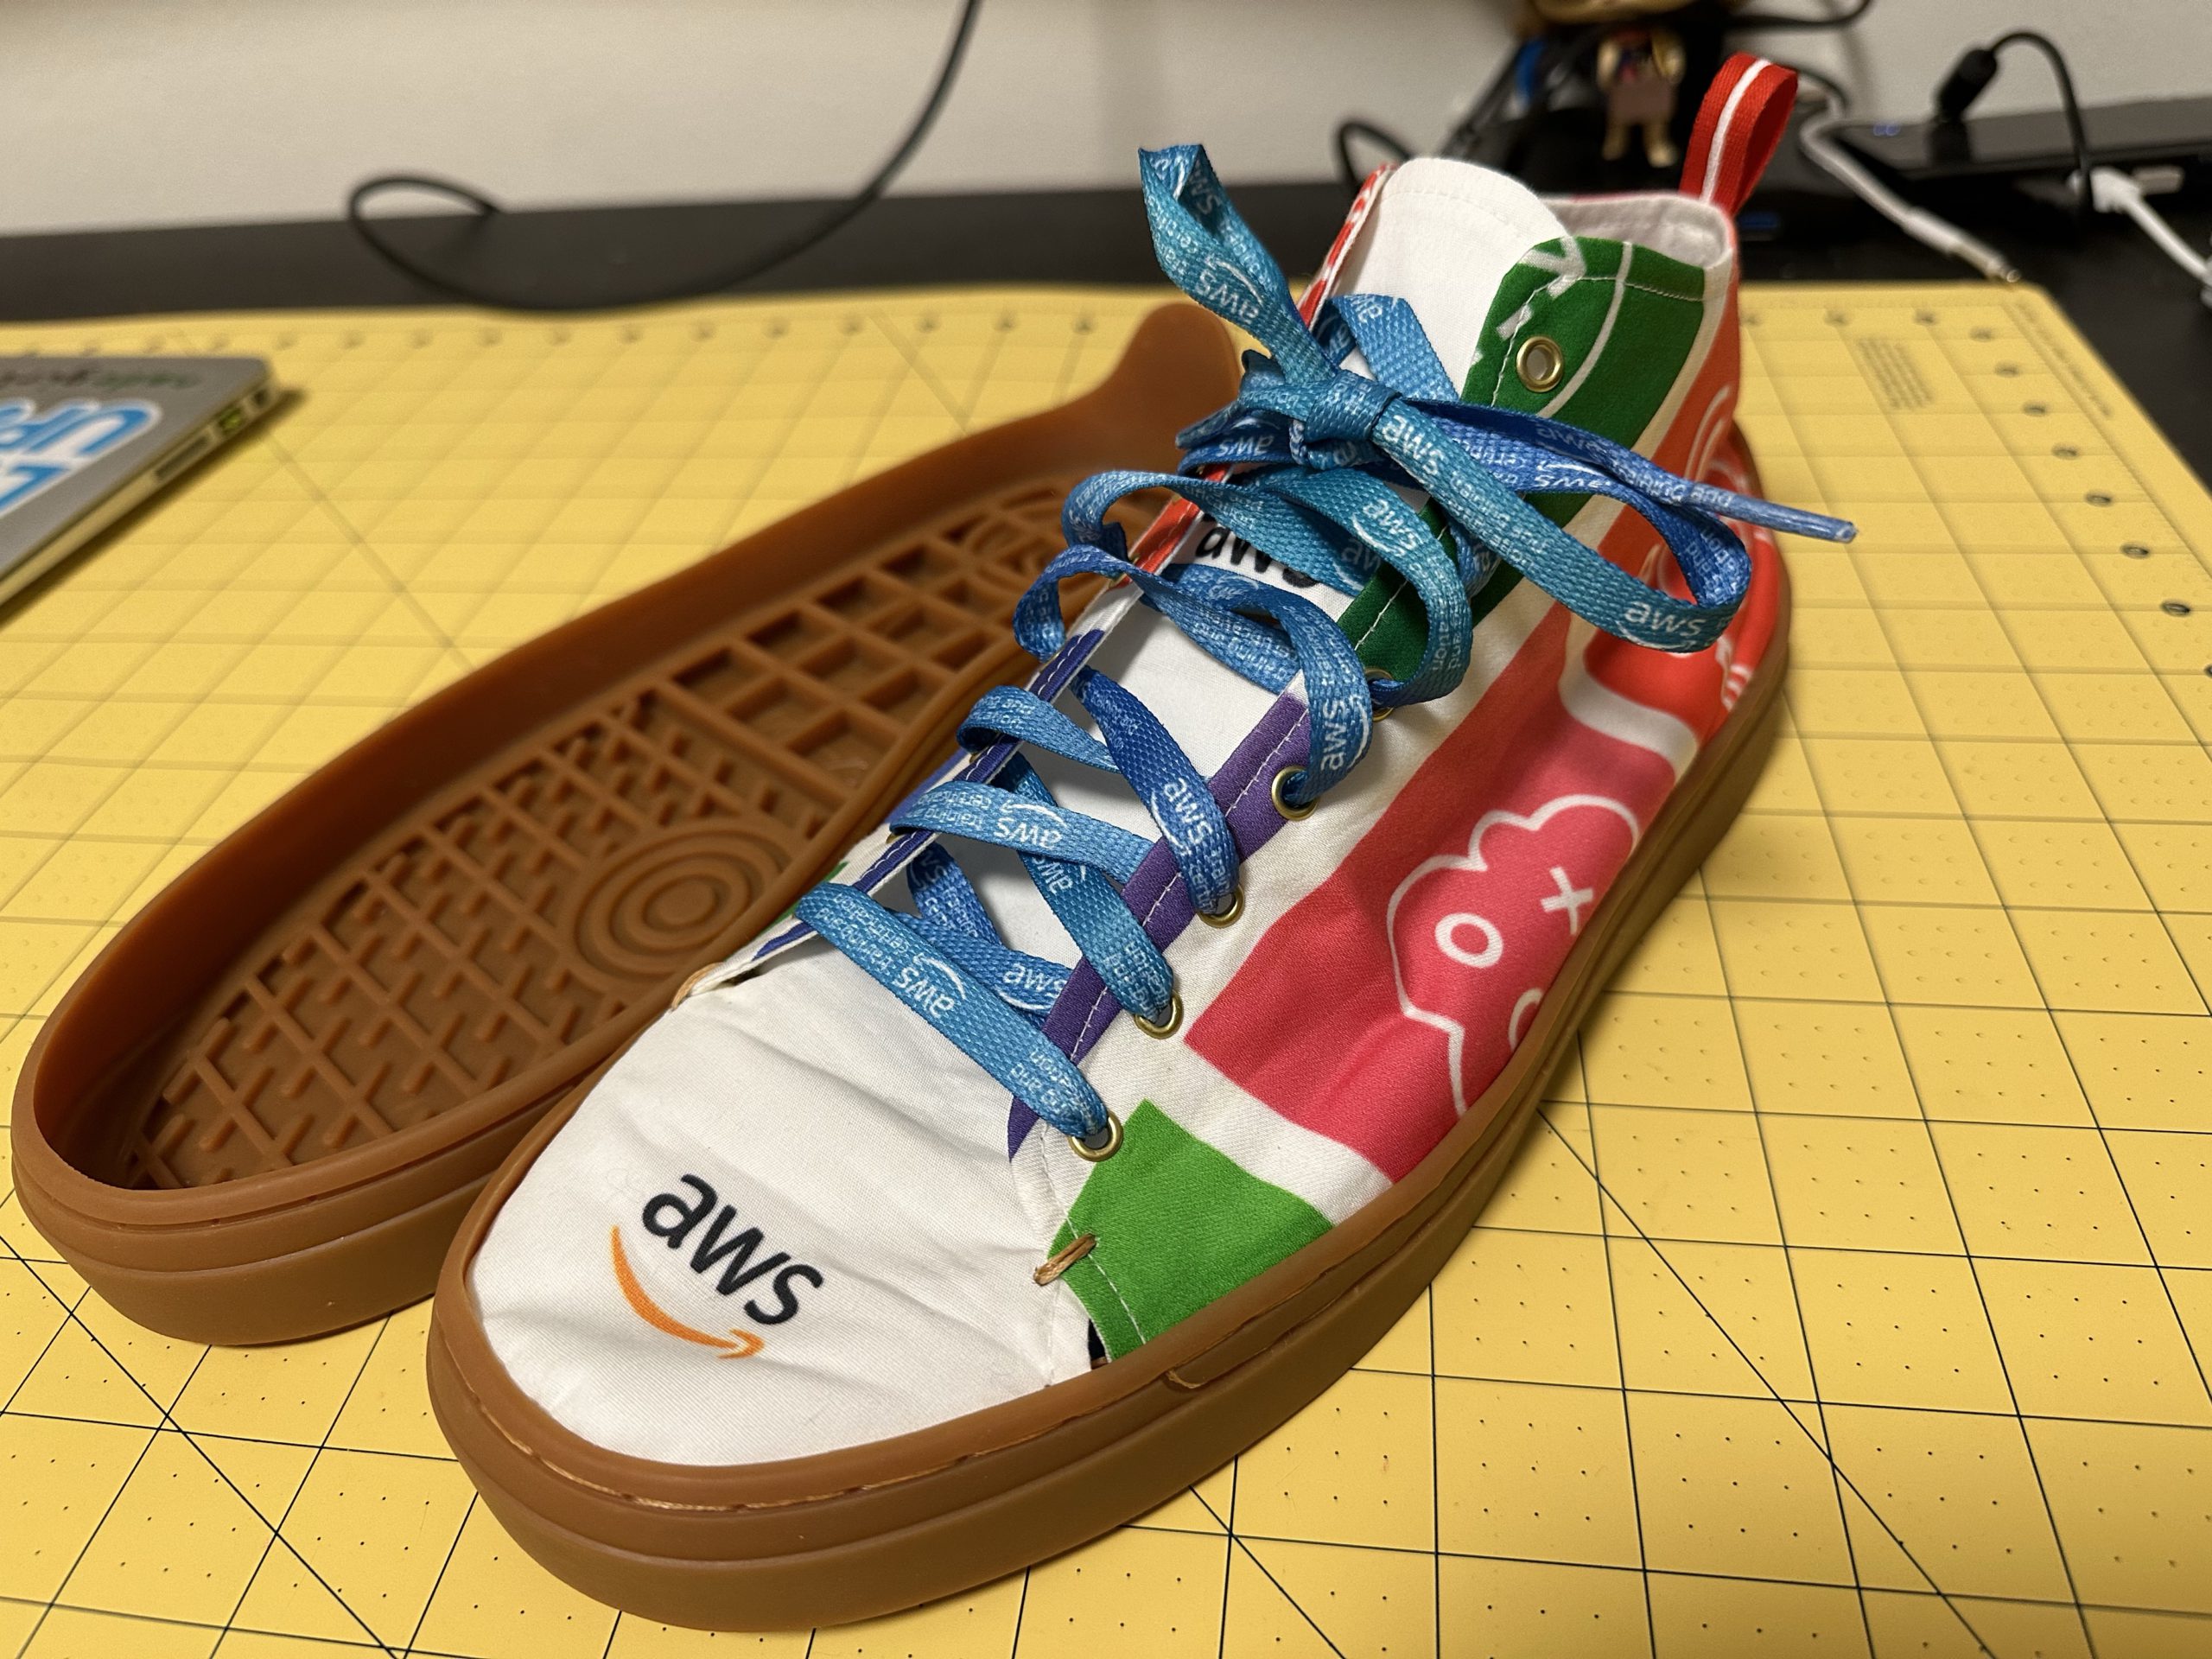
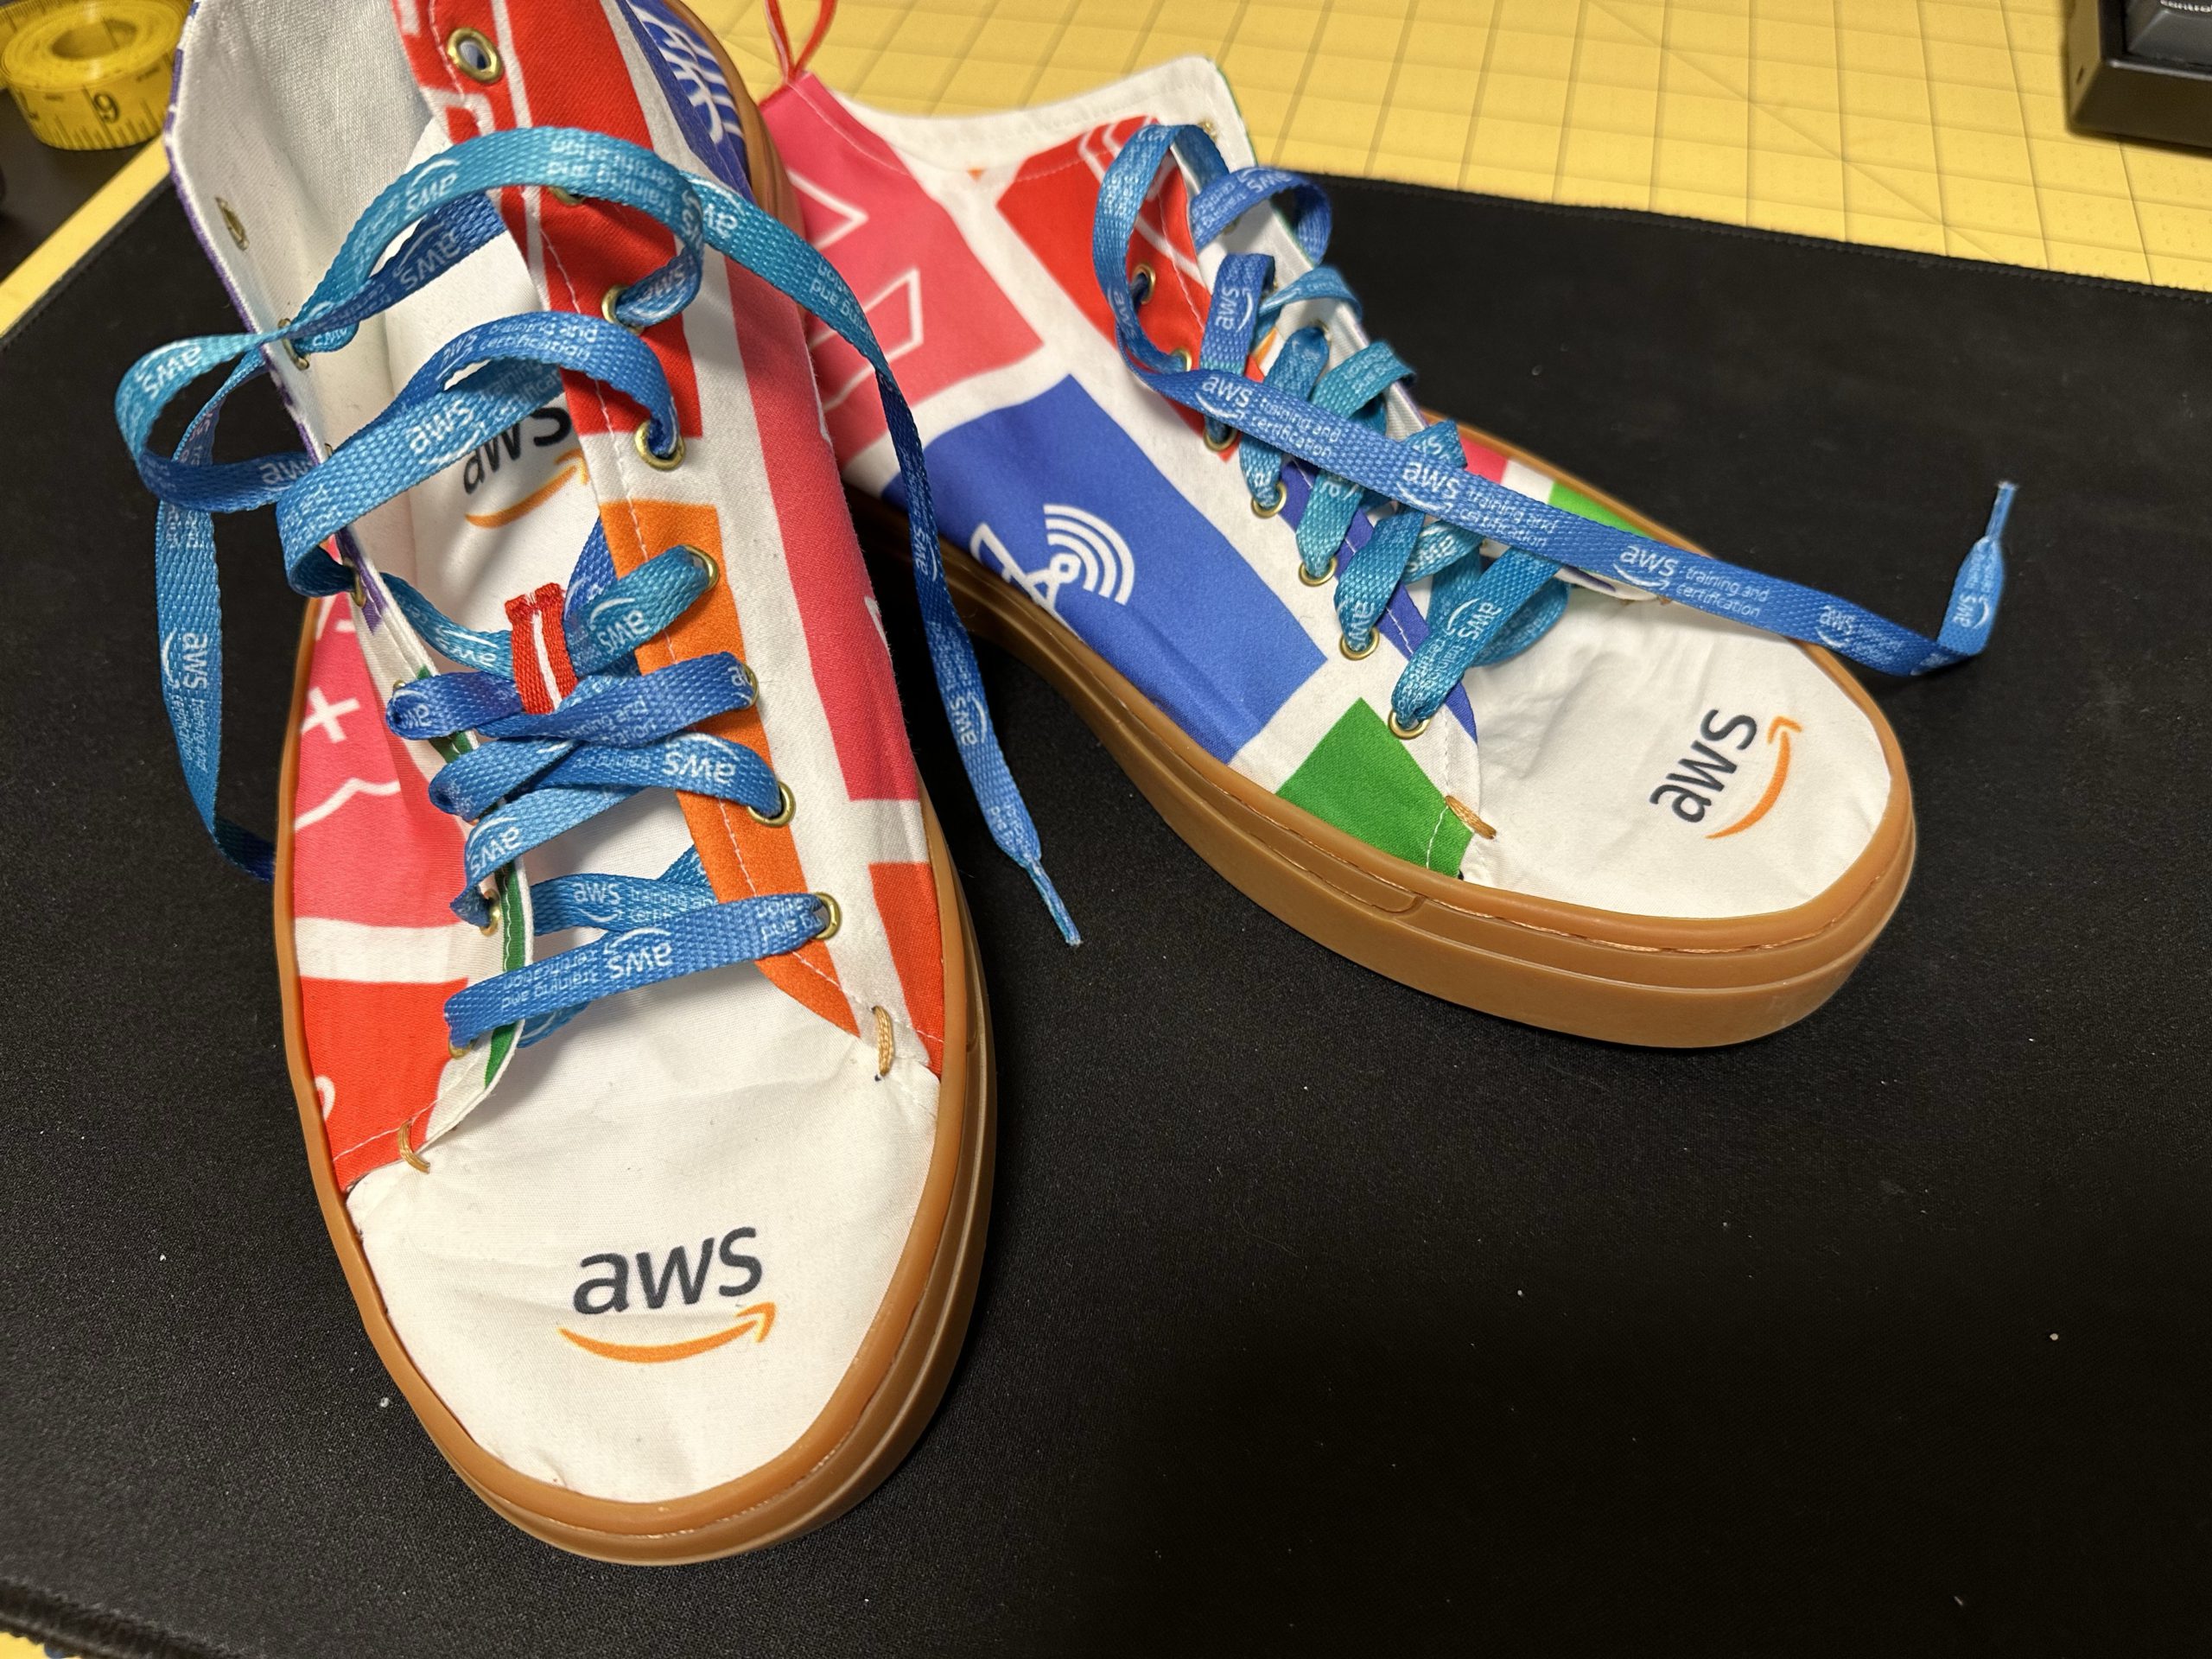
I managed to find some AWS Training & Certification laces in my swag bag, which went perfectly. I also bought a can of Scotchguard and gave them a good spray to help repel stains. They’re pretty comfortable, but I’m not sure yet how long they’ll last. If I were doing it again, I’d try to get even stiffer interfacing, as this is still pretty soft. I figure if/when they fall apart, I’ll pull the tops off and try something else!
But guess what? I still had some fabric left over, and with less than week left until AWS re:Invent, I decided to make a shirt.
I had to piece a few bits together, but I just managed to eke out a Tessuti “Arkie” shirt. Again, I used white cotton for the facing and for the underside of the collar. No French seams on this one as I was flying to finish it in time!
My AWS capsule wardrobe should hopefully be enough for the near future. 😜 Let me know if I’ve inspired you!
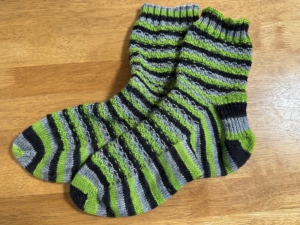 I think these socks win the prize for the longest time from start to finish, and they probably also set a record for the number of times I frogged and restarted! My initial cast-on was way back in April 2021 – back when I was still livestreaming my knitting – and I finally handed them over to the Snook yesterday.
The yarn is Drover Self-Striping from Colagirl Collective that I bought from Convent & Chapel many years ago. I can’t find any record of the colorway name or number, but the lime/grey/black reminded me of Minecraft. My original plan was to do the Undulating Rib socks, but I realised after casting on that it was fighting with the self-striping. So eventually I frogged them and started over. I settled on a simple broken-rib pattern, which gave a sort of pixelation effect and kept me from being too bored. :
Row 1: *K2, P2* repeat to end
Row 2 & 4: Knit
Row 3: *P2, K2* repeat to end
I knitted them toe-up with a circular needle (using the Magic Loop technique). Normally I prefer to knit both at the same time, but the wool was pre-balled and I had no way to access the other end. That meant I had to knit them one-at-a-time, and of course I lost my notes during the long gap after finishing the first one. It was only really an issue on the heel, which I decided to knit using a traditional gusset and heel flap (but in reverse). I suspect that my numbers are slightly different on the two of them, but I was already knitting these as fairly baggy house socks so I figure a few stitches either way doesn’t really matter.
The Snook was pretty happy to receive these, as the weather has turned decidedly Autumnal and the floors are feeling a bit cool in the mornings!
