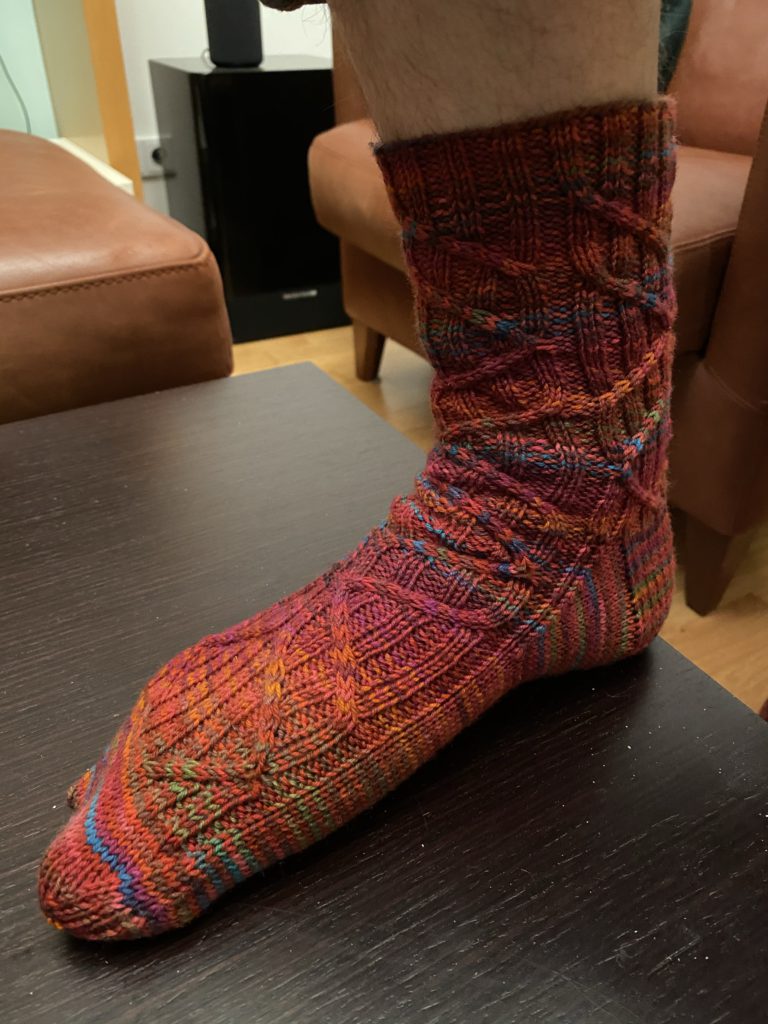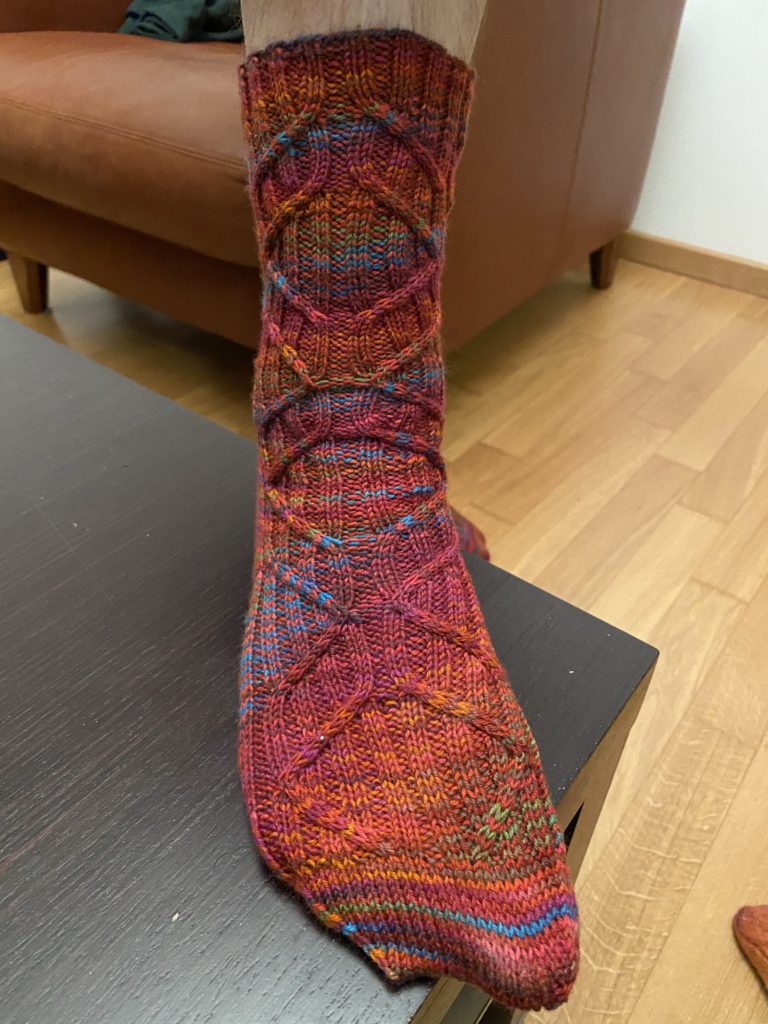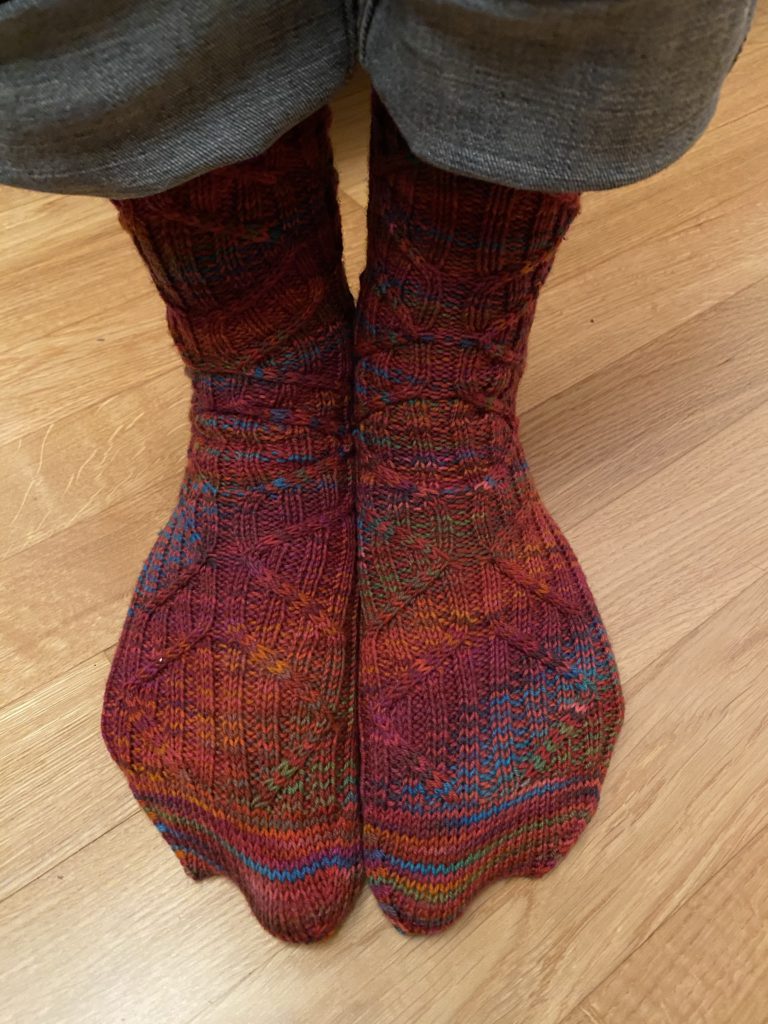
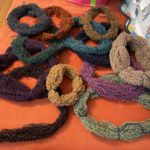
I realised recently that, while I’ve been having a lot of fun streaming my knitting on Twitch, I’ve been pretty lax at actually documenting it on Ravelry and the blog. I’ve completed two big projects since I’ve been in Germany, but unless you follow me on Instagram or Twitter, you probably haven’t seen them.
Lanatus

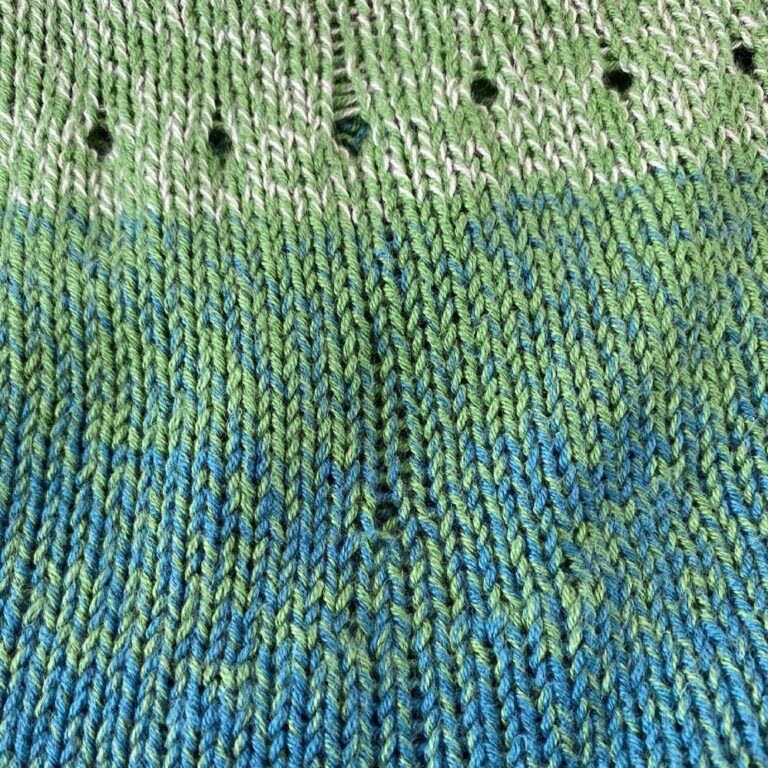
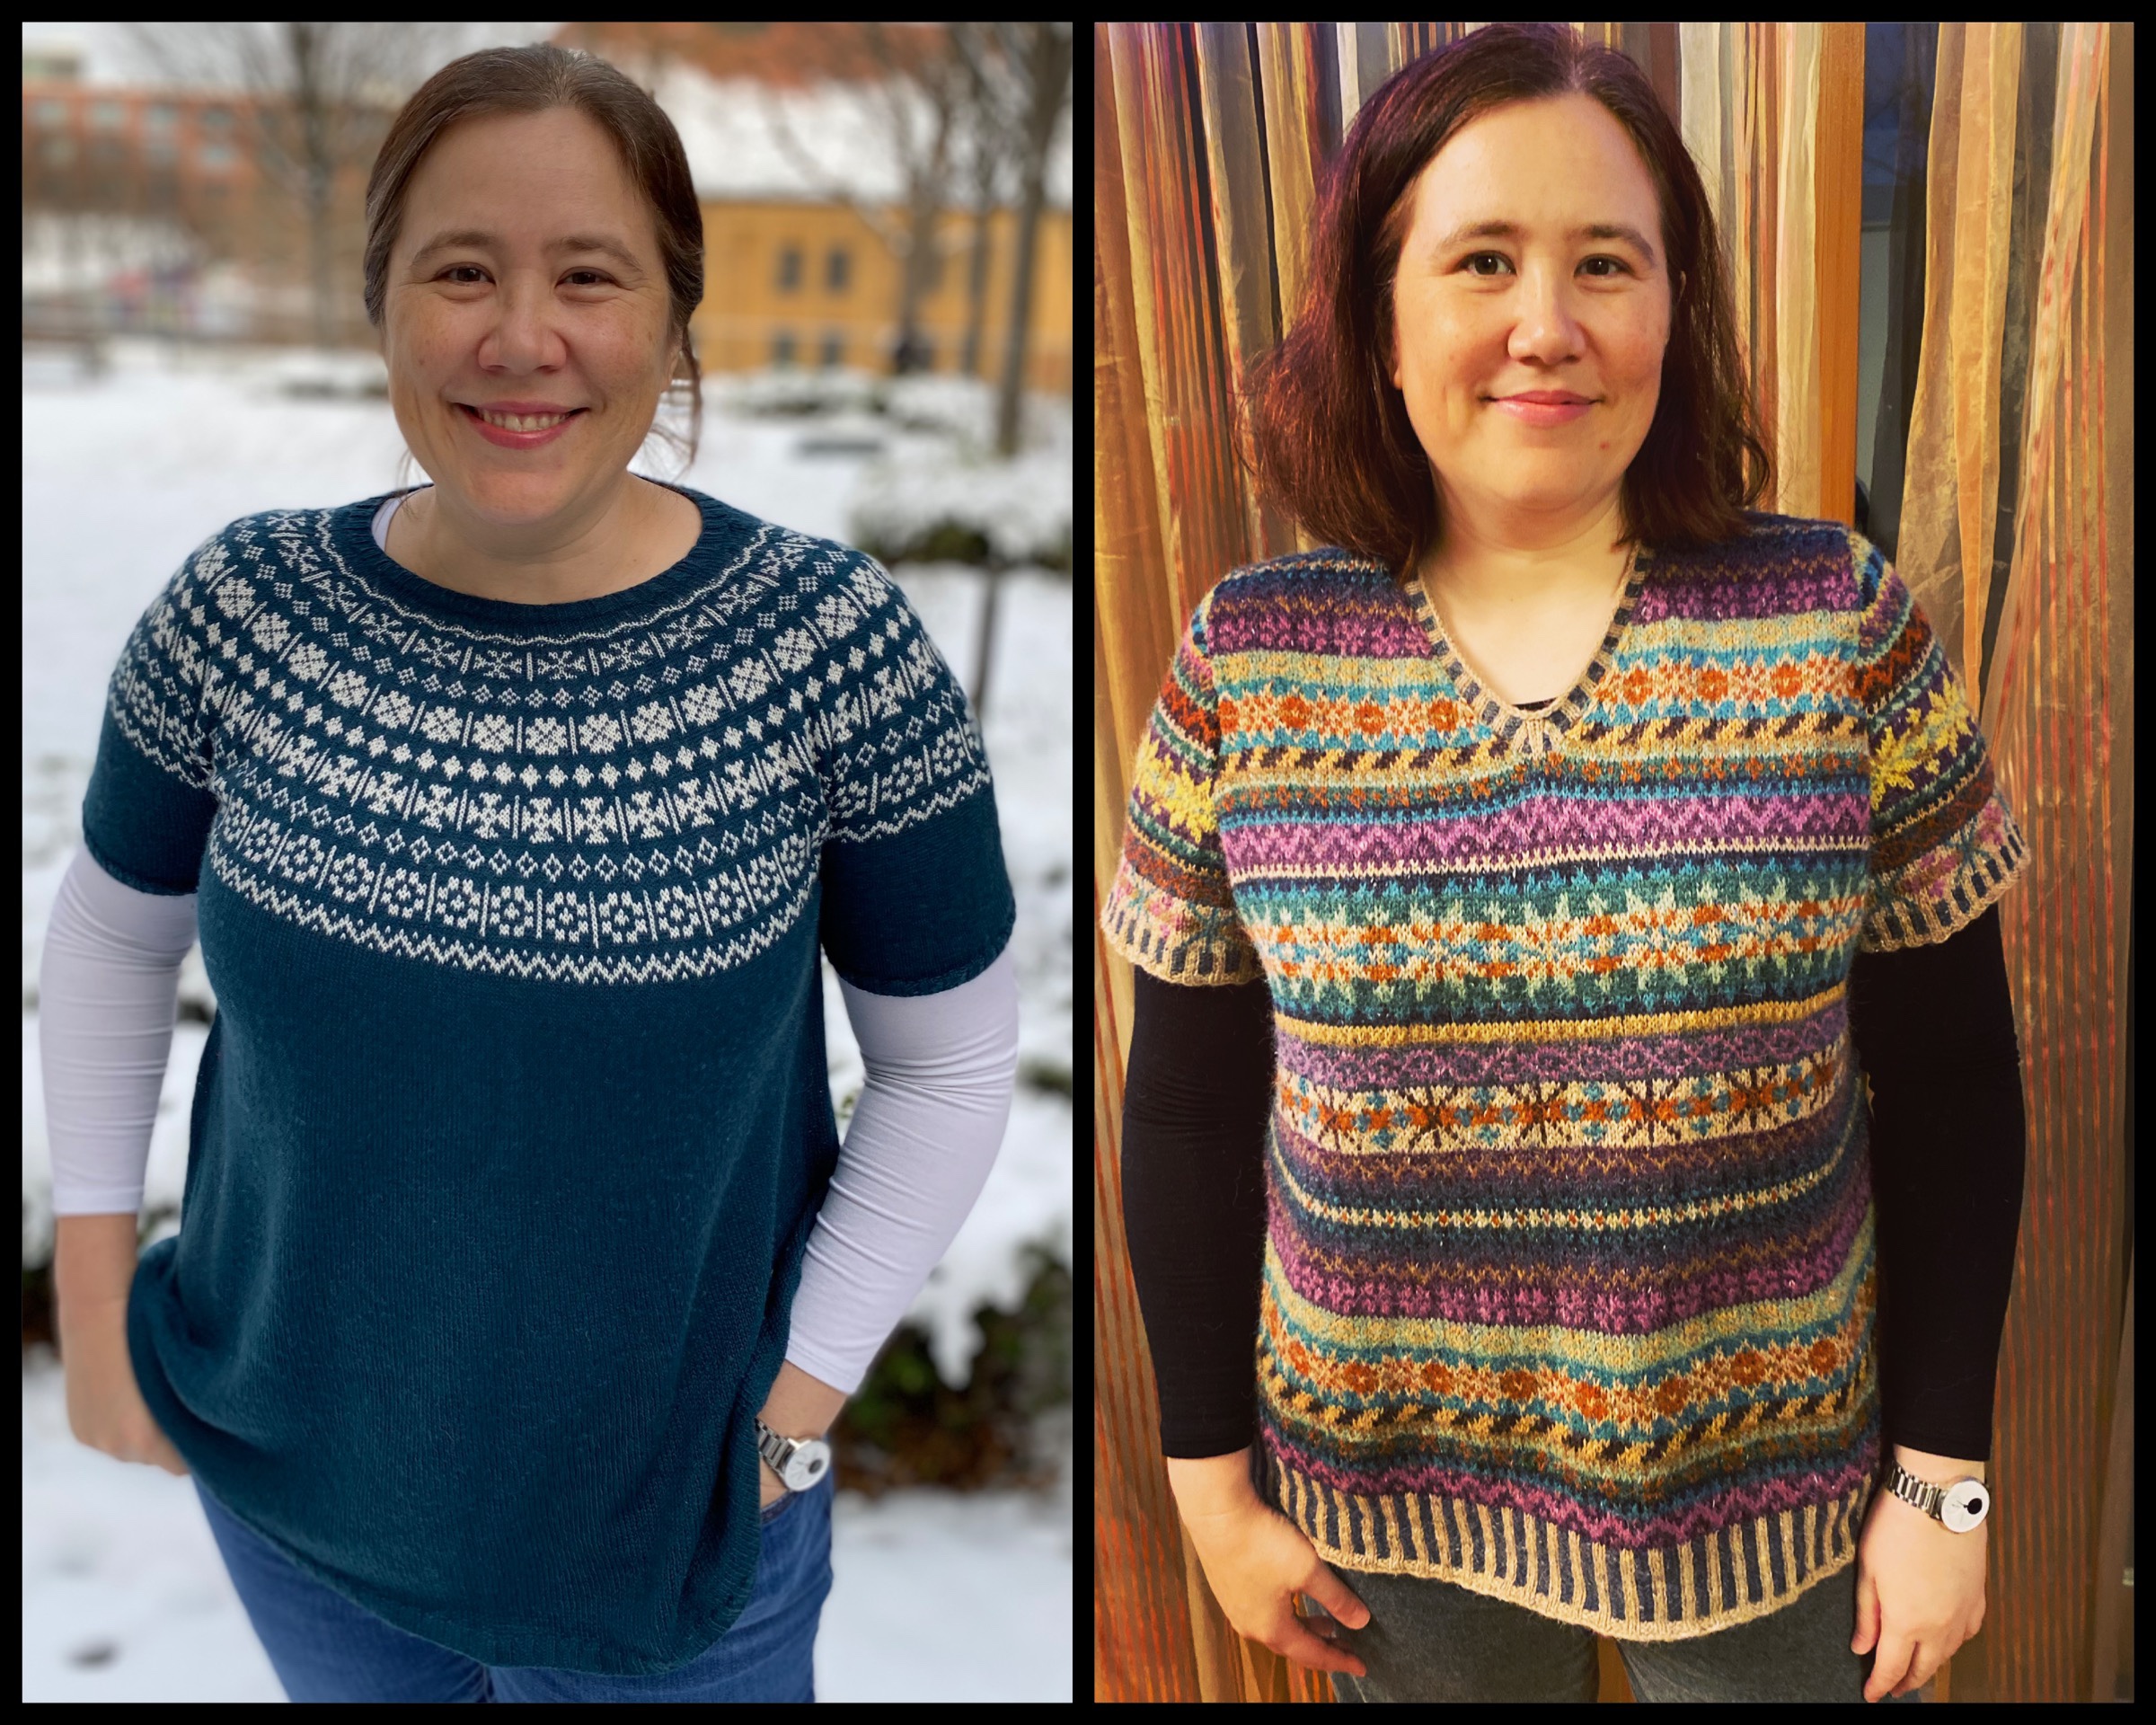
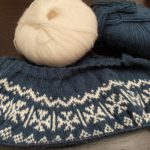
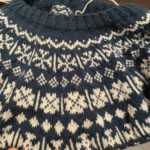
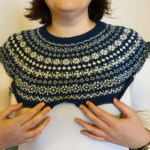
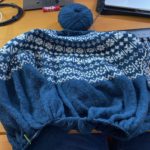
I learned about Susan Crawford’s new book Evolution through Twitter last year (there was some kerfuffle about her not being able to advertise it because of the name), and I immediately fell in love with the Lanatus pullover. My version is knitted out of Lana Grossa Cool Wool Fine in a beautiful teal blue and white. It’s knitted from the top down, and my first attempt at the fairisle yoke had to be frogged when I realised I wasn’t spacing the motifs out correctly. It was a fun knit though, and the yoke ended up beautiful. The only real modification I made was to knit the body a fair bit longer because of my height. Slogging through the endless stocking stitch body was a pain after the fun of the yoke, but I’m so happy how it turned out! I love wearing it. The wool is beautifully soft and not itchy at all. I’ve been wearing it over a long-sleeve tee, but I think in spring I could wear it just on its own. More details over on Ravelry…


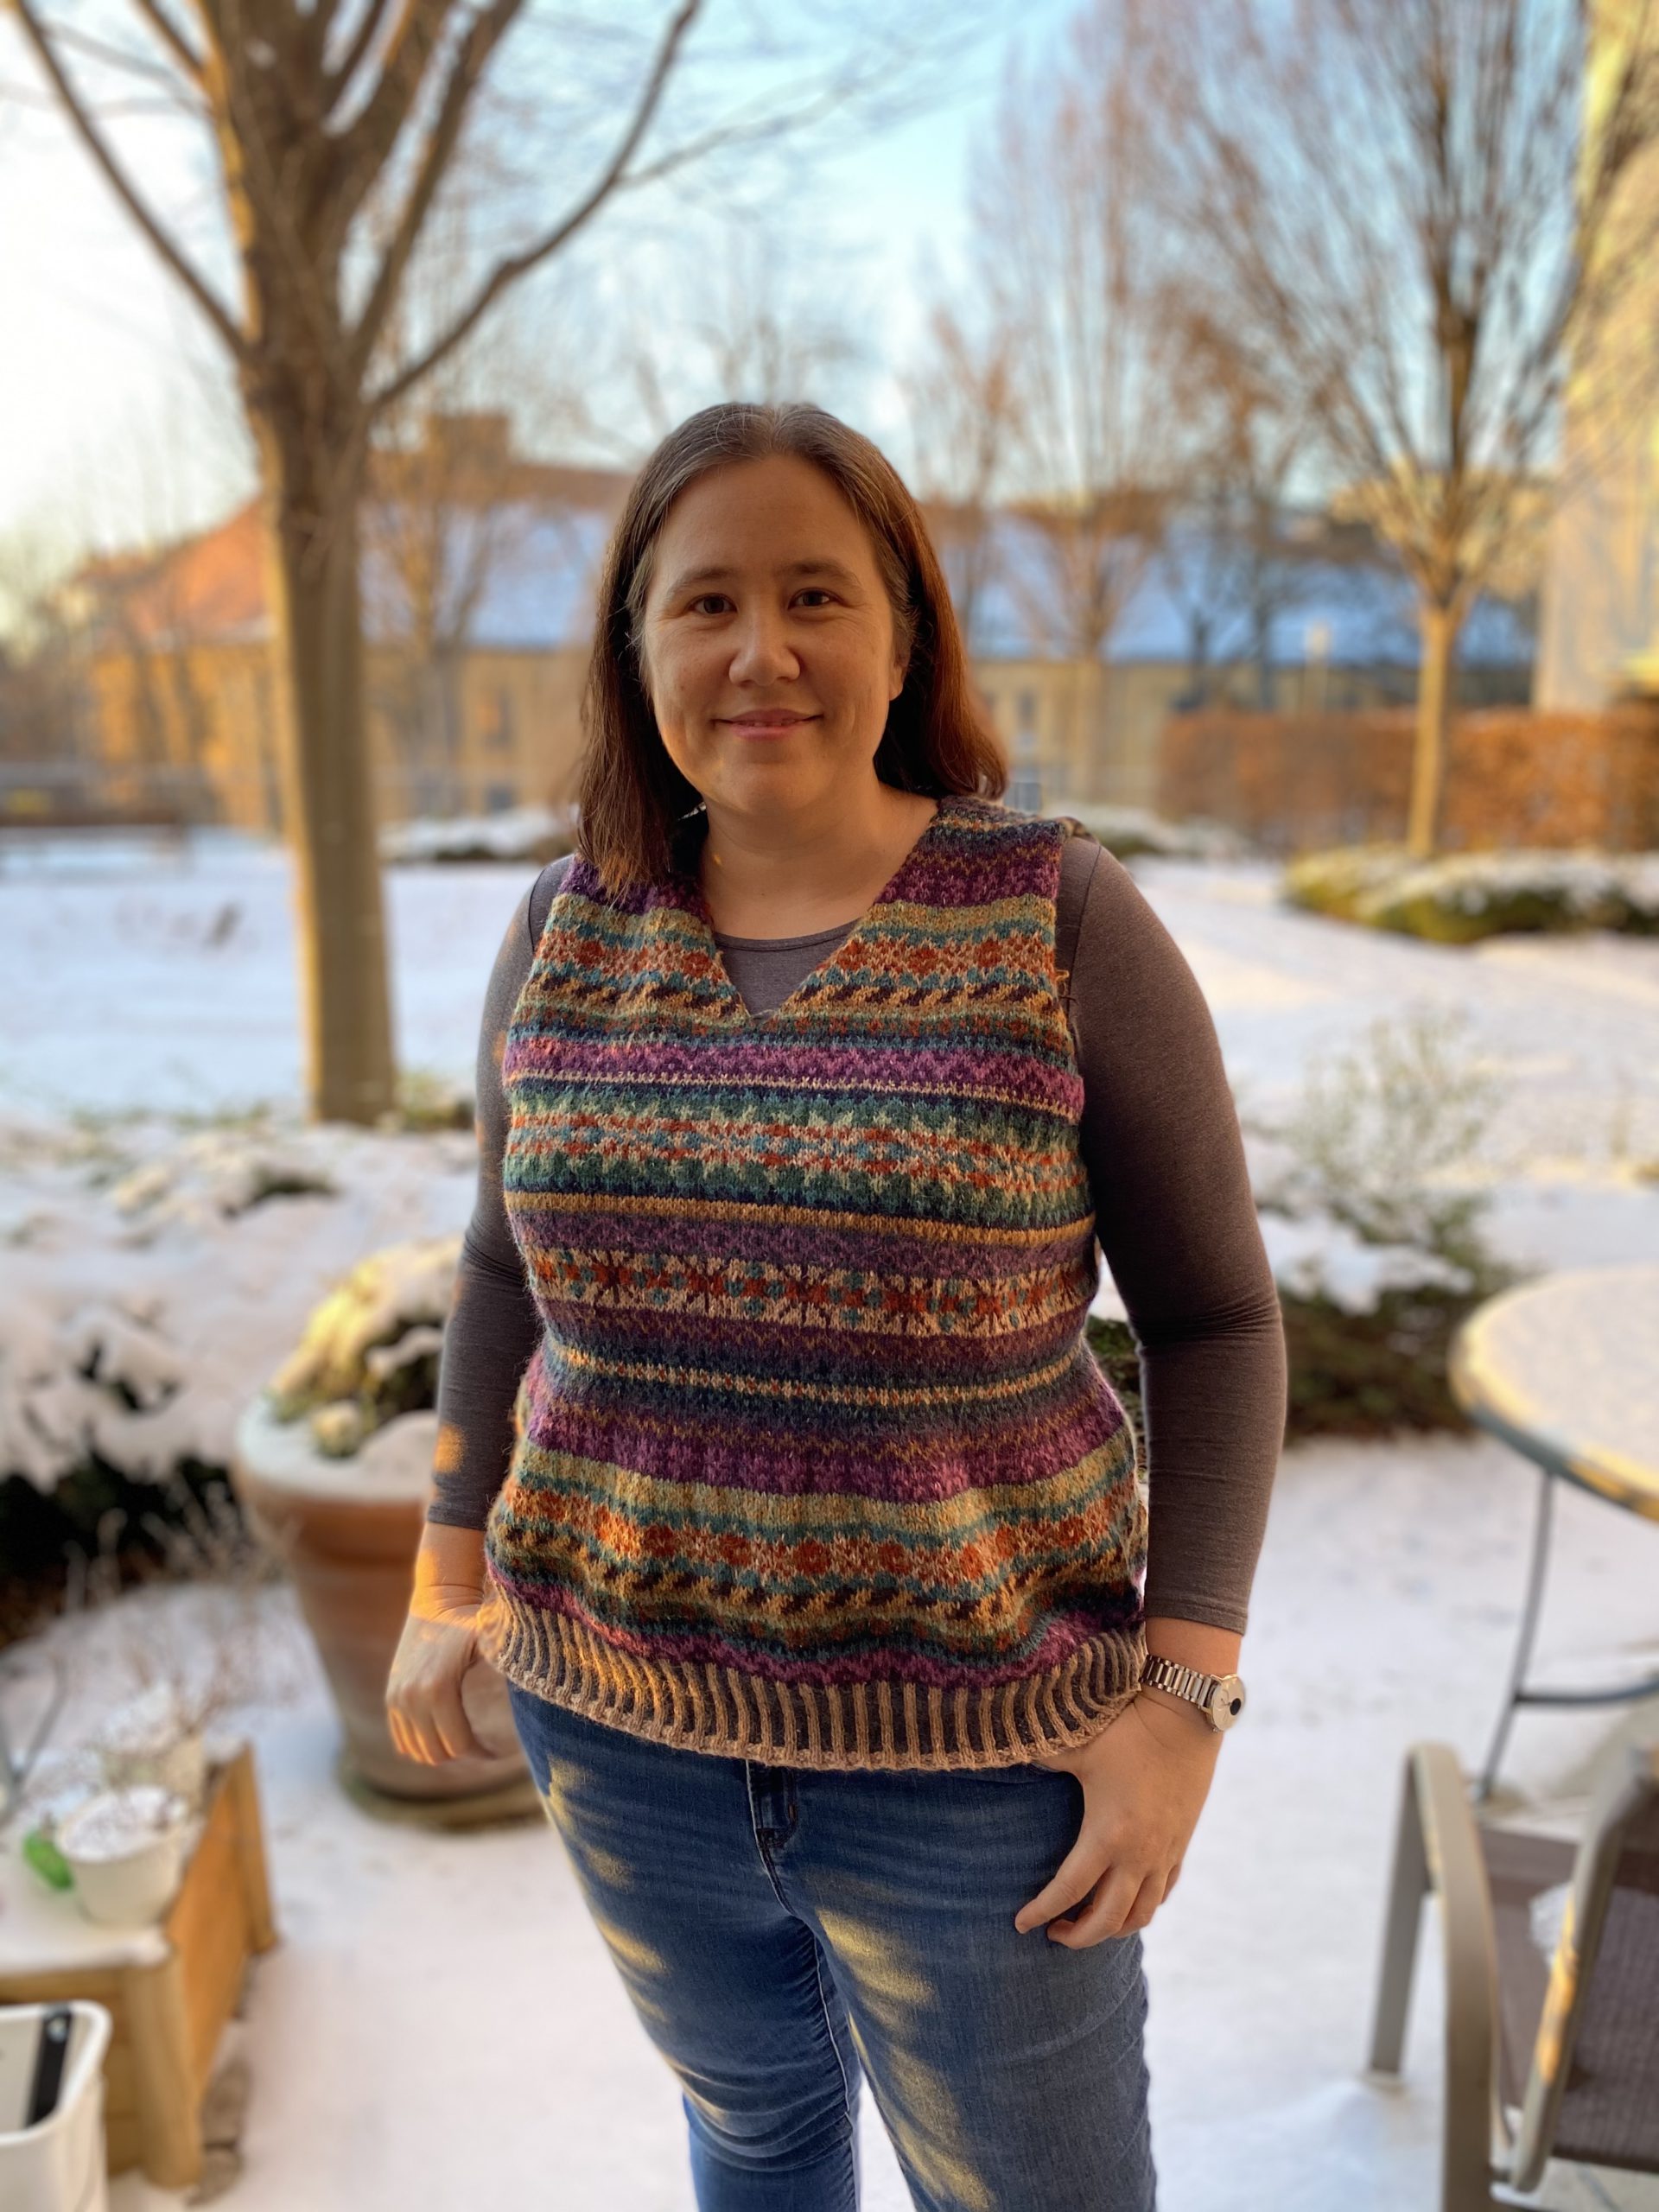
Orkney (Vee)
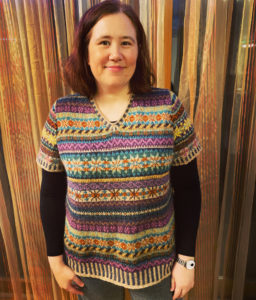
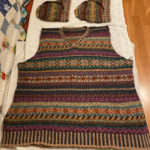
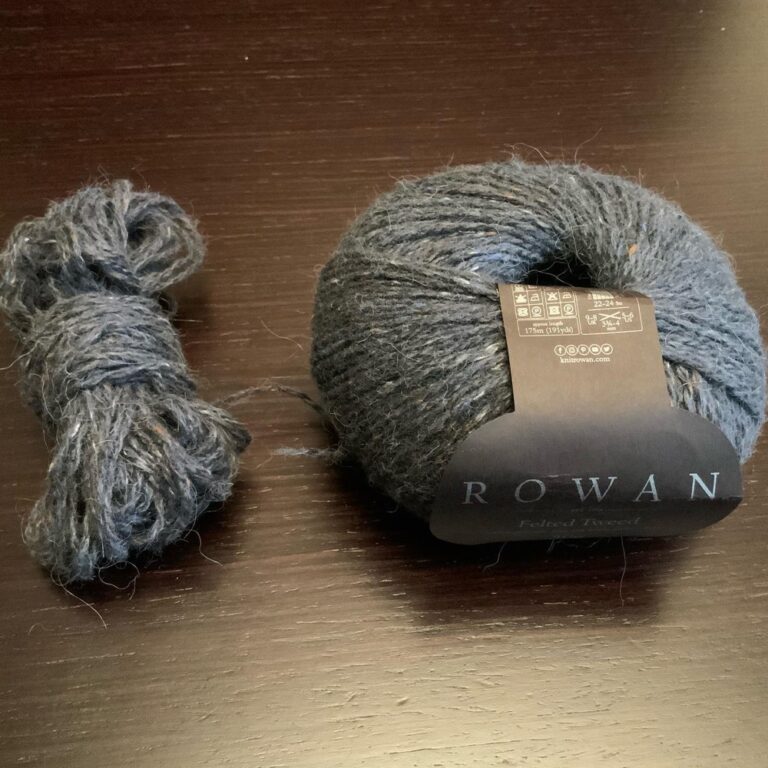
This one is epic. I can’t remember where I first encountered Rowan’s Orkney by Marie Wallin (probably from Donna since it’s in her queue), but I know I bought the wool at Calico and Ivy’s closing down sale in March 2013 and started knitting the pattern sometime that year. My plan was to knit it as a cardigan, but modify the pattern to be knitted entirely in the round with steeks for the front opening and sleeves. It was looking a bit small as I knitted it, but in a fit of stubbornness and denial I knitted it all the way up to the shoulders before finally accepting that it was never going to fit me comfortably. Then I discovered the Ravelry comments for the pattern, most of which point out that the tension as stated is just really weird for this yarn. Well, crap. In a fit of pique I stuffed it in a bag and shoved it in the naughty corner, and it sat there for the better part of seven years.
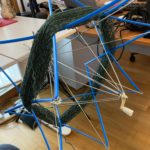
In January 2021, I decided that dealing with Orkney was going to be a New Year’s Resolution. I got it out to double check the sizing, hopeful that somehow it had either grown over the years or I had shrunk. I even tried putting it on waste yarn to pull over my head and down to my waist to prove it had way less ease than I’m comfortable wearing. Well, nothing to do but to frog. I frogged the whole thing. The dust on it actually triggered an allergy attack! Then I skeined up all the wool (with the help of the Snook), washed it, dried it, and rewound it into balls. (You can watch the ball winding on YouTube!) Then it was time to start over.

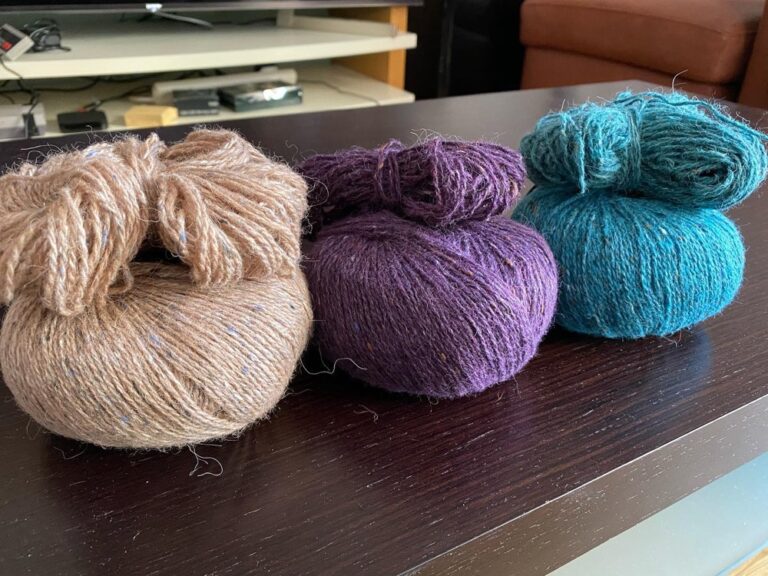
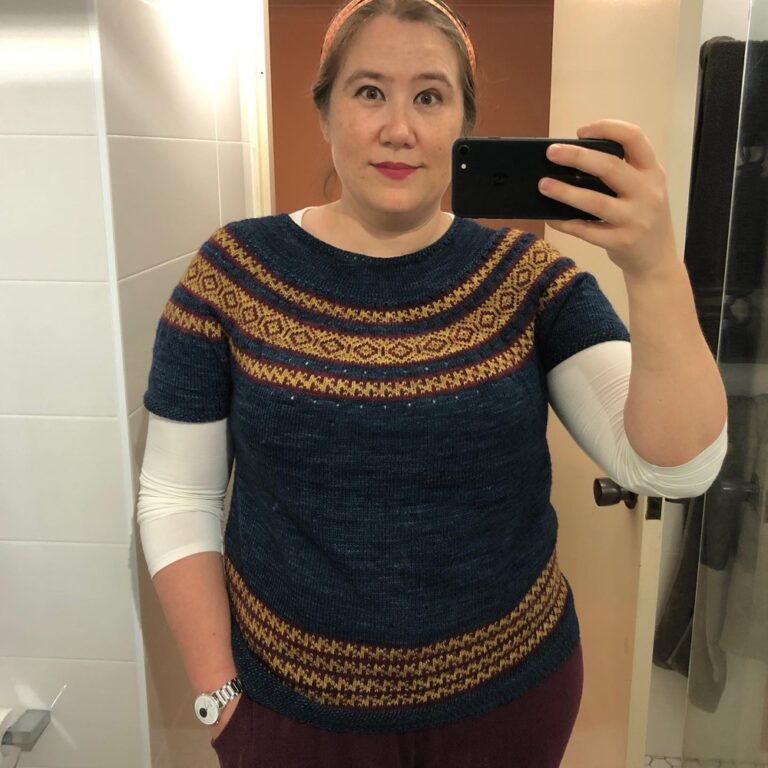
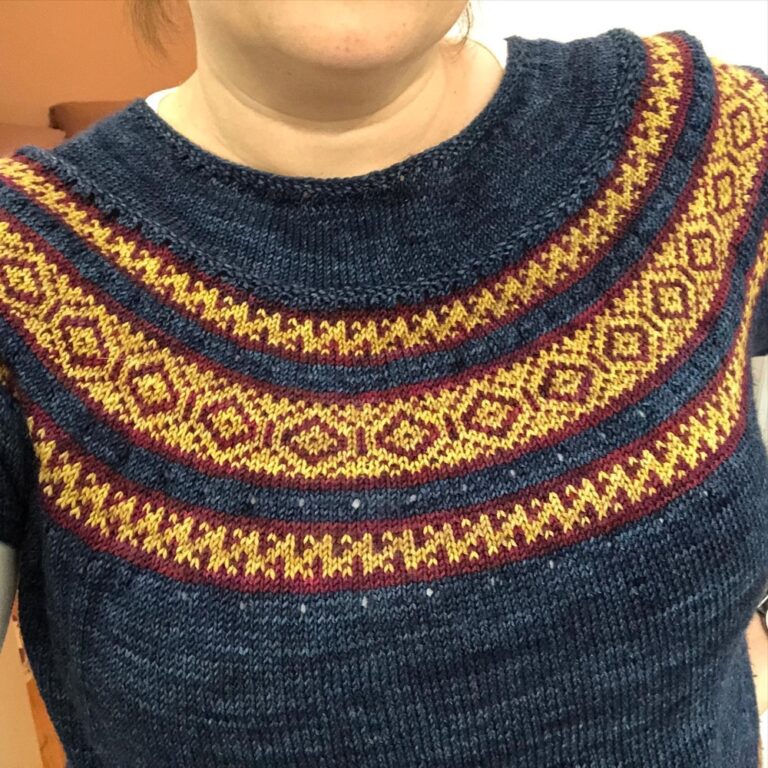
This time I had a think about the garments I actually like wearing. I don’t wear twee little cardigans. So instead I decided to knit it as a pullover. I still wanted to knit it in the round, so I spent some serious time working out the maths so that all the patterns would repeat smoothly all the way around. It turns out that 336 stitches would allow every motif to repeat evenly* and, with my tension, would come out to the size I wanted. It was also close enough to one of the pattern sizes that I could still use the sleeve cap shaping. Therefore I got to work knitting the body in the round over 336 stitches. I started with a larger needle but dropped to a smaller about halfway along, figuring that would give it some shaping and a little extra room around the hips.
*There is a single motif that is 10 stitches wide – a 3-row motif of x’s and diamonds. I added two stitches to it – a little peerie dot in the middle of each gap. That got me to 12, which fits perfectly into 336. Yay!
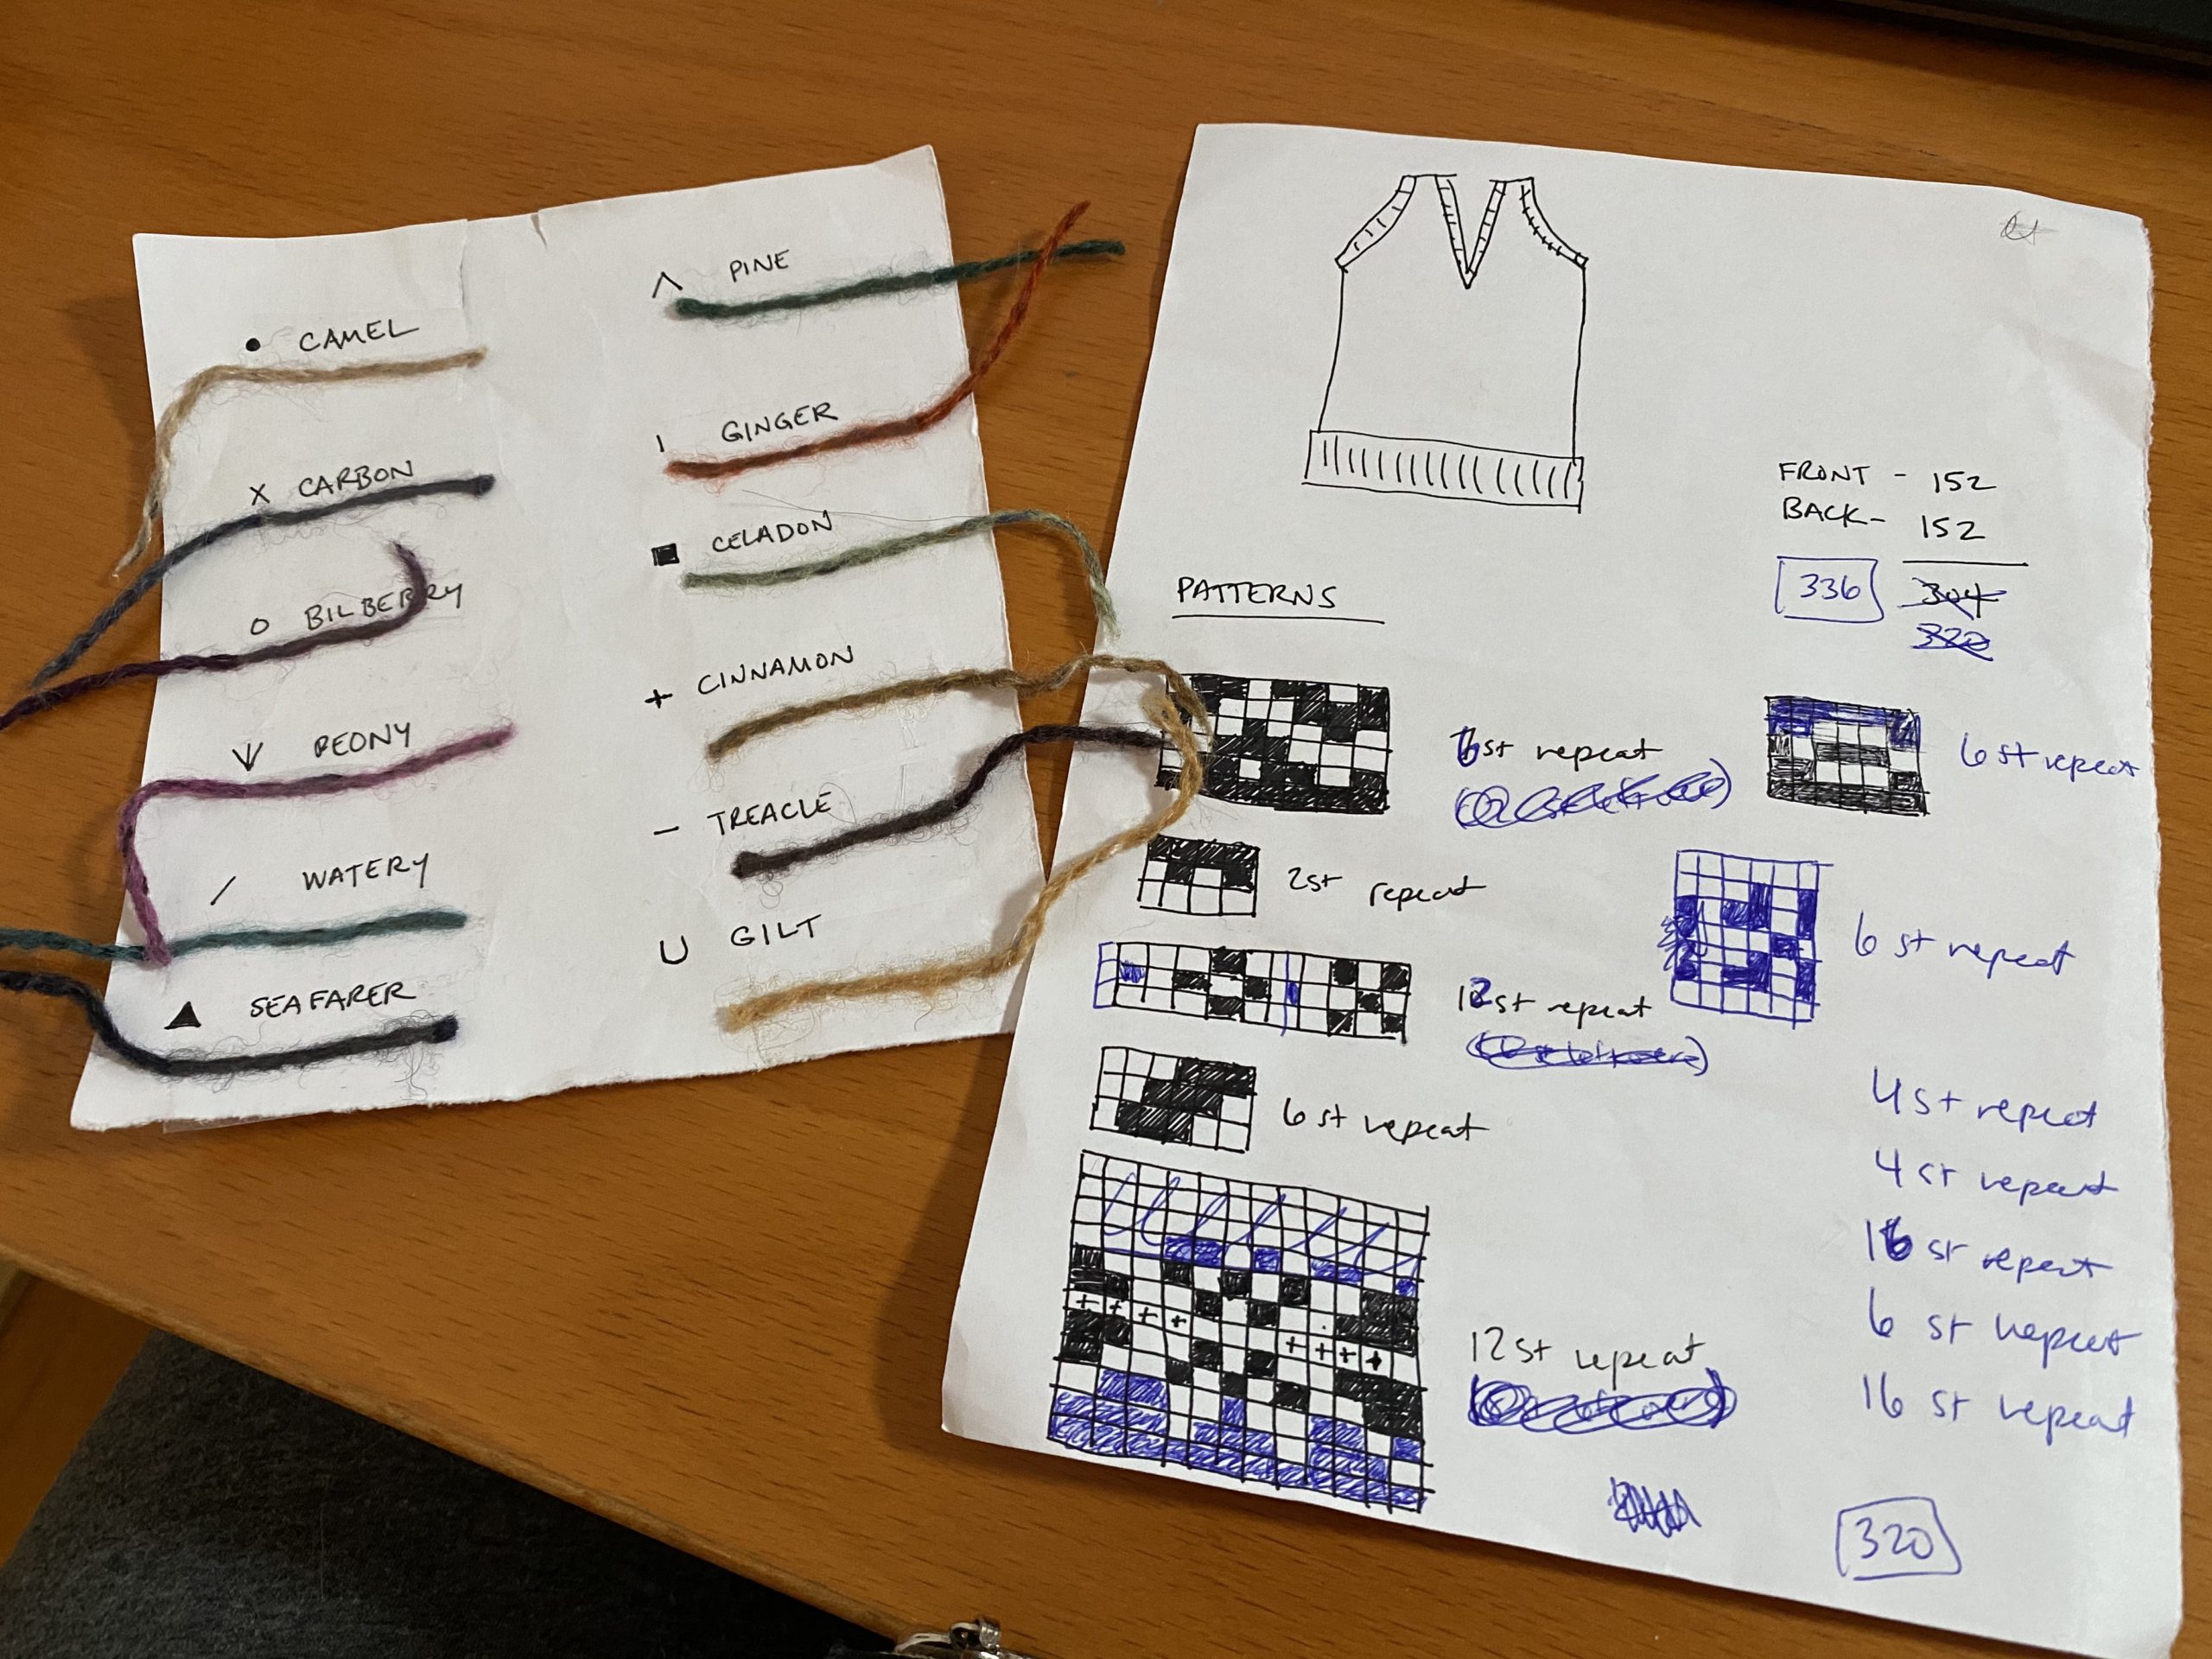
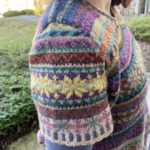
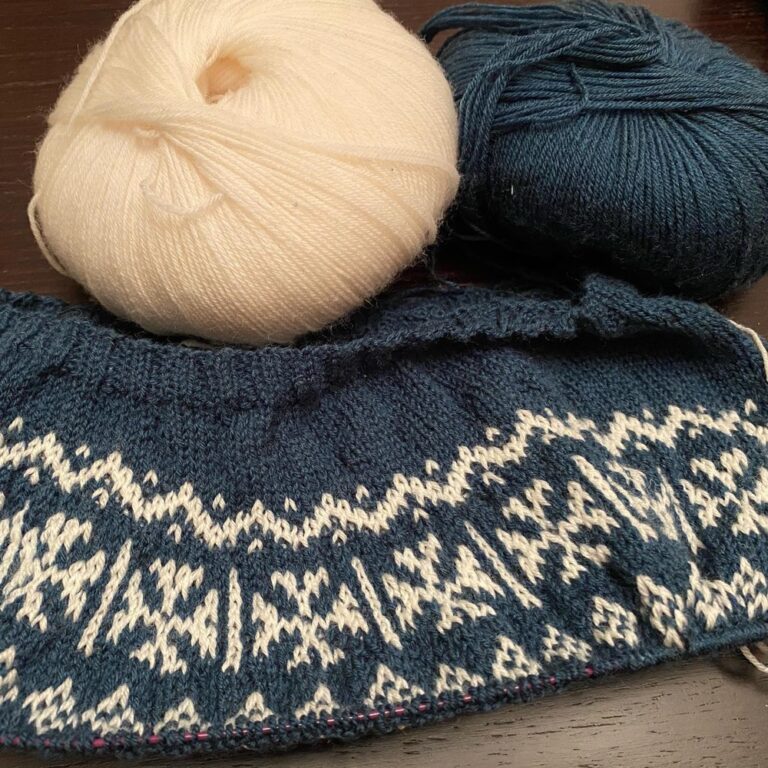
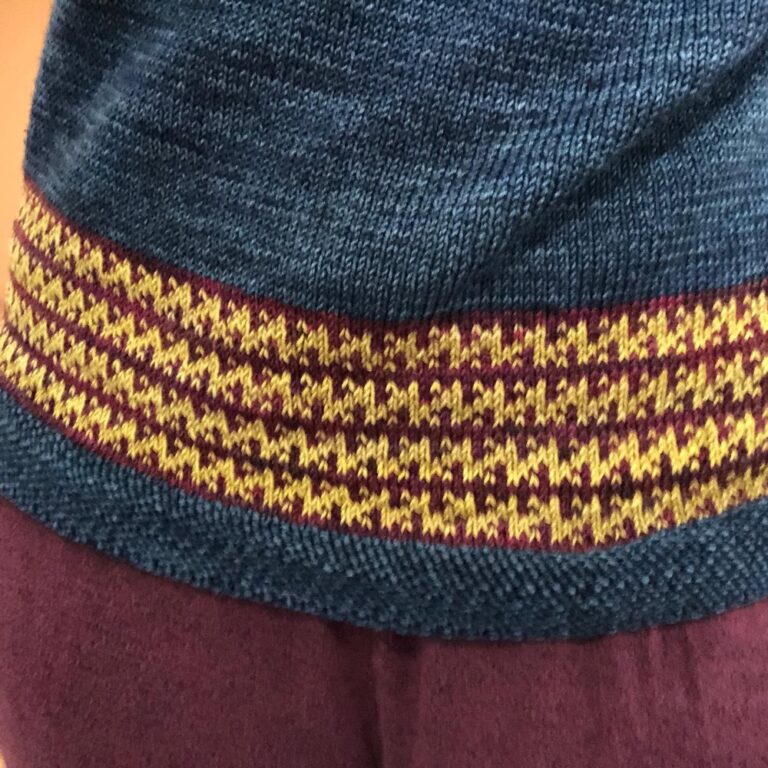
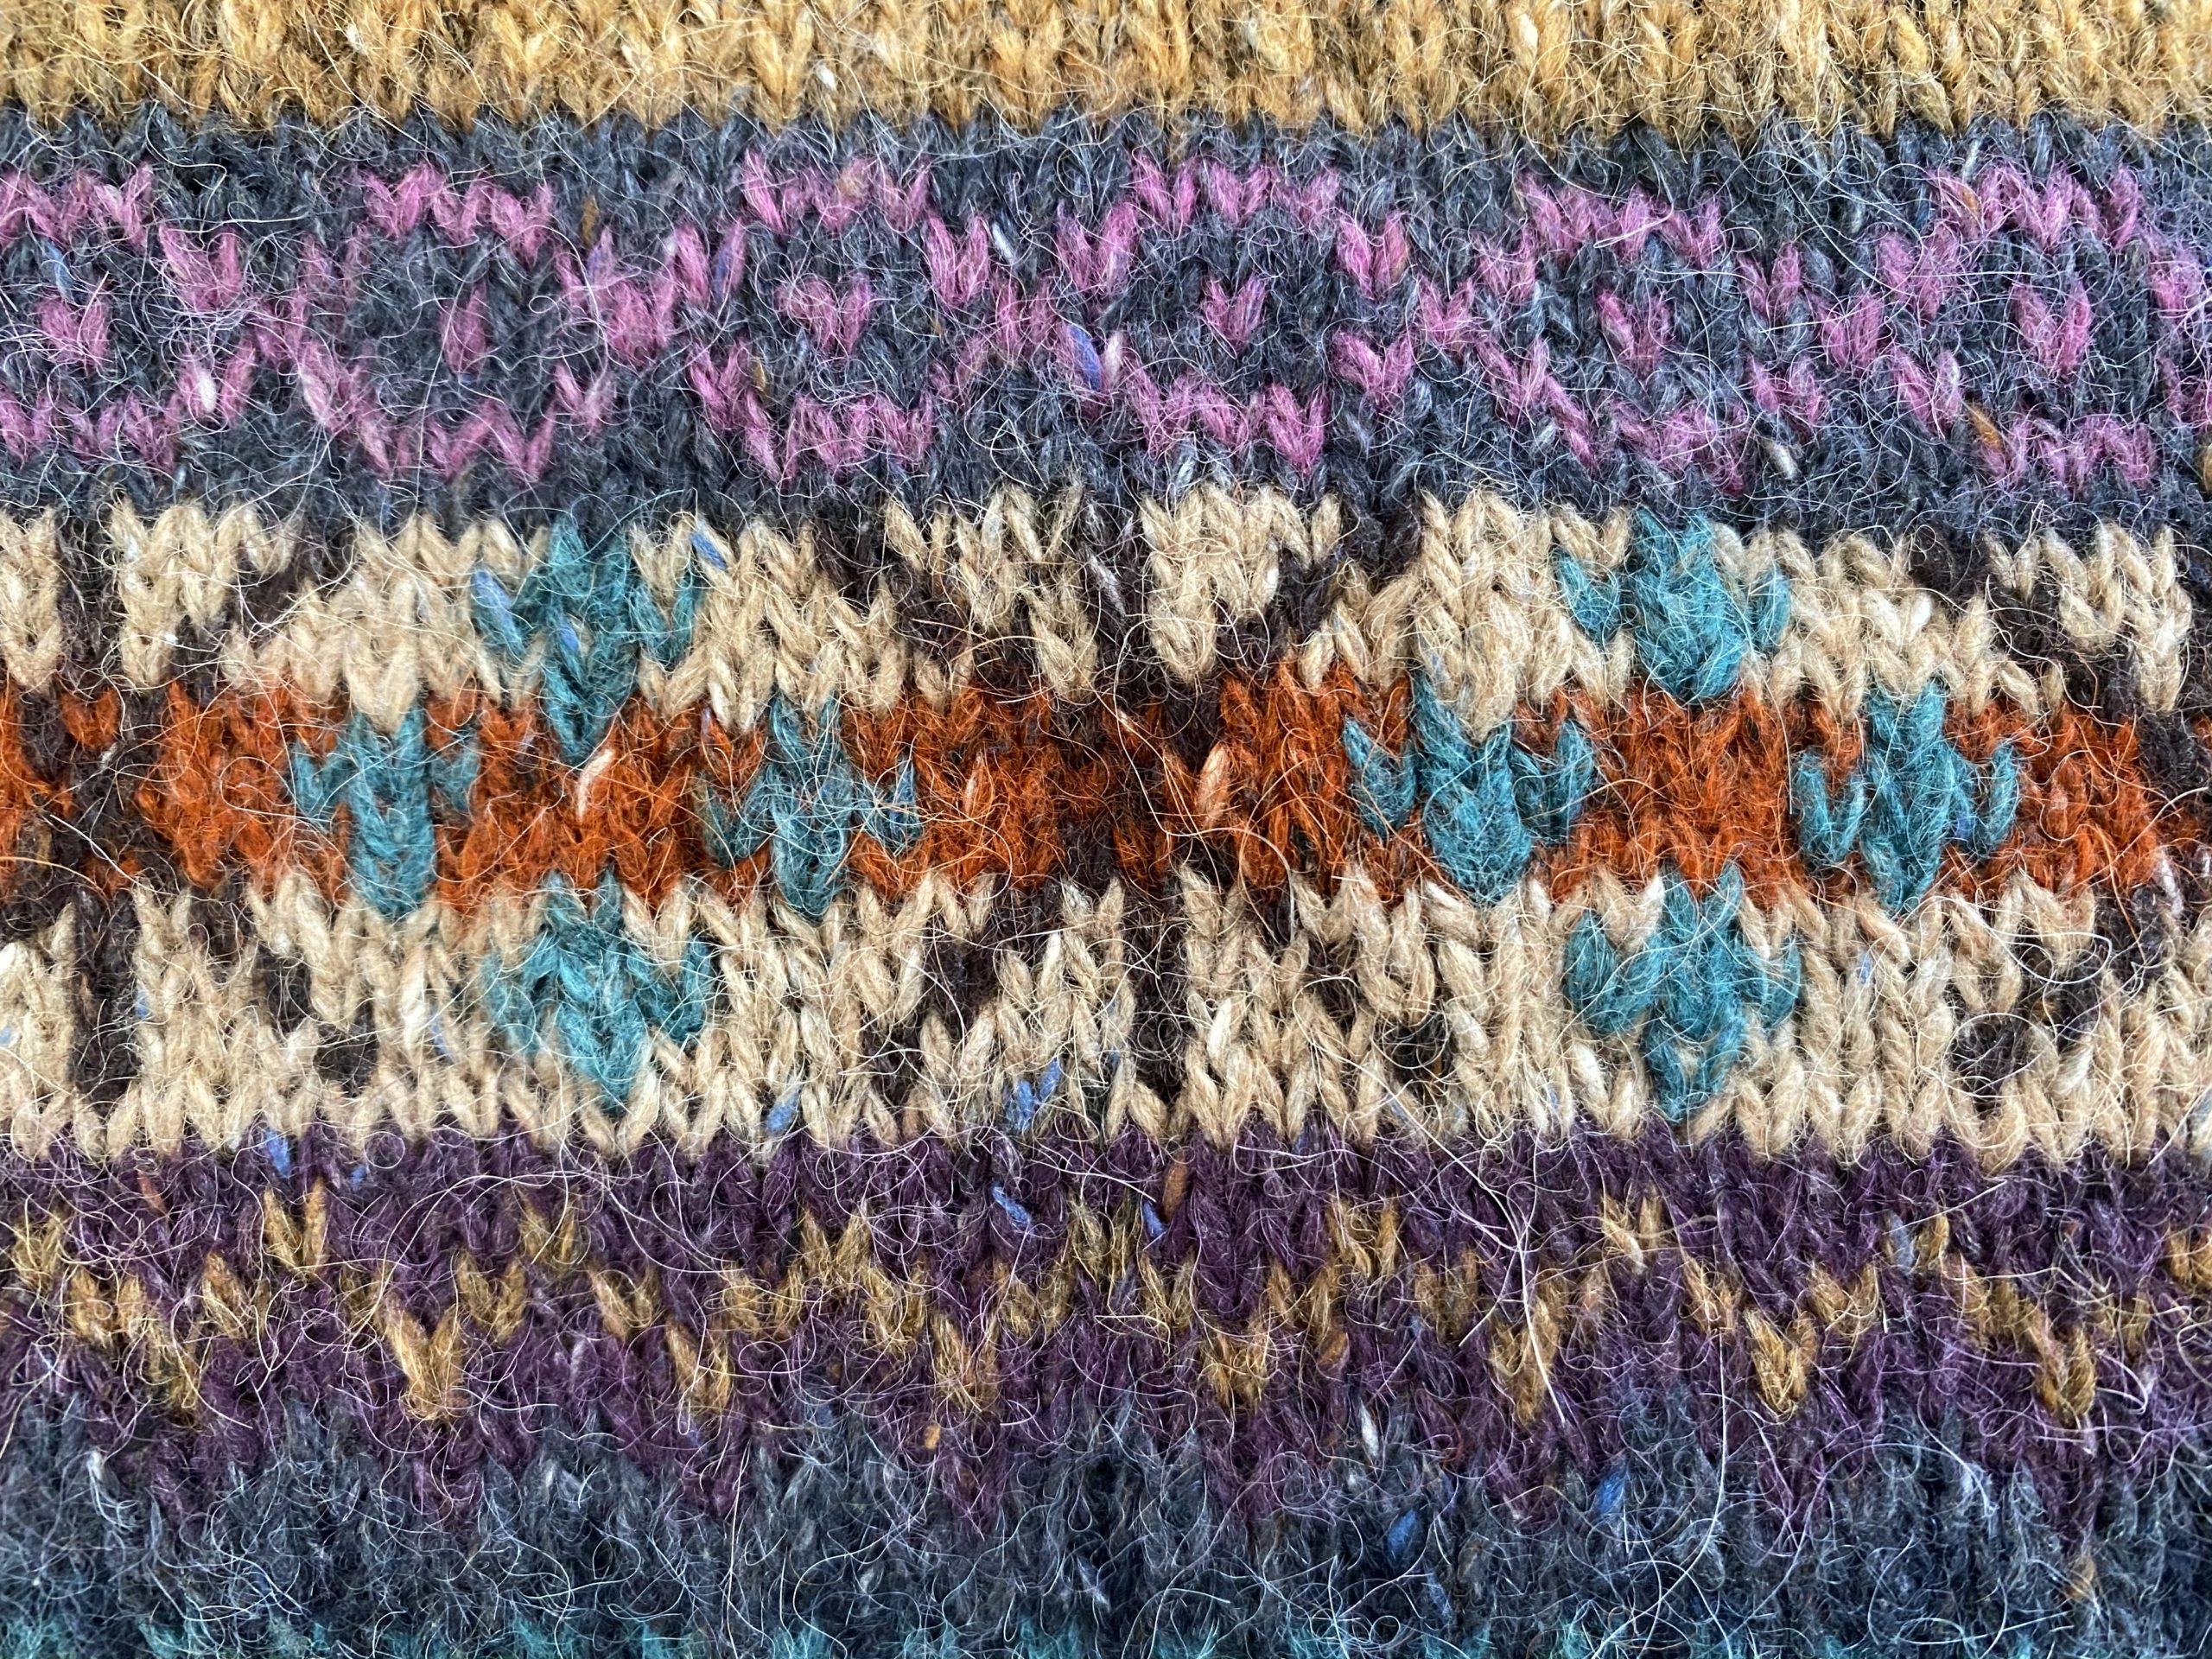
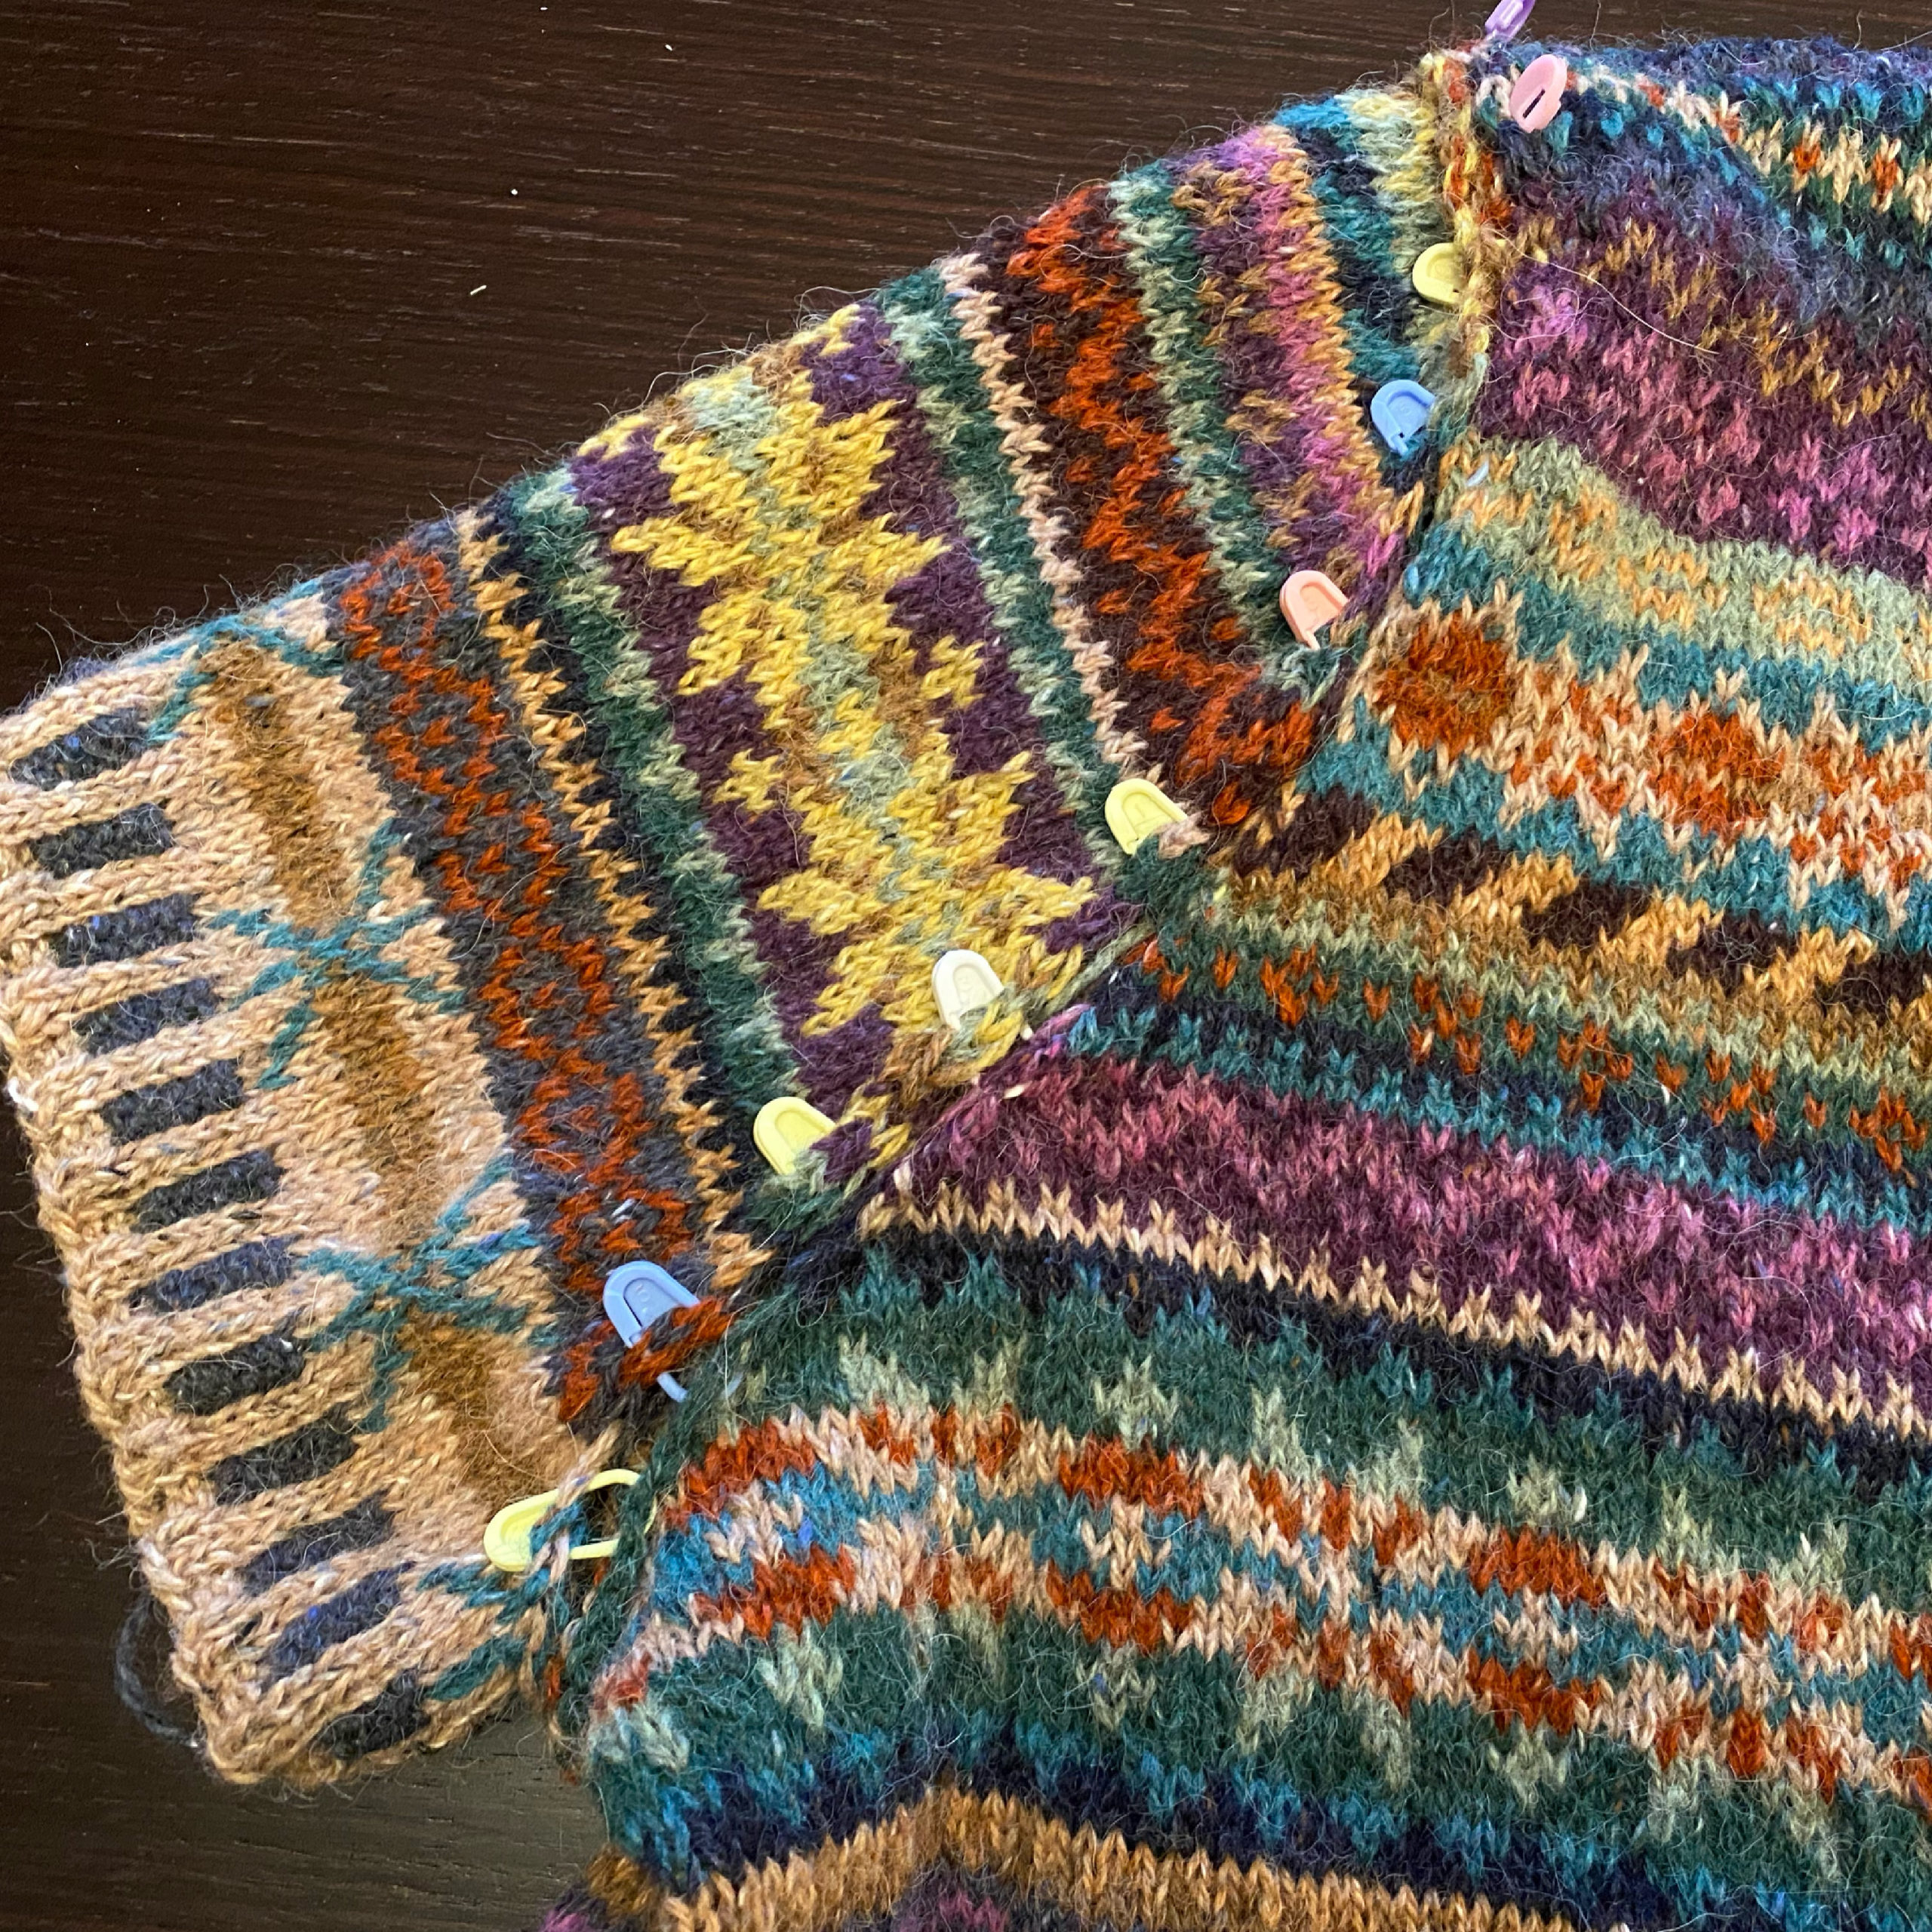
The only bit of the body that gave me any trouble was the motif across the middle with brown X’s and aqua diamonds on top of a series of camel and red stripes. (See image below.) This motif requires you to juggle THREE colours in a single row. What a pain! I actually tried it out; I’m a pretty experienced fairisle knitter and I have no problem carrying one colour in each hand. But adding a third one in there while avoiding getting them all twisted… was really torturous. So I undid that part and then had a brainwave: I could embroider the aqua bits on afterwards! So I knitted that motif with just two colours per row, leaving off the little aqua diamonds, and then went back afterwards and used duplicate stitch to add them. (This motif also appears on the sleeves, so I did the same thing there.) This is much easier and faster, and you can barely tell the difference!
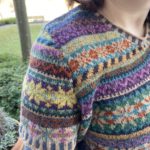
Once I got to the armholes, I switched to knitting the front and back separately. Of course, this required me to knit flat fairisle, so I had to deal with purl rows. It was tricky and slow going, but I got there. I did the back first because I hadn’t yet decided what the front neckline would be. Rather than follow the pattern’s instructions for a traditional “stairstep” shoulder shaping, I modified the pattern to use short rows and left the stitches live for a three-needle bind off.
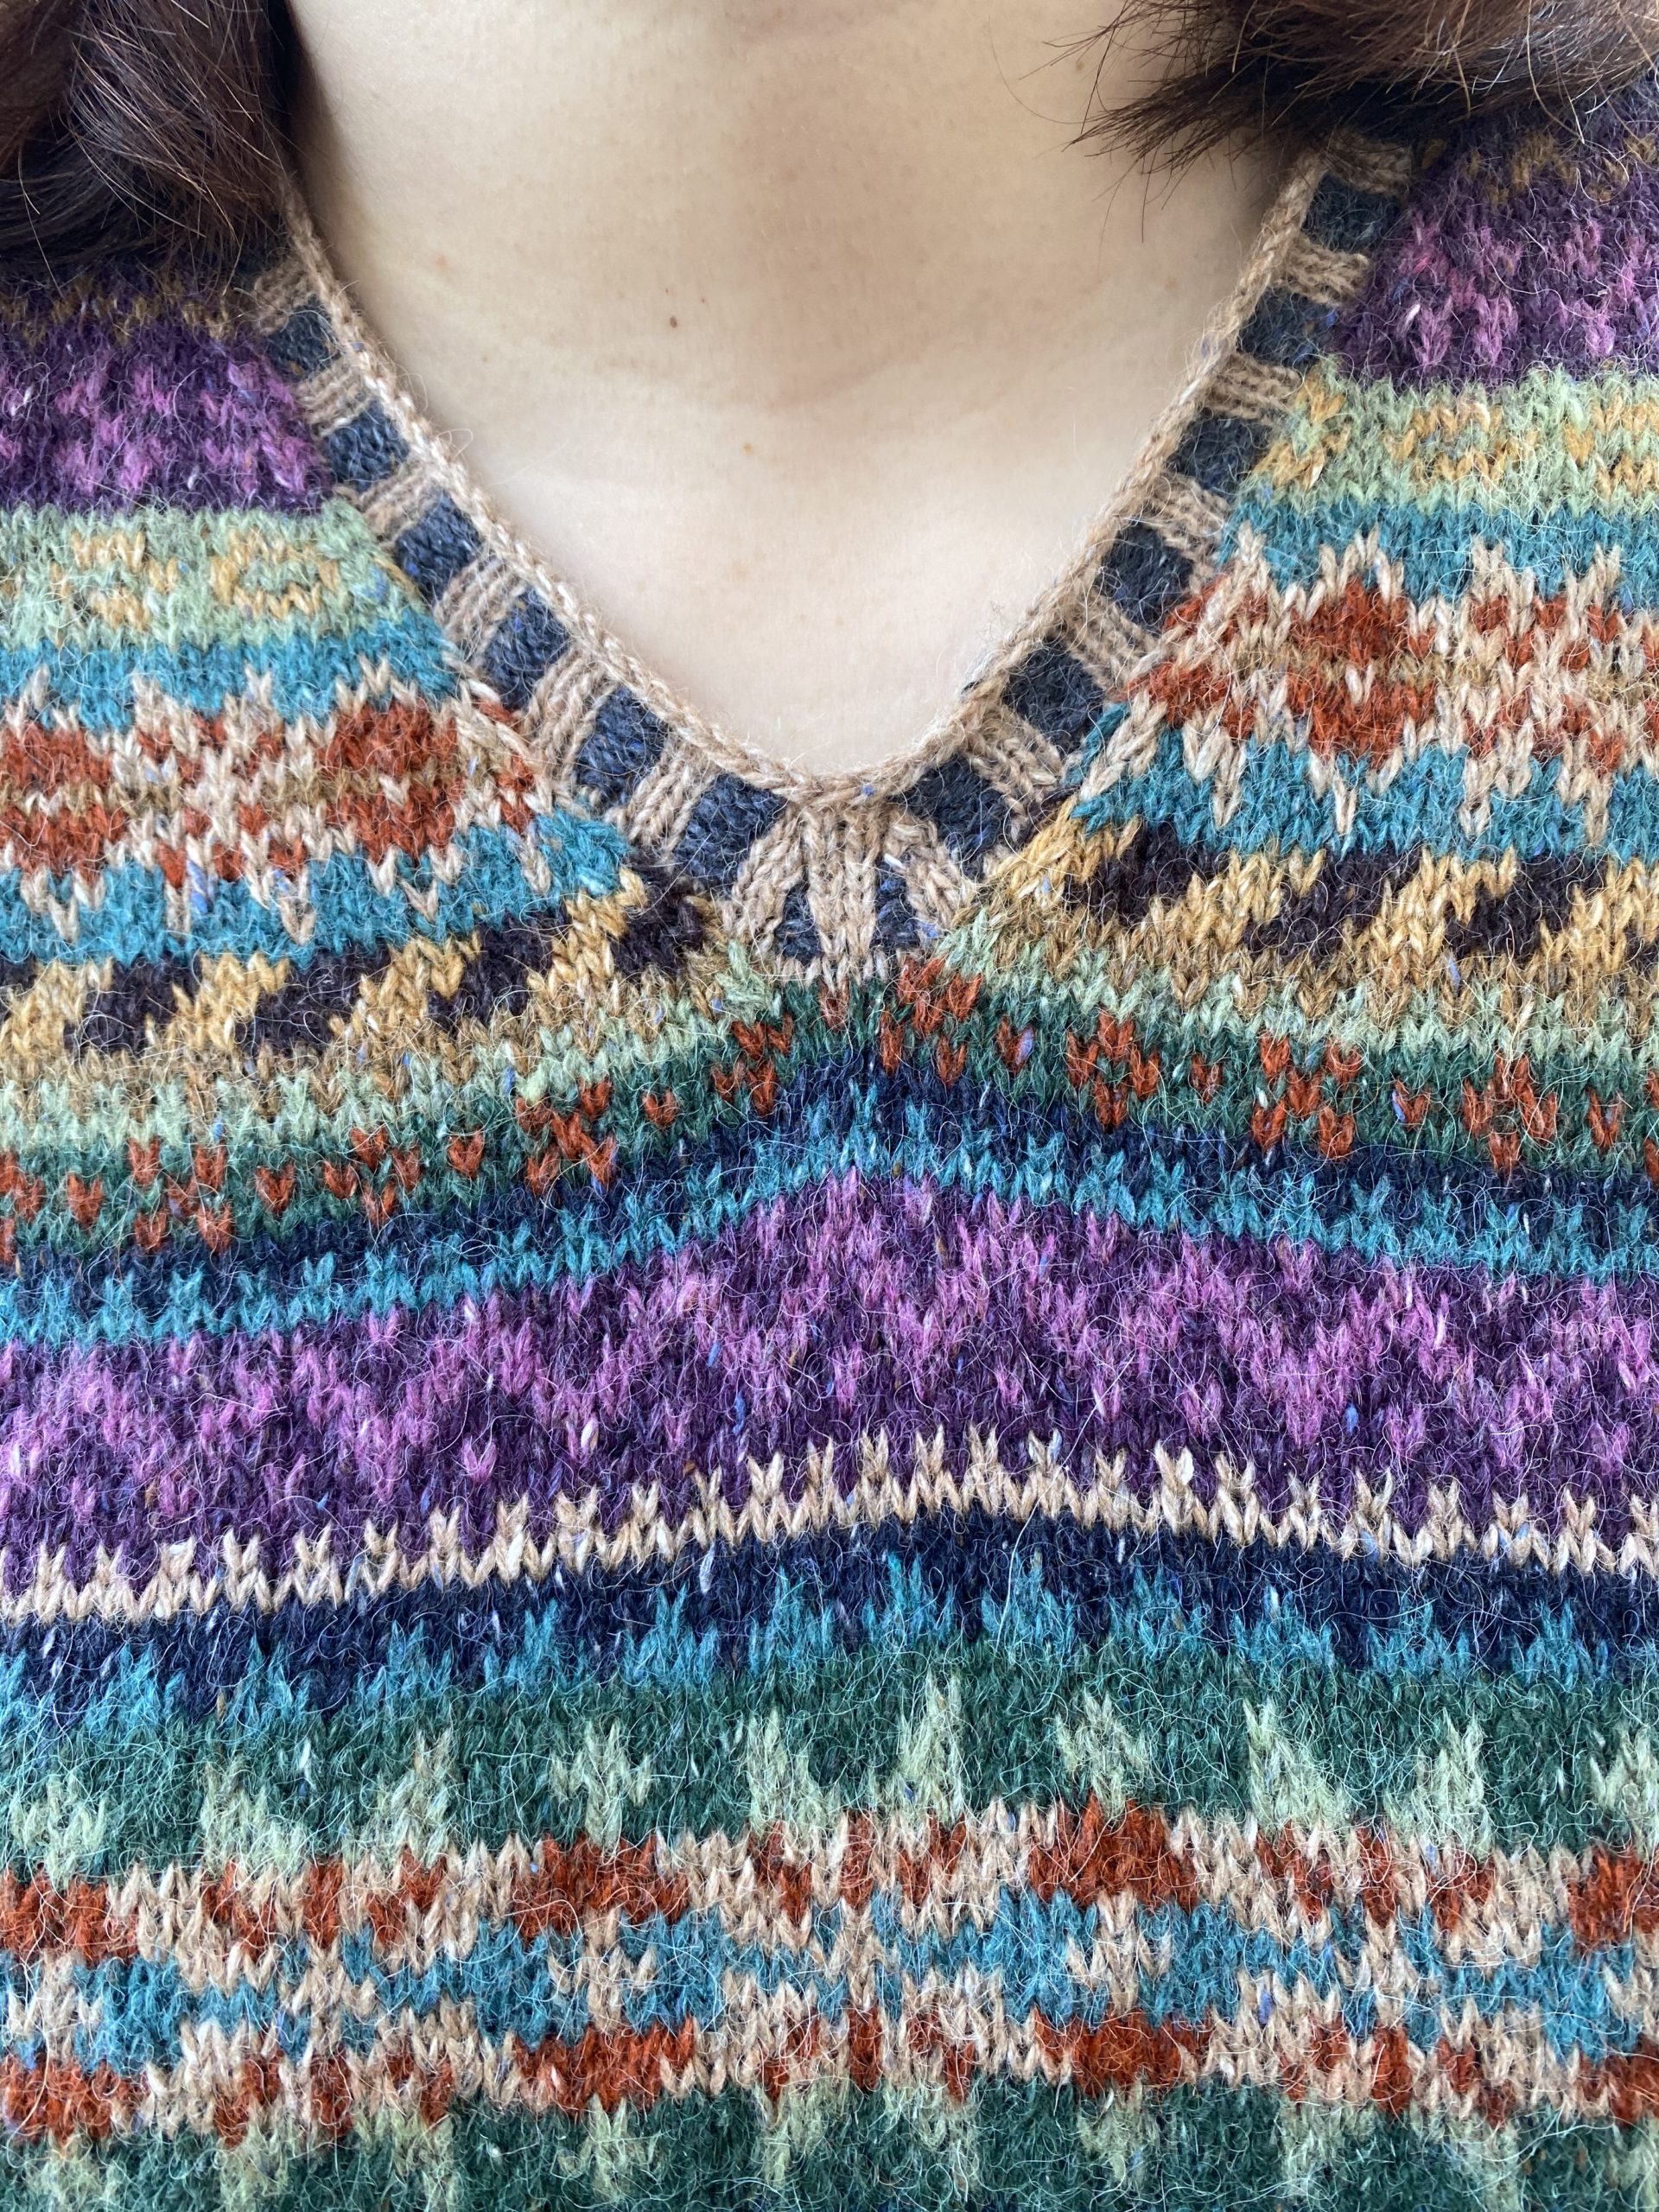
For the front, I decided to go with a vee neck. (Partly this was driven by the fact that I do find Rowan Felted Tweed a bit itchy, and I didn’t want it right up against my neck.) I found a vee-neck pattern in a similar weight wool and size, and used that schematic and shaping to work out when to start the vee. I basically did a decrease on every right-side row until the point where the front shoulder width matched the back. Again, I did the short-row shaping rather than cast off stitches, and I then joined the front to the back with a three-needle bind off. Here’s what it looked like at that point…
Then I had to decide sleeves. Because of the itchiness factor, I knew I’d be wearing this over a long sleeve tee so I thought short sleeves might be cute. The plan was to use the sleeve cap shaping from the pattern and then just add on a little extra length for the ribbed cuff. However, I ended up having to go through several iterations to modify this. Again, the weird tension of the original pattern meant that my sleeve cap was too short for the sleeve opening, so I reworked it a few times to add extra rows for the necessary height. I also ended up increasing the number of stitches to 108. I also tried to center the larger motifs on the sleeves so it would look nicer. Once I finally got a version that fit, I pinned it onto the garment and realised I had another problem…
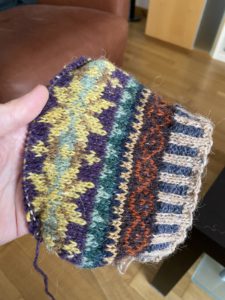
The sleeves use the same motifs as the body, but knitted in different colourways. When I pinned on my sleeve, I realised that they were too close, with a given motif on the sleeve almost next to the same motif on the body. I figured that for the contrast to work, it really needed to look more deliberate. So I again frogged the sleeve and started over, this time starting with a different point on the chart so that they didn’t line up so closely. Much better!
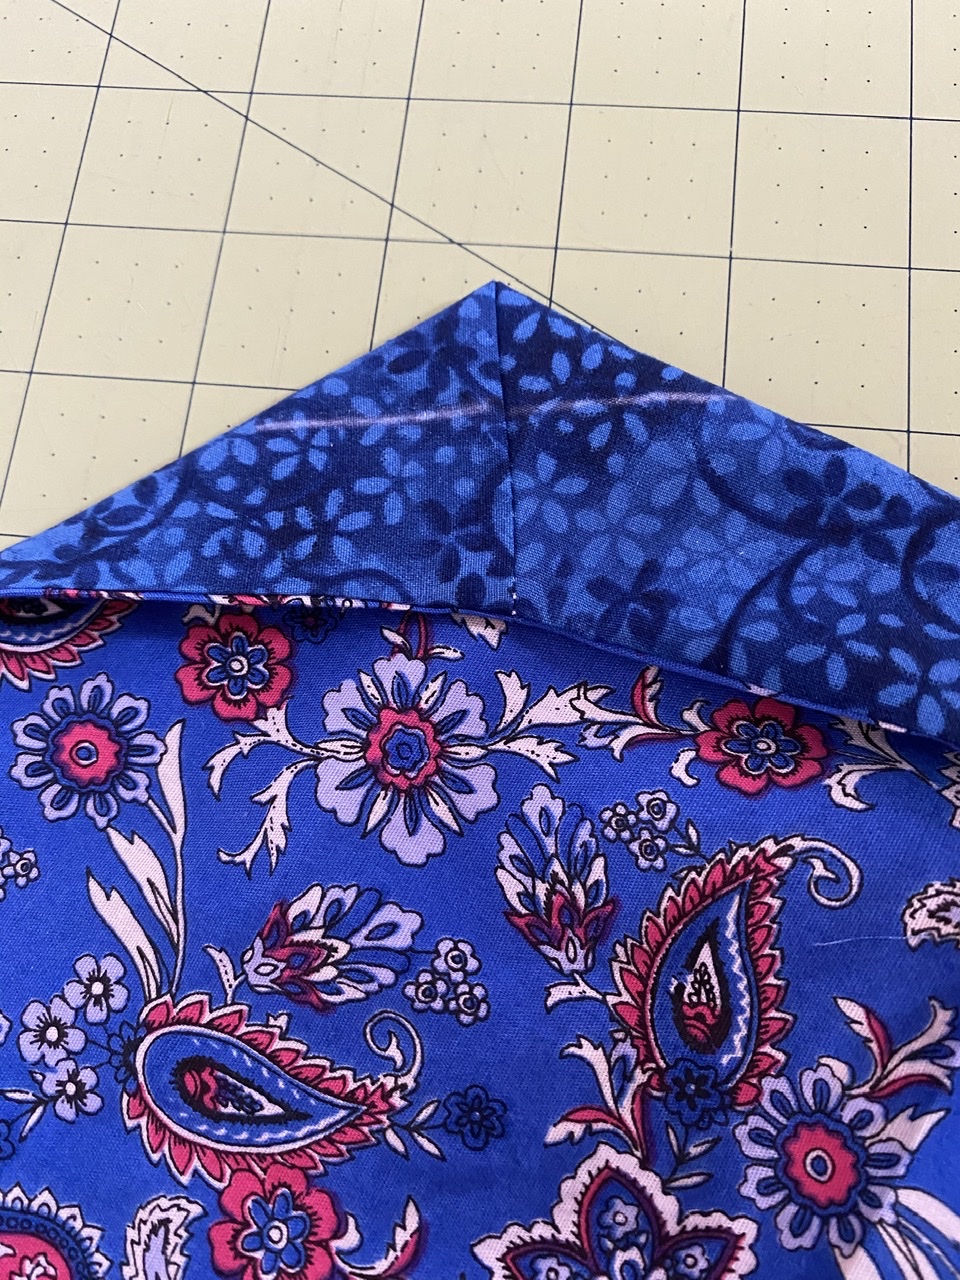
The last bit of knitting was the corrugated ribbing neckline. I realised as I was picking up stitches that most patterns and tutorials for a centered decrease vee-neck ribbing are for 1×1 rib rather than 2×2. I couldn’t find any examples of it, so I had to figure it out on my own. I think it looks pretty good in the end!
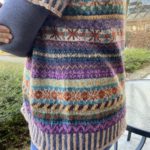
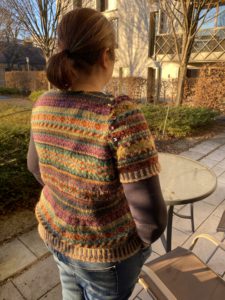
After a LOT of weaving in (and duplicate stitch embroidery on those 3-colour row motifs), I gave all three pieces a wash and a gentle block. Then I sewed on the sleeves and wove in the final ends. It’s done! Nearly eight years after I started… ❤️ Full details over on Ravelry.