I am so going to Hell. The big thing on the Glitter discussion boards lately has been album cover purses. Basically you buy an old record album, cut up the sleeve, and fashion a bag out of it. I’ve been keeping my eyes open for suitable albums ever since. Friday I hit the jackpot. It’s the Carpenters’ “Now and Then” album. Saturday I collected all the other supplies and today I made my bag. Is it morbid to carry a fashion accessory emblazoned with the picture of pop music’s most celebrated anorexic? Yeah, that’s what I thought.
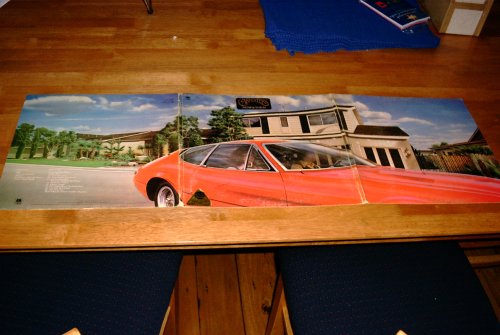
Okay, before you vinyl purists get all up in arms about the wanton destruction of this album, rest assured that it was a bargain basement, scratched-as-hell, one dollar piece of junk. (I plan to turn the record itself into a bowl, but more on that later.) Here’s what the front of the album looked like. As you can see, it was one of the big folded-type ones, not simply a cardboard sleeve. This was nice because it meant I had plenty of cover to work with. A lot of people make small handbag-type things, but I wanted a full-size messenger bag so I planned to use the whole thing.
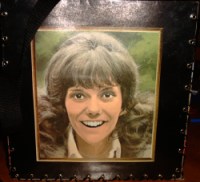
So the car image is nice, but it was the inside that sold me. Check out this surreal image of Karen Carpenter. It looks even weirder in real life. She’s all Photoshopped and color blocked. I like it.

And of course, on the opposite side we have Richard. Who looks like a vampire. He’s got really pointy eyeteeth!
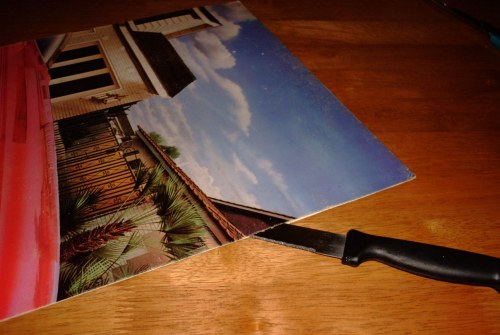
The first thing to do is cut all the pieces apart. I discovered that two of the trifold sections (the parts that weren’t the record sleeve) were actually glued along a couple sides. So I had to use a knife to carefully separate them. Once I had all six pieces (the other inside piece was the song list), I planned how I wanted the bag to look. I decided to use the front cover (the car) as the front of the bag, and have the side panels continue the image and sort of “wrap around”. Then for the back, I’d use Scary Karen. Inside, I backed the front with the song list, Karen with Dick, and the side panels with some remaining cardboard. I also used a double thickness for the bottom. (The point of doubling the sides up is just to make sure it’s sturdy enough not to fall apart.)
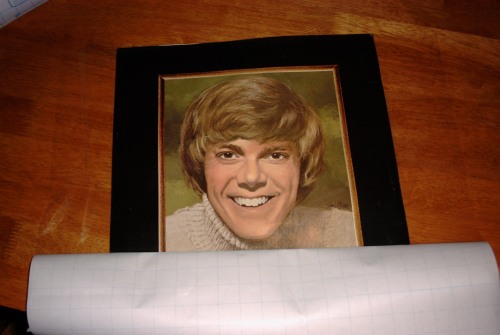
The next step is to laminate all the boards. I glued the double-thicknesses together and took them up to my local copy shop, but the woman there said they were too thick to go through her machine. So I went with my backup plan, which involved clear Contact paper (the kind kids use to cover their books). Basically I just wanted to waterproof and protect it. So here’s me carefully laminating Dick. I didn’t care so much about the pieces facing the inside, but I made sure that the outsides were perfect and air bubble-free.
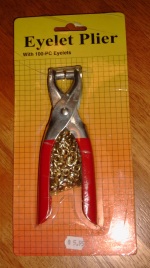
Okay, so to fasten all the sides together we need to insert “grommets”, which are little round metal eyelet thingies. I bought this package at my local hardware store. It even comes with a tool. (You push them through the hole from the right side and then bash the end down to keep it from pulling through.) Unfortunately this tool sucks. Don’t buy it. It broke within minutes and even when it worked it did a crappy job. So I went to the craft store and found another package that came with little metal bits that you pound with a hammer. These worked much, much better.
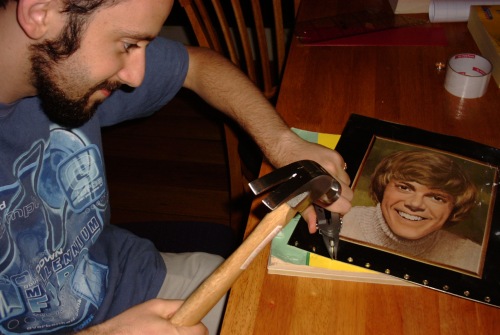
Here’s the Snook demonstrating the right way to pound some grommets. I spaced them so that they’d be staggered along each edge and therefore the lacing would cross and look cool. At least, that was the idea. I messed it up on the back side, but you can’t really tell. Anyway, punching holes and inserting the grommets is the worst part of the whole job. But if you get good grommets from the start, it’s much easier.
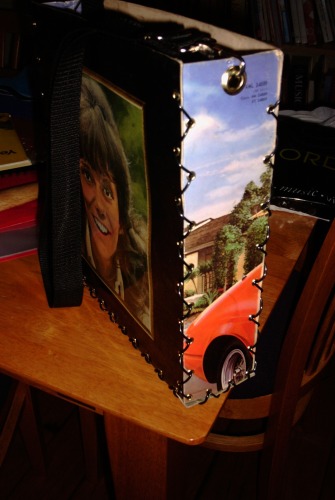
Here’s a side view so you can see the lacing that holds it together. I used some cheap (like twenty-five cents a meter) vinyl lacing that I found at my craft store. You could also use leather or ribbon or even fishing line. Whatever floats your boat. I went over every edge twice so that the lacing would be criss-crossed. It worked pretty well. Here you can also see that I’ve put one big grommet in the top of each side panel. This is where I hooked my handle, which was just a basic black nylon strap that I pulled off an old bag I had.
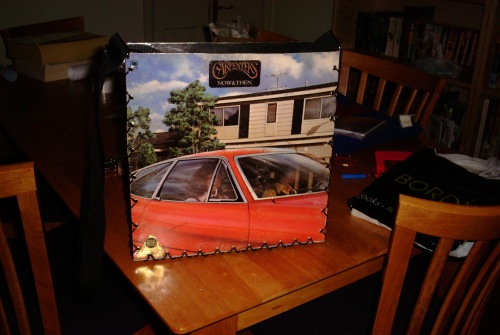
Here’s the completed bag from the front. Neat, huh?
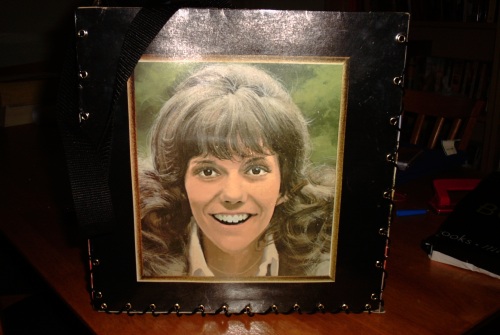
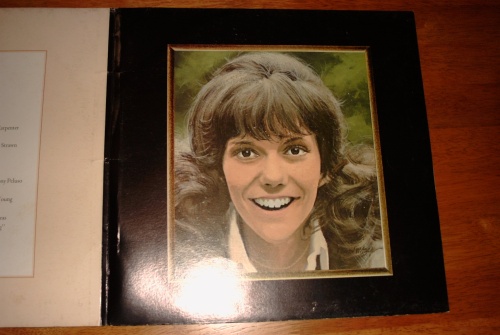
And here’s the back, with Scary Karen grinning at you.
That’s it! As you can see, this made for a really big bag. It’s as wide and tall as a record and the side panels (and thus the depth) are about one-fourth of that. It’s really more like a cereal box than a purse. I like it though. Now it just remains to be seen whether I’ll actually have the nerve to carry the thing… 🙂
 Snookums and I decided last week that we wouldn’t be celebrating a traditional Valentine’s Day this year. Personally, I’ve always been bitter about the holiday because I never really had anyone special to share it with. (My relationships always seemed to implode about that time of year.) So we decided not to participate in something designed solely to sell merchandise and make single people feel crummy. That’s why I was super surprised when he came home with flowers for me yesterday afternoon. He said it was a non-Valentine’s Day present for me. He even remembered that gerberas are my favorites! What a sweetie. I’m feeling all warm and lovey-dovey now, but I promise to compose myself by Thursday. Okay, single people?