
Well, where else do you think you buy them? 🙂
Images and videos that I’ve taken on-the-go
Well, where else do you think you buy them? 🙂
I’ve been obsessed with bags lately. (It offends my feminist pride to admit I carry a purse.) I keep accumulating them because I can never find the ideal one. I got a suede one recently that’s damn near perfect, but every time I carry the thing it rains. Anyhoo, last night on the train home I had a flash of inspiration – why not use one of my now giant (courtesy of the diet) pairs of corduroys to make a bag? The result is before you. It’s lined with a red bandanna and I appliqued felt hearts to the front. Isn’t it cute?


I’d seen several people on Glitter recommending the “chop off the legs and sew up the crotch” method of making a jeans purse. When I spread out my cords, though, I had to give up on that idea. I mean, they’re huge. I can’t believe my bum was that big. It wouldn’t be a purse; it’d be a duffel bag. So I decided to go halfway. I cut off the legs and then cut it in half vertically near the zipper. Then I spent a good half hour messing around with pins and basting to try and decide how to sew the thing up. Eventually I just said “screw it” and sewed a semi-straight line down the side. Then it came time for the bottom…
The bottom was the hardest part. See, jeans kinda “pooch” out more in the back to accommodate your bum. So I had more fabric on the back side than on the front. The solution, I eventually figured out, was to put a couple of darts (i.e. folds) in the back piece to make it work out. You can kinda see ’em on the picture of the back. Again, I just kinda eyeballed everything, but it came out looking much better than anticipated.
Next was the strap, which I made from one of the legs. I like a long strap, so I slit a leg lengthwise and sewed the lengths together to make one really long piece of fabric. Then it was just a matter of folding it together so the seams didn’t show and running a line of stitching along the edge. (I’m happy to report that my little Janome sewing machine handled layers of corduroy very well. My only problem was that occasionally it was a tight fit getting everything under the presser foot. There’s probably a way to lift it up higher though that I just don’t know of.) I sewed the straps to the inside of the waistband, trying out my zig-zag stitch for the first time. I figured there was no way to hide the sewing, so I might as well make it look intentional. 🙂
Looking inside the bag at this point, I realized I needed a lining. The front pocket was still hanging in there, and the seams and stuff just looked really messy. I had some bandannas in my fabric stash so I grabbed a red one and fashioned a pocket of similar size to my bag. (Because my bag is kinda trapezoidal in shape, I sewed the lining rectangular at first and then progressively angled in new seams at the top til the opening fit the waistband.) The I just stitched it in place inside the waistband.
Lastly I decided it needed a little decoration, so I pulled out a piece of felt and cut out some hearts. Then I just sewed them to the front panel (being sure not to go all the way through). They’re just tacked on, so they should be easy to remove if I want to change it in the future.
The whole time I was making this, I kept imagining that I’d ruined my pants (not that I could wear them anymore anyway) and that the end result would look ridiculous. But when the Snook got home and complimented me on it, I realized that it actually kinda works. I like the fact that it still has pockets and stuff for my mobile and train tickets. It’s yet another product for my eventual craft stand! 🙂

Last week I went to an “Introduction to Jewelry Making” workshop at the Bead Company near my house. I made the necklace, bracelet, and earrings pictured here. It was pretty much straight stringing; nothing as complicated as I’d already done with the flower necklace. But I learned how to use wire and crimps to make sturdier jewelry with nicer clasps. The necklace and earrings both use crystal-cut hematite and pink glass beads, while the bracelet is made up of funky cut glass and shiny silver spacers. I had a lot of fun at the Glebe Markets today checking out the price that similar stuff was going for. I saw earrings exactly like mine for $20! I can now make the same pair for $2. I’m never going to overpay people for stuff I can make myself again.

We recently cleaned up our office and uncovered the long-forgotten zen garden. Here’s what the Snook created. Any interpretations? Personally, I find it interesting that the rocks are “unbalanced” and seem bunched up on one side. Also note that he’s “buried” the rocks beneath layers of straight lines. So perhaps this “unbalanced” side is something that’s contained and buried deep within.
Or maybe he just likes making straight lines with the little rake. *shrug* I dunno.

Look what I made! I was feeling so crappy when I was home sick Monday that I decided to make myself something pretty to compensate. I started flipping through a bead magazine that Ma Snook recently sent me. There I found instructions to make this great “flower” necklace. I’m a sucker for these things, but I always feel ripped off when I pay some craft fair hippie ten bucks for one. It didn’t look too hard so I decided to give it a shot. I nipped round the corner to pick up the supplies and then plopped myself down on the couch. I wasn’t sure how it would turn out, but the end result is just gorgeous (if I do say so myself). The actual construction time was, like, 90 minutes, but that was with me watching Friends, Malcolm, and Millionaire at the same time. In other words, this is a super easy project even if you’re a total beginner.
 Technically the pattern is for a choker, but I can’t stand chokers. So I made mine a little bit longer, and since the beads weren’t too big it lays pretty flat on my chest. In the instructions below I’ll tell you where you can lengthen yours if you want. To the right you can see the back closure. It uses a “T-bar” which you then slip through one of the loops on the other side, which means it’s adjustable.
Okay, supplies. You need two types of beeds: teeny little “seed” beads (the black ones in my necklace), and bigger beads to use for the petals (the purple ones). Seed beads are those itty-bitty little round ones that you buy in bulk. My shop was actually out of black ones, so instead the ones I used are little chopped tubular ones. You really can’t tell the difference, so just get what’s available. The smallest amount my shop sells is 25 grams, which was way more than enough to do, like, five necklaces. I’d estimate you need a very small handful (and even that will probably leave some left over).
For the bigger beads, you can use whatever you want. Mine are called “Mysterious Beads” and each one is about the size of a small pea. Just keep in mind that they’re going to be clustered in groups of four, so the bigger beads you get the chunkier your necklace will be. Anything vaguely round will do. (The magazine shows examples with faceted glass crystals and freshwater pearls.) You need 88 of them to make the basic choker, but I just bought 100 since it was cheaper that way. I ended up using some of the extras to lengthen it, too.
Other than the beads, you need beading cord. You could probably get away with using fishing line, but I’d avoid sewing thread if possible (I don’t think it’s strong enough). Whatever you get, it needs to be extra-fine because it has to go through some beads twice. You also need a beading needle. My seed beads were too tiny for a sewing needle, so I had to get a special one. It’s basically just two pieces of thin wire connected at the ends (to create a very long “eye” for your cord). They should have some near where you buy the seed beads. You also need the “T-bar”, which is the metal rod with a ring on it that you connect to one end of the necklace. If you can’t find one you can probably make do with a normal necklace ring clasp (it just won’t look as pretty at the back). Lastly, you need a bit of clear nail polish. But hey, everybody’s got that, right?
Instructions:
That’s it! Sounds complicated but really there are only a couple tricks and once you know them the rest is easy. Let me know if any of you give it a try!

I’ve been waiting for Marci (who just set a wedding date!) to receive the scarves I made her before I showed them off. Since she got them today… here they are! (Don’t worry, Marci; he doesn’t have cooties.) The Gryffindor scarf shown here was acrylic and turned out really long. The Slytherin was 100% wool (some gorgeous soft Tasmanian stuff that I’m now obsessed with) but is wider and shorter.


I’ve gone one more in production, but after that I’m available if anybody wants to place an order!
I am so going to Hell. The big thing on the Glitter discussion boards lately has been album cover purses. Basically you buy an old record album, cut up the sleeve, and fashion a bag out of it. I’ve been keeping my eyes open for suitable albums ever since. Friday I hit the jackpot. It’s the Carpenters’ “Now and Then” album. Saturday I collected all the other supplies and today I made my bag. Is it morbid to carry a fashion accessory emblazoned with the picture of pop music’s most celebrated anorexic? Yeah, that’s what I thought.
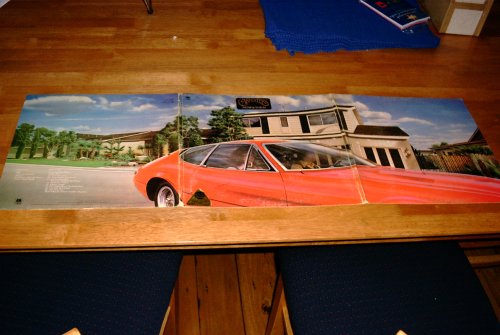
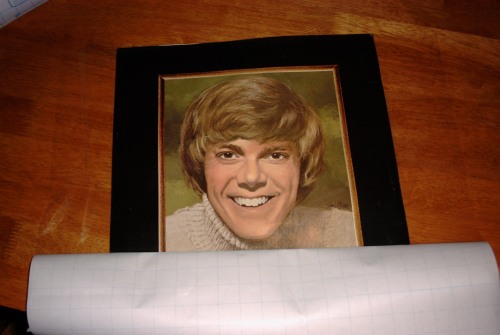
Okay, before you vinyl purists get all up in arms about the wanton destruction of this album, rest assured that it was a bargain basement, scratched-as-hell, one dollar piece of junk. (I plan to turn the record itself into a bowl, but more on that later.) Here’s what the front of the album looked like. As you can see, it was one of the big folded-type ones, not simply a cardboard sleeve. This was nice because it meant I had plenty of cover to work with. A lot of people make small handbag-type things, but I wanted a full-size messenger bag so I planned to use the whole thing.
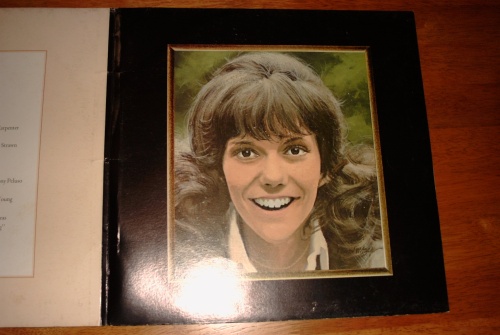
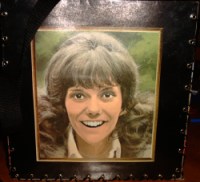
So the car image is nice, but it was the inside that sold me. Check out this surreal image of Karen Carpenter. It looks even weirder in real life. She’s all Photoshopped and color blocked. I like it.

And of course, on the opposite side we have Richard. Who looks like a vampire. He’s got really pointy eyeteeth!
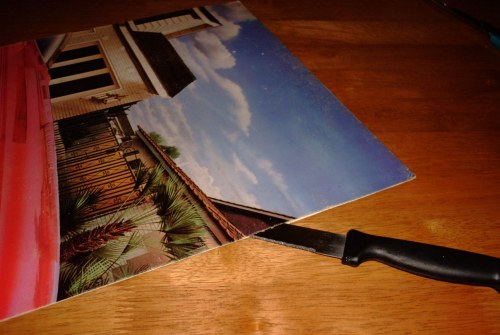
The first thing to do is cut all the pieces apart. I discovered that two of the trifold sections (the parts that weren’t the record sleeve) were actually glued along a couple sides. So I had to use a knife to carefully separate them. Once I had all six pieces (the other inside piece was the song list), I planned how I wanted the bag to look. I decided to use the front cover (the car) as the front of the bag, and have the side panels continue the image and sort of “wrap around”. Then for the back, I’d use Scary Karen. Inside, I backed the front with the song list, Karen with Dick, and the side panels with some remaining cardboard. I also used a double thickness for the bottom. (The point of doubling the sides up is just to make sure it’s sturdy enough not to fall apart.)
The next step is to laminate all the boards. I glued the double-thicknesses together and took them up to my local copy shop, but the woman there said they were too thick to go through her machine. So I went with my backup plan, which involved clear Contact paper (the kind kids use to cover their books). Basically I just wanted to waterproof and protect it. So here’s me carefully laminating Dick. I didn’t care so much about the pieces facing the inside, but I made sure that the outsides were perfect and air bubble-free.
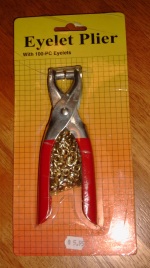
Okay, so to fasten all the sides together we need to insert “grommets”, which are little round metal eyelet thingies. I bought this package at my local hardware store. It even comes with a tool. (You push them through the hole from the right side and then bash the end down to keep it from pulling through.) Unfortunately this tool sucks. Don’t buy it. It broke within minutes and even when it worked it did a crappy job. So I went to the craft store and found another package that came with little metal bits that you pound with a hammer. These worked much, much better.
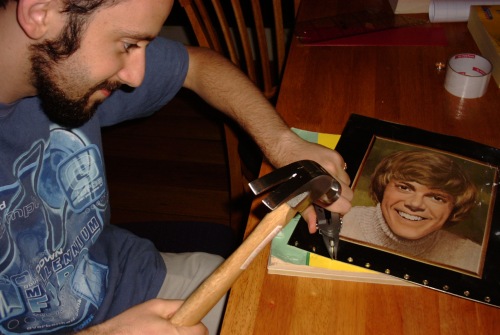
Here’s the Snook demonstrating the right way to pound some grommets. I spaced them so that they’d be staggered along each edge and therefore the lacing would cross and look cool. At least, that was the idea. I messed it up on the back side, but you can’t really tell. Anyway, punching holes and inserting the grommets is the worst part of the whole job. But if you get good grommets from the start, it’s much easier.
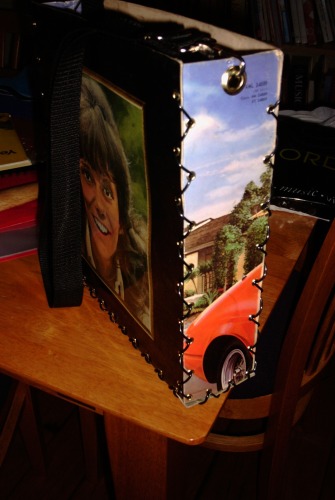
Here’s a side view so you can see the lacing that holds it together. I used some cheap (like twenty-five cents a meter) vinyl lacing that I found at my craft store. You could also use leather or ribbon or even fishing line. Whatever floats your boat. I went over every edge twice so that the lacing would be criss-crossed. It worked pretty well. Here you can also see that I’ve put one big grommet in the top of each side panel. This is where I hooked my handle, which was just a basic black nylon strap that I pulled off an old bag I had.
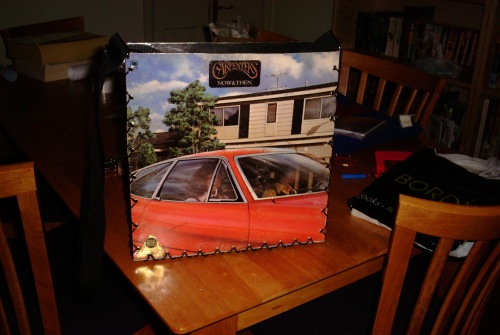
Here’s the completed bag from the front. Neat, huh?
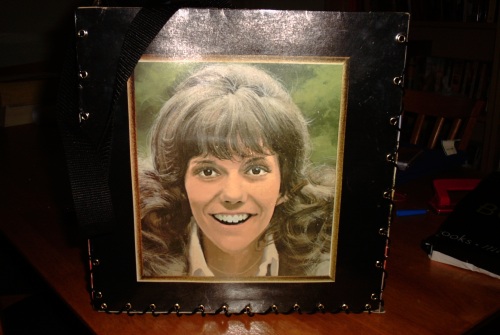
And here’s the back, with Scary Karen grinning at you.
That’s it! As you can see, this made for a really big bag. It’s as wide and tall as a record and the side panels (and thus the depth) are about one-fourth of that. It’s really more like a cereal box than a purse. I like it though. Now it just remains to be seen whether I’ll actually have the nerve to carry the thing… 🙂
 It was a beautiful sunshiney day and I was filled with domestic energy. After cleaning the whole house, I was inspired to finally pull out the digital camera and document our dwelling. Thus at long last, pictures of our house are now available for your perusal. That should make the folks happy. Just try to ignore the dust bunnies in the corners… 🙂

I can’t believe I forgot to show you my new shoes! Am I a sixteen-year-old Japanese girl or what? Yes, they’re black leather Mary Janes with pandas sewn on the top. They even have little smiles. Aren’t they cute?
 Snookums and I decided last week that we wouldn’t be celebrating a traditional Valentine’s Day this year. Personally, I’ve always been bitter about the holiday because I never really had anyone special to share it with. (My relationships always seemed to implode about that time of year.) So we decided not to participate in something designed solely to sell merchandise and make single people feel crummy. That’s why I was super surprised when he came home with flowers for me yesterday afternoon. He said it was a non-Valentine’s Day present for me. He even remembered that gerberas are my favorites! What a sweetie. I’m feeling all warm and lovey-dovey now, but I promise to compose myself by Thursday. Okay, single people?