Little My Softie

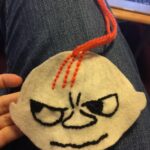
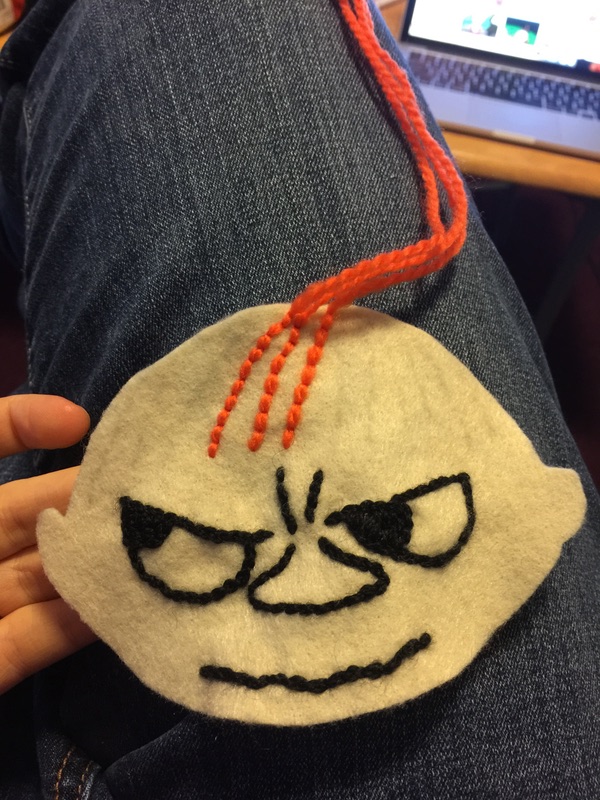
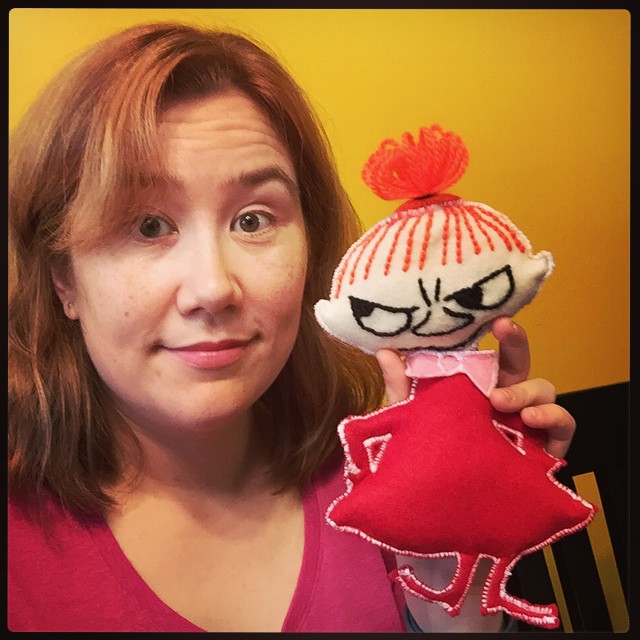
I wanted to make a special present for my niece Cali, so I thought that I’d whip up a “Little My” softie. Little My is from the Moomin books, and she’s Cali’s favourite character. (I know because I sent her this Uniqlo t-shirt and she LOVED it.) So I started by downloading a line drawing and printing it out. I decided that I was only going to make a simple “two-dimensional” toy rather than try to translate her into full 3-D. I traced the drawing onto some felt and cut out the pieces. The trickiest bit was embroidering her face.

Embroidering the face

I used some acrylic yarn for the embroidery. Her features were done in black with a split stitch, and I used orange yarn to backstitch her hair (leaving long strands at the top to form her top-knot). Rather than bother with turning things inside-out, I just used a tight zig-zag stitch around the pieces (with wrong sides together) to sew the her head and body pieces together. For her hair, I actually tucked the long ends back down into her head before sewing her scalp so it couldn’t be pulled undone. It worked really well! I stuffed the head and body parts through the neck opening and then joined the two halves there. Then I zig-zagged across the neck to join and covered the resulting mess up with a cut-out pink bow-tie (tacked on by hand). I also zig-zagged around the arm openings (where her hands are on her hips) and then snipped out the inside bits. I had planned to use black felt for her hands and boots, but honestly I couldn’t be bothered at that point.

No big deal - just being the BEST AUNT EVER. #littlemy #handmade

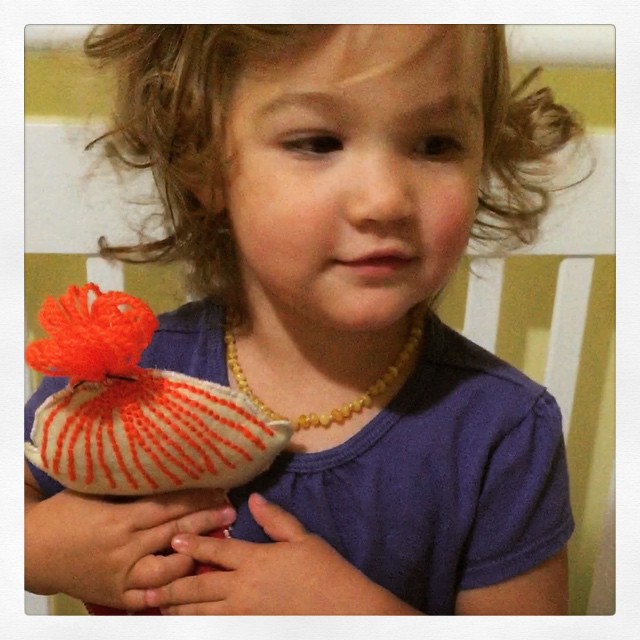
The first thing my niece Indie said was, “Her head’s going to fall off I think!” Which may well happen. The whole thing was a bit of a bodge and I doubt it’ll hold up very well–the felt was starting to pill within a day–but I’ve decided to just treat it as a prototype. Cali absolutely loved it, and that’s all that matters! I’m thinking of redoing it in fleece and trying to make her a bit more three-dimensional next time…

Technical Speaking Workshop with Damian Conway

I mentioned recently that I entered YOW!‘s “Women in Tech Speaking Competition” and won a spot at a full-day training session with Damian Conway. The training took place at the start of May, and the format was essentially to give a talk and get feedback from Damian and the other participants (nine other women). We were asked to prepare a 12 minute talk to give on the day, so I cut down a version of my How to Win Hackathon talk. (I didn’t have time to memorise the new version, but I figured I’d wing it.) I decided to be brave and volunteer for the first speaking spot, which fortunately meant I got a lot of feedback. (We were running behind schedule the rest of the day!) I took over ten pages of handwritten notes over the course of the other nine talks, and I’ve since combined them into a shared Google Doc with a few of the other attendees. Here’s a sample of some of the valuable practical suggestions:

  • A good talk should be for the audience. How will your talk inform, entertain, or make their lives better? It shouldn’t be a sales pitch about you.
  • Aim to reduce any distractions from your content. Dress simply and–“especially for women!”–avoid writing or embellishment near your chest. If you can, remove everything between you and the audience (podium, hair in face, etc). Remove any lanyards or name tags.
  • Don’t point with a single finger. It’s an aggressive movement and in a lot of cultures it’s extremely rude! Use your whole hand (palm outwards) to gesture. (Evidently I’m a pointer. I never knew!)
  • If possible, set up your laptop to your left. People tend to look to the right when they lie and to the left when they recall, so having it on your left makes you (subtly) look more trustworthy.
  • Test your presentation on the worst projector you can find (not your beautiful Retina laptop). Most of them will have crappy resolution and even crappier colours.
  • The Noun Project is a great source for icons and simple imagery to use in your talk.
  • Buy your own clicker and use it! (I went out a few days later and bought myself the Logitech R400.)

I’ve got heaps more, so send me a message if you’d like me to share my full notes with you.

A few days later, Damian sent through his transcribed notes for each person as well. I was extremely gratified to read this part:

I’d encourage you to look at making speaking at least a part-time career: you have real skills and real charisma, both of which you could be sharing with more people. You also clearly love speaking and teaching and connecting with an audience…which are the ultimate secrets to being a great presenter.

That’s the dream, right there! I’m still working towards my next conference presentation. I was thrilled to be selected to speak at YOW! West which took place last week, but unfortunately I had to decline due to the timing around changing jobs. (I didn’t know I’d be getting garden leave.) I’m undaunted though. I’ve been bookmarking upcoming conferences from the excellent Technically Speaking newsletter, and I’ve identified a couple that look promising. Time to write some CFPs!

Pinterest for Sewing Pattern Organisation

Yesterday I found myself staring at the Brumby skirt from Megan Nielsen and my finger was hovering above the “Buy” button. Something made me hesitate. Don’t I already have loads of skirt patterns? I realised that one of the downfalls of buying PDF patterns online is that I don’t have a good system in place to organise them. Instant gratification is all well and good, but what’s the point if you can’t remember what you actually have? I have some in a folder on my laptop; some stored in Dropbox; some as attachments in GMail; and some saved in Google Drive. I decided to try out Pinterest for organising them. Behold my sewing pattern collection!

Holy crap. There are 70 pins in there! These are the standalone patterns, either PDF or printed. Most are purchased, but a few were free downloads from various blogs and sites. Prior to this I hadn’t really played around with Pinterest much–realising that it could represent a major time-suck–but the visual aspect of this project made it seem like a good fit. Adding all my patterns went quickly using the browser extension and the iPhone app. Pinterest experts, I’ve got a couple questions for you:

  • I can’t see a way to tag pins. That would be really helpful, to be able to mark them as “skirt” or “pants” or whatever. Can you do that?
  • There doesn’t seem to be any way to change the default view. The “masonry” grid view is lovely, but I’d love the option to switch to a list with thumbnails (so I could see more on a page). Is that possible?

Maybe I’m trying to use the wrong tool for the job. Is there anything better than Pinterest for this? Pinboard has nice tagging, but it’s completely text-based (and I think for sewing projects, an image really helps). Delicious–which I didn’t realise was still around!–seems like it might fit the bill. Maybe I’ll try that out as well and compare…