Month: April 2018
-
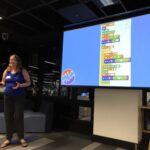
Shared today on Twitter
Me: I should move my personal site to Github pages. It looks so much simpler and easier!
Two hours later I’m installing rvm dependencies because I’ve got multiple versions of Ruby somehow that I need to resolve so I can run Jekyll and develop locally.
😭🔫
It appears that rvm is actually installing a third version of Ruby, so… 🤷♀️
@groodt I’ve finally got it using 2.5.1. 🙌 Now installing lots and lots of Jekyll dependences.
I miss just writing HTML.
RT @AiiGod: yall: 4/20
me, an intellectual: 1/5
I have a locally running Jekyll site! 💃FINALLY.
@Mandy_Kerr @sandysandy @kylietimpani @hj_chen @Una @msandfor @fox After a morning fighting with tech, this was exactly what I needed. 😍Thank you – I’ve been inspired by you from the moment I met you!
RT @yow_conf: Sydney-siders, is the 370 the worst bus in Sydney?
@notsolonecoder looks at the data in her #YOWData talk. You won’t want to…
@drpuffa @SaraSoueidan Not a blog – just a single page site that rarely changes. Jekyll is probably overkill, but I liked the theme.
-
Shared today on Twitter
@Malarkey I know what you meant, but my brain keeps parsing the “designer” part as an adjective, like stylish luxury goods. 😂
@mamund @Bankwest @yow_conf QUOKKAS! Oh, please share! (When I was there in March, it was a holiday weekend and the ferry booked out so I was denied a quokka selfie, which burns my soul to this day.)
RT @johnallsopp: We love new speakers at our events. If you’re a front end dev, CFP for Code in Melbourne in August are pen for one more we…
@philnash Knitting and sewing! More complex projects exercise the same part of my brain as coding, but easier ones are more meditative and allow for relaxation.
Was going to proudly show off the new @telstradev shirt I got from @DeveloperSteve, but somebody wanted a cuddle. Now it’s covered in white fur. 😹 https://t.co/H2aN99GG03


Any other @FullContact users having issues today? Seems very slow, but Status page isn’t showing any issues…
Save the date, Sydney women devs! June 29-30 – fourth annual SheHacks all-women hackathon. Free, volunteer-organised event for the WiT community. If you want to sponsor, mentor, or volunteer, please contact @GGDSydney. #shehacks https://t.co/KGSYjDfhwu
@GGDSydney I should also add – not just devs! Designers and product folks also very much welcome…
The number of times I’ve tried to type Slack emoji in other apps is ridiculous. SO THIS IS SUPER AWESOME! 🚀💯 https://t.co/TN77Wg6jEq https://t.co/F35xMzfkOQ
@sarahcalverley @satyanadella @MicrosoftWomen @MicrosoftAU I’m saving it for my next airplane flight! 🙂
HOW GOOD IS THIS DAY?!
@desplesda I’ve seen that here in Sydney with some of the Chinese cooking wines, actually. I guess it’s to keep winos from guzzling them. ☹️
Correction: It’s actually the FIFTH SheHacks that @GGDSydney has run! (Good grief, the time does fly…) 👵 #shehacks #shehacks2018 https://t.co/eNrhnYAz1Q
@msharp I was gonna suggest Young Henry’s as well. I like their beer. It’s not really much of a bar though – it’s an outdoor tasting room of sorts IIRC.
@msharp How about The Gretz from the lovely folks at Hartsyard? Looks like a more comfortable place: https://t.co/kks7sVmuka. Been meaning to check it out myself!
@mamund @yow_conf @Bankwest SO CUTE! ❤️
@maetl @darthted Whoa! Somehow I missed this. I’m sorry to see you go, but sounds like an amazing opportunity for her. Good on you for supporting her! I hope the move goes smoothly. 🙂
Sent off a support request to my lovely friends at @canva. Now is the fun of waiting to see who gets it! (🤞for @saberkite!!)
@msharp This is awful.
@saberkite @canva Oh boo. I hope it’s not a new person. They’ll be confused by the “HEY CANVA IT’S KAYRISSSSSS!!!” bit at the beginning. 😂
@unixbigot @telstradev @DeveloperSteve Grace Hopper is still the best kitty name ever, it is known. 😺
RT @imbriyonce: If you thought I was about to sit here, learn choreo & dance like I’m one of Beyoncé’s backup dancer… YOU’RE ABSOLUTELY R…
@Asher_Wolf A wonderful friend and champion suggested me to some overseas conference organisers, who invited me to come speak later this year! ❤️
@saberkite @canva Gahhh, it’s Edison, and he is treating me like just a normal customer. I mean, that’s good and all, but I’M KAYRISS DAMMIT. 😂
RT @tinycarebot: ❤: ask your friends for help if you need it please
@saberkite @canva I gotta track down who has access to her old email account. Not sure what credit card she used either. 😭
RT @starbuxman: start.Spring.IPO
#PVTL
@TheMartianLife @parisba @desplesda @The_McJones That’s awesome, well done!!
@yow_conf @chaitanyakuber @daveathomas Actually we’re working on a venue in Sydney, so you may well be able to see it live. 🙂
@yow_conf it me.
@chaitanyakuber @yow_conf @daveathomas DMing you!
-
Shared today on Twitter
@the_patima I voted for URL since I do that more often. I do occasionally use the sharing buttons though, mostly if I want to tweet and I want to pull in the title and I’m being too lazy to copy/paste.
RT @yow_conf: Come to our #yownight with @DataSciAu’s Executive Directive @lindamciver tonight!
She’ll be sharing how we can get students (…
@kmbannerman @caseywest GENIUS!
@Cuff_S Tell her she’s my running hero now!
@stevelikesyou @LookaheadSearch S’okay. @twalve and I said nice things about you all anyway.
@mobywhale @stevelikesyou @LookaheadSearch @twalve I may have stolen a duckie on Friday. 😉
RT @jesstelford: I’ve got a secret: I _still_ have to lookup the syntax for media queries 🙈
My Google Home mostly gets things right, but my accent still gives it trouble. “Is there a Wotso in St. Leonard’s?” ended up in a history lesson about a particular saint. 😂 https://t.co/k2VCyE4BKO

And it took two tries to explain who Ozma was. (The first resulted in treatise on respiratory mucus.) 🤧 https://t.co/c3sxY6Z1pg

@hj_chen @Mandy_Kerr Once again, I find myself in your Venn diagram ladies.
@gilmae *runs off to endorse @gilmae for C# on LinkedIn*
@emd3737 @CSatzke As a conference organiser, we do not love this. As a conference attendee, RIGHT ON MAN.
RT @levelsconf: Only five days left to get in Talk Submissions aka #CallForPapers for https://t.co/JxJJgQeUiH !
☕️ Maybe some coffee or te…
RT @yow_conf: Definitely a theme @lindamciver raises in her #yownight talk.
Tonight’s your last chance to catch her in Sydney (unless you’…
@KenScambler @jedws Didn’t you hear? Jed is the new Kris for Melbourne YOW Nights. 😛
@KenScambler @jedws Perhaps not quite as often. However, I’ll be there in two weeks for @VoxxedMelbourne!!
RT @Amys_Kapers: Even if you’re writing code on a page, make sure you get the syntax highlighting right!
👩💻
@mamund APIs – From Good to Gr…
@Accelerando_au @unixbigot Are these the ones you had done as a rush job? Where’d you end up getting them?
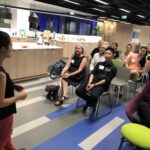
Excited to host @lindamciver’s final #yownight in the lovely @thoughtworks office! https://t.co/TODab5nLTl
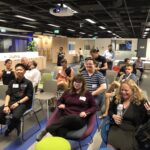
We are generating a LOT of data. “Who here knows how much an exabyte is?” No hands. “Okay, you’re the least geeky audience, but possibly the most honest.” 😂 #yownight https://t.co/oSfEbTiS8w

I love how @lindamciver says things like, “My favourite neuroscientist says…” I don’t even know any neuroscientists, much less have a favourite! 😂 #yownight https://t.co/yXbWFCNcNY
Thank you to @Andrea__Leong and @etymon from @SciencePartyNSW for joining us tonight! It was great to hear about their policies towards improving STEM education. #yownight https://t.co/QCcC6HWals
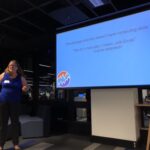
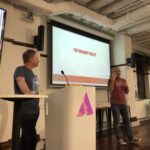
“This language is Turing complete, if you know what that means and care about it. It teaches programming… but it doesn’t teach RELEVANCE.” @lindamciver dropping truth bombs tonight! #yownight 💣 https://t.co/FDnBR4jfvo
@drpuffa @lindamciver It’s being recorded! 😁
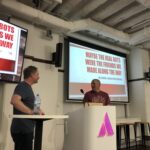
Studying voting data can illuminate some very interesting questions. Which party’s voters are more likely to follow the How to Vote cards? “It will not surprise you to learn that Greens voters are the most rebellious.” #yownight https://t.co/BpOgGJsFou

@philiplaureano @lindamciver It was! It’ll be up on our YouTube channel hopefully next week. 👍
Shit’s getting real. #yownight @lindamciver https://t.co/UueBli4aXW

“We have a tech industry going through an ethical crisis because it’s going through a diversity crisis. We need people willing to say, UH, COULD WE NOT BE EVIL?” 👏🙌 #yownight https://t.co/CRTRO2RZc9

@SteveGodbold Good question. We’ll have to ask @lindamciver!
@Andrea__Leong @etymon @SciencePartyNSW @afinno 😂 Sorry about that! We were overindexed on Andr(ae|ea)s.
RT @melindafentonsm: Great new non-profit. Thanks #yownight for introducing us to Linda McIver https://t.co/R0eUtTRT0g
@erikablair1997 @yow_conf Thank YOU for helping us! Glad you enjoyed it. 😁
“NBN construction commenced.” The Snook has been tracking every step of this. Finally it’s Chippendale’s turn!
Aussie women in tech! You should add yourself to this great list. (Thanks @devdevcharlie for leading the way!) https://t.co/Mm0GN4Csqe
@zarahjutz You are giving me flashbacks to my first job as the best damn checkout chick at the IGA in Wolcottville, Indiana.
@twelveeyes @Andrea__Leong It’s a very small world. Given ten more minutes last night, I’m sure I would’ve mentioned knitting and we would’ve made the connection. 😂
@WORK180_ANZ @LareneLg @sarah_j_smith @deniseshrivell @NatalieRens @drpuffa @charlottejee @ChiefDisrupter @JanOwenAM @Ganjm001 @thatpatrickguy @Anne__Lawrence @catrionawallace @ChadRenando @QChiefEntrepren @LawyerCas Today I came across this crowd-sourced tech-specific list: https://t.co/vfMuMEfYQR. Worth adding yourself or sharing with other Aussie women in the industry!
-
Shared today on Twitter
@chartortorella Tempted.
What happens when @frconil asks his @github buddies to hook you up. ❤️🐙🐱 #stickergoodness #octocat https://t.co/5BYWyvbIlZ

@gilmae @frconil @github I scored a couple giant ones too. One’s got your name on it. 🙂 https://t.co/QbWkkhsjWS

@damncabbage @maetl MAKE IT END. https://t.co/iRYPufsTuv
I don’t get how you have a dockless scheme for something that requires electric charging? 🤔 https://t.co/uNjBRGsjPe
RT @jmickey_: Day 3 of @mamund’s #API workshop at @Bankwest. Mike has been a wealth of knowledge so far, and his workshop has been incredib…
RT @petersagal: I am extremely sad to tell you all that my dear friend and colleague for 16 years, Carl Kasell has passed away at the age o…
YASSS. @minxdragon starting the day, and I’m finishing it! https://t.co/6lCyL11BUP
@minxdragon Imma have to add some inspirational stuff to make it worthy of the locknote. 😂
RT @Data61news: Check this out – @yow_conf is holding a Citizen Data Science event tonight in Melbourne and tomorrow in Sydney: https://t.c…
@minxdragon Now we get to fight over who talks about AI-generated knitting patterns…
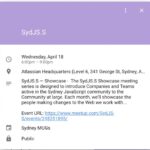
Never seen the @sydjs logo look like that before! 😂 Cheers to @MicrosoftAU for tonight’s SydJS.S showcase! #sydjs https://t.co/l3H56B4z41


Hearing from @jakkaj about his history in the local tech community. (“Silverlight? Any of you heard of that?”) 😂 #sydjs @sydjs https://t.co/RjKAXsKfpC

Loving the title of @GeekTrainer and @billba’s talk! 🤖❤️ #sydjs @sydjs https://t.co/8ss0R0HDTZ
Still tickets for this tomorrow in Sydney! https://t.co/q4TIMr1ktM https://t.co/HxEYqsCVdu
If you’re building a bot, don’t worry about passing the Turing test. You’ll just fall into the uncanny valley and get creepy or frustrating. “And the world is already full of so many disappointments…” #sydjs @sydjs @billba @GeekTrainer https://t.co/qX19rc2g0n
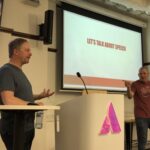
The reasons phones suck at voice control compared to Alexa and Google Home is because phones don’t have enough microphones to give necessary clarity of speech. #sydjs @sydjs https://t.co/sbQhNDxAWS
RT @hnalalioness: Training students how to use data. What to keep? What to discover? How to share info meaningfully? #yownight https://t.co…
First tech talk I’ve ever seen that namechecked @scottmccloud’s “Understanding Comics”! @billba #sydjs @sydjs https://t.co/fmv3JkAyus

This is a very Yank-heavy #sydjs (and I have no problem with that!). Next is @holtbt talking about GraphQL and serverless. @sydjs https://t.co/irk8GWJmOC

TIL that “galactose” is a thing. @holtbt #sydjs @sydjs https://t.co/YGBShNJBqr


@DeveloperSteve @SydneyAirport Are you just now going home?!
The second of a record THREE @yow_conf #yownights happening on the same night! https://t.co/SYunxwWzWr
Whoa. The first time I’ve ever seen the @LookaheadSearch logo at a meet up and NONE OF THEM ARE HERE! 😱 https://t.co/DoL8iJX4cH

@carlfish @holtbt @sydjs Right?!
@DDDPerth @mamund @wilsonwaters Thank you so much for helping out! We really appreciate it. 🤗
@glenngillen I support Melbourne. It’s linked in the Github description. 🙂
@glenngillen Just making sure it isn’t broken too. My sysadmin wasn’t monitoring properly. 😂
RT @marlousteh: @neal4d #yownight trivia: Did you know YOW! was previously “JAOO” confusing a lot of Aussies on how to pronounce this, as i…
RT @lindamciver: ok Sydney, we’ve got a “nerdiest crowd” competition going. So far Brisbane is a nose ahead. Can you beat them??? Come to m…
@mmastertheone There will be good!
@mmastertheone Where good = food. 😂
@OphelieLechat I went to check their prices. That’s about right for well made pieces! Good stuff. 🙂
@sallyannw We’re running an event tonight that seems like your type of thing! Would love if you could share to any educators who’d be interested. https://t.co/q4TIMr1ktM
-
Shared today on Twitter
Not a view I normally see! Smoky and overcast today… https://t.co/KxMavQRfk1 https://t.co/cCixhsgPYj

RT @seelolago: WHY SHOULD A TINY ISLAND ACROSS THE SEA REGULATE THE PRICE OF TEA https://t.co/zfMY6qC4Dd

@johnallsopp I *loved* Roseanne when I was growing up. Our whole family watched it together. But I haven’t get been able to bring myself to watch the reboot. It just feels like it would ruin it.
I had a meeting this morning at IBM and was pleasantly surprised that every software dev manager in the team was a woman! Can’t think of any other Sydney tech companies where that’s true…
RT @afinno: Come explore the frontiers of citizen data science this Thursday with Dr Linda McIver!
https://t.co/RtUVQiU1js
I just went into the ladies room at the coworking space and heard the woman at the other end of the stalls having a conversation ON HER MOBILE PHONE.
She kept right on talking over her own flush, and then I heard the water at the sink run for ONE SECOND, TOPS. I hid in my stall until she left so I never got a look at her.
And now it’s like, someone around me is a total sociopath. Who could it be?! How am I supposed to concentrate now??
@Jonwestenberg WHO ARE THESE PEOPLE.
Me: “Hey, my calendar script cron job failed this morning. Can you take a look at the server?”
The Snook: “Whoops. I filled up the disk with my WoW auction house scraper that I forgot was running.” 😂
@gilmae Is this because I asked you to be a meetup organiser? 😜
@Amys_Kapers @rosemary THAT’S WHAT THE SILENT BUTTON IS FOR!
Still tickets to hear this amazing talk in Melbourne tomorrow and Sydney on Thursday! https://t.co/9YwrwvXS5p
RT @unixbigot: “Citizen Dara Science involves real datasets, meaningful projects, and the potential to solve problems”, says @lindamciver…
RT @unixbigot: “We have a tech industry that has a significant ethics problem” says @lindamciver . Right now is “so far from Ok that you c…
RT @shinyUX: #YOWNIGHT @lindamciver
We need #diversity in #tech to change the way that companies behave… and I don’t mean diversity in…
Melbourne registration here: https://t.co/1TkGCX7clA @mattdelves
Sydney here: https://t.co/q4TIMr1ktM
@mattdelves I should’ve been prepared for that, but I’m literally in a taxi. 😂
RT @yow_conf: And that’s a wrap for our #yownight with @lindamciver in Brisbane!
Thanks to @Direwolf82 for emceeing tonight and introduci…
RT @unixbigot: Sydney, Melbourne, if you are on the fence about attending the @lindamciver #YowNight, go! It will make you want to go kid…
@NatalieRens @drpuffa @charlottejee @ChiefDisrupter @JanOwenAM @Ganjm001 @thatpatrickguy @Anne__Lawrence @catrionawallace @ChadRenando @QChiefEntrepren @deniseshrivell created Peggy’s List, which has some crossover with tech!
@NatalieRens @drpuffa @charlottejee @ChiefDisrupter @JanOwenAM @Ganjm001 @thatpatrickguy @Anne__Lawrence @catrionawallace @ChadRenando @QChiefEntrepren @deniseshrivell https://t.co/q0Zpq2cdgU
@darthted 🙁
RT @nic_hazell: Amazing energy and insights from all our @shestarts advisors at our @LinkedIn Mentor Mixer last night – building the networ…
RT @yow_conf: Plan to join us at Melbourne #yownight today with @DataSciAu’s Executive Directive @lindamciver on how Citizen Data Science c…
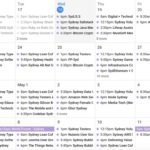
Happy news! The Sydney meetup calendar is working again now that the “WoW auction house server snafu” 😂has been fixed. Subscribe in your calendar application of choice: https://t.co/TafJ0JSwuk https://t.co/XyCTnUlgxP
@Erdbeervogel @yow_conf @agileaus We’ve been trying a few different things. 1) We now cover travel for domestic speakers for all events; 2) we offer diversity scholarships (inc. travel and ticket) for folks from underrepresented groups to attend…
@Erdbeervogel @yow_conf @agileaus 3) we’ve run a speaker development program for women in tech for the past three years that provides a free full day of professional speaker training (applications for 2018 still open now! https://t.co/xb1LWPKFaL)
@Erdbeervogel @yow_conf @agileaus 4) We also have a lot of women on the team and try to ensure diverse lineups on the Program committee. Half of our evangelist team are women.
@Erdbeervogel @yow_conf @agileaus All of that aside – we’re still not perfect. Our events range from our December confs with one-third women speakers down to LambdaJam, which only has 10%. (For that one, we’ve introduced an intro day to try to provide an on-ramp for folks new to the field.)
@joannejacobs @ChiefDisrupter @drpuffa @charlottejee @JanOwenAM @NatalieRens @Ganjm001 @thatpatrickguy @Anne__Lawrence @catrionawallace @angelapriestley @kirstinferguson @kcarruthers @annie_parker @womeninmediaOZ I mentioned that one last night. It’s really aimed at Marketing/Advertising/Media though, which is just one of the sectors covered in the big list in the original post.
@damncabbage I hate you.
In which I talk a bit about some of @yow_conf’s efforts to improve diversity at our events… There’s always room for improvement! https://t.co/9ITGyVI0yo
RT @lindamciver: So much fun at my Brisbane #YOWNIGHT last night. Can’t wait for Melbourne tonight and Sydney tomorrow! https://t.co/V5hxYK…
@mmastertheone YES! I will be hosting. Thank you! 🙂
RT @frankarr: 100 days, but still Day One https://t.co/FCDu5FV7vz https://t.co/bbrRkvOMha

@damncabbage @maetl I’m thinking it’s like vampirism, and we need to eradicate the original source to free us all.
-
Shared today on Facebook
Not a view I normally see! Smoky and overcast today…

Feeling Autumnal today so I decided to break out the clodhoppers!! 😂

-
Shared today on Twitter
This happened ages ago though, right? I remember hearing @unixbigot talk about it in a tech talk like a a year ago. https://t.co/iDWZF7eSyc
RT @johnallsopp: This by @jessitron is a drop everything and go read it now, particularly for developers of any level
https://t.co/topXw79…
RT @pjf: InfoSec folks: I can use speculative execution of machine-code to invalidate cache-lines and use that side-channel to establish an…
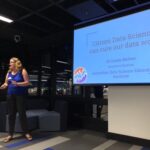
RT @CitSciOz_VIC: 😮”Citizen Data Science has potential to enable students to make scientific discoveries… & engage with technology on a w…
RT @OKFNau: @lindamciver of @DataSciAu speaking at @yow_conf in Brisbane, Sydney and Melbourne this week about how Citizen Data Science can…
@Cuff_S Ha! Somebody suggested my talk to him in the comments. 🙂
@rbanks54 Hey Richard – I’ve got one on giving better tech talks. Maybe some inspiration for more folks to step up as speakers in the future? Happy to do it if you don’t get any other volunteers.
@rbanks54 Ah, fair enough! No worries.
RT @rbanks54: Looking for one more talk for Sydney AltNet next week. We’ve got one on Blazor. Happy for the second talk to be on pretty muc…
RT @roisinmcmahon: Drowning in data woes? @lindamciver has answers to your problems 💻👩🏼🎓 I’ve got my ticket for her Brisbane talk tonight…
RT @DeathWishCoffee: If you can’t handle me at my before-coffee, you don’t deserve me at my after-coffee.
@carbocommander NPP? All I get is “New Payments Platform.”
@carbocommander YOU DOWN WITH NPP? YEAH YOU KNOW ME! 🙌
-
Shared today on Twitter
@polleyg @KnitGuildNSW Honestly, seems like a topic that – with only a very little adaptation – would fit right in at a lot of tech meetups!
In case you missed it last night and enjoy looking at sewing photos over your Sunday brunch. (I can’t be the only one!) https://t.co/A9sh29k4gA
@animoller @yow_conf Believe me – we’ve really done a lot. It’s disappointing, but it’s more than last year. Definitely my #1 mission to improve this number each year!
@animoller @yow_conf @krutimevada @YoungCodersAU Would love to have Kruti at a future event! Lambda Jam is focused on functional programming though; I can’t see that she does anything in that area. 🙁
@animoller @yow_conf @krutimevada @YoungCodersAU You’re both invited to apply for YOW’s speaker program – trying to build the pool of women speakers by giving free professional training to another group every year! https://t.co/DL1IidZg6W
@GeoffreyHuntley Ahhh, happy boys!
@charis Lovely!! Looks like you’re having fun. 🙂
Step 23 – buttonholes! An automatic buttonhole foot is an amazing bit of engineering. Now I just need to do it 12 more times… https://t.co/ZkPqSEiYd0


Step 24 – cut open buttonholes. https://t.co/MErdSMs52H


Tonight I realised that @hannahyanfield is the Anne Perkins to my Leslie Knope. Hannah, you poetic, noble land-mermaid! https://t.co/ulw5MAj9bd

Step 25 – sew on buttonholes. https://t.co/hDS7jHuYRB

@hannahyanfield 100%, you cunning, pliable, chestnut-haired sunfish. ❤️
@Reidyd No, just traced the spacing from the pattern.
And it’s finished! New Simon shirt from @freesewing_org for the Snook. 😁 https://t.co/s3Cm2CZL6j https://t.co/ePTEhyWbE3