Plush Tobias Fünke – LOVE IT.
Tag: sewing
-
The TENTH Annual Web-Goddess Oscar Contest

My annual Oscar Contest is now open! If you pick the most correct answers, you’ll win the big prize: The Monkey with the Dragon Tattoo. Yes, I made Lisbeth Salander Monkey. She has piercings; she has a Macbook; she has a golf club; and she has the titular tattoo. I think this is the most work I’ve ever put into a single monkey! (She’s also the first one that’s probably Not Safe for Work, given the slogan on her T-shirt.) And remember, in the event of a tie, the person that entered earlier wins. So don’t wait too long!
Here’s Lisbeth Monkey in profile. Check out that fringe.

Front view. As you can see, she has an eyebrow piercing, a nose piercing, and a lip piercing. She’s also got black spiral earrings and a necklace chain with a razor blade on it. (Special thanks to the Snook, who crafted the razor out of plastic and spray painted it.)

She wears combat boots, of course.

She wears a hoodie over a ripped-up T-shirt. Oh look! She’s hacking on her Macbook.

I wouldn’t piss her off if I were you. Chick has a golf club and she knows how to use it.

If you pull down her T-shirt in the back, you can see her dragon tattoo. (FREEHAND, BABY!)

I told you it was Not Safe for Work.

-
Christmas Craftiness 2011
Christmas Craftiness 2011
I just realised that I’ve made a lot of stuff this month that didn’t actually get documented on the blog yet. For posterity’s sake… Felt Tree Ornaments
As in previous years, a group of my knitting friends met up for a “Christmas Tea Party” earlier in the month. We always do a handmade ornament exchange. Rather than knit something, I saw some felt tree ornaments online and decided to sew instead. I made a template out of some cardstock and cut out the front and back of several trees. Then I hand-sewed on a selection of buttons to each front. (I’ve got a box of odd buttons.) Then I sewed the pieces together, sandwiching a piece of ribbon at the top for the hanger and leaving the bottom open. I stuffed each tree lightly with polyfill, then sewed the opening closed. I then trimmed the edges with pinking shears and did some decorative stitching with red yarn. They turned out pretty cute! I was very happy to see them go home with Kylie, who has hung them on her mantle. (In a stunning non-coincidence, I got Kylie’s project: a truly amazing knitted Christmas tree!) Nuts & Bolts and Compost Cookies
Next up was the December meeting of the Inner City brand of the Knitters Guild, and I was on duty for morning tea. I decided to go with a sweet/salty theme and made “Nuts & Bolts” and Compost Cookies. Nuts & Bolts is basically the Australian equivalent of Chex Mix. (Recipe here.) You mix up cereal and nuts with a packet of soup mix and some spices and then bake it in the oven to get crispy. I also add pretzels to mine. This stuff is addictive! The Compost Cookies were famously created at the Momofuku Milk Bar in New York. (Recipe here.) The idea is that you throw all kinds of sweet and salty things in there: potato chips, coffee grinds, candy, whatever. I used dark choc chips, meringue pieces, Tim Tams, Sesame Snaps, pretzels, and sea salt crisps. They were pretty good! Even though I chilled them overnight, they still spread quite a bit in the oven. (Always happens. I still haven’t gotten the hang of the new oven yet, clearly.) Both dishes were a big hit at the meeting. Caramel Walnut Upside-Down Banana Cake
We got some ladyfinger bananas in one of our FoodConnect boxes, so I decided to turn them into a cake. I’d made this Smitten Kitchen recipe before and the Snook really liked it. I actually divided the batter in two and made two smaller cakes this time: one for us and one to take to work. I still haven’t worked out the trick to getting flipping the cakes and getting the caramel out nicely, but the taste outweighs the messiness of the topping. Everybody at work loved it, and the cake I took in disappeared in about 5 minutes! Candied Gingerbread Men
I had a wild idea to make gingerbread men for our last day of work before the Christmas break. Of course, the only cookie cutter I own is the state of Michigan (don’t ask), so I had to go on a search for a proper one. Then I had to decide on a recipe. I went with Serious Eats’s Candied Gingerbread Men. It uses crystallized ginger, which I know the Snook likes a lot. He actually did most of the prep for the dough since he was on vacation this week. I cut them out and baked them late Wednesday night. I didn’t have any time to decorate them, but they were still tasty. The shapes were amusingly non-standard, mostly because I suck at rolling out dough and cutting consistent shapes. It was good fun though, and it made the whole house smell like Christmas! -
Sock Monkeys
For those of you who don’t know, back in 2004 I actually posted a photo tutorial for making your own sock monkey. So even if you don’t win this year’s Oscar Contest, you can always make your own!
-
The 9th Annual webgoddess Oscar Contest

My annual Oscar Contest is now open! I have added an additional category this year (“Best Cinematography”) to hopefully help avoid ties. If you pick the most correct answers, you’ll win the big prize: a pair of custom-made, one-of-a-kind Black Swan and White Swan ballerina sock monkeys! One is beautiful, pure, and repressed; the other is totes sexy-crazy. They might just be my best sock creations yet. (However, I disclaim all responsibility if you use them to act out the movie and then it drives you insane.)
SPOILER ALERT!
Once upon a time, there was a young ballerina named Nina. She was beautiful and pure and kinda repressed, and her greatest dream was to dance the lead in Swan Lake. She lived with her demanding mother in a tiny womb-like apartment and didn’t have any friends. She was a little weird.

Through a series of events that may or may not have involved a pilfered lipstick and a stolen kiss, Nina got her wish and got picked to play the Swan Queen. As rehearsal wore on though, Nina started to get paranoid. She began to fixate on the new dancer Lily. Was someone following her? Who was that lurking in the shadows and behind mirrors?

Nina was perfect as the White Swan, but she couldn’t embody the sexuality and ecstasy of the Black Swan. She tried everything, but mostly her creepy Mom kept thwarting her. It really started to get to her. She spent a lot of time looking in mirrors. She got a weird rash on her shoulder.

On a night of reckless abandon, Nina goes to a club with Lily, drops Ecstasy, and makes out with a random dude. Then in the taxi, Lily makes a move…

They spend the night together – OR DO THEY? – and it pretty much facilitates Nina’s full psychotic break. She freaks out on her Mom and has some more avian hallucinations. On opening night, she wrestles with Lily in the dressing room and dramatically stabs her. Nina’s Black Swan persona finally emerges.

Exhilarated, Nina dances the third act as the Swan Queen passionately and sensually. As she dances, her arms sprout feathers and become full black wings. She loses herself and transforms into the Black Swan, earning a standing ovation. The whole audience wonders what the hell just happened.

But what becomes of the White Swan? Pretty much just what we all expected. OR DOES IT?

THE END
Actually, I’ve got some more photos so you can see the details of the prizes. First, the White Swan. She features a white dress with feather detail, white tutu, pink ballet shoes, and white feathered headpieces. She has a mysterious rash on her left shoulder.


Next, the Black Swan. She features a black dress with feather detail, black tutu, pink ballet shoes, and a black crown (of pipe cleaners). She has red button eyes and hand-painted makeup on her face and hands. She also features velcro down the back of each arm so you can attach a pair of black feathered wings.


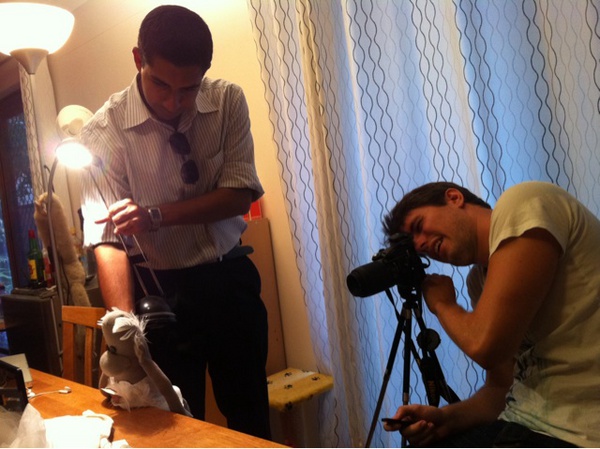
Massive thanks go to Kunaal and Josh for all their help, especially with the fantastic photos. And as always, thanks to the Snook for inspiration and assistance.
-
Robot Skirt
 Robot Skirt
I forgot to mention that I finished my third skirt! This is the same A-line pattern that I used for the previous two. (It’s the one from the class I did at the Sewing Room last year.) The fabric is a thick cotton drill I got when I was visiting my Mom in the U.S. last year. Fun!The shoes are new Converse “re-issues” I got last weekend from Platypus. Only $39!
-
New Skirt
 I sewed another skirt!
Saturday I finally decided it was time to start sewing some of the skirts I’d planned. I’d bought a couple different fabrics over the past months, and last weekend I prepped them (basted the edges, pre-washed and dried, and ironed) and cleaned out my sewing machine. So I dug out the pattern from my class a few months ago and got stuck in.This is the one that I managed to finish (since it’s the only one I had a zipper for). The fabric is a very fine wale corduroy (light blue with dark blue paisley) that I got on Clearance at Lincraft. It was so cheap that I didn’t have high expectations for the finished product, but I figured it would be good for practice. To my surprise, it squared up nicely and didn’t give me any trouble at all. I laid out all my pattern pieces and remembered to make sure the nap all ran the same direction. The sewing was fairly straightforward, though I did have to refer back to my old skirt a few times just to double-check the order of operations. Sewing in the zipper was probably the scariest bit, and I played around with several different techniques (including sticky tape!) before settling on basting it in by hand just to make sure it didn’t shift around. I only made one tiny mistake in the whole project, when I forgot to leave a seam allowance to turn back at the opening of the facing near the zipper. (That’s the final step – to turn back the raw edge and tack it down on the underside of the zipper. I managed to get it to work, but it may fray a bit at the top edge. I might put some clear nail polish on it.) Here’s a bigger picture so you can see the true colour a bit better.
I wore the skirt to the barbecue on Sunday, and needless to say I’m THRILLED with it. The cord feels very soft and lovely to wear. My only disappointment is that the waistband seemed to bunch up by the end of the day. I had the same problem with the original skirt though too, so it may be a fit issue. Any sewers want to advise me? Or do you think I need thicker interfacing for the facing pieces?
-
Zipper Bag
 Zipper Bag
Tonight was my second sewing class over at The Sewing Room. It was great! Zippers are kind of my nemesis, so it was good to get to focus on them. We started by doing a sample piece on calico showing how to place a trouser zipper (like for jeans). Then we started in on our project for the night: this handy bag/pencil case. It’s got a front zipper with a pouch inside, and a size zipper for the main pouch. Once again I was the Hermione of the bunch, zooming ahead and finishing early. It turned out pretty well! My sewing is a little wobbling around the zips, but good for a first attempt. And hey, I only managed to shatter one sewing needle! (I ran over the metal stop at the top of the zipper.) Good times.

-
Sewing Class
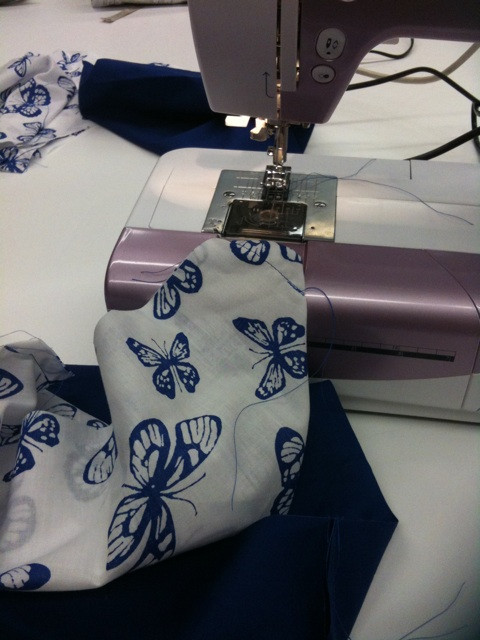
 Remember how I told you I booked in for a sewing class? Well, Thursday night was my first one! After work I walked over to the Sewing Room in Surry Hills to learn how to make a sling bag. The room was cheerfully crammed full of interesting things like mannequins and overlockers and boxes of trims. When I got there, a student was working on her HSC project: a chocolate brown ball gown that she’s embroidering on the theme of Aboriginal history. (Needless to say, it was gorgeous. Why don’t American high school kids get to do amazing things like that?!) Anyway, there were three other young women in the class, all of whom were total beginners. I know how to use a sewing machine for the most part, but I’ve never really sewn a garment from a pattern all on my own. (So yeah, I was the Hermione of the group a little bit.) The pattern was really basic and easy to follow, and the Bernina machine wasn’t too different from my Janome at home. I snapped a photo during mid-construction. Our teacher Penny was fantastic, answering all our questions and giving everybody hands-on help. (She taught me a new way to turn narrow tubes inside out that will save loads of time on my next sock monkey.) The three hours flew by, and in fact, I didn’t finish my bag til closer to 10pm. Isn’t it cute? The fabric is just some cheap cotton I picked up at Lincraft. All I need to do now is sew on a button for the closure. Before I left, I took Penny’s advice and used some scrap paper to trace around the pattern pieces so I can reproduce it at home. It’d be great for gifts, huh?
Next Thursday I’m booked in for Zippers, Casings, and Buttonholes. This is venturing into uncharted territory for me, which will be fun. After that, it’s on to making an actual skirt! If you’re interested in sewing in Sydney, I suggest you bookmark the Sewing Room blog. They have loads of classes to attend, and they also have nights where you can come and get help with whatever pattern you want to make.
-
web-goddess Oscar Contest 2010

The Eighth Annual web-goddess Oscar Contest has finally begun. I’ve added a thirteenth category this year – Best Original Score – to lessen the odds of a tie. As usual, the number of dead people in the obituary montage will be the tiebreaker. And what do you get if you win? Why, it’s a Sparkly Emo Vampire Sockmonkey Playset! (And don’t worry, Twilight-haters. I’ve catered for you too.)
The contest will end the minute the ceremony begins!
Once upon a time, a girl named Bella fell in love with a very sparkly emo vampire named Edward. He gave her piggy-back rides in the trees.

But her long-haired Native American friend Jacob didn’t approve and warned her away.

Bella didn’t care. She and Edward frolicked in a meadow and he sparkled.

Jacob cut his hair and took to wearing cutoffs and hanging out in the woods in the rain.

But what’s this? It’s Buffy the Vampire Slayer! With a flash, she whips out Mr. Pointy and reduces Emo Edward to dust.

Yes, ladies and gentlemen. If you win this year’s Oscar Contest, all this melodrama could be yours. You get three different sock monkeys: Edward, Bella/Buffy, and Jacob.

Edward comes with foofy auburn hair, amber eyes, embroidered six-pack, and a black peacoat. Oh, and he sparkles in the sun.

Bella has long brown hair, a grey coat, and a treasured copy of “Wuthering Heights” (with hand-embroidered cover). She’s also very clumsy and lacks any sort of personality. (Just like the books!)
")
Jacob (in his younger incarnation) has long brown hair, an embroidered six-pack, and a pair of denim cut-offs. He’s friendly and nice and has no idea he has a latent werewolf gene.
")
Later, Jacob gets ripped, cuts his hair, finds out he’s a werewolf, and kinda turns into a jerk. See? You can tell he’s scowling. Poor kid has no idea Renesmee is in his future.

With a quick change of wig and the addition of a crucifix, Bella becomes Buffy! Buffy has long blonde hair and a wooden stake. She’s also quick with a pun and has very little patience with mopey emo vampires.
The four wigs (Bella’s long, Buffy’s long, Jacob’s long, and Jacob’s short) all have a strip of Velcro on the underside that corresponds to a strip on the appropriate monkey’s head. You can mix and match to your heart’s content!

So whether you’re a Twi-hard or a Twi-hater, there’s something for everyone in the Sparkly Emo Vampire Playset!


