As you’ve no doubt gathered, I recently finished a new shirt for the Snook. I decided that I’d document the whole process in a video.
It’s not often I get to put my Film degree to use! I had a lot of fun playing with iMovie and editing this thing together. I hope you enjoy it as much as the Snook likes his new shirt!
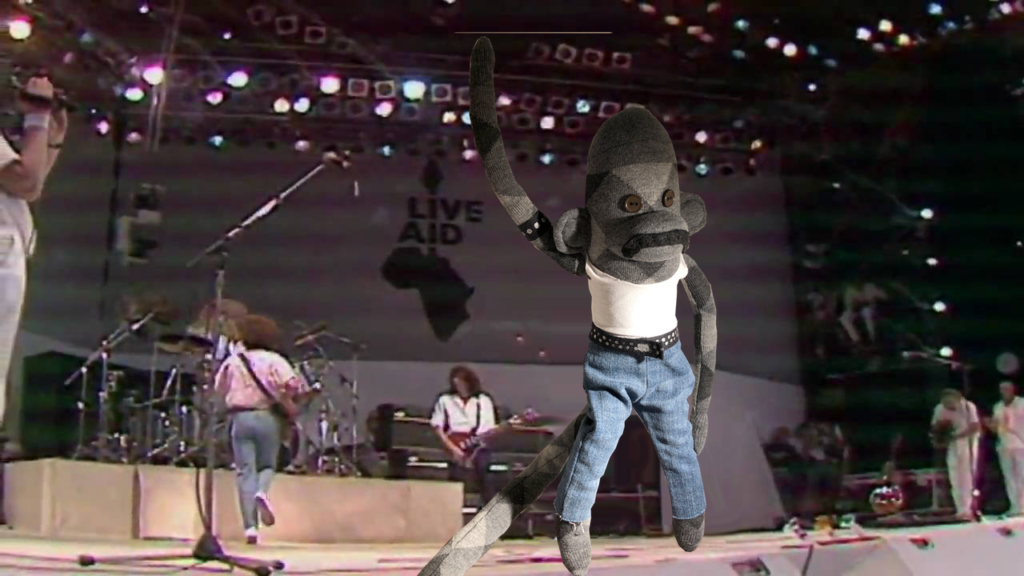
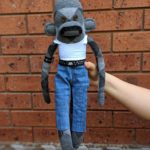
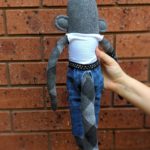
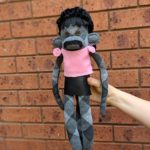
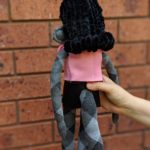
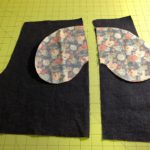
A month or so ago, Christopher commented on Facebook how much he missed my annual sock monkey Oscar Contest. I admitted that I’d thought of reviving it, but I hadn’t had any inspiration for a good monkey… and then it hit me! FREDDIE MONKCURY.
Freddie Monkcury at Live Aid
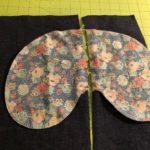
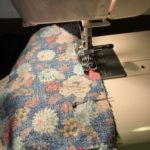
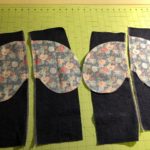
I had a monkey mostly put together from a few years ago, so he took shape fairly quickly. I found a very basic pattern for doll pants in the right size and used material from an old pair of jeans. His “I Want to Break Free” outfit was a little harder. The “leather” for his skirt is actually polyurethane from a $5 bag I found at Kmart. His bouffant wig started out as sculptural felt that I then handsewed black chenille pipe cleaners onto. (I also fashioned a very basic vacuum cleaner too!)
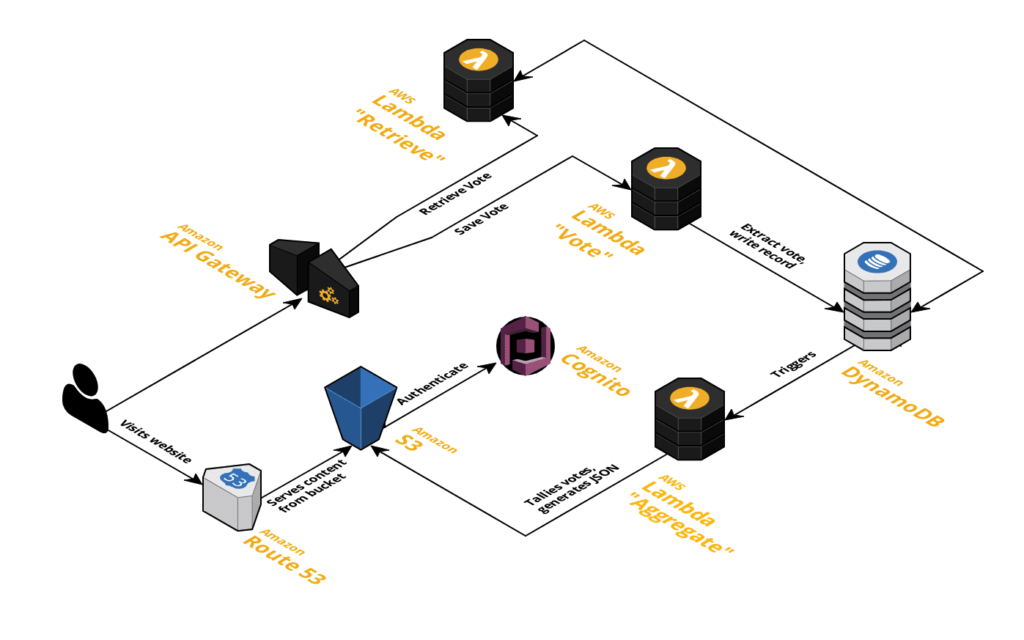
Application Architecture
For the first 11 years, the Contest consisted of a custom PHP and MySQL application that I’d built. For this year, I decided to challenge myself to completely rebuild it on Amazon Web Services (which is where I work!). Here’s how the architecture ended up:
The next step was to customise it! After I changed the images and CSS to my own branding, the next thing to change was the data saved to the database – I changed it to a form with all the Oscar categories and nominees. Next, I wanted users to be able to review and update their votes, so I added another Lambda function that retrieves a logged-in user’s votes so the form can be populated correctly. I then added a third Lambda function that scans the complete database, processes the votes, and publishes an aggregate JSON file to S3. (This is triggered whenever the DynamoDB table is updated.) For actually displaying the prediction graphs, I used ChartJS.
I think that covers everything! Many thanks to the Snook (my rubber duck and eternal programming mentor) as well as David, Jody, and Amy for their help with testing.
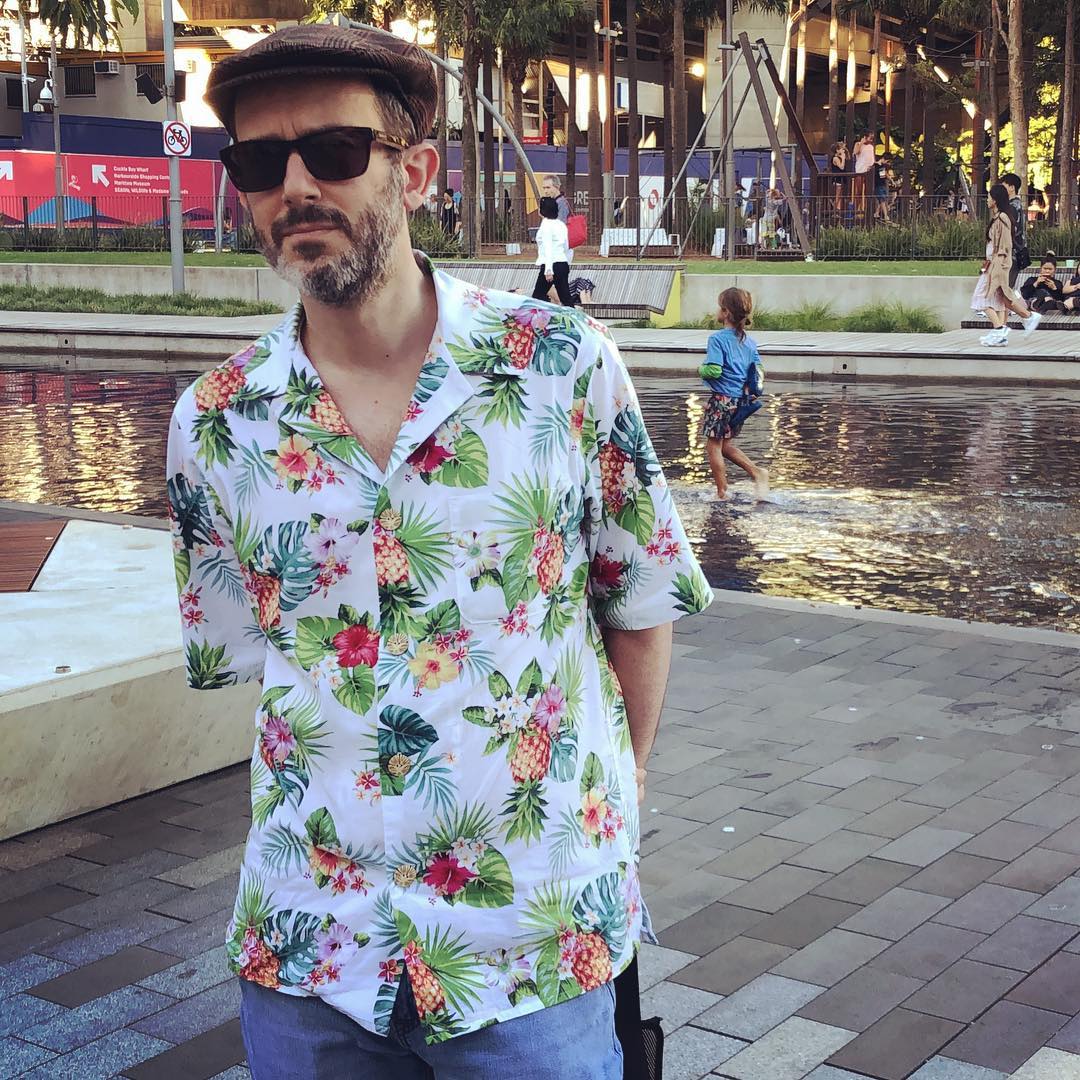
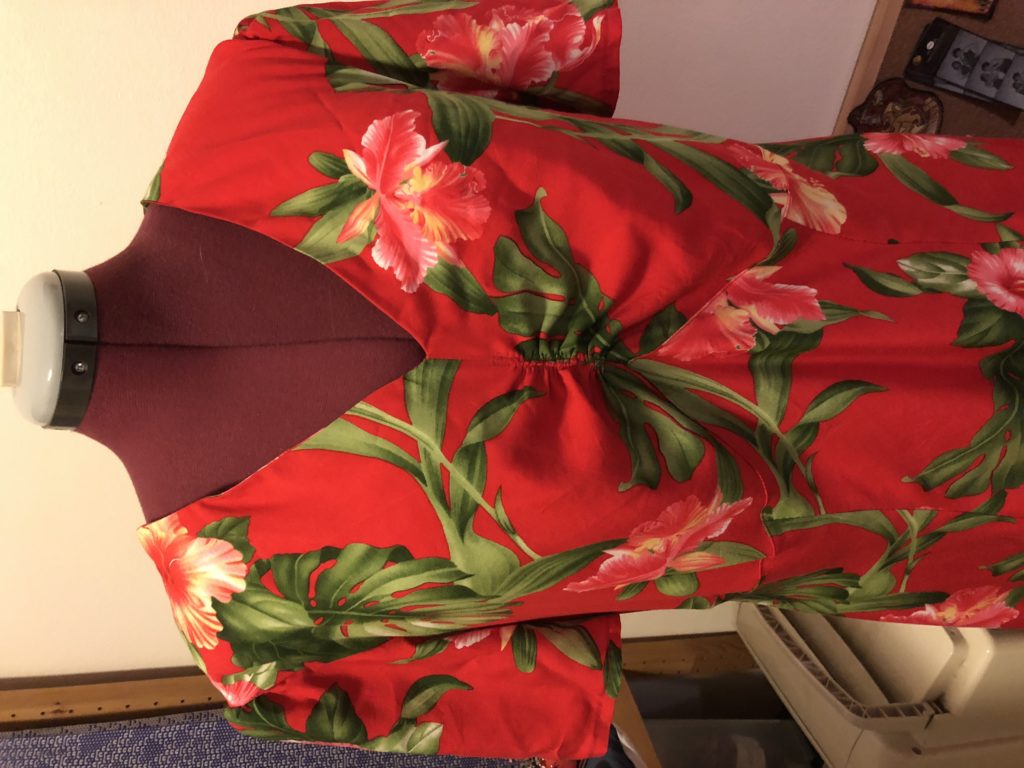
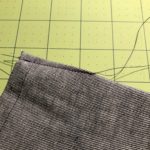
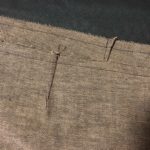
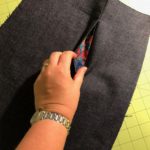
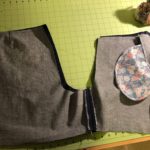
When last I left off, you’ll recall I had assembled the bodice and front skirt of my Hawaiian dress. Since then, I’ve snatched bits and pieces of sewing time whenever I’m able. I was soon able to finish off the complete outer shell and try it on.
I discovered quite a bit of fabric pooling at my lower back. (Note to self: I think I need to start doing swayback adjustments going forward.) I had the Snook help me by pinning out the excess. I was able to then undo the seam and move it to remove the extra fabric. Then I made a note of the measurements so I could do the same on the lining pieces.
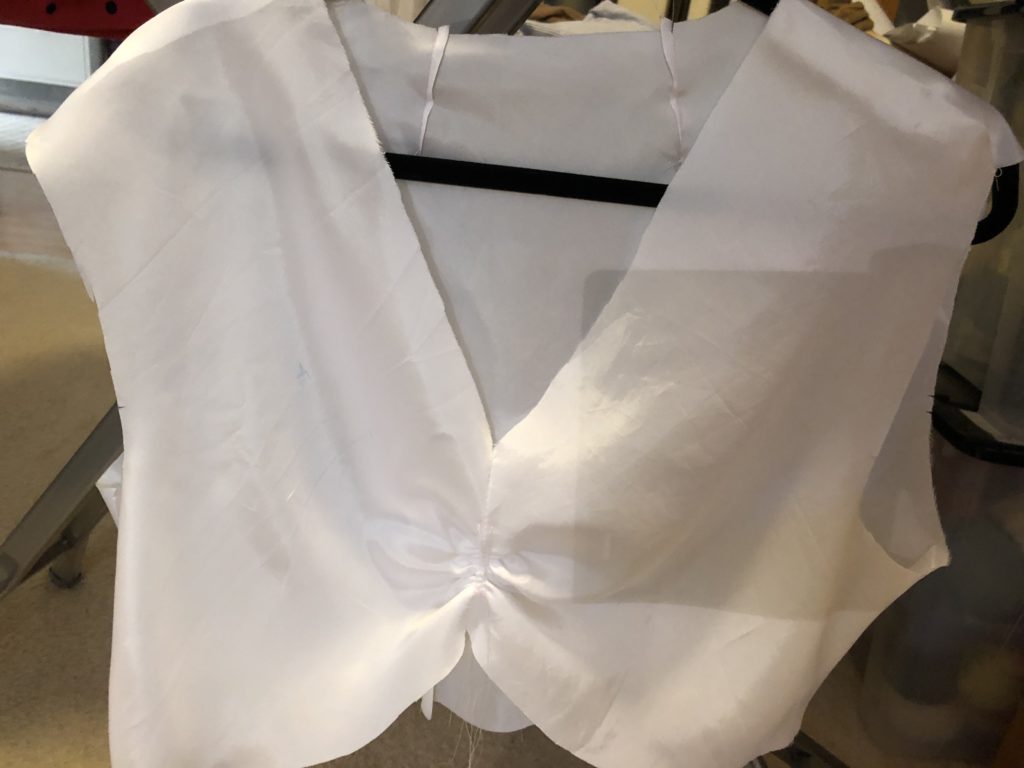
Oh right, the lining. Then I basically had to recreate the entire dress again. I had to cut out all the pieces on the bias, hang them, press them, and assemble the dress. Here’s the bodice in progress.
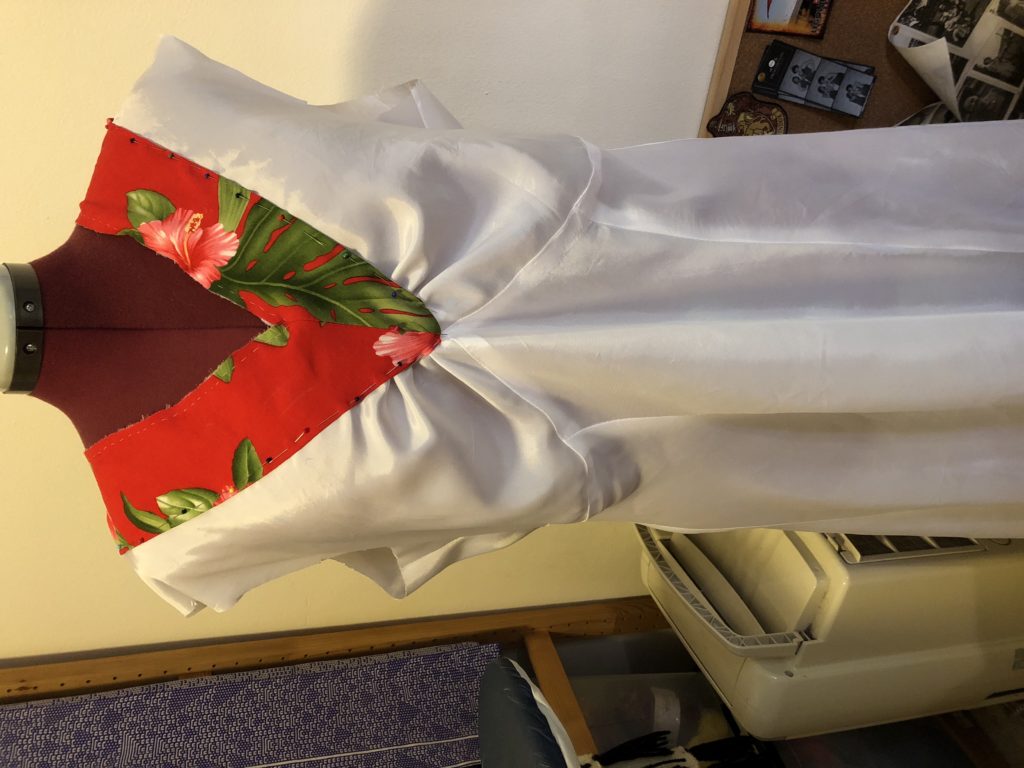
I also sewed together a neck facing out of my outer fabric. This was then pinned on top of the lining so that you wouldn’t see the white peeking out at the neckline. Here’s what it looked like on the inside before I sewed it down.
Then I inserted the lining, making sure the right side of the shell was next to the right side of the lining. Once I sewed them together at the neckline, I was able to flip it inside out so that the lining is inside and all seams are neatly trapped between. That v-neck was tricky though, and I had to unpick it a few times to get it to lie flat. (It’s still not perfect but it’ll do.)
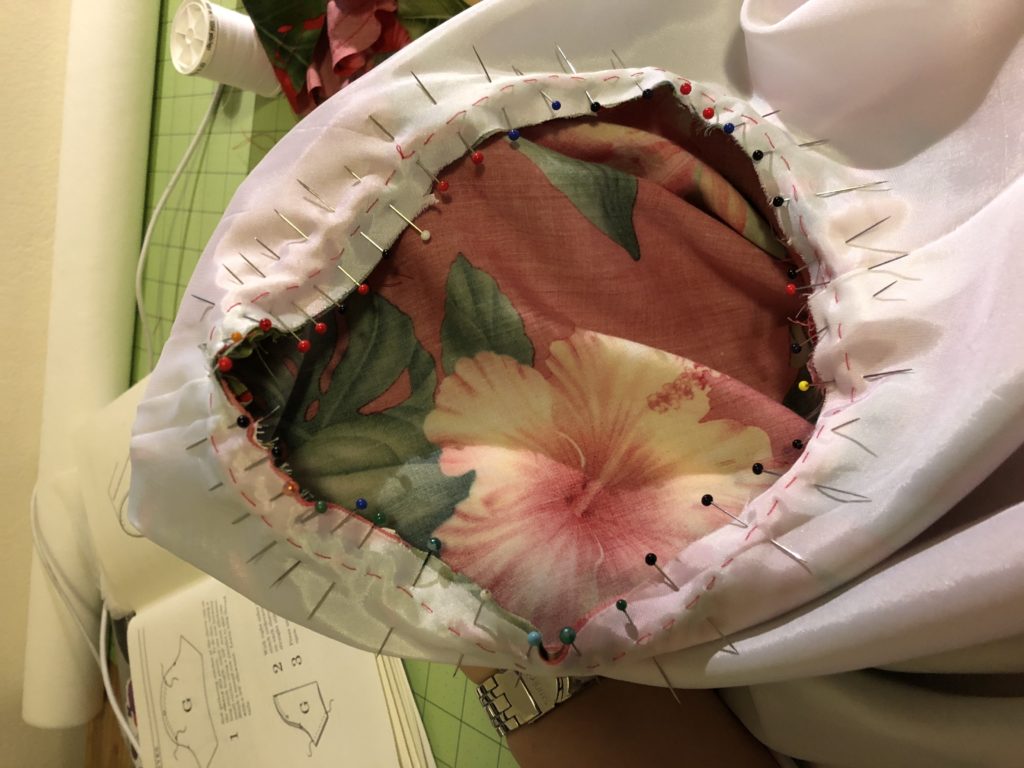
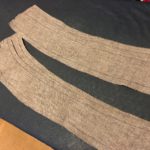
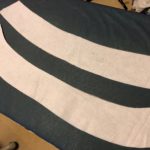
The next step was to prepare the sleeves. Each cap has a bit of a puff at the top so I sewed basting stitches so I could gather them to fit. Here’s what it looked like once I had the sleeve pinned in place.
Yeah, I use a lot of pins.
Then I sewed in the sleeves and finished the seam. By the way, I found it weird that the pattern didn’t tell me explicitly to finish any of the seams. Not all of them (like the sleeves) are under the lining. I even went back and overlocked the skirt seams just because I was paranoid about fraying. Then I hemmed the sleeves.
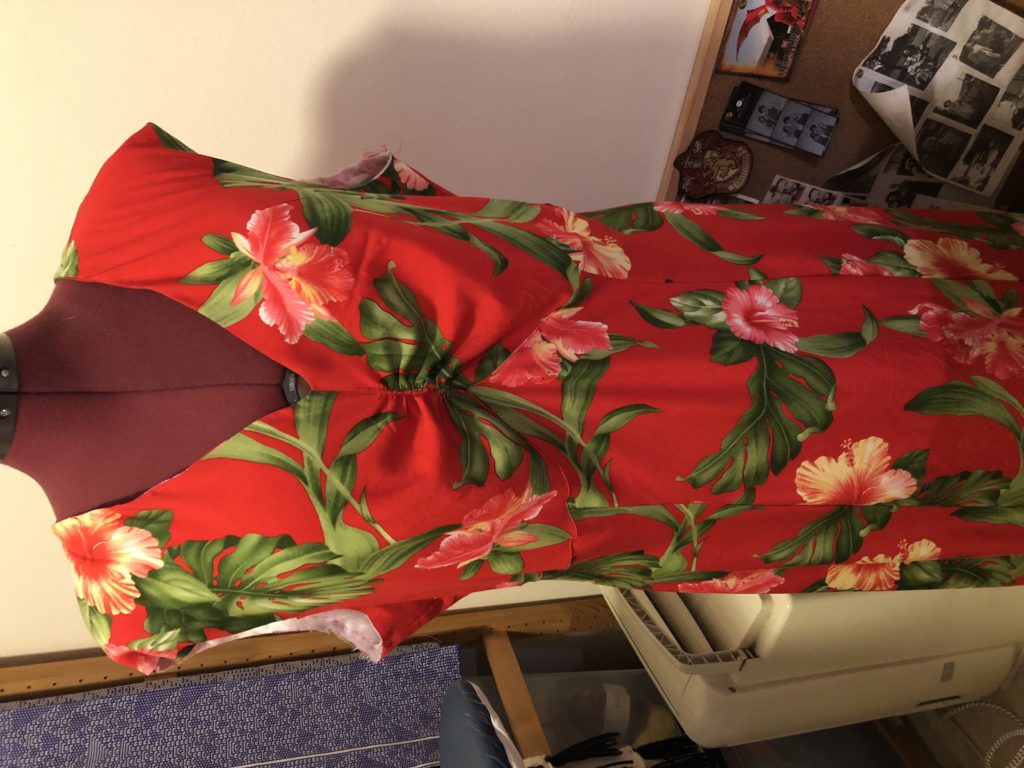
And here’s what it looks like right now. All that’s left is to straighten up the bottom and hem it!
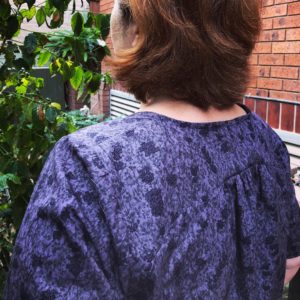
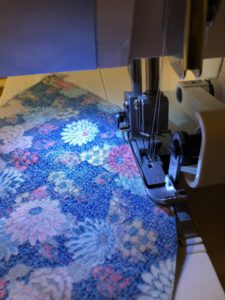
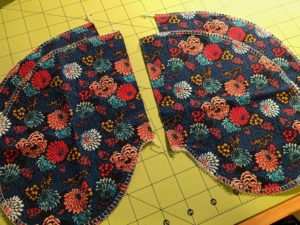
I think this is my fastest sewing project yet! This is the Montrose Top from Cashmerette, and I whipped this up in about 4 hours today.
The fabric is Liberty Saville Poplin in a lavender print that I bought at The Fabric Store during their last sale. (Savvy blog readers will notice that I used it for the Snook’s most recent Simon Shirt. I deliberately bought enough so I’d be able to make something simple for myself too!) The only real design feature on the garment is a curved and gathered back yoke, which was pretty simple to do.
In terms of sizing, the pattern offers 9 different sizes, 3 different cups, and 2 different sleeves, so it’s suitable for pretty much everybody! I cut a straight 20 C/D, and it’s comfortably roomy. (I might go down to an 18 next time.) This is definitely the best sleeve fit I’ve ever had on a garment I’ve made for me. I made one alteration to lengthen the front and back, just based on the fact that the pattern was written for someone who’s 5’6″. I’m closer to 5’10” but I’m also short-waisted, so I decided to add in 2″. However, when I tried it on it was still too long, so I ended up chopping that length off and rehemming. Next time I’ll go back to the original length.
I can see myself making these in lots of different colours. Just a great little wardrobe staple! I reckon I like it even better than the Colette Sorbetto…
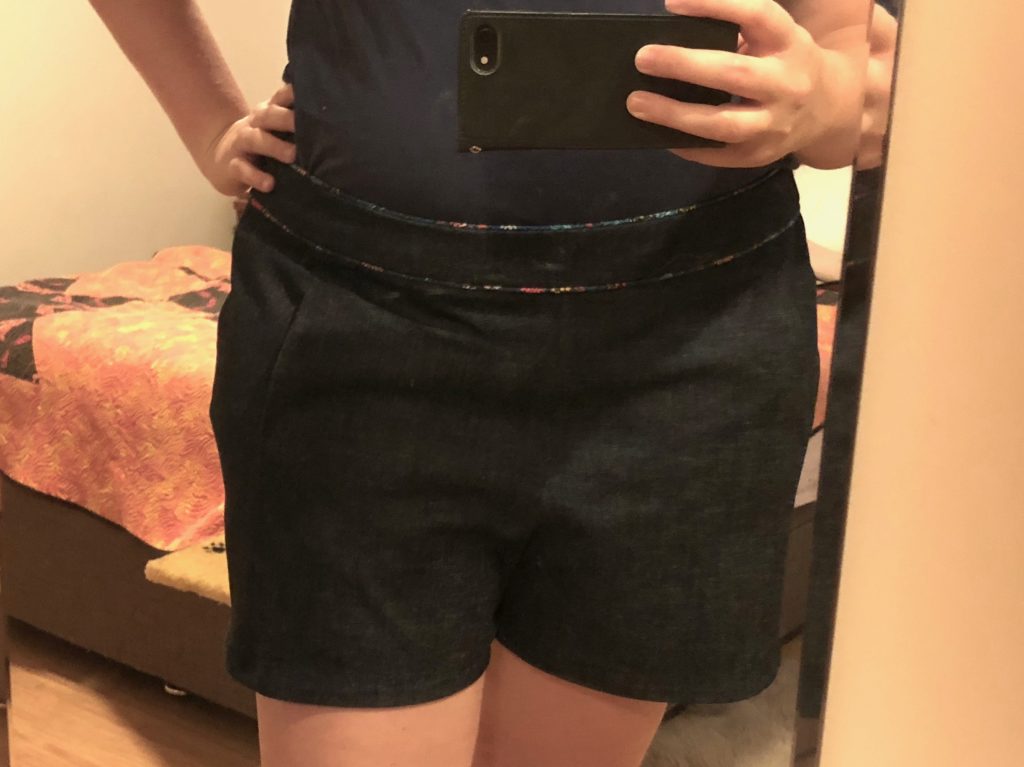
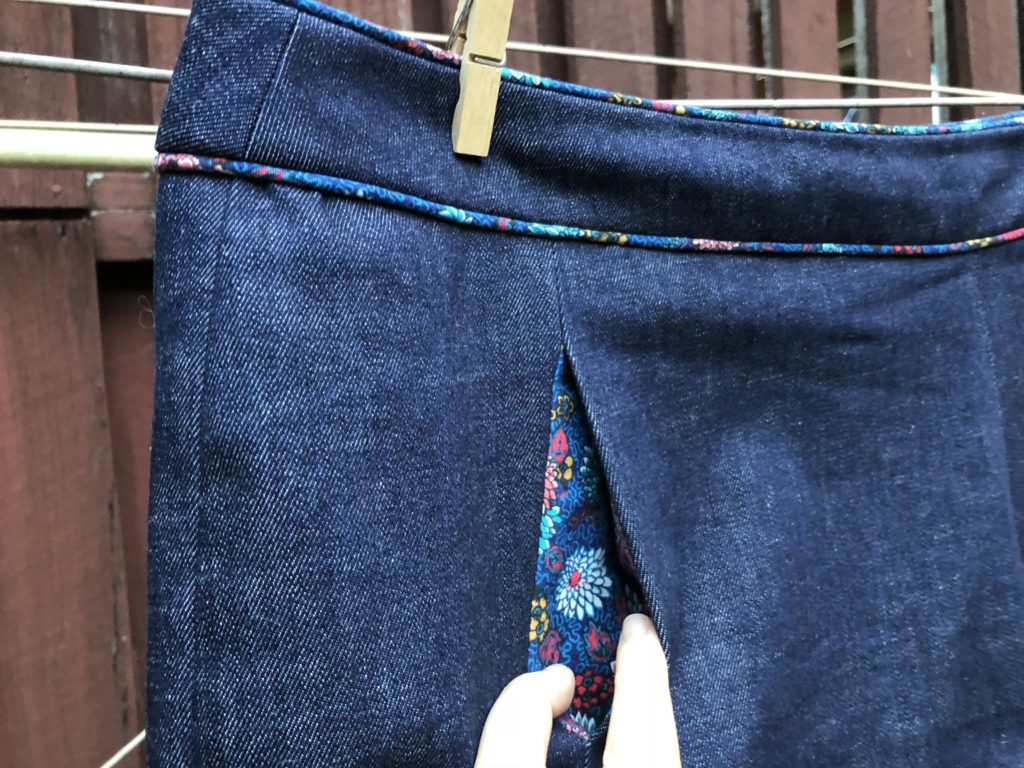
I realised today as I was wearing my fancy handmade Colette Iris denim shorts that I had intended to blog the whole process for you back in February. Whoops! Better late than never.
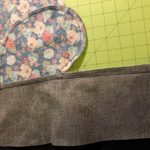
These were my fifth iteration of the shorts, and I’m extremely happy with how they turned out – especially since the 1st and 2nd versions weren’t even wearable! Over the course of refining the previous versions, I ended up adding some room to the butt, lowering the crotch, and then scooping out the front seam a little. I also added custom piping (which I blogged about here) to both edges of the waistband.
Here’s what I used to make these shorts:
Sewing supplies
Sewing machine
Denim needles
Overlocker
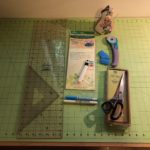
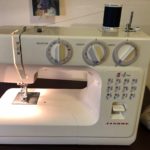
You don’t actually need all of this stuff. For sewing supplies, all you really need is a good pair of scissors, some pins, a ruler, and something to mark your fabric. I have a fancy cutting mat and rotary cutter, and I sometimes use carbon paper to transfer markings. My sewing machine is an old (nearly 20 years, I think?) Janome that I’ve had serviced once or twice. It doesn’t have all the bells and whistles but it does the job. For this project, I used denim needles which are a bit stronger than normal ones (since denim is thicker to punch through). I also have a very basic Janome overlocker that I bought at Aldi a few years back, but that’s optional too. (You can just zig-zag your seams with your regular machine.) You’ll also need the pattern, of course, cut out in your chosen size. For fabric, I used 100% cotton denim I bought at The Fabric Store as well as some leftover Liberty Clarks Canvas for the pockets and piping. You also need some iron-on interfacing.
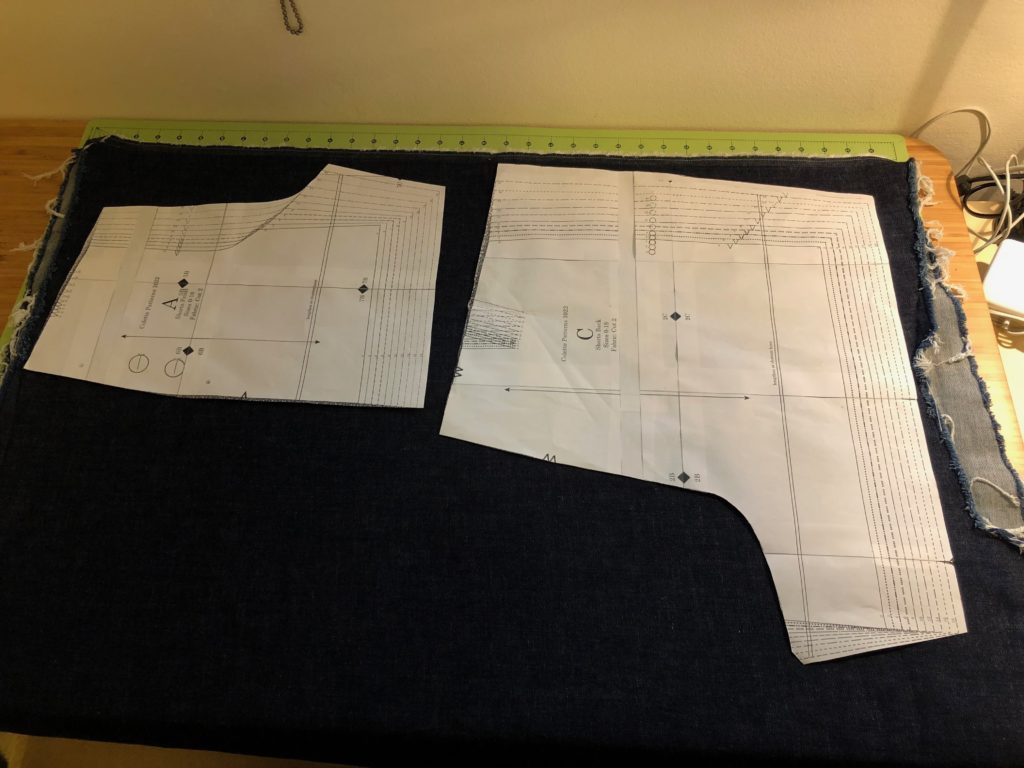
Let’s get started! I began by laying out my front and back pattern pieces on my pre-washed fabric.
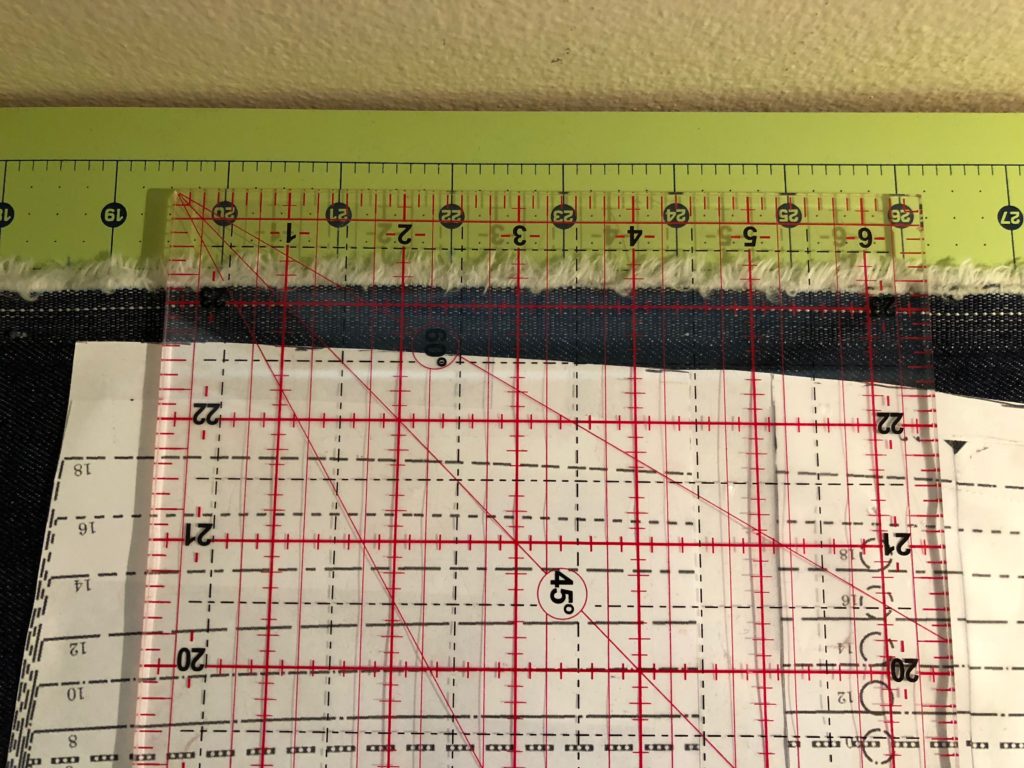
I used my clear ruler to make sure the grain lines on the pattern pieces were parallel to the fabric edge.
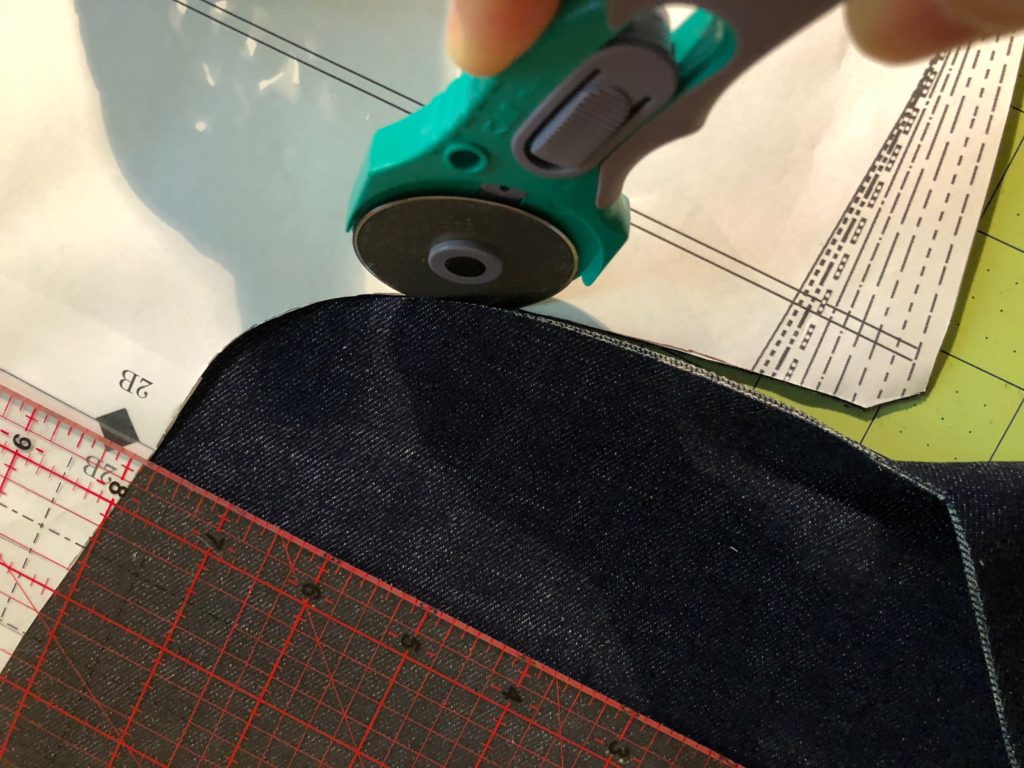
I used my rotary cutter to cut out the pieces, but you can also use scissors if you prefer. (You’ll probably want some sort of pattern weights to keep your pieces from moving around. I don’t have special ones; I just use my rulers and whatever desk supplies are lying around.)
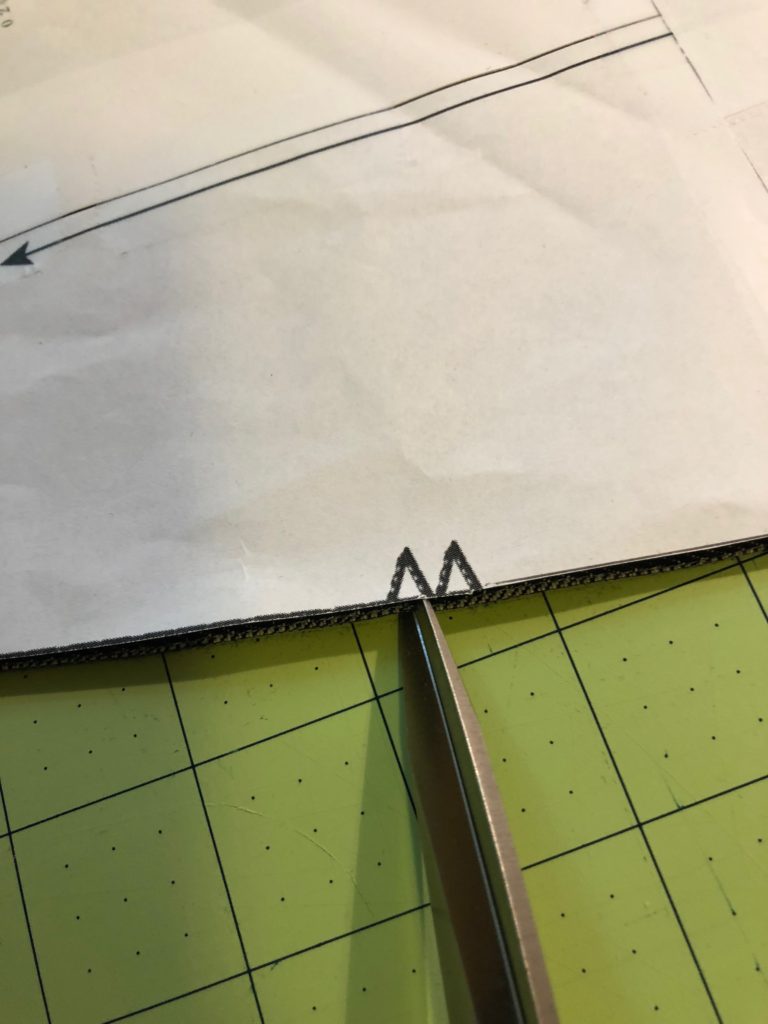
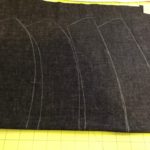
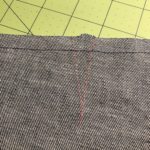
Next I transferred the markings from the pieces. For notches, I just made tiny snips into the edge of the fabric.
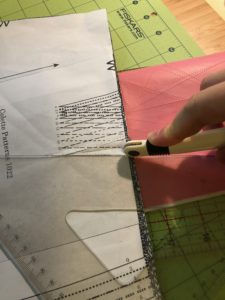
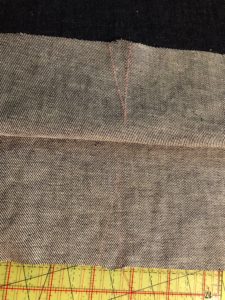
For darts, I used my carbon paper and tracing wheel to transfer them. I folded the paper in half (right side out) and slipped it between the layers, which means I could transfer to both pieces at once.
Tracing markings
Marked darts
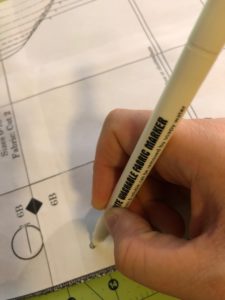
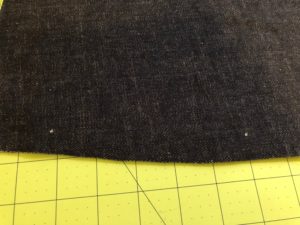
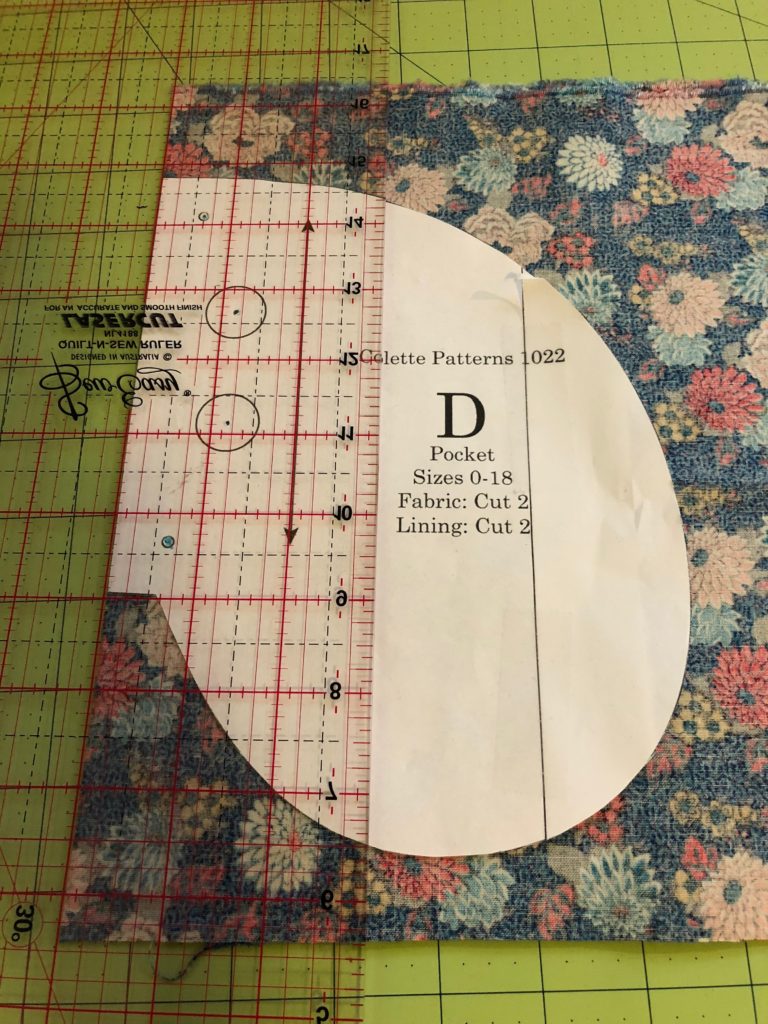
For marked dots (like for pocket placement), I poked a hole in the pattern and then used a special marker for marking on dark fabrics. It leaves a white dot that’s very visible! You can also use chalk for this.
Marking dots with special marker
Marked dots
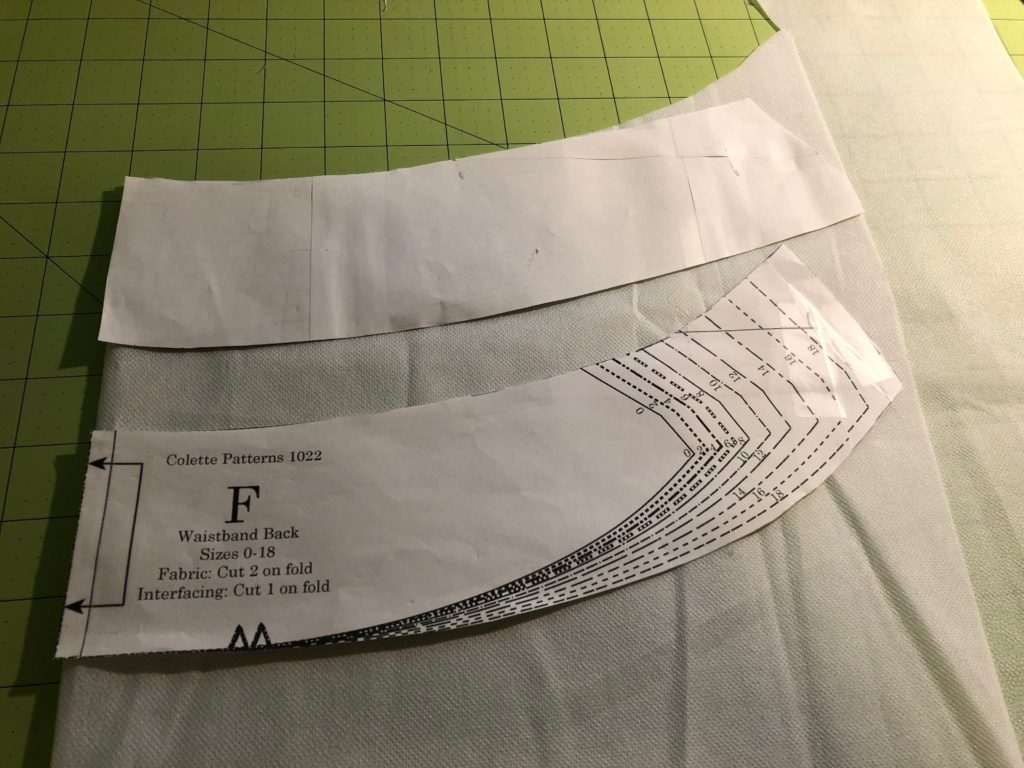
Just to show you a more lo-fi method of cutting out pieces, for the waistband I traced the pieces using chalk and cut them out with scissors. These are cut “on the fold” so each pattern piece is only half the size of the resulting fabric piece. (To maximise fabric usage, I flipped the front waistband pieces over so they nested better and resulted in less waste.)
Waistband pieces
Flipped to maximise space
Tracing with chalk
Traced pieces
I also cut all of my pockets out of my lining fabric.
The last bit of cutting was to cut the waistband pieces out of iron-on interfacing.
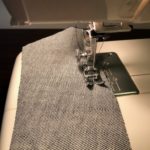
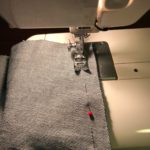
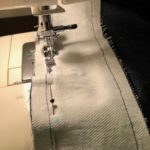
And it was finally time to start sewing! The first task is staystitching, which I hate because it’s boring. I had to sew lines of stitching along the top and bottom edges of all four waistband pieces to stabilise them and keep them from stretching. I also had to staystitch at the waist edge of the shorts pieces.
Staystitching
Staystitched waistbands
Staystitched pieces
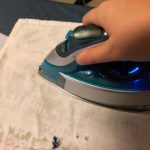
Next I had to iron on the interfacing to two of the waistband pieces. (I used a damp tea towel as a pressing cloth for this.)
Interfacing
Ironing
Waistband pieces
Next it was time to sew the darts! I put a pin at the point of the dart and then folded them to bring the legs together. I sewed from the top to the tip, shortening my stitch length as I got closer to the tip. (I normally sew at 2.5 length; by the time I get to the tip I’m as short as my machine will go.) Then I knotted the tails and trimmed them off. I ironed the darts towards the center.
Marked dart
Pinning dart
Sewing dart
Shortening stitch length
Sewn dart
Ironed darts
The next task was to finish the edges of the pockets, which I did with my overlocker. (You could also zigzag these with a sewing machine.)
Finishing edges
Finished!
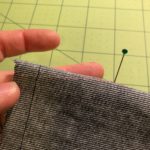
Next, I lined up the pockets with the marked dots on the side of each piece and pinned them in place. I sewed them down (with a smaller seam allowance than normal), then finished this entire edge with my overlocker. Then I ironed the pockets so they flipped away from the piece.
Lining up pockets
Pinning
Sewing
Sewn and overlocked
Ironed
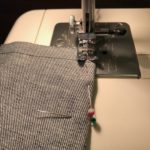
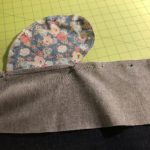
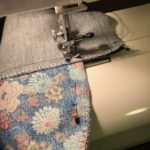
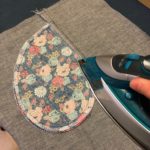
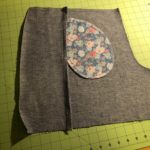
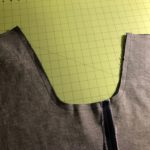
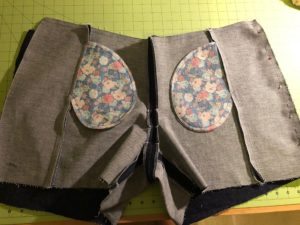
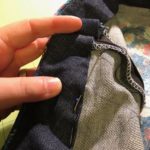
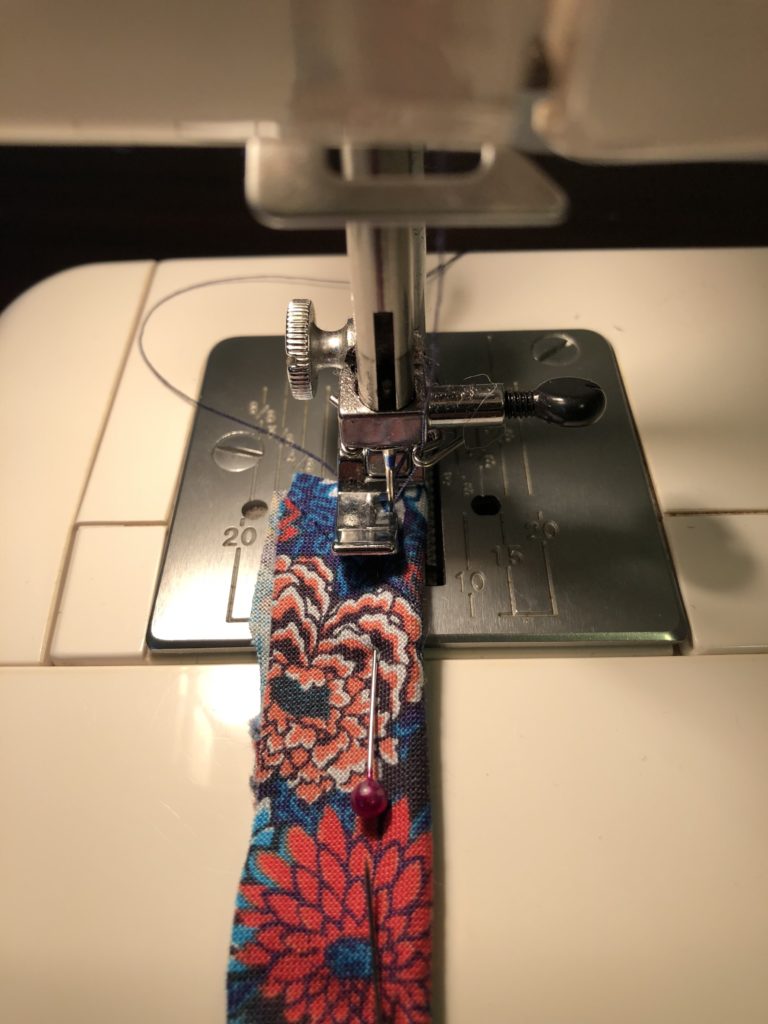
The next job was to sew the front pieces together to finish the pocket openings. I lined up the pieces and pinned them together. I sewed from the waistband down to the leg (with a normal 5/8″ seam allowance), pivoting 90 degrees to sew around the pocket pieces as I went. Then I ironed the seam, pressing the pockets towards the center. You can just see the pocket fabric peeking out!
Lining up pieces
Pinning
Sewing – pivot!
Pivot!
Sewn seam
Ironing
Finished front piece
From the outside
Pocket detail
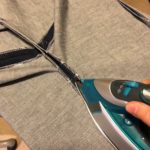
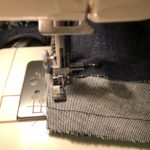
Time to sew the crotch! I joined up each front piece with its corresponding back piece and pinned the short inside leg seam. I sewed the seam, then overlocked each side of the seam allowance separately so I could iron it open.
Pinning seam
Sewing
Finishing seam
Finishing seam
Ironing
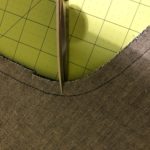
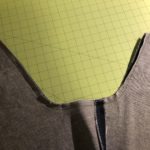
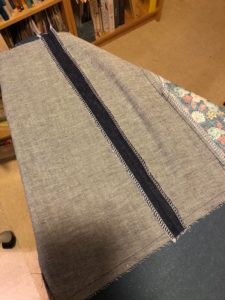
Next, I lined up the two halves of the shorts and pinned the crotch seam from front waist to back waist. After sewing this seam, I cut into the seam allowance along the curved bits to allow it open up. Then I overlocked each side of the seam allowance separately and pressed it open.
Lining up pieces
Sewing crotch
Sewn crotch
Clipping curves
Finished seam
Ironing
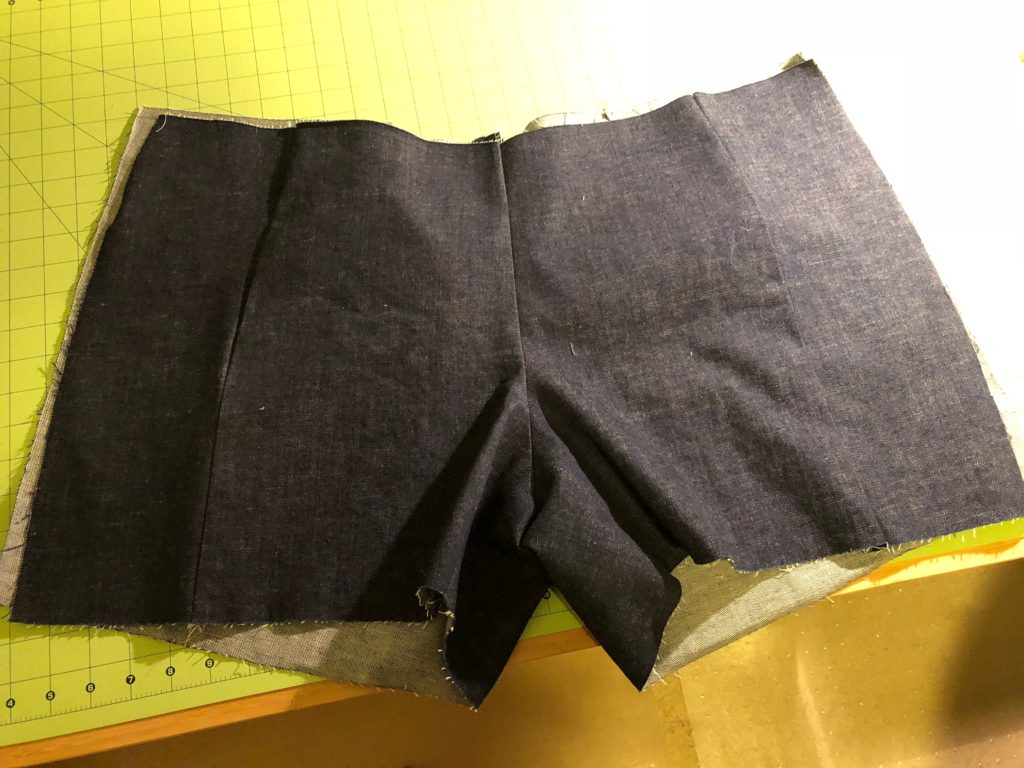
It was finally starting to look like a pair of shorts!
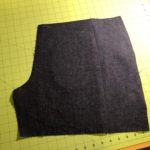
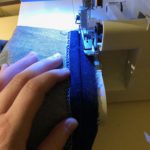
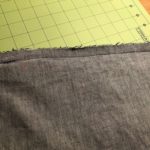
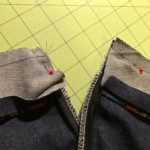
I turned them inside out and pinned the right side seam together. (The left side is left open since it will have the zipper in it.) Then I sewed the seam, overlocked the edges, and pressed it open.
Pinning seam
Finished side seam
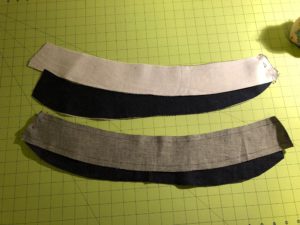
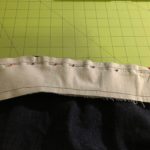
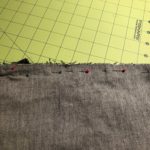
Before I could insert the zipper, I had to attach the waistband. I sewed the interfaced bands together at the right side. Because the non-interfaced waistband is on the inside, I had to sew the left side for that one. (Takes you a while to get your brain around the geometry, I know.) I finished the edges and pressed them open.
Pinned waistbands
Finished seams
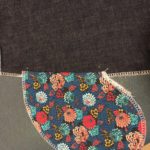
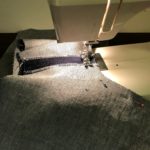
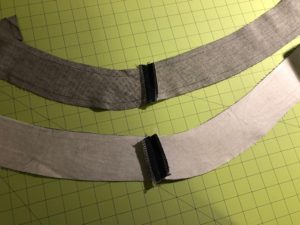
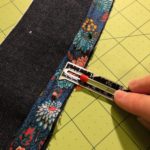
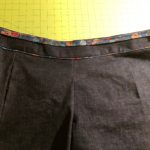
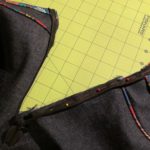
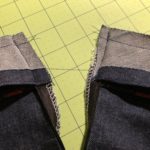
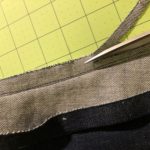
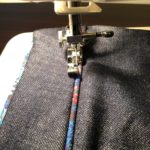
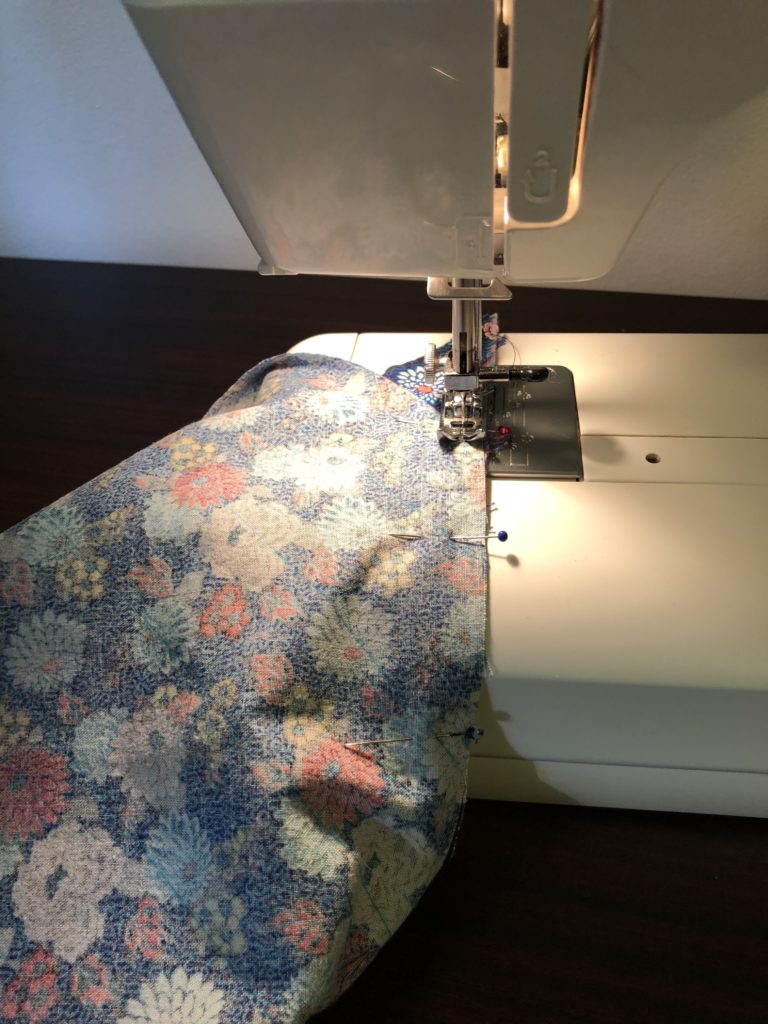
Here’s the point where I deviated from the pattern to add my piping! I pinned it to the top and bottom of the interfaced waistband piece, making sure to place it 5/8″ from the edge so it would just poke out from my eventual seams. I sewed it down using a zipper foot (which only has one prong and allowed me to sew very close up to the edge of the piping).
Pinning the piping
Sewing piping
Attached piping
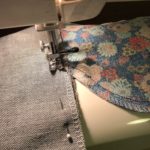
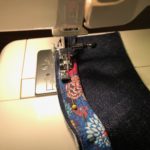
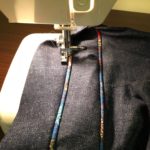
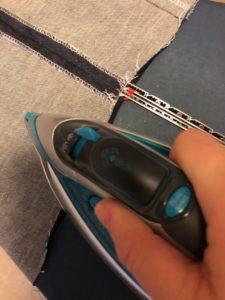
Next, I pinned the interfaced waistband piece to the top of the shorts and sewed it down. Again, I used my zipper foot so I could get close up to the piping (which was sandwiched in between the pieces). Then I ironed the seam towards the waistband.
Pinning seam
Sewing waistband
Pressed waistband
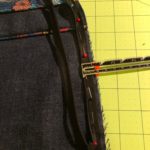
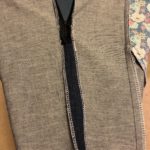
It was time to install the zipper. Rather than walk through all the steps, I’ll just direct you to Colette’s excellent tutorial. I refer to it every time I have to insert one! Pro tip: It helps a lot to have an invisible zipper foot, which has special channels that your zipper teeth travel through. It allows you to get very close to the zipper!
Zipper
Pinning zipper
Invisible zipper foot
Sewing zipper
Sewing other side
Once the zipper was in, I pinned the remainder of the left side seam. Then I sewed it, making sure to overlap a bit past the point where the zipper ended. This is where I made my one mistake of the project: I should have overlocked these edges before putting in the zipper! I managed to do it after the fact, but it was a little messier than it could have been. Then I pressed the seam open.
Pinned seam
Sewn seam
Finished seam
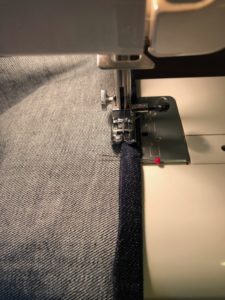
Attaching the waistband facing is really counterintuitive and weird, so you just have to follow the pattern instructions and trust that it will turn out! I started by turning up the bottom edge 5/8″ and pressing it in place. Then I opened the zipper and flipped out the seam allowances. I aligned the waistband facing to these edges and sewed them down as close to the zipper teeth as I could get.
Pressing bottom edge
Pinning at zipper edge
Sewn zipper edge
Then Colette has you do something really weird: you turn the zipper away from the opening again. Then I stitched down all along the top of the waistband, sewing slowly over the zipper and using my zipper foot to get as close to the piping as I could. Then I trimmed down the seam allowance at the corner and graded it down all along the seam. Then I flipped the facing away from the seam and understitched it as far as I could (meaning I sewed the seam allowance to the facing along the edge of the piping – it’s supposed to make sure the waistband rolls to the inside).
Flipped, sewn, and clipped
Grading seam allowance
Understitching
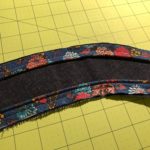
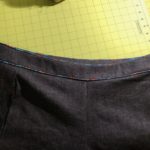
The final waistband steps were to turn out the waistband completely and poke out the corners, give it a good press, then hand baste down the folded facing edge on the inside. Then I edge stitched on the outside of the garment along the piping to make sure the facing was caught and sewn down securely.
Pressed waistband
Basting facing
Edgestitching
And the final, FINAL step was to hem the legs of the shorts. I folded them up twice and pressed, then sewed down the hem. And they were finished!
Pressing hem
Sewing hem
I hope that gives you an idea of the amount of work that goes into a single garment. I think there’s a perception that sewing your own clothes saves money. It really, really doesn’t. Think of it this way: all up, these took me about 7 hrs over the course of two days. (That includes an hour to make my own bias binding and piping though.) At current Australian minimum wage of $18.29, that means there’s well over $100 worth of my labour in these. The cost of materials would push that even higher.
Now think about how much you might pay for a pair of denim shorts in a shop. I’m guessing it’s a lot less! (And no, it’s not solely due to automation. Sewing clothes is still a largely manual process, as robots can’t yet handle textiles very well.) Someone got paid to make your clothes, and they probably got very little for it and worked in very crappy conditions. No, I haven’t stopped buying clothes in shops yet. But making my own things makes me more appreciative of the work that goes into it, and less willing to shop at the “fast and disposable” fashion places these days.
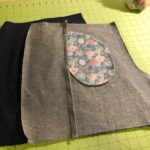
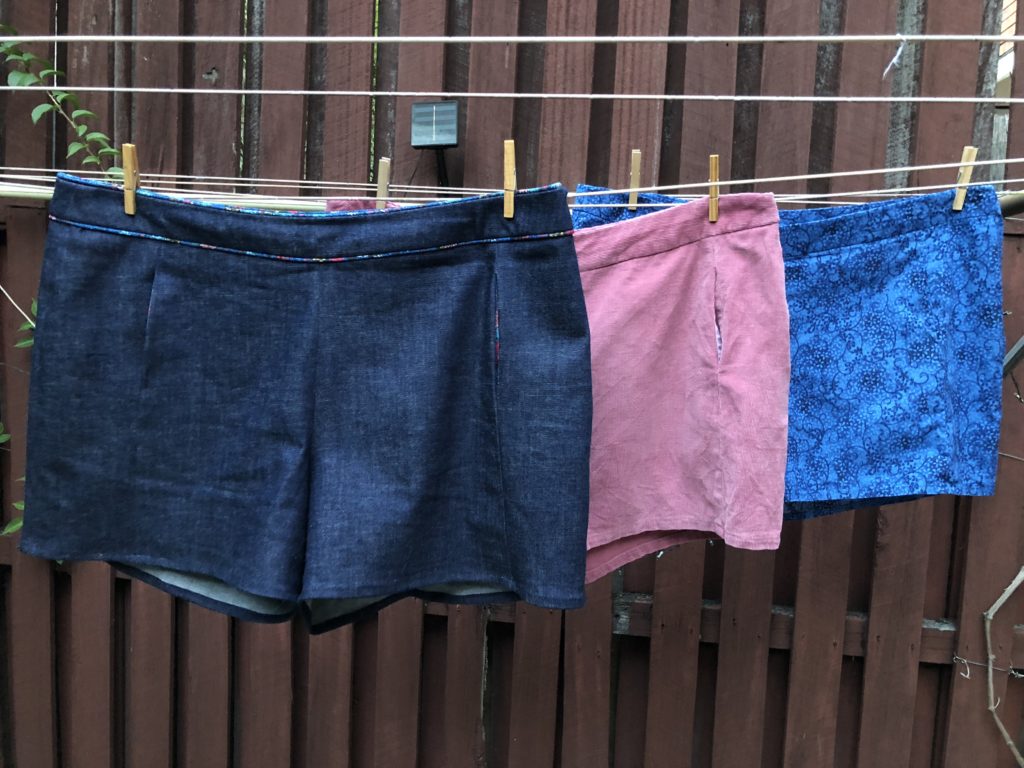
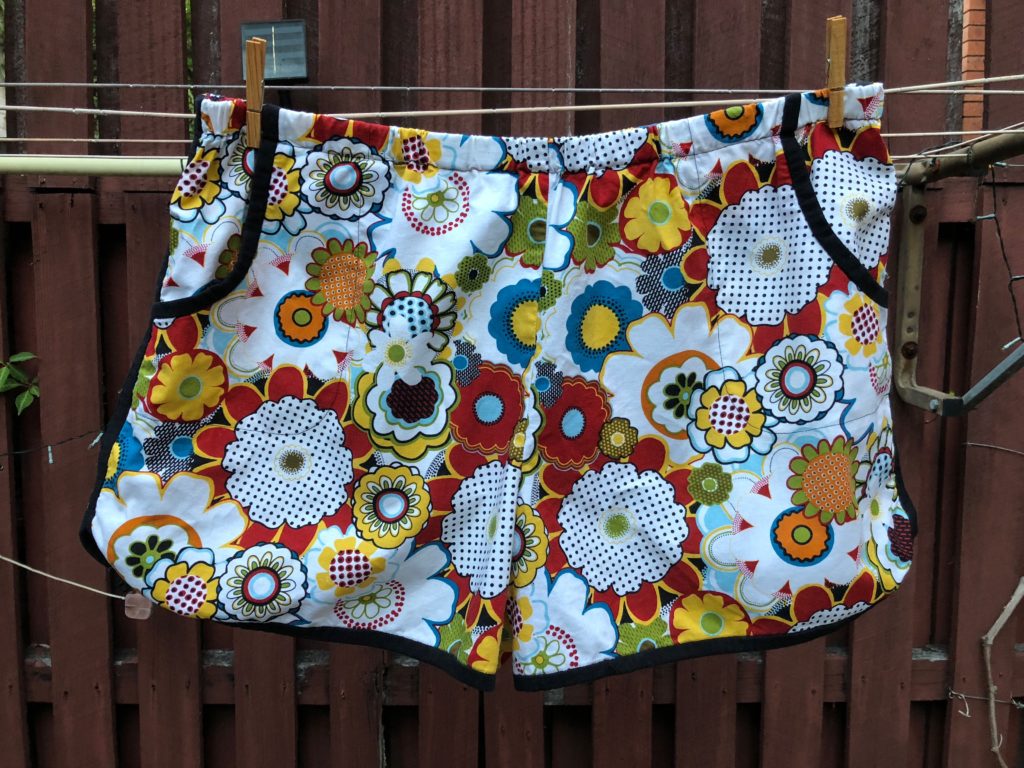
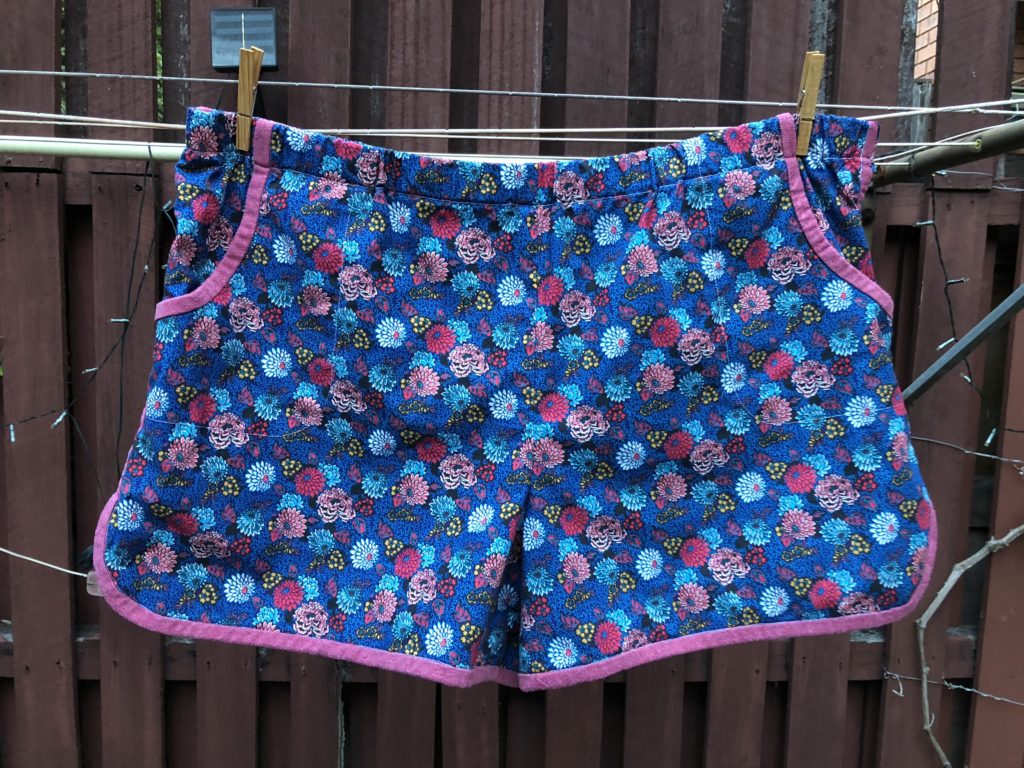
I realised back in December that my wardrobe was pretty light on shorts and set out to rectify that. I ended up making FIVE different pairs from two different patterns, and I’m pretty happy with how they turned out!
These three pairs are all based on Colette Patterns Iris Shorts. They’re sort of retro, with pockets set into a front seam rather than on the hips. They open with a zipper on the left side. I bought this pattern years ago and made a first attempt at them, but they didn’t fit at all and I was too disheartened to try again. This time I was determined to crack it.
This was my first attempt. I didn’t want to use anything too fancy until I had fixed the fit issues so I used this blue floral quilting cotton I had in my stash. My first attempt was again a complete disaster, so I ended up pulling them apart and recutting the bum pieces to add more width to accommodate my hips. That seemed to do the trick! Wearable, but not perfect.
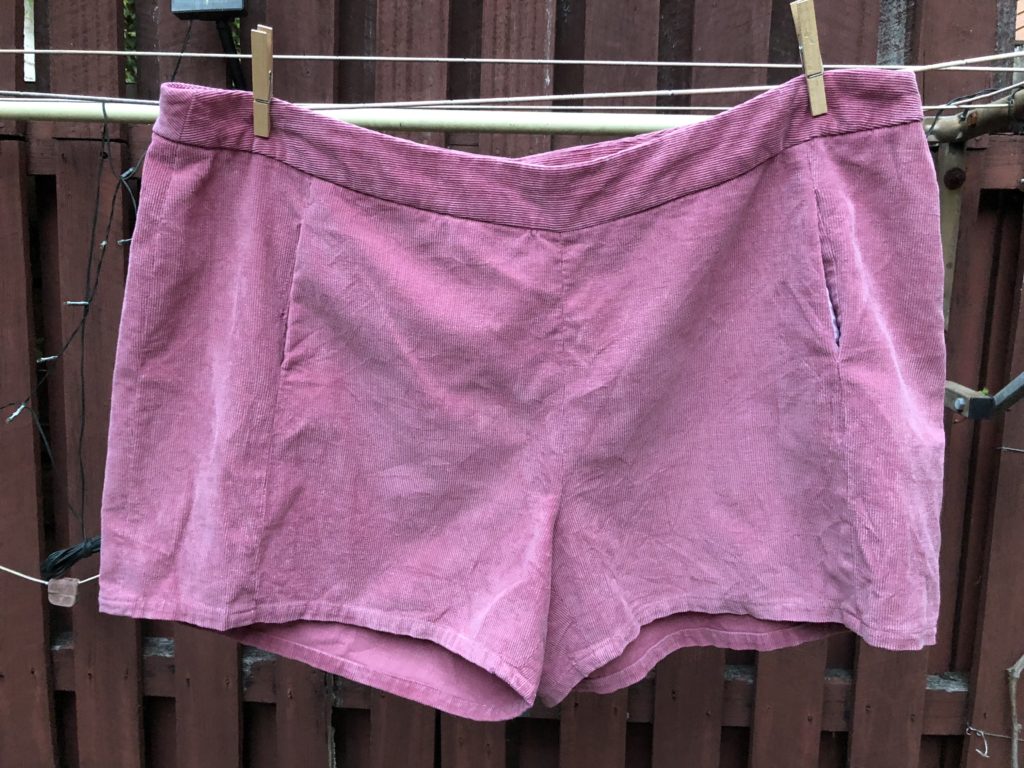
For my second attempt, I made further adjustments. The blue pair felt like they were, uh, riding a bit high, so I lowered the crotch by half an inch on both the front and back pieces. (The first adjustment detailed on this page.) For this pair, I used a pink fine-wale corduroy I bought from Jody’s Mum’s destash. I didn’t have much of it, which turned out to be problematic when I screwed up the cutting and had to recut one of the front panels. There’s definitely some bodgy bits around the pockets on these, but overall the adjustment was a success. The fit is relaxed and comfortable!
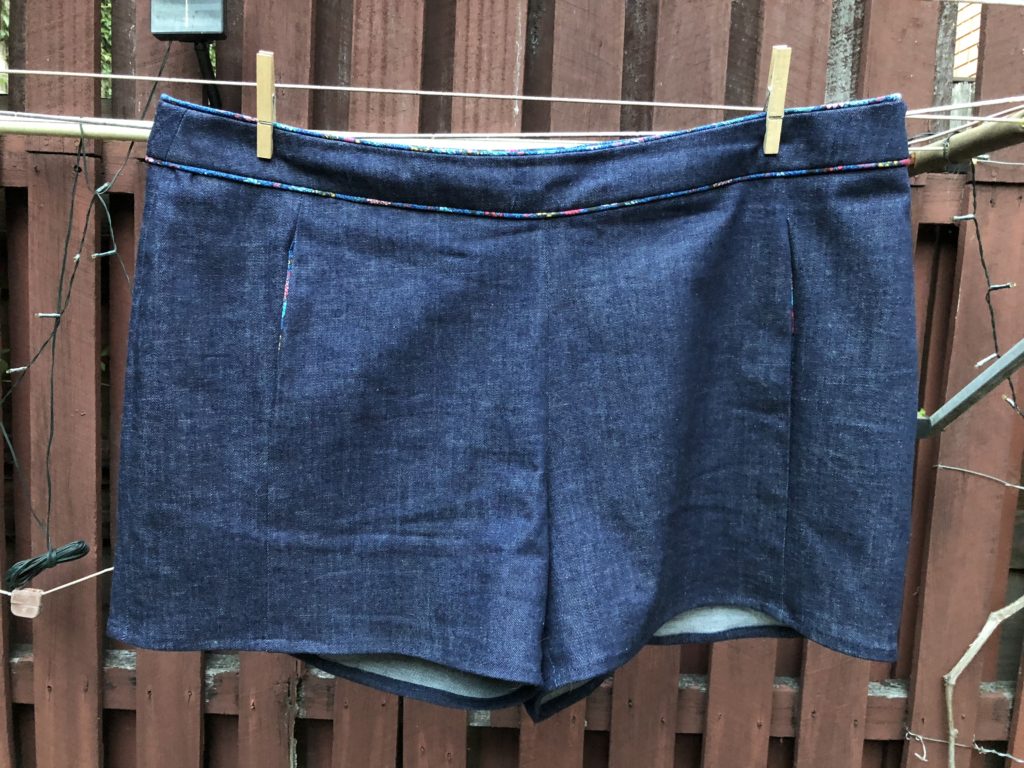
The last pair were just finished today. These are made from a beautiful denim that I picked up during The Fabric Store‘s recent sale. I made one final adjustment to the fit, to “scoop out” a little more of the front crotch and remove a little excess fabric there. I decided to get a bit fancy with these and apply piping to the top and bottom of the waistband. I used some beautiful Liberty cotton canvas for the piping and the pockets, and I’m so happy how they turned out! (I also documented the whole process of making them, which I’ll be posting soon.)
This pattern is a roomy cut and features very inclusive sizing, so I didn’t have to make a single change. These were the first pair I made, which used some quilting cotton I’ve been holding on to for years, waiting for just the right project. I’m slightly annoyed that I wasn’t smart enough to vary the placement across the fronts to avoid the obvious repetition across the crotch seam, but it’s fine. The waist is elastic so you don’t have to bother with putting in a zipper. The black trim along the edges is actually recycled from an old t-shirt! That’s a trick that the pattern suggests, and it’s brilliant. Since it’s a knit it goes around the curves easily without needing special bias tape, and it feels great against your skin.
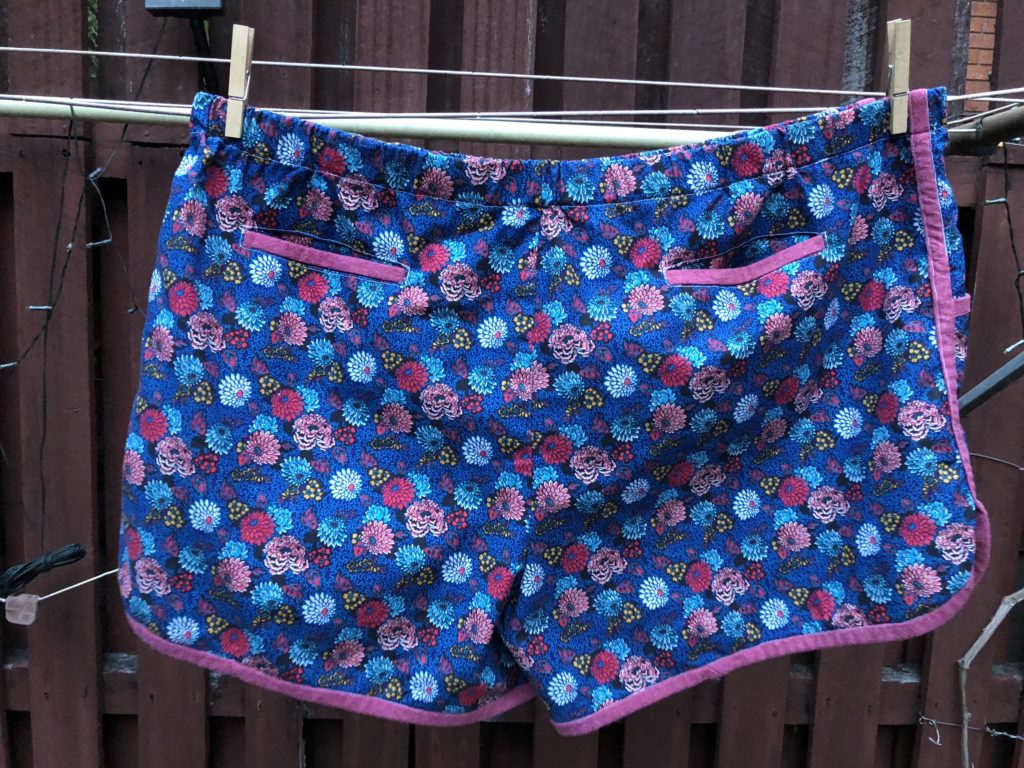
My second pair turned out so, so well. As soon as I saw this Liberty Meandering Chrysanthemums cotton canvas at The Fabric Store’s sale, I fell in love and immediately knew it was destined for these shorts. The dusty pink trim is again from an old t-shirt.
For this pair, I also added welt pockets on the back. They’re a perfect size for my cell phone!
I cannot tell you how satisfying it is to make your own clothes! It’s getting to the point now where Rodd and I will both be wearing garments that I’ve made, out in public or to work or whatever, and nobody knows that there’s actually no label inside. Hm. Maybe I should get my own labels, huh?
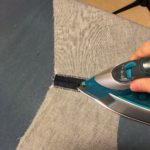
For my latest sewing project, I decided to try my hand at using some contrast piping along the waistband. I’ve only ever used piping once before, for the Comma Club Cushion I made for the Canva Hackathon a few years back. It wasn’t too hard though and I still had plenty of the cording left over.
To make piping, you need bias tape. I should probably explain what the heck that means. For those who don’t sew: imagine fabric being woven on a loom. You’re picturing it as a rectangle, right? Pretty much like a big bedsheet. And that’s correct! Woven fabric has threads at right angles to each other, and it’s usually pretty strong and non-stretchy if you pull on it lengthwise or widthwise (unless it has elastane or something like that in it). However, if you pull on a piece of fabric diagonally, you’ll probably find that it does have some stretch. We refer to the direction diagonal to the weave of the fabric as the “bias.”
If you’re cutting out pieces of fabric to make clothing, you normally want to keep the pieces oriented straight up and down to keep them from stretching out of shape. That’s why pattern pieces usually have lines on them so you can line that up with the straight edge of the fabric. Occasionally though – most often for certain dresses – you want a kind of flowiness that clings or skims over the body. In those cases, you cut the fabric on the diagonal. (You may have even heard the term “bias cut dress” or something like that.) Fabric cut on the bias is stretchy enough to move and flex around curves. That’s what we want for the piping, because it’s going to be applied around the curved waistband of my shorts.
You can, of course, purchase pre-made bias tape (also called bias binding). That’s what I did for the Cushion, and it worked fine. But it tends to just come in plain colours though, and I wanted to use a special fabric. That means I had to make my own! I highly recommend you try this sometime. It’s really satisfying, and it doesn’t take that long. It’s also a great way to use up scraps of fabric that aren’t big enough to use in other projects.
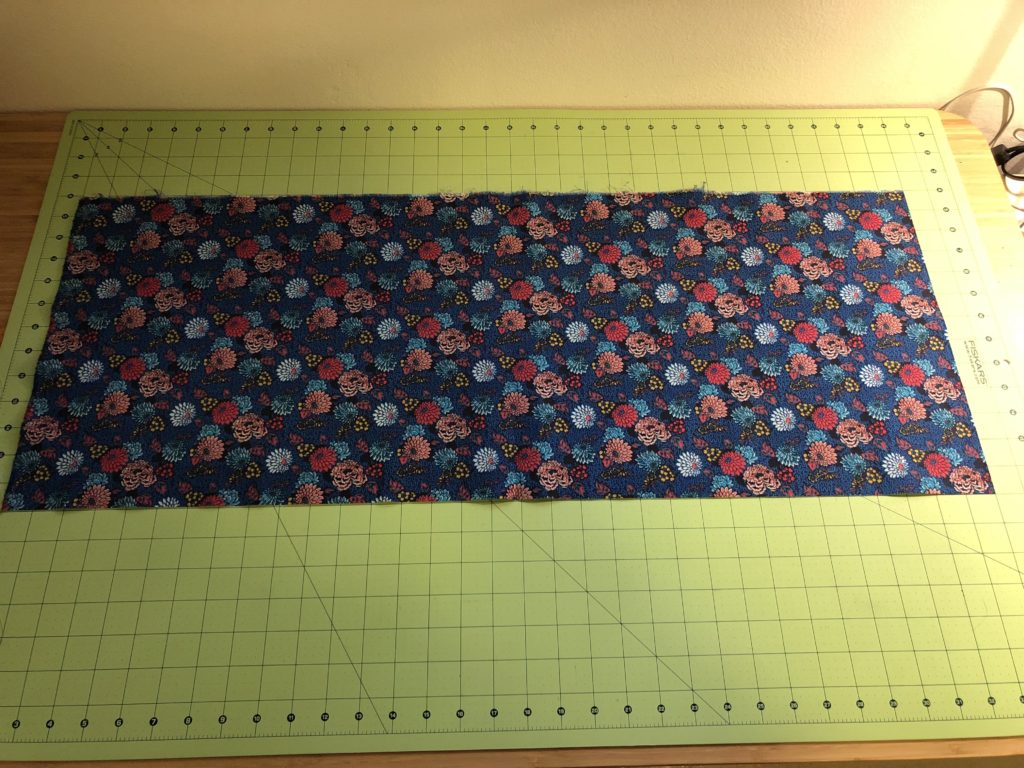
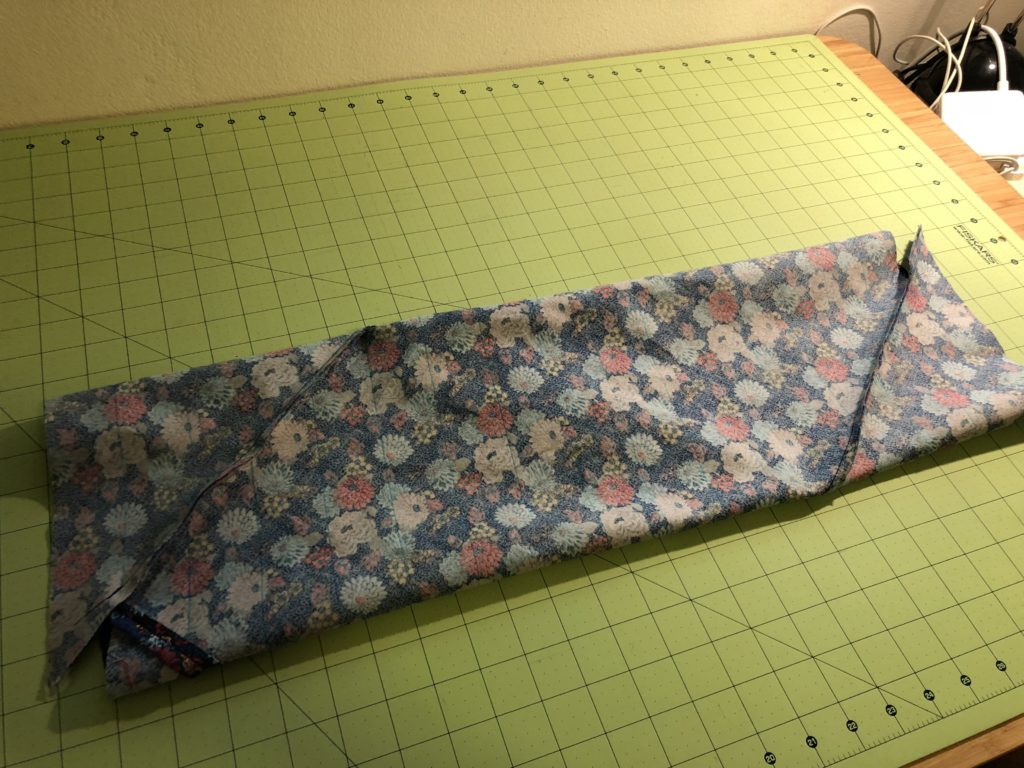
The method I use is based on this tutorial from Seamwork. I recommend you look at that one first, as it uses a small square of striped fabric and is thus slightly easier to see what’s happening. I started with a rectangular piece of my fabric that was 33 inches wide and 13 inches tall. (Actual size doesn’t matter as long as it’s cut “on the grain” – ie. straight.) And yes, I tend to use English measurements when sewing, just because my cutting mat uses them as well as most of my patterns. Feel free to convert to metric; it makes no difference to the end result.
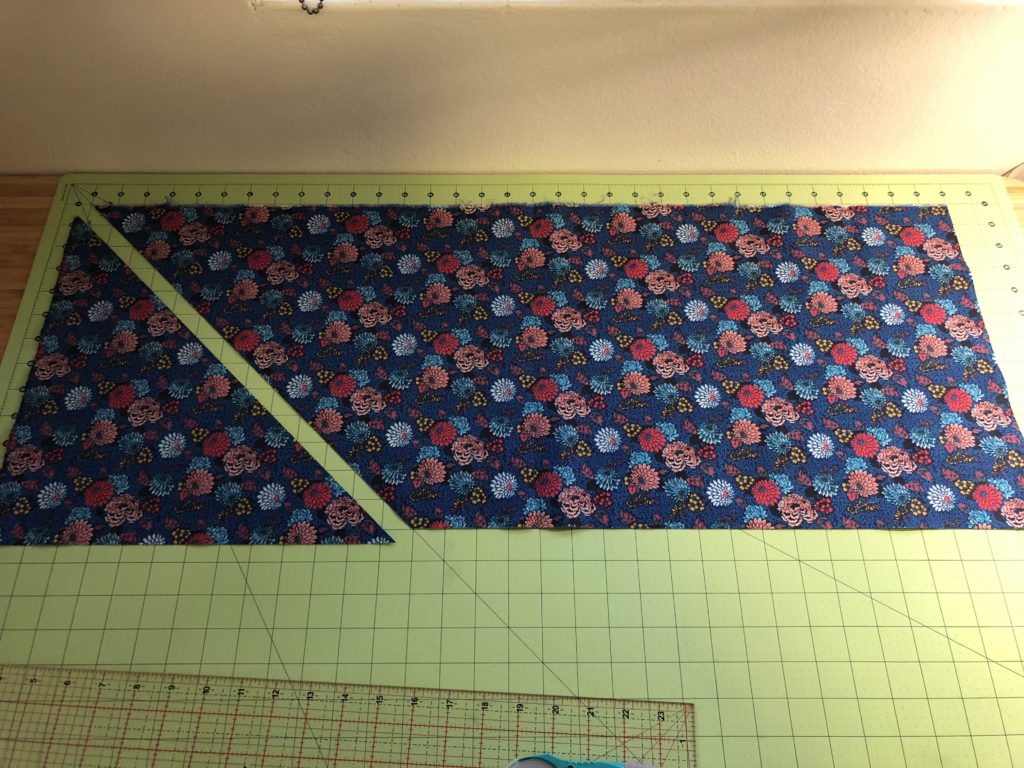
Next, I cut off one corner at a 45 degree angle. I used the lines on my cutting mat for this with a long ruler and my rotary cutter, but you can also do it by drawing a line and then cutting along it with scissors.
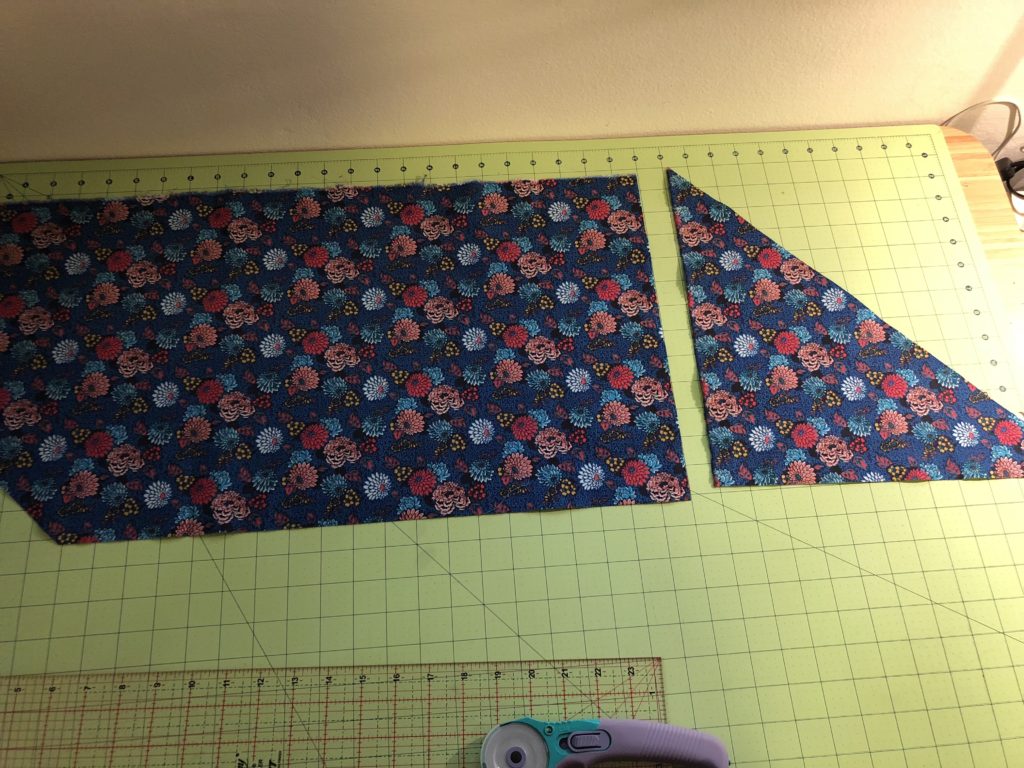
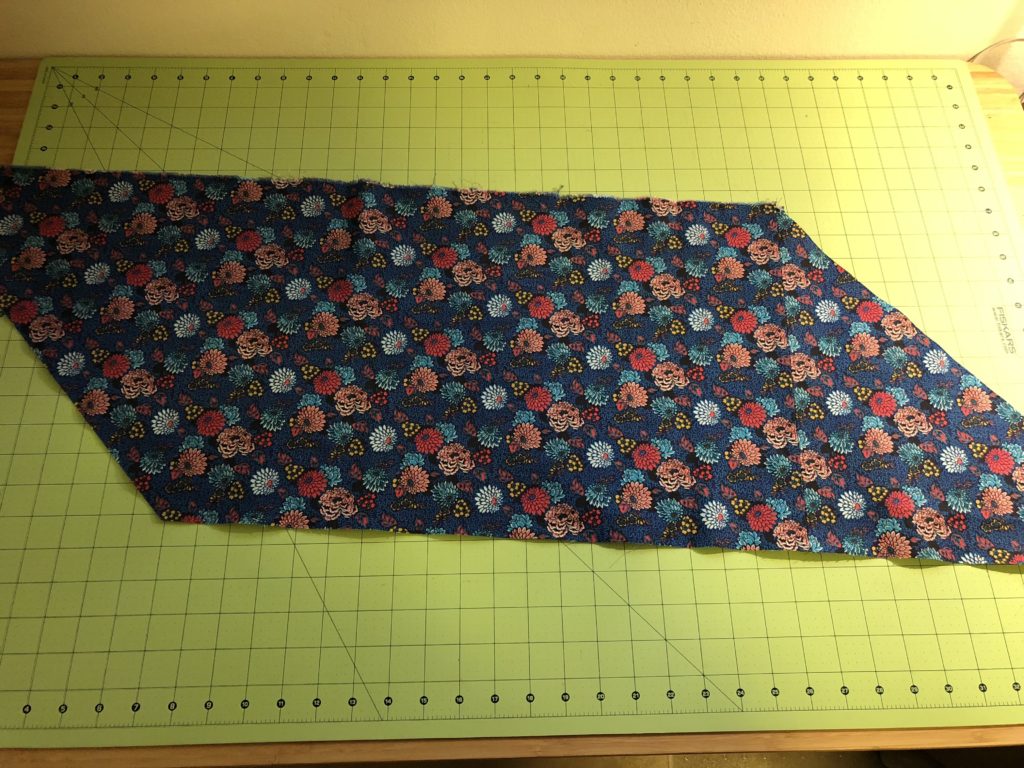
Now you want to move that piece you cut off to the other end of the fabric to make a parallelogram. We could just cut off both opposite corners and throw them away, but that would be wasting fabric. By constructing a parallelogram first, you’re using every bit of it (which is nice, because this fabric is expensive!).
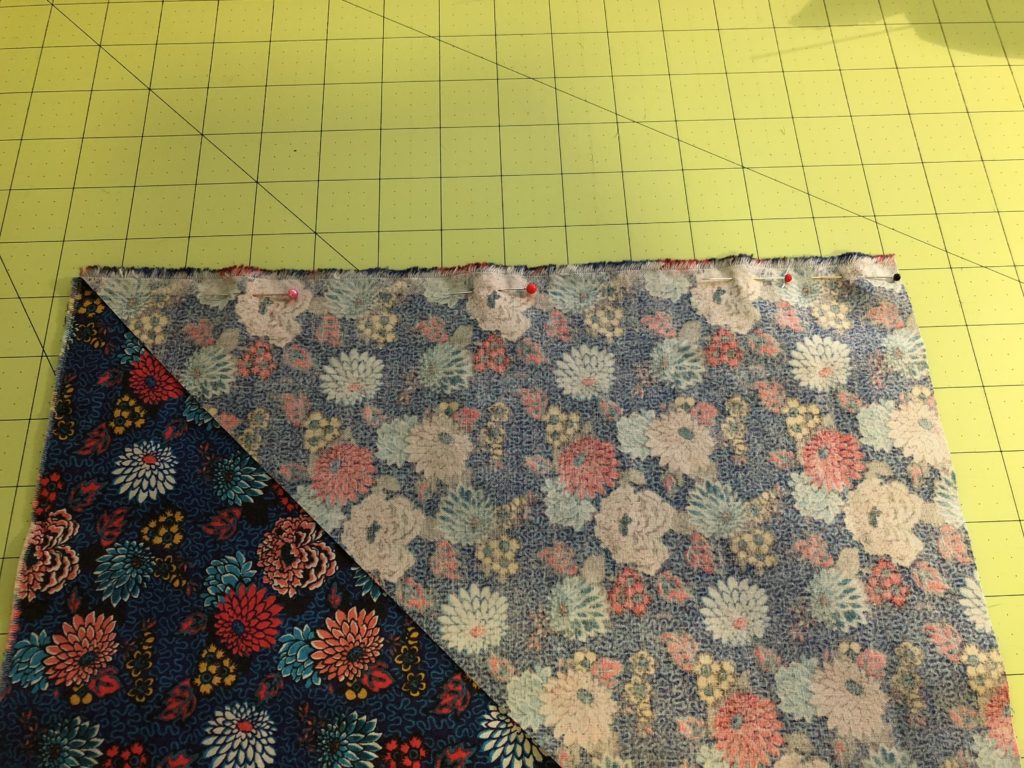
Now I need to sew those two straight edges together to join up our parallelogram into a single piece. Here I’ve pinned the triangle on top of the other pieces, right sides together.
Now to the sewing machine! I’m going to sew this seam with a normal straight stitch and a narrow 1/4″ seam allowance.
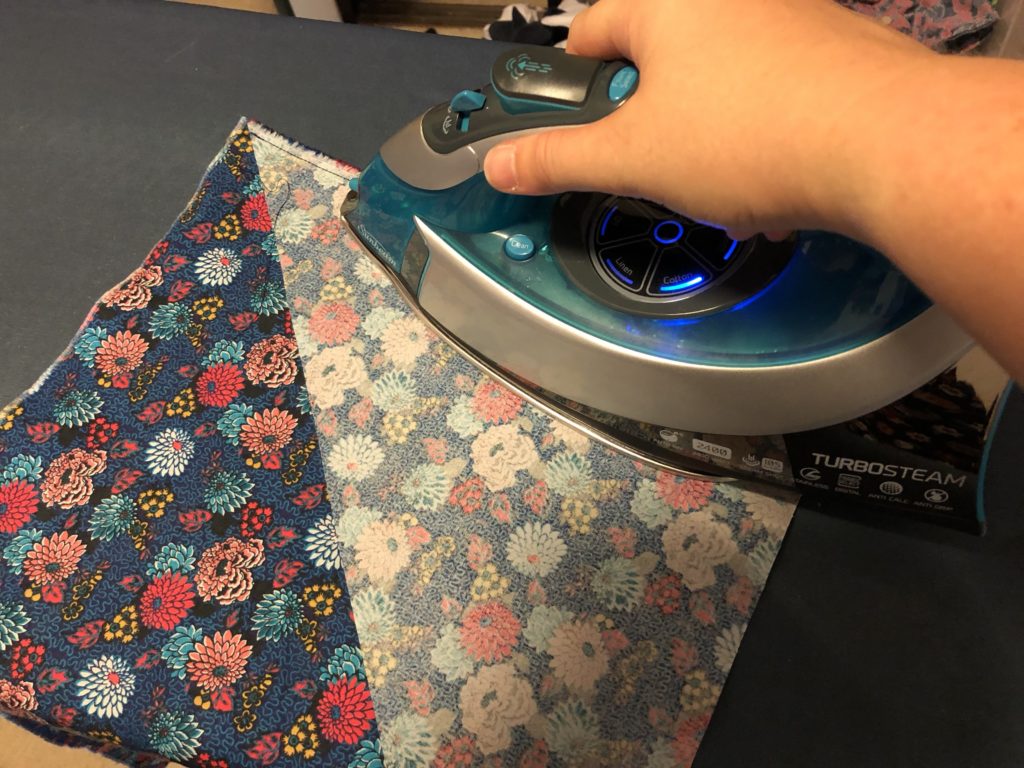
Once it’s sewn, it’s over to the ironing board. First I press the seam to “set” it. (I have no idea if this really makes a difference, but I read a suggestion to do it once so I do. 🤷♀️)
Then I place the fabric face down and use the iron to press the seam open and flat.
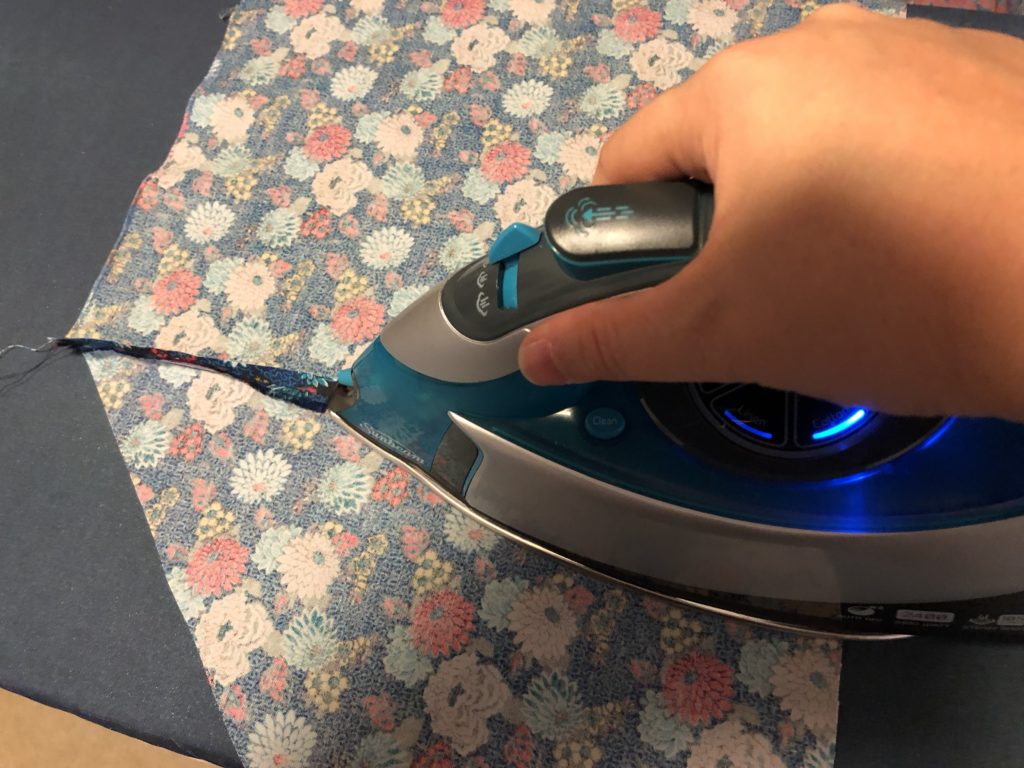
The end result looks like this on the back…
And now you can see our joined and finished parallelogram!
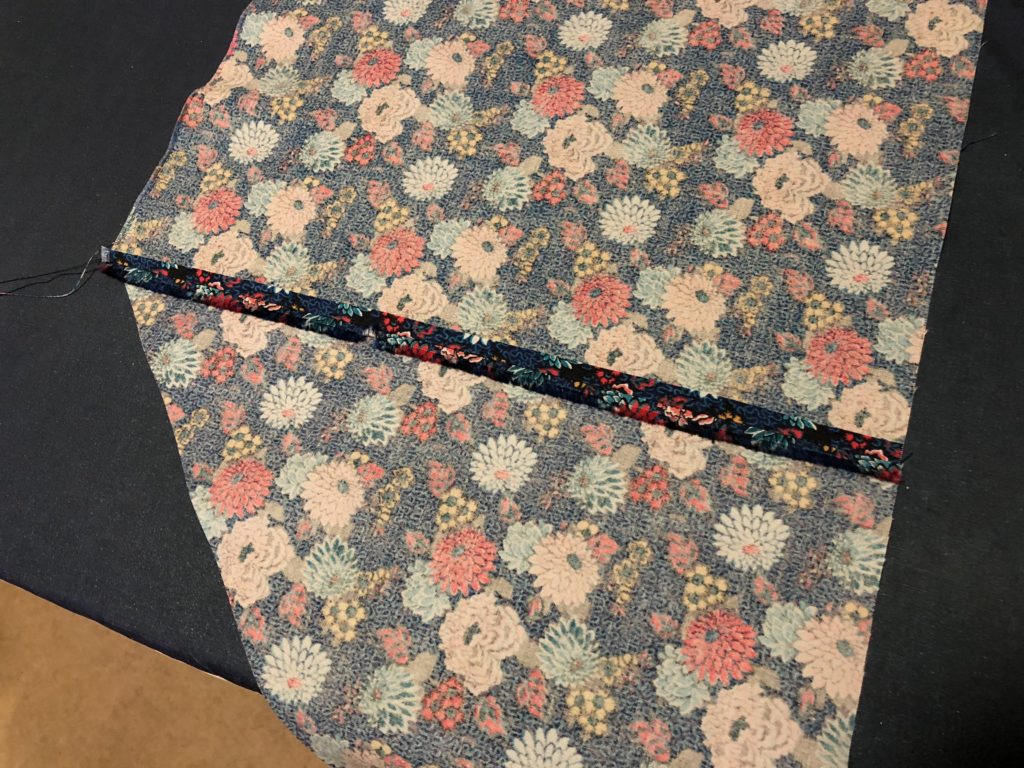
The next step is to mark the width of your bias strips. I wanted mine to be 1 1/2″. Since my fabric is so dark, I flipped it over and used a washable fabric pen to draw the lines with a ruler. You can just see them in this photo below. (They’re light blue.) The lines go right over the seam we just sewed. Whatever width you’re using, you’ll probably have a little bit left over at the end of your parallelogram. That’s okay; you can just cut it off.
Now – we could just cut all these strips and then laboriously sew them all together. But where’s the fun in that? It’s time for SEWING FUN WITH GEOMETRY. We are going to turn this flat piece of fabric into a tube with a continuous spiral of bias tape going around and around it. Get ready for your brain to turn inside out!
Basically, we’re going to line up the marks we just drew on the long sides of the parallelogram and then sew them together. However, if we just lined them up straight, when we cut them apart we’d get a series of circular rings of fabric. So instead we need to offset it by one so that the line goes around and around continuously. Again, I think the Seamwork tutorial does a good job of showing how this works. (It really is something you need to do yourself to really grok.)
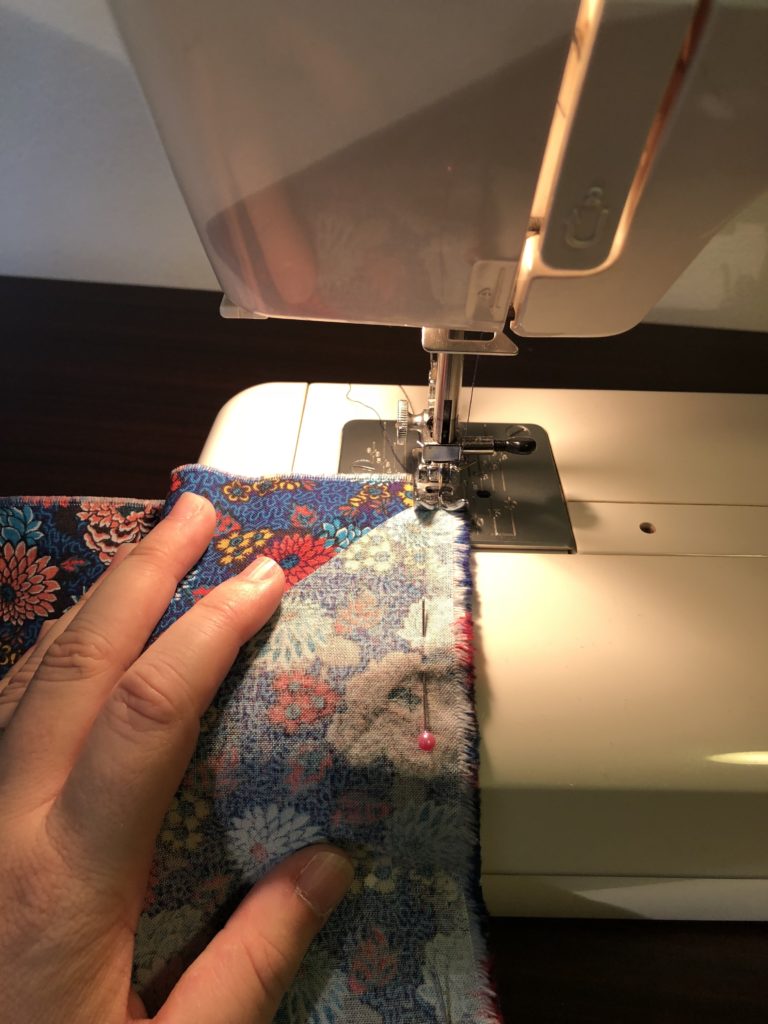
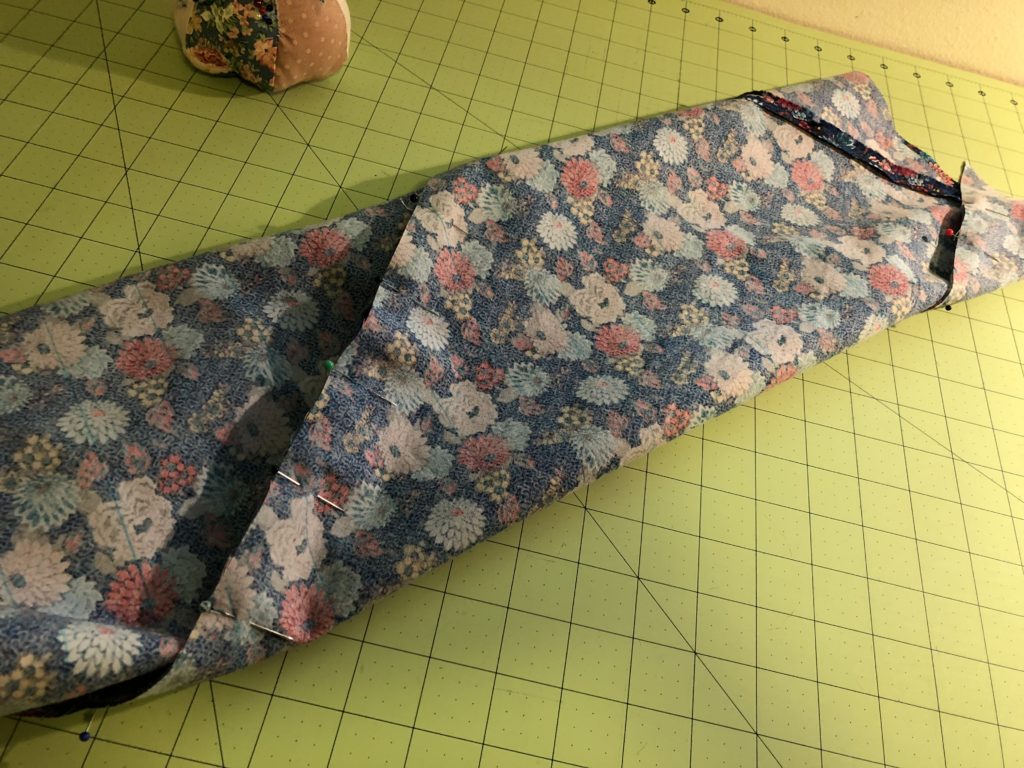
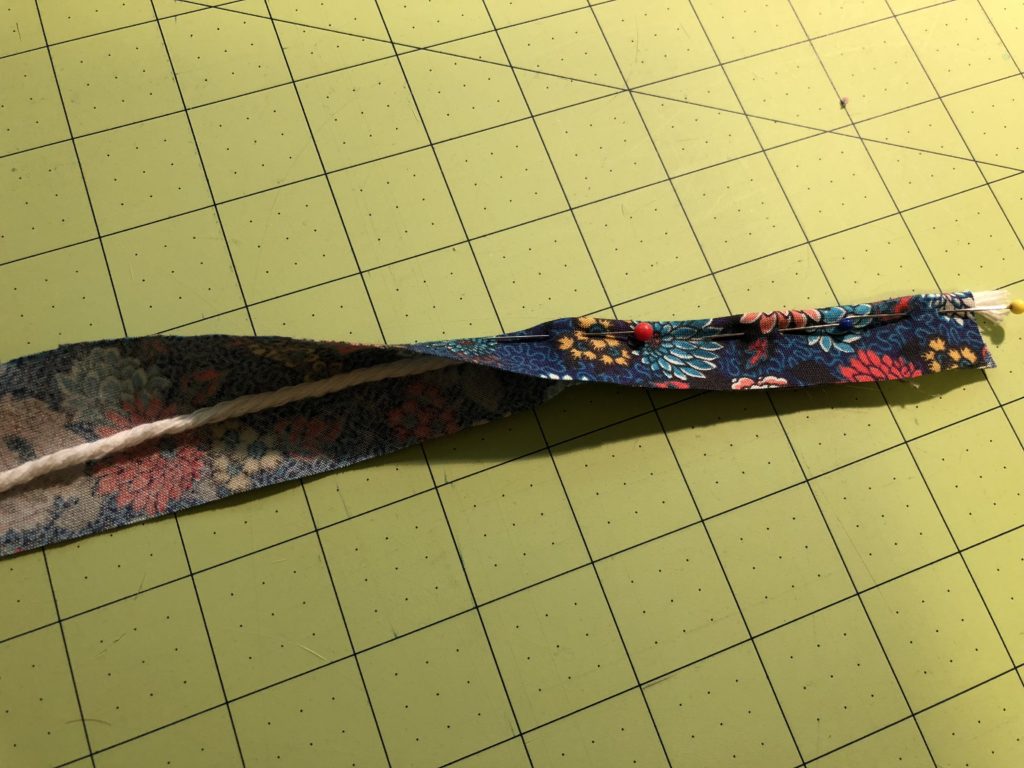
Here I am pinning the tube seam with right sides together. I pin at every single line, placing my pin at a 1/4″ seam allowance and making sure it intersects the other line at exactly that point. You’ll find the fabric doesn’t easily want to offset like this, and to some extent you have to keep turning it and coaxing it as you go.
This is what the tube looks like all pinned up for sewing. It’s like a shirt sleeve, but twisted. You can see that the seam with the pins that we’re going to sew actually wraps around the tube.
Sewing it is awkward but doable. Just do a little bit at a time, and keep rotating the tube as needed as you go down. The key is to make sure you’re not inadvertently sewing over any other bits of it as you go. Just keep a nice narrow 1/4″ seam as we did before.
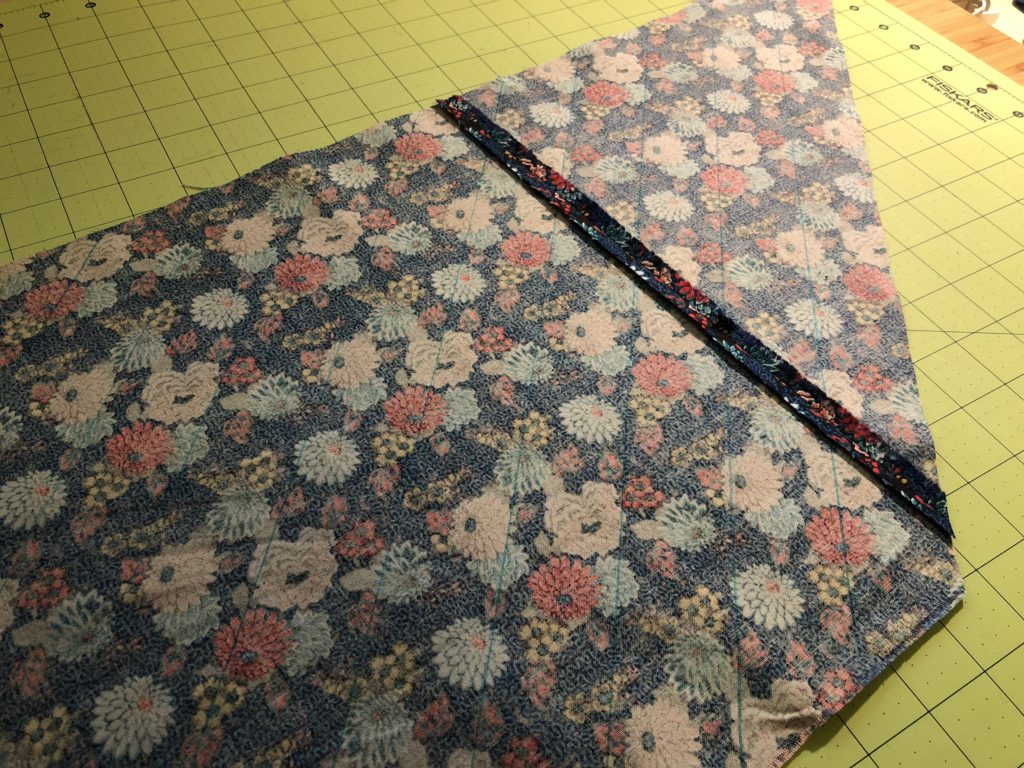
Once you’re finished, your completed spiral tube will look like this. You can clearly see the offset strip at each end as well as how the lines I drew continue around and around, over the seams.
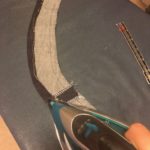
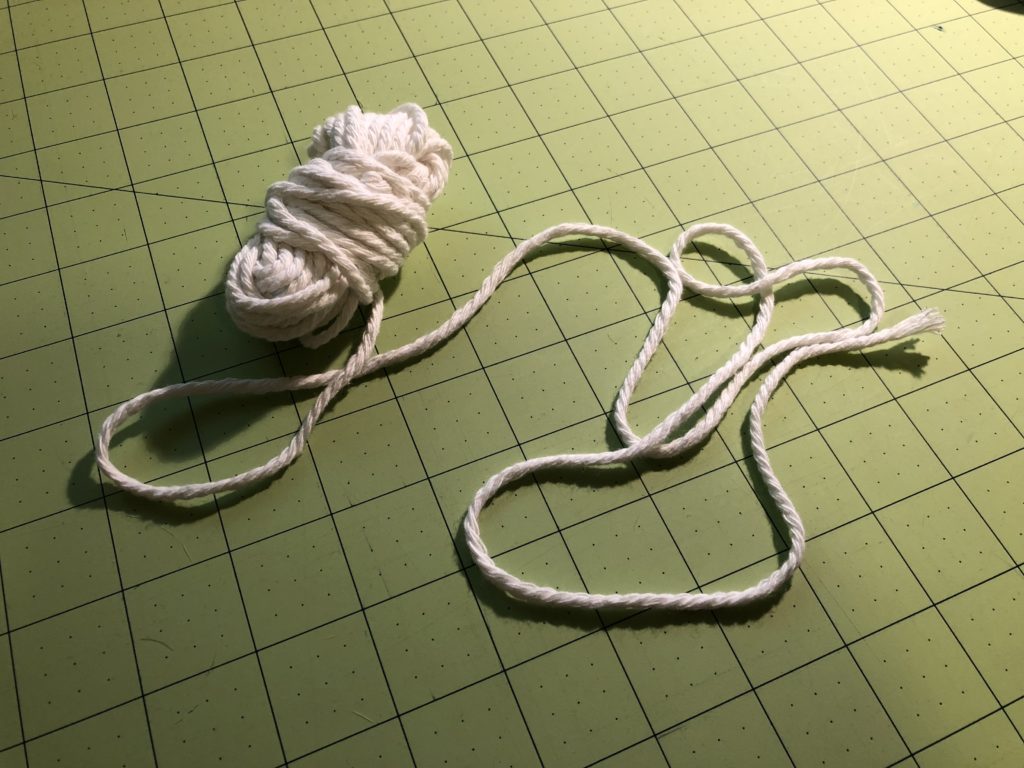
The last step is the fun part – start at one end and just cut along your drawn line! You’ll go around and around the tube in a spiral, with a lovely pile of bias tape accumulating beside you. This piece of fabric turned into a bias strip 7 yards (6 meters) long! Here’s a time lapse video of me cutting mine.
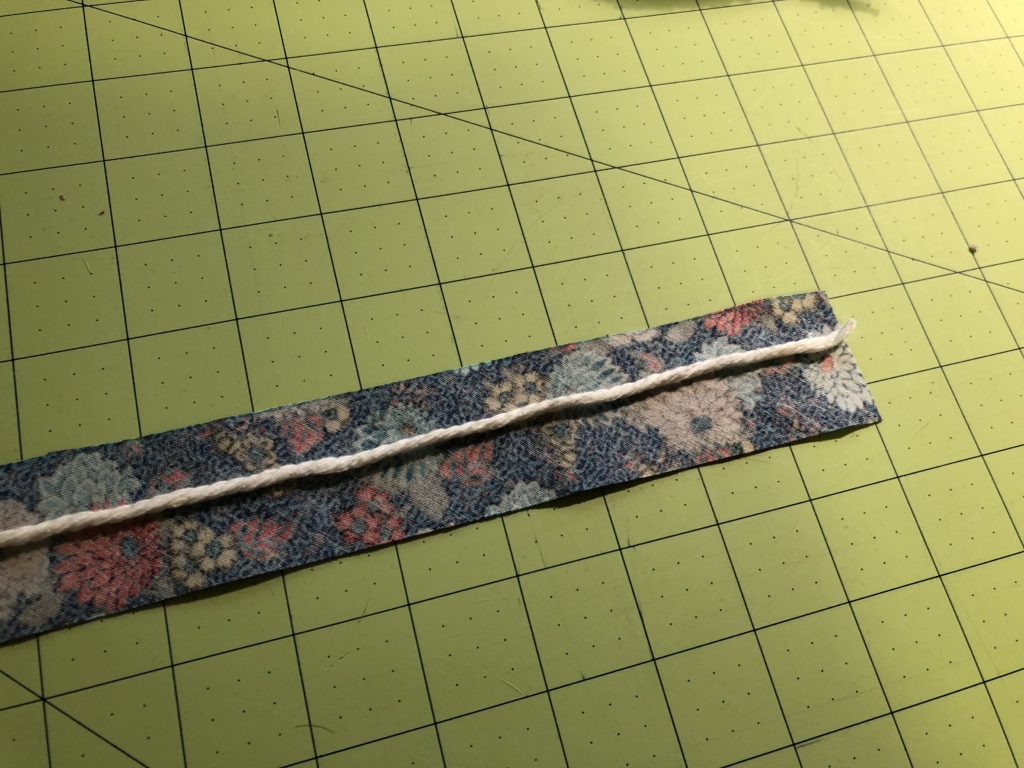
And that’s it! I gave mine a final iron and pressed open any remaining seams. Now it was time to finally make the piping. I was going to use it around the top and bottom of my waistband, so I worked out roughly how much cord I’d need and cut off that much (plus a couple inches for safety). Then you just lay your cording down on in the middle of the wrong side of your lovely bias tape.
Then you fold it over to sandwich the cord and place pins along the length as close to the cord as you can.
The last step is to sew along the line of pins. You should use a zipper foot for this. This is a special sewing machine foot that only has one “prong” so you can get very close to a zipper (or your bit of cord, in this case).
And that’s it! With my custom piping all finished, I was ready to use it in my sewing project. Stay tuned for that one…