
Christmas craftiness – it’s a pear pincushion!
Tag: sewing
-
Photo post
-
A-line Skirt
 A-line Skirt
Another finished thing for Sewvember! I made this last weekend based on the hand-drawn pattern I used for my previous A-line skirts. The fabric was a remnant that I bought at Publisher Textiles when my Mom was visiting last winter. I believe it’s a thick cotton. Instead of a waist facing, I drafted my own waistband using this Colette tutorial. Somehow I got muddled and put the zipper on the right instead of the left, but that was the only snag in an otherwise quick and rewarding project. -
Photo post

Finished this month’s MetaQuilter square. That was a LOT of seaming! #sewvember -
Photo post

We hung our new art today. Suddenly our place feels very grown up! Thanks @artbuds! -
Colette Hazel
Colette Hazel

Frocktober #12 – this is @ColettePatterns Hazel I sewed last weekend! #ifeelprettyEdited to add: And here’s my third finished dress! I actually managed the whole thing – from cutting to finished – in a single day. The pattern is Hazel by Colette. The fabric is some cotton that I picked up at Lincraft during their sale. (No matter how much I iron it, it looks wrinkly. I think it just wants to be wrinkly.) I didn’t bother with a muslin; I just went for the size based on my bust. Unfortunately I think that was a bit too big, as I ended up having to go back and take in the bodice side seams a bit. Next time I’ll do a smaller size. I had been nervous about the diagonal bodice seams, but they turned out pretty easy. The zipper insertion was fairly painless too. Pretty cute, huh? The only negative is that the strap placement made it difficult to find a bra to wear with it. I ended up going with one with “clear” straps so they’re less visible. Still, I think I’ll definitely make another of these. I’ve got a border print calling to me…
-
Washi Dress

Frocktober #7. This is the Washi Dress I made this past weekend!
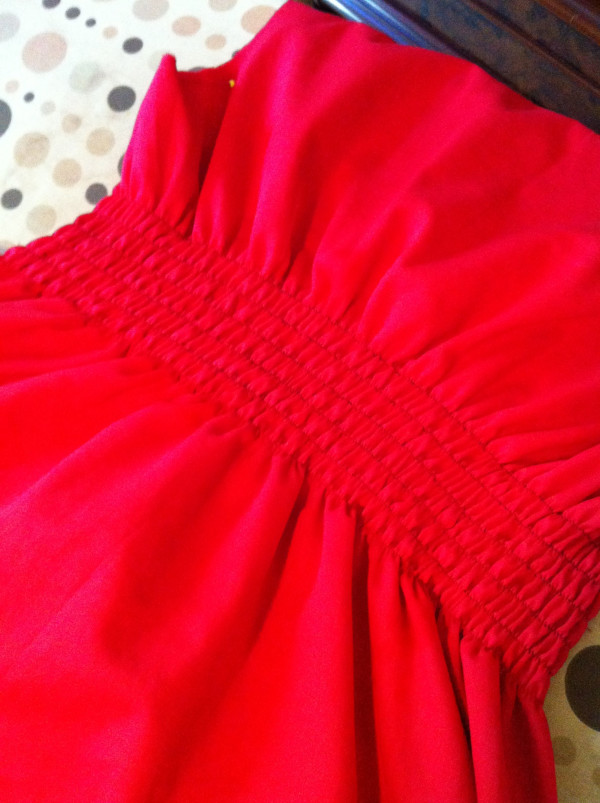
For those who are interested, this is the Washi Dress. I made mine out of cotton voile. When I went to cut, it occurred to me that the voile was rather sheer. So I made a spur-of-the-moment decision to “underline” it (i.e. use a double-thickness of fabric). I’ve never done that before, so I had to figure it out as I went. It doesn’t help that I’m completely shite at cutting so two pieces never match up perfectly. And of course, I didn’t have quite enough fabric to cut two of every piece so I had to go back to Lincraft for more. It still turned out pretty well! I also got to have my first attempt at shirring, which is like magic. Overall it’s a bit “baby doll” on me, but I think it’s a nice summer dress. Oh, and POCKETS!
-
Photo post

My first ever garment finished in a single day! It’s a sleeveless Tova tank. #sewingparty -
Another Tova Top
Another Tova Top

I made myself another shirt! It’s an altered Tova in cotton eyelet. Very happy with it!
So this is my second Tova top. The fabric is just some cotton eyelet I picked up at Lincraft a while back. The first one I made had some sizing issues that I tried to correct this time. I added an inch to the center back and top front pieces, and I flared out the bottom a bit too to give some more room around the hips. I also chopped the sleeves off at the elbows. (I forgot to add an inch to the bottom front piece, which means that this one isn’t as gathered at the bust line. That turned out okay, though.) This one definitely fits better through the bust now, but I still feel like my shoulders are constricted when I hold my arms out in front. Could that be the sleeve depth? Should I try and alter that next time? I’ll probably make at least one more so I can keep practicing. It’s a nice blouse to wear to work as well…
-
Photo post

Another embroidery finished. This quilt is gonna be awesome. -
Photo post

I finished my embroidery for this month’s MetaQuilter square! #redwork
