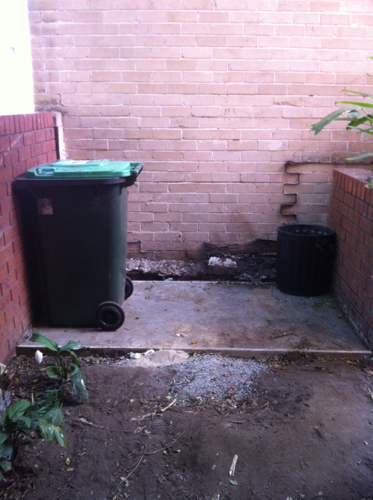
Once the kitchen renovation was complete, the next big thing on our list to fix was the garden. Our terrace is long and skinny and it’s the last unit on the block, so we’ve got a fair bit of outdoor space. There’s a bit in front, a loooooooong bit down the side, and a secluded bit out the back. Here’s how it looked when we actually moved in.


Over the first five years or so, we did some minor improvements. We planted some vegetables along the side of the house and fixed up the path. The veggies did well at first, but ultimately we didn’t get much harvest. We tried “Square Foot” gardening, building raised beds and planting seedlings. But we just don’t get enough sun to really amount to much. I got discouraged and pretty much let everything get overgrown. In the back courtyard, the saplings started to become full-grown trees and block out the sun from the clothesline. We got an arborist out who recommended we have them removed, as well as the palm tree in the corner that was in danger of falling. That was pretty much the deciding factor that it was time to act.

So in August 2012 we hired a landscaper to come cut down the trees and grind down the stumps. Then the Snook and I got to work clearing out all the old grass and leaves and weeds. We knew we were going to repave the area, so we pulled up all of the old terracotta pavers and stacked them to one side. Hilariously, we found a separate layer of pavers UNDERNEATH the top layer. It was backbreaking work. This is what it looked like once we finished clearing the back garden.

Here’s a glimpse of the many, many pavers that we pulled up. While most were square, we also had quite a few rectangles. There were spiders underneath too, so we had to wear gloves and be careful.

We knew there was a random bit of pinkish-greenish marble out there buried in the ground, but once we dug it up we found several big chunks of what appeared to be an old marble countertop. Here it is stacked against the side of the house. I think we finally got Reverse Garbage to come collect it.

Here’s what the back garden looked like on September 22, 2012. A lot more sunlight without those trees!

This is the view from the side garden stepping down to the back. You can see the horrible “pebblecrete” stairs at the back door. The grass really started to go nuts over the course of the spring and summer.

And here’s a shot of the side garden, where you can see how overgrown and shaded it had become.

Our New Year’s Resolution for 2013 was to finally get this project started properly…
Tiger Landscaping agreed to take on the project and were scheduled to start in February 2013. I decided to take a few more photos to show what things were like in the “before” state. Here’s the view from the back door. You can see how much the grass grew in the area we had cleared four months before.

So the Snook had to clear it again.

A bit like a war zone, let’s be honest.

Random vines were growing up the shady back wall.


The side garden was pretty much just as overgrown and full of composting leaves as before.

And this is the front garden. Not too far off what it looked like originally, but it bothered me that the space where the palm is was basically wasted. I had an idea that we could put it to more use for some sort of small shed.

The first step was to get out another stump grinder to make sure the roots of the trees out the back were well and truly dead. (The trees that had grown were weeds and we’d been given approval to take them out and replace them with nice ones.)

And on that same day, February 26, we also got a major delivery out front of all the pavers and wall bricks that we’d chosen. The poor guys from Tiger basically had to cart all of that stuff around the house and up multiple steps using just wheelbarrows!

Here’s a giant pile of it out the back waiting to be put to use.

And with that, it was finally time to start building…
The plan was to build an L-shaped retaining wall in the back garden using these interlocking Stackstone bricks. They’re kind of like Lego. Unfortunately they’re not super uniform, so it took the Tiger guys more effort than anticipated to set them level and straight. Here’s the first row going in.


Here’s the inner corner of the L. You can see that the blocks are basically hollow with a metal frame to reinforce them.

Since they were setting the blocks into concrete, I couldn’t resist writing our initials inside. I knew it would be filled with dirt and covered up for all eternity, but I like knowing that it’s there.

The wall grew pretty quickly and was mostly finished within a week or so.


The final steps were to fill behind it with gravel and soil, and to start laying down gravel in preparation for paving the courtyard.


But it wasn’t just the back garden that had work happening…
Out in the front garden, the annoying palm at the end was removed and the area cleared.

The guys then built a frame so they could pour a concrete slab.


And now back to the fun bit out the back. They started laying down our pavers! We chose travertine pavers to be laid out in a French pattern (meaning multiple sizes).

They also installed a drain so if we got a lot of rain it wouldn’t wash down into the car park or under the fence into our neighbour’s.

Sand was dumped on top of the pavers and pushed around to fill all the little gaps. You can also see here that the “caps” on the wall are being put on as well.

We toyed with the idea of getting the old walls sandblasted, but we decided we liked the way they looked. We settled on instead giving them a good wash and scrape to remove the worst of the flaking paint.

Rather than try to remove the old pebblecrete, the decision was made to simply apply the travertine right over the top of it. (We got thinner pieces of it for this.) Here it is going on the treads and top. We also had them remove those terrible old aluminum handrails.

Here’s the view down from the side with the paving nearly completed.

And here’s the stairs, basically finished off.

But hey, what happened to all those terracotta pavers we pulled up from the back, you might ask? We put them to good use! Since they matched the ones we already had on the side of the house, we had the landscapers use them to fill the bare area along the side of the house.

Again, sand was used to fill in all the gaps.

That pretty much takes us up to the end of March 2013. The concrete pad at the front had set up nicely and we were still trying to decide what to put on it.
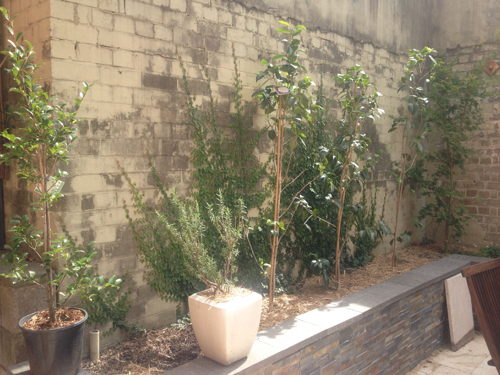
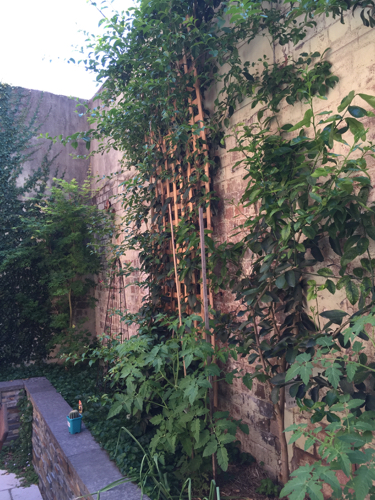
In early April it was time to plant! We decided to put four camellias along the shady wall in the back. You can also see two small clumps of plants between the camellias along the wall. This is creeping fig, which we hoped would eventually climb and cover the wall.
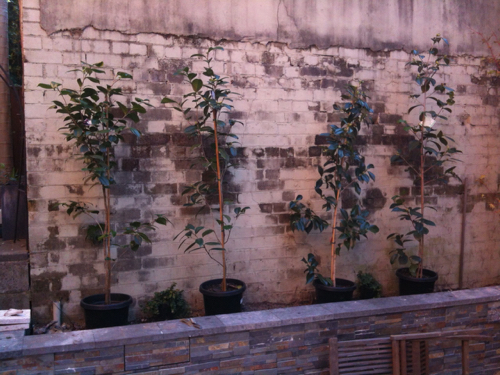
We also put a Japanese maple in the corner. I asked the Snook to pick things with COLOUR!

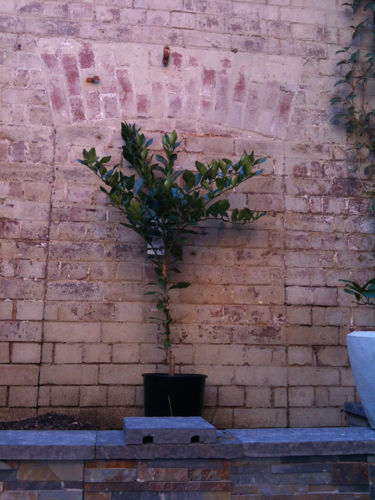
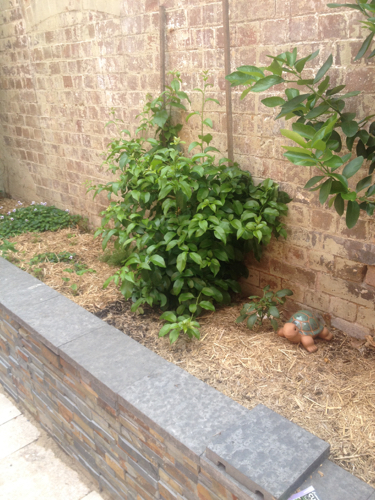
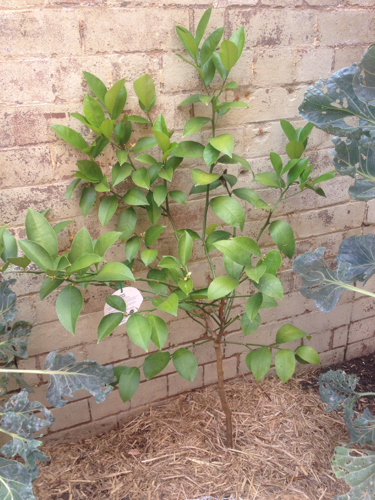
Along the sunnier back wall, we planted a bougainvillea along with a lime tree and a Meyer lemon.

The Snook asked them to plant the lemon centred in this old bricked up door opening in the wall, which we thought was a neat feature.
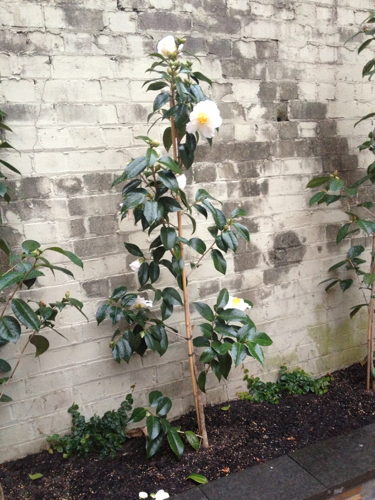
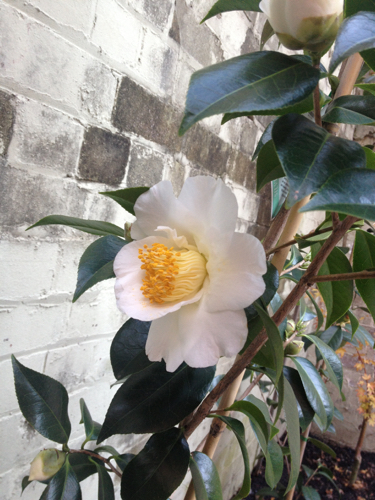
A month later in May, we had our first camellia blooms!
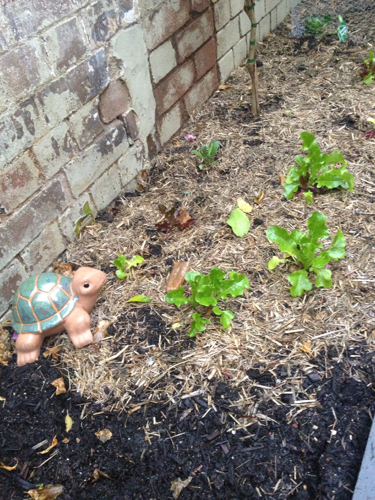
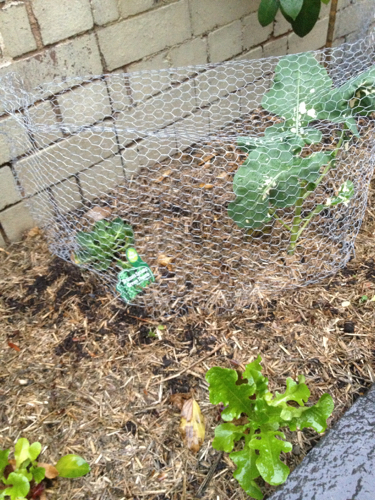
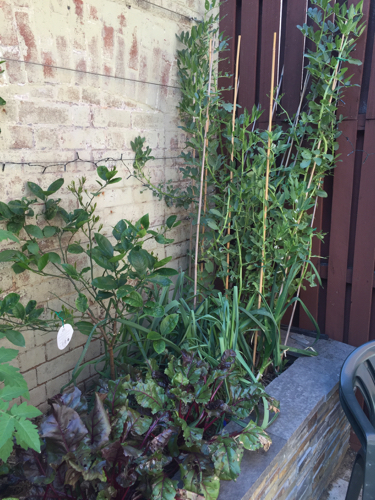
We planted some lettuce and green veg in the sunniest corner past the lemon tree. Something was trying to get the plants at night, so the Snook put up chickenwire to dissuade it. (Maybe a possum?)

I got us a little turtle to keep watch over the seedlings. His name is Maturin, of course.

Here’s June 1, 2013. The veggies are getting bigger!
By the end of June we had more camellia blooms and were able to harvest our first lettuce.

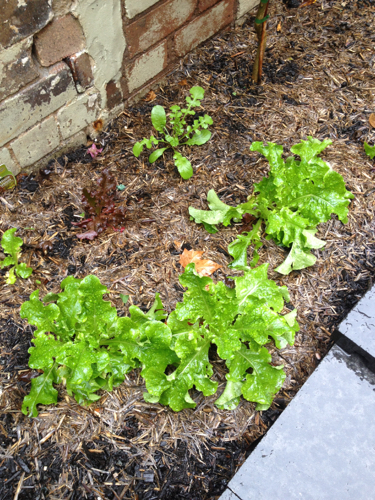
And here’s the end of August. This was more edible veg than I’d ever been able to grown in our garden before!

Things pretty much stayed that way through the spring and summer as we were busy with travel and work…
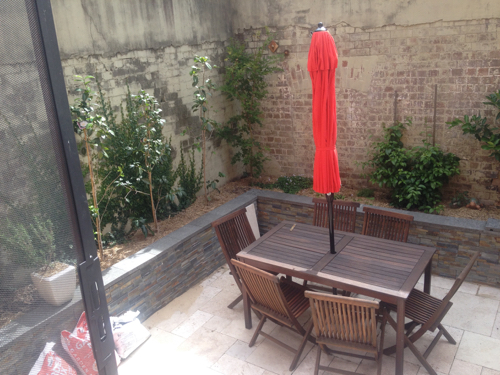
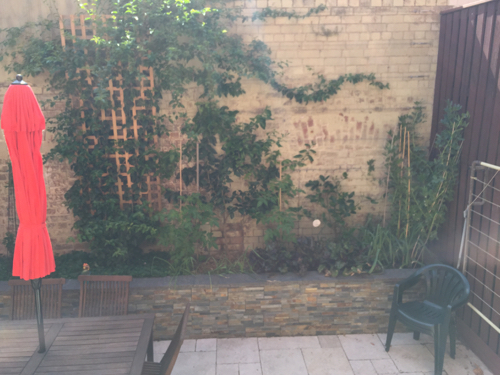
Fast forward to New Year’s Day – January 1, 2014. The Snook had sanded and re-oiled our old table and chairs, and we got a fun new red umbrella for it. You can also see how much the creeping fig has grown behind the camellias. It’s nearly halfway up the wall!
A closer view of the camellias and creeping fig.
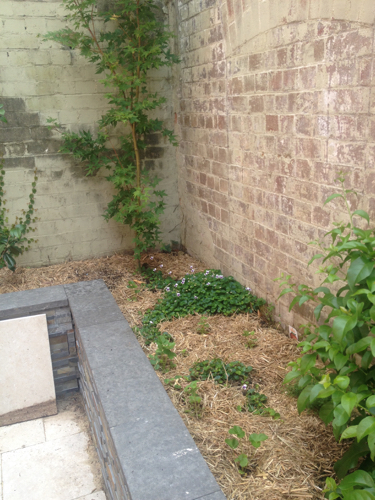
Here’s a view along the sunny bit towards the Japanese maple in the corner. You can see where the Snook planted out a small patch of violets in the empty spot, along with a few strawberry plants.
The bougainvillea was growing quite vigorously too.
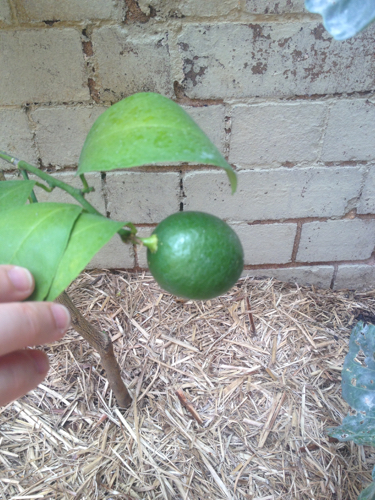
The lime tree had its first baby lime on it!
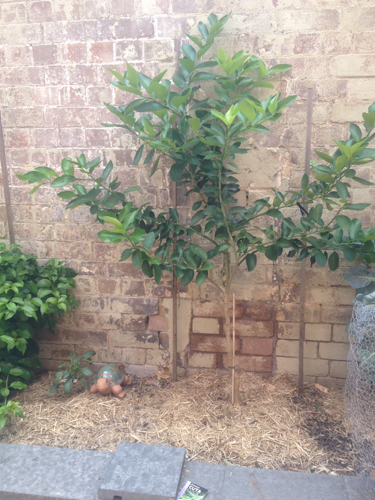
The Meyer lemon seemed to be growing a bit more slowly though.
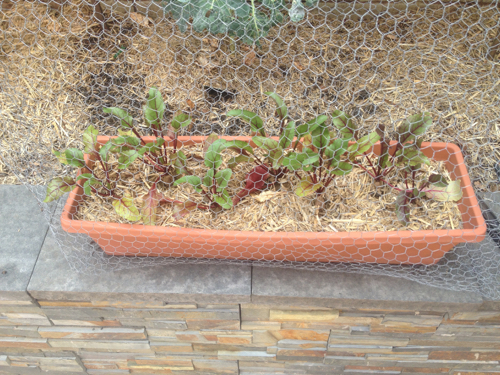
The Snook decided to grow some baby beetroot in a planter. It worked pretty well!
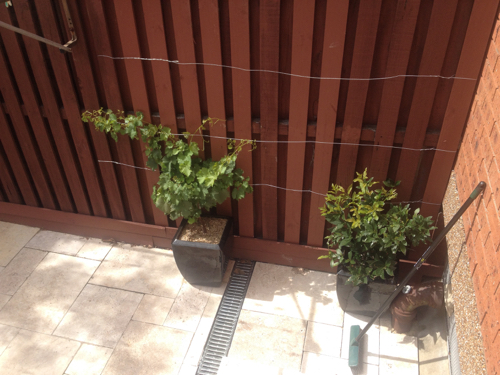
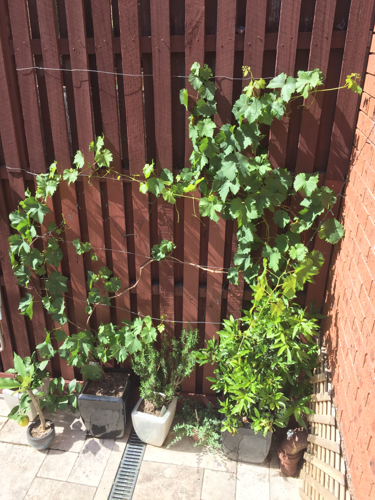
At the bottom of the back steps next to the clothesline, the Snook planted a grapevine in a big pot and strung up some wires for it to climb. He also put his laurel (bay) tree there.
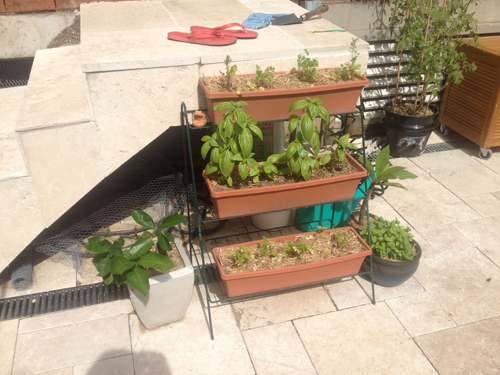
In front of the stairs is a very tiny lemon tree (basically our old potted lemon tree cut back to just the root stock) along with planters full of herbs.
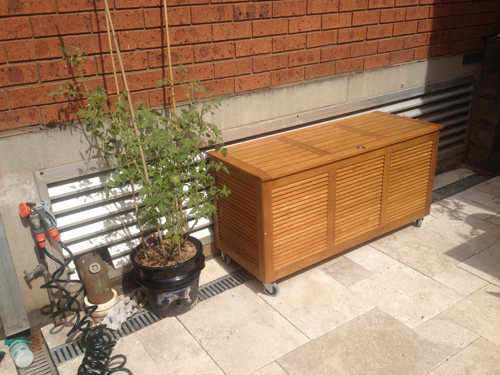
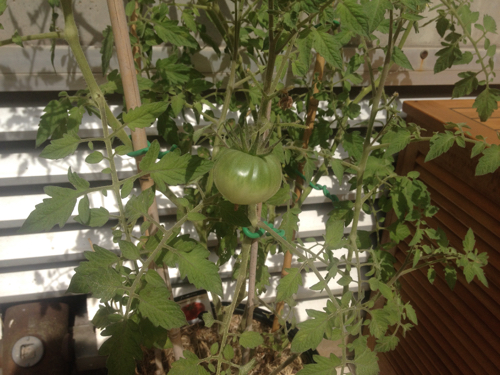
Along the other wall, we put a potted tomato and a storage box that has the outdoor cushions.
We even managed to get some tomatoes, though not as many as I would’ve liked. (We suspect some nutrient deficiency in that potting soil, as the plants got really tall and then turned yellow and withered.)
And finally, down the front of the house I got my shed! Well, not really a shed. It turns out that Chippendale is a heritage listed area so it’s a pain in the ass to get permission to put up any structure that you can see from the street. So instead I convinced the Snook to get a Bike Box. It came flat-packed and we put it together ourselves. Now we can lock our bikes up outside and keep them safe from the weather!

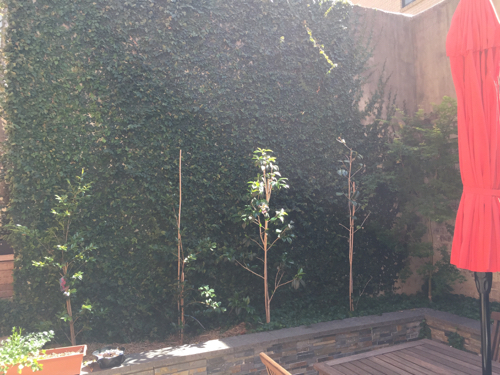
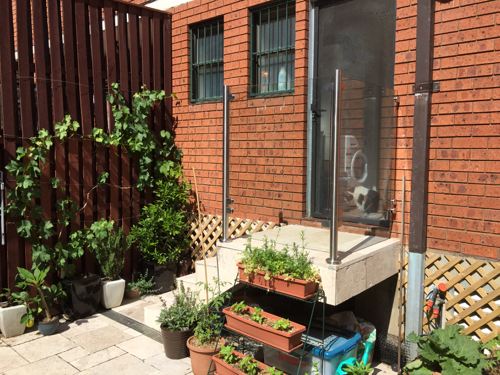
So after all that work, there were still a couple things we needed help with. Luckily Rodd’s Dad Ray came to the rescue! He came down in October and, over the course of just a few days, finished it all off. So here’s the back garden in November 2014, with the creeping fig now completely covering the wall. (We’ve had to replace two of the camellias. We suspect there wasn’t enough sun for that variety.)

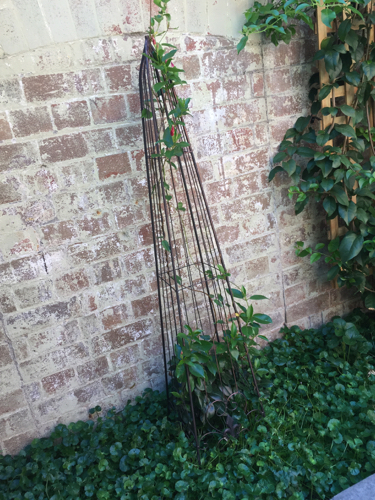
We bought a funny little steel obelisk and planted a climber inside it in the area between the Japanese maple and the bougainvillea. (We had another old doorway space there and wanted something visual to put in it.) The climber has sweet little red flowers.
We installed a trellis for the bougainvillea to climb, and boy has it! The thing is up over the top of the wall now. Pa Snook also strung steel cables along the wall above the lemon and lime for it to creep along.
The violets are now completely carpeting the corner of the bed. The Snook has to regularly hack them back to keep them from encroaching on the veg! We’re now trying out some tomatoes in the area in front of the lime tree.
For veg this spring, he planted more beetroot, leeks, and broad beans. The beans have climbed really high against the wooden fence and we’ve had a couple harvests already!
The grapevine is doing really well! Still no blooms yet though. The bay tree really likes that sunny spot.
Our potted herb garden in front of the stairs continues to grow. We’ve got basil, parsley, mint, sage, tarragon, cat mint, ginger. You can also see that we installed some lattice to hide the vents for the car garage below.
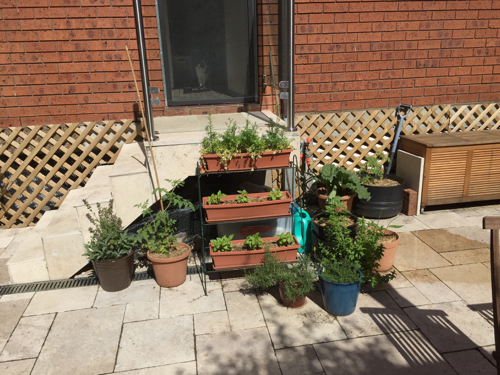
And here you can see the beautiful glass balustrade that Pa Snook put up on the stairs! At last I don’t have to worry that people are going to fall off. And even more amazingly – he fixed my screen door! It now shuts and locks properly and it’s perfect and we can open up the house in the summer without worrying the cats will escape.
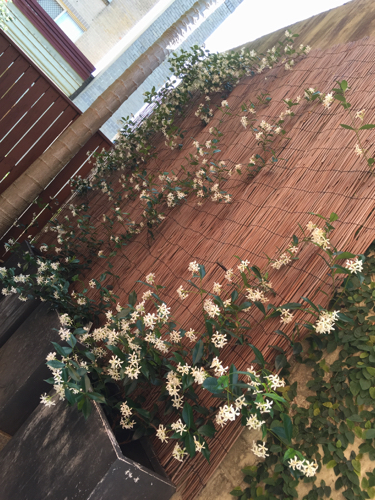
So that’s the back garden pretty much complete. And we can’t do anything else with the front for now because it’s likely to get torn up as part of repairs to the building’s brick front wall. And I haven’t really shown much on the side of the house, since we really haven’t done much there other than get it paved. The star jasmine are blooming though, and we’ve got some ideas. I may be updating this page before you know it!
That’s all for now…