I’d been feeling the itch to do some more sewing this holiday break, and I decided that I needed some more tops. (Let’s be honest. I have more than enough dresses.) I’d also bought some fun novelty fabric when I was home in the seven months ago – Wonder Woman and Dr. Who! So last week I washed and prepped everything, and I quickly realised I was going to have a problem. For some reason, I only bought a meter each of those fabrics. What?!! That’s not enough to do anything meaningful with. So very quickly I realised I was going to have to piece them and use contrast fabrics.
Wonder Woman Sorbetto
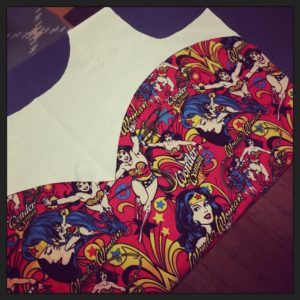
For the Wonder Woman, I had an idea to mimic her bustier with a sort of sweetheart neckline. I found this tutorial on adding a sweetheart yoke to a t-shirt and realised I could mimic that technique. I decided to base it off the Colette Sorbetto tank, which I’ve made a couple of times in the past. I traced a new version and removed the pleat from the front. Then I drew in the bust curve and cut the piece in two. I used the top piece to determine where to make the cut across the back piece. (I drew that line straight.) I added some extra paper so I could extend the 5/8″ seam allowance on all four pieces. Then I cut out my pieces, and I was ready to sew!

Honestly, I didn’t really have any idea how to sew those pieces together. The tutorial kind of glosses over it (and it uses knits anyway). Just imagine flipping that white bit over… You end up sewing a convex curve to a concave. In the end I did it in two passes, from the edge to the center each time. The very middle is a little bodgey, but mostly it worked!
The rest of the construction was straightforward. I did run into one issue on the sides – when I’d measured where to put the seam across the back, I hadn’t taken the seam allowance into account. I also cut WAY too large a size, but I was able to pinch out an inch in the center of the back and that worked great. For the binding, I wanted something shiny and gold like Wonder Woman’s lasso. I ended up getting a perfect shiny satin bias ribbon binding at Tessuti. It turned out great!
Grey Kate
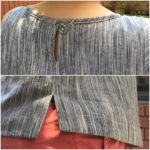
For my second project, I unearthed some grey linen I’d bought last year along with the Kate Top pattern from Tessuti. I decided to do View B with the higher neck and the keyhole at the back. The sizing looked a bit small, so I lengthened by 1.5″ and sized up a little bit. The instructions were fairly clear, and the only problem I had was that the three pieces of bias binding I cut weren’t nearly long enough. (Luckily I had plenty of fabric to cut more.) This was my first time using tearaway Vilene shields to stabilise the neck and sleeve openings, and it definitely felt more stable than just staystitching. I loved the method for creating the mitered split hem! I also was pleased to find in my stash the perfect button for the back opening. My only complaint about the project – and I should’ve realised from the picture – is that it’s designed for a much smaller bust. (Next time I’ll do an FBA.)
Foxy Saltbox
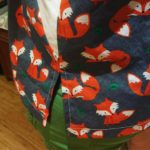
For my third project, I really wanted to use the Dr. Who fabric to make the Saltbox top. (I bought that pattern a few years back as part of the Sew Independent Bundle.) Unfortunately I just didn’t have enough fabric. Then I remembered a really cute fox print I bought at Spotlight in Auburn last weekend and realised it would look great with the white I had left over from the Wonder Woman top. I checked my size and the pattern helpfully recommended that I do an FBA. It’s the first one I ever did, and it went really well! It helped that the pattern had the cut lines printed on it, and they gave you exact instructions for what to do. The whole thing came together very quickly! I also really liked the instructions for doing a continuous hem around the side splits. Next time I’ll have to do the version with sleeves!
Dr. Who Sorbetto
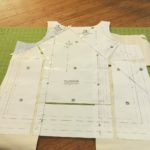
For my final project, I was determined to use up that damn Dr. Who fabric. Back I went to the Sorbetto, this time cutting a straight line across the bust. Even then, I still didn’t have quite enough to cut the front and back pieces. I ended up piecing the back down the middle. (I did an awesome job matching it up though so you can barely tell!) I’m still annoyed I couldn’t line up the TARDISes perfectly from front to back, but it’s so busy you can barely tell. This was the fastest project of all and I had it done in less than 4 hours, including the time it took me to make my own bias binding.
And that’s it! Four new tops. I’m actually really pleased with how it all went. The more I sew, the better things look. I didn’t sew anything back-to-front or have to do any major unpicking. On several occasions I said out loud, “I FRIGGIN’ LOVE MY OVERLOCKER.” It makes everything look so much more professional. I also got to do some serious 3-D geometry, from sewing curves together to doing my first FBA.


Comments
3 responses to “Holiday sewing – 4 new tops!”
Awesome job all round!!
Good job Chris. I’ve hacked the sorbetto a few times, including adding cap sleeves. Thanks for the link to the saltbush top. It’s awesome.
They look great!
If you know how to put couture sleeves into a dress/jacket – you could use the same gathering technique to join convex/concave pieces for the sweetheart neckline