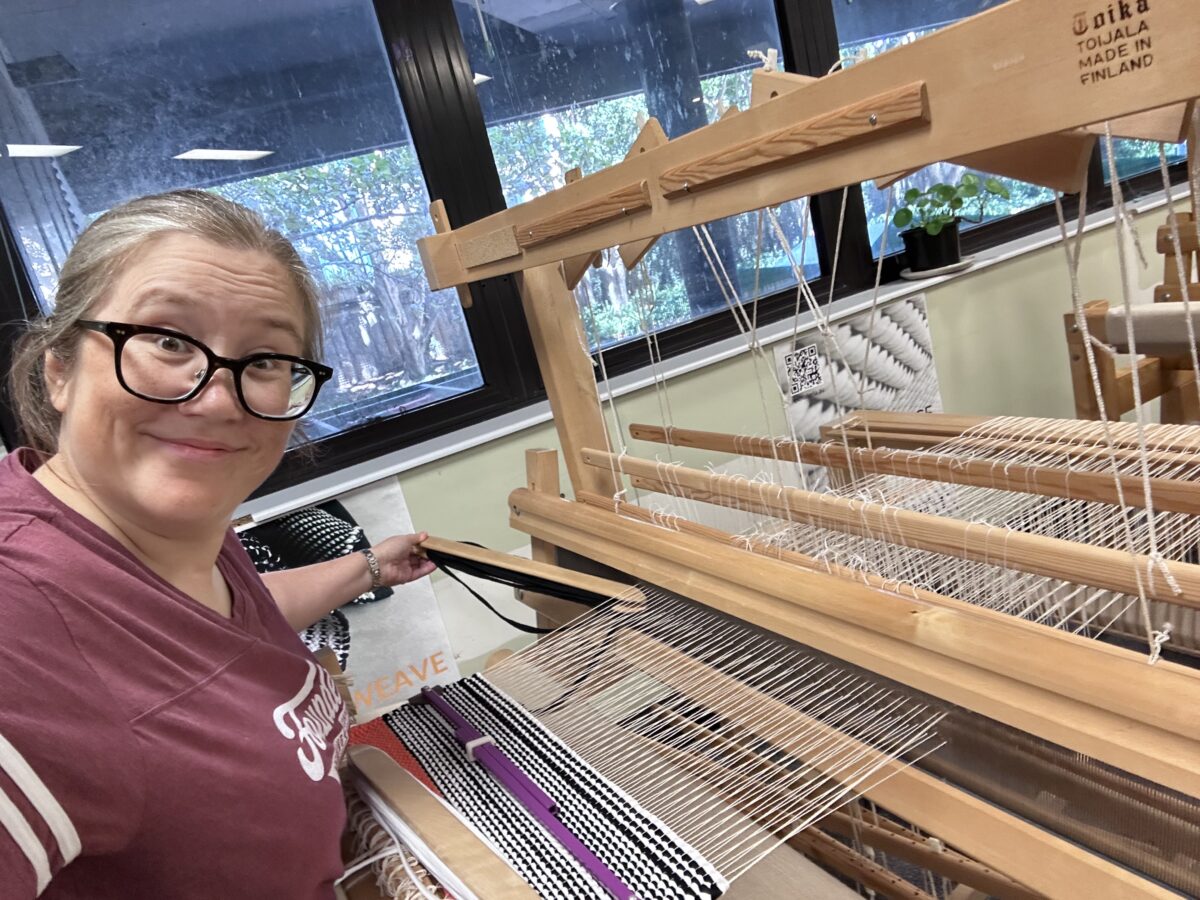
Acquiring a new skill! This is addictive. I’m starting to regret not having enough room in my house for a floor loom… ☺️
Category: Crafts
Craft projects of mine
-

Bailee shorts
I need more shorts, I realised recently. Maybe I didn’t notice because I was working last summer? Anyway, it’s time to make some shorts. These are the Bailee shorts from Tessuti, and I made them in leftover fabric from the tiki wiggle dress I made 8 years ago. I had just enough material, though I did have to rotate the pockets and waistband off-grain. As usual with Tessuti patterns, they were mostly great but with a couple perplexing instructions. For example, the waistband piece is a long rectangle with a fold indicator on one short side, but the cutting diagrams show the long side placed across a fold. Well, which is it? If I do that, it’ll only be half as long as it’s meant to be! I followed my gut and did it the way that makes sense, but it was annoying. Anyway, they turned out wearable, which was all I wanted. The fabric is quite a thick cotton – almost a stretch sateen – so they don’t really drape, and they’re really more like Hawaiian shorts. I’ll do my next pair in a drapey linen to see how they compare…
-
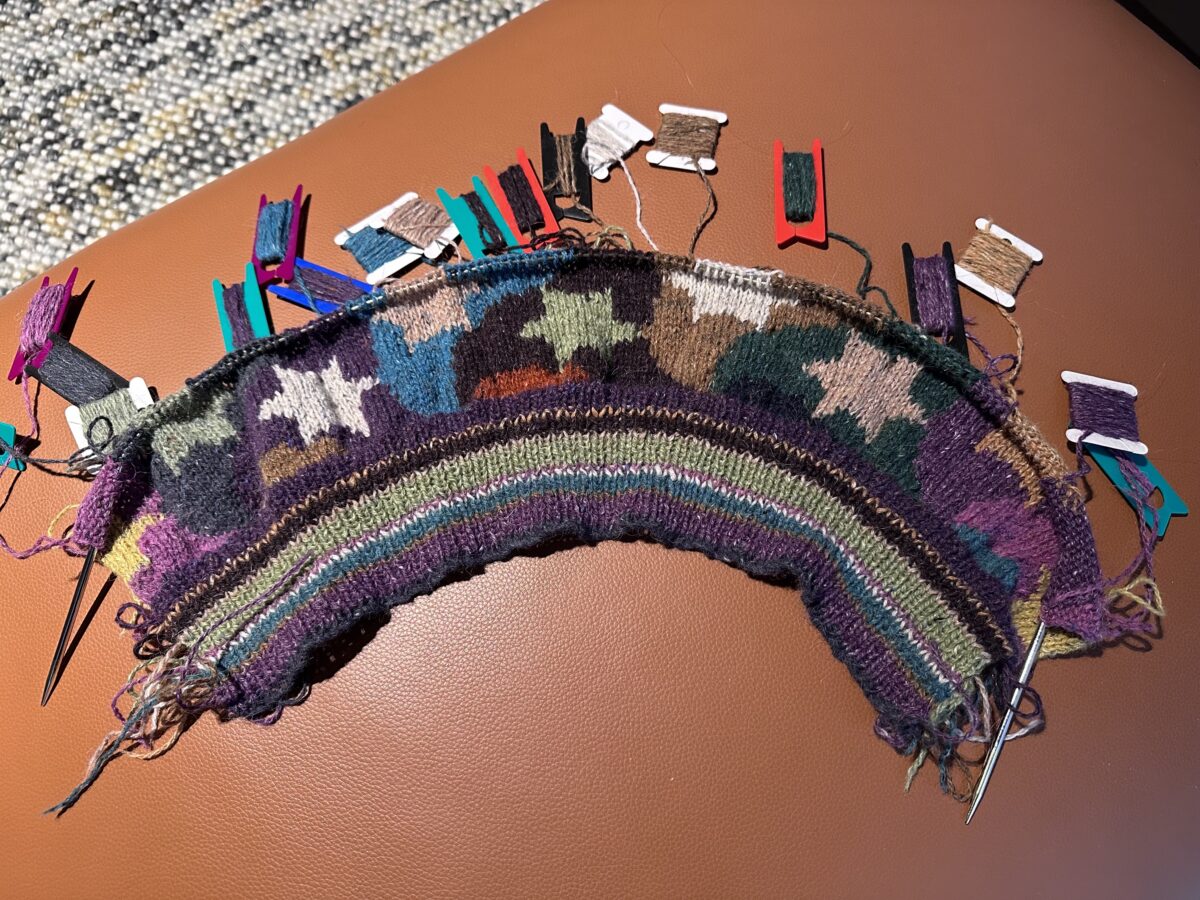
Intarsia
Okay, this is getting fun now! I’m sure I’ll be cursing when it comes time to weave in all those ends though. 🧶
-
Textile protest
Threads of Resistance: “Knitting and embroidery are laden with stereotypes of domestic femininity – and the subversive potential for protest.”
Wonderful essay by Gemma McKenzie showcasing ways textile art has been used as a tool of protest by women. I was especially blown away by the embroidered scrolls of Lorina Bulwer – WOW. The rage!
-
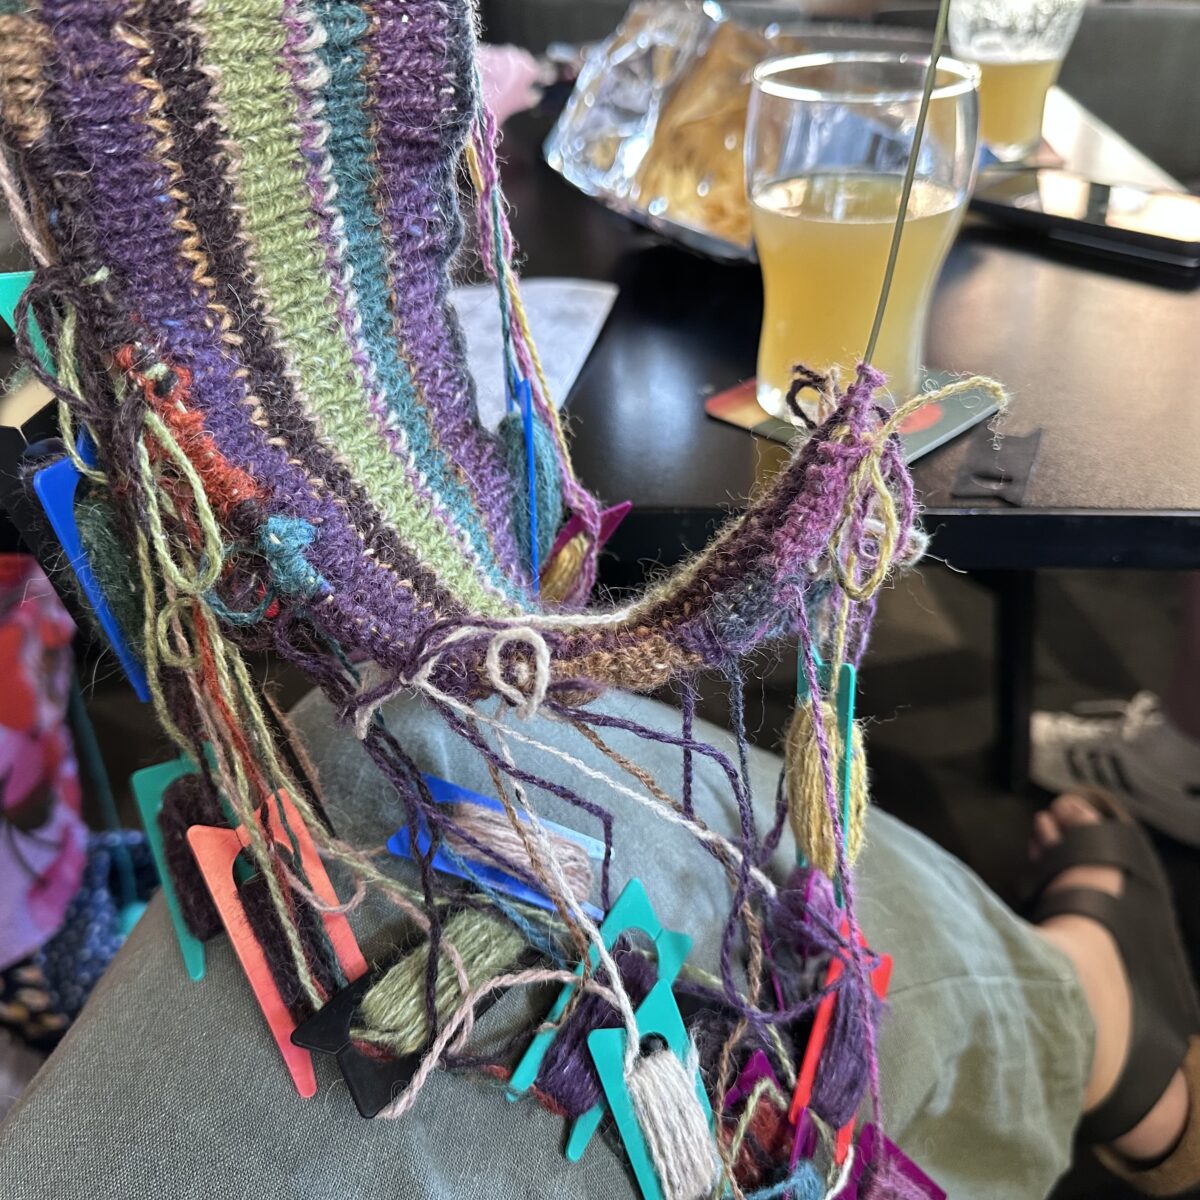
Pub knitting
“What? This is a perfectly normal thing to knit at the pub,” I sob into my beer while untangling 28 different coloured bobbins. 😭🧶
-
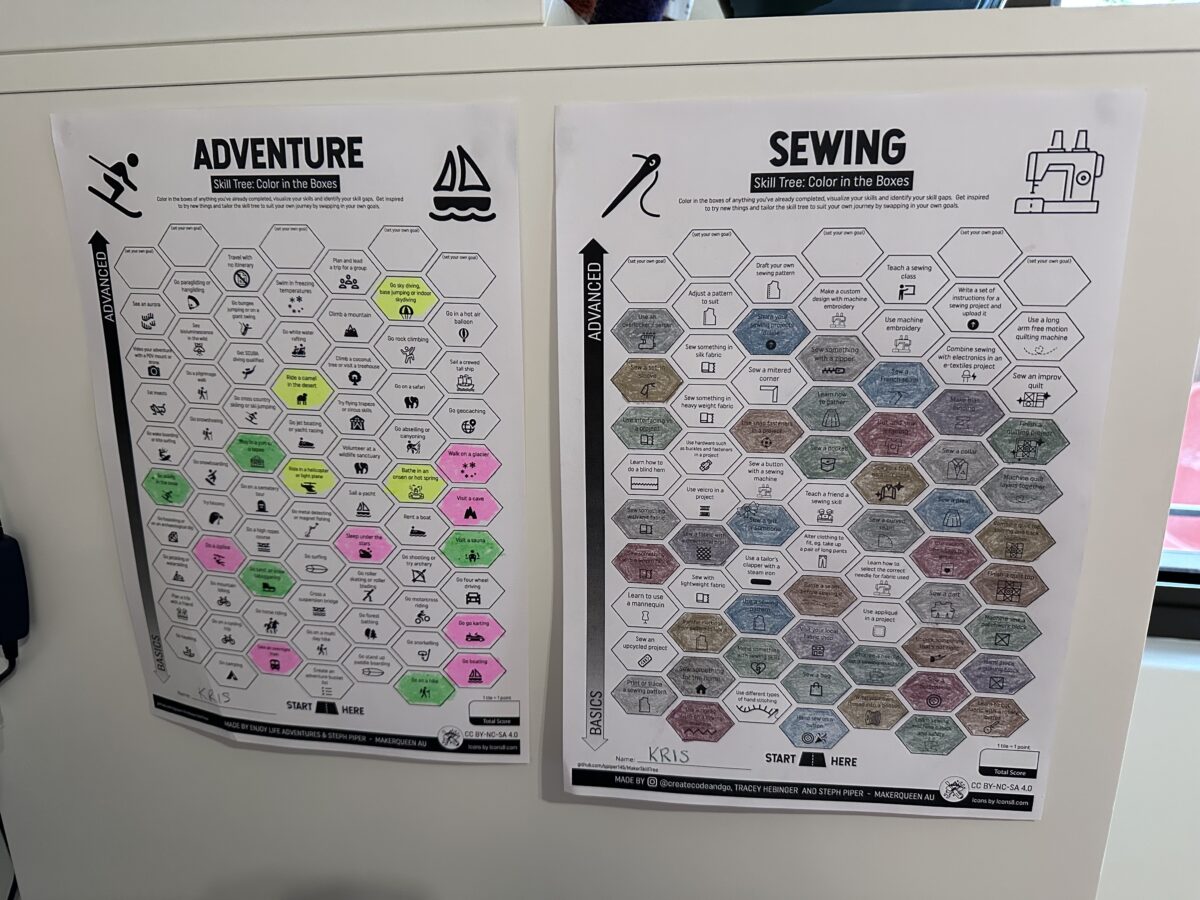
Skill Trees
I had some fun today colouring in boxes on my Sewing and Adventure Skill Trees. Looking forward to filling in some more of these this year!
-

Marimekko Arkie shirt
Starting the year with another finished project! I used the bulk of the remainder of my Marimekko Unikko fabric to make myself a Tessuti Arkie shirt. This is actually the third time I’ve used this pattern, and the last one was so roomy that I decided to go down a size in the body. I left off the pockets, and I moved the break point and top button up about an inch. Looks good, right? I was worried it would be a little too clown-like with the bright colour and large print, but I think it’s fun and suits me.
-
Sleeve pinning
Peggy Olson knows that the best way to set in a sleeve is to use a LOT of pins. (I know some of you can do it with zero. I’m not there yet.)
-
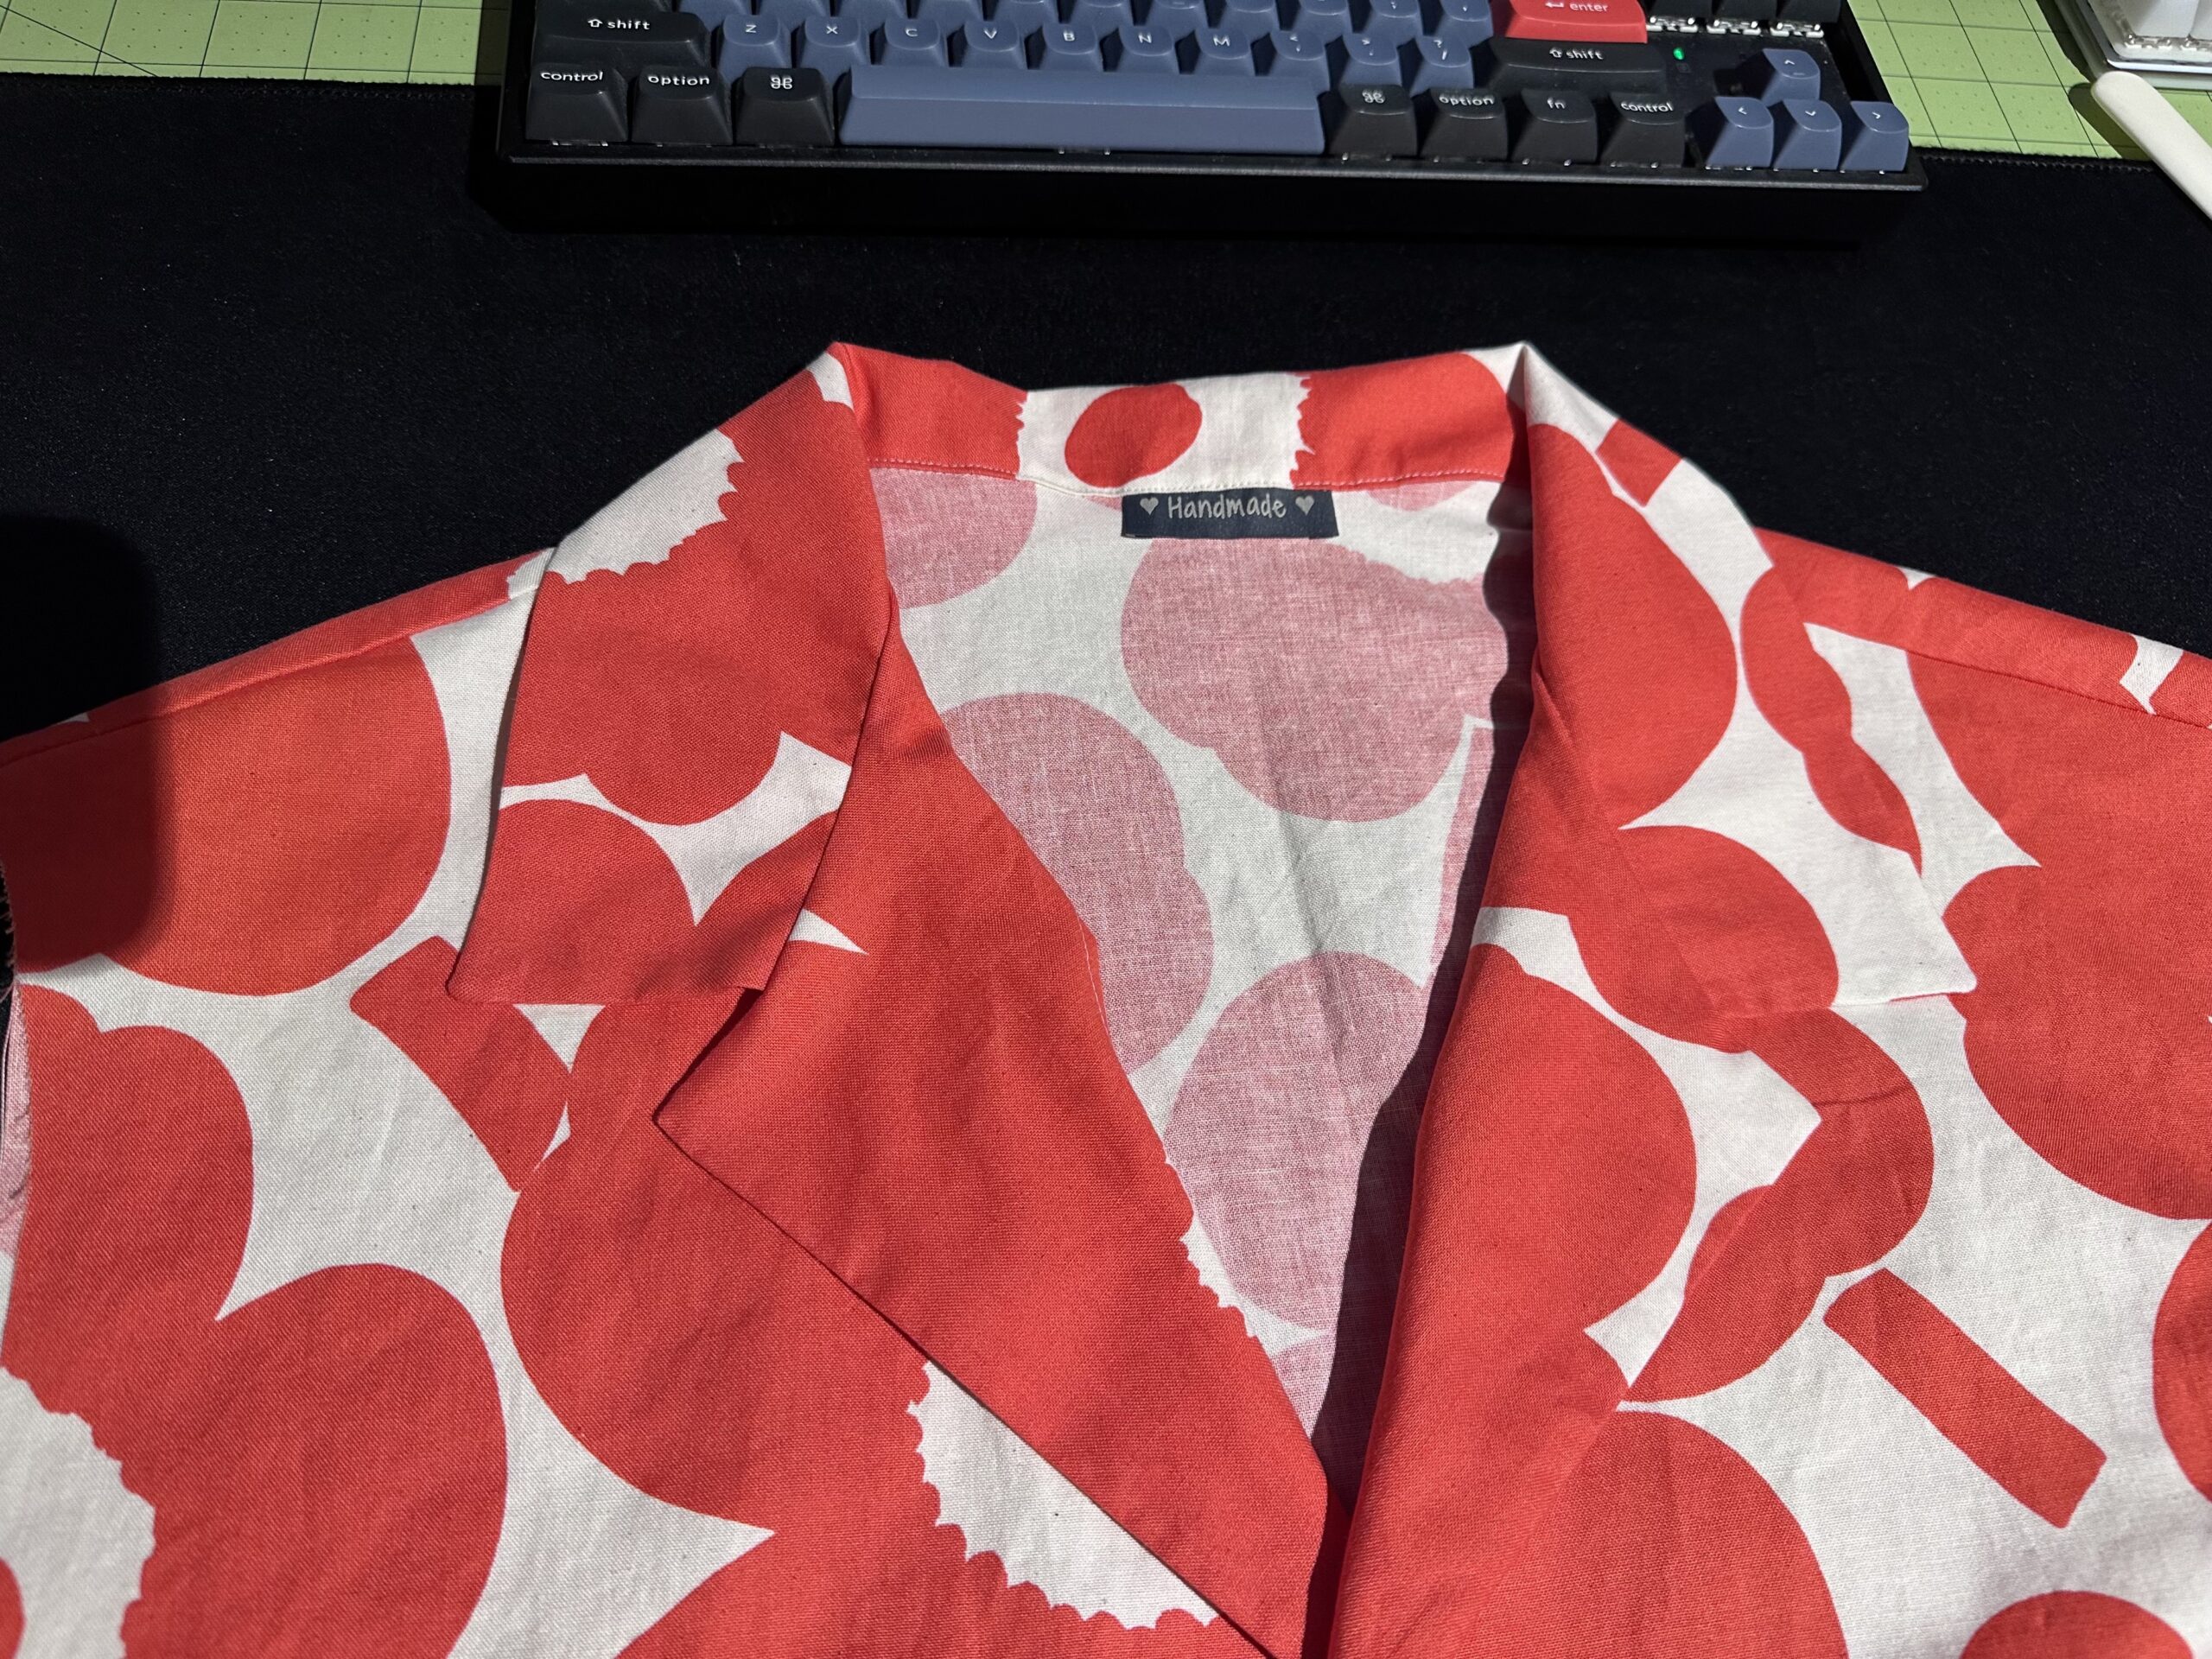
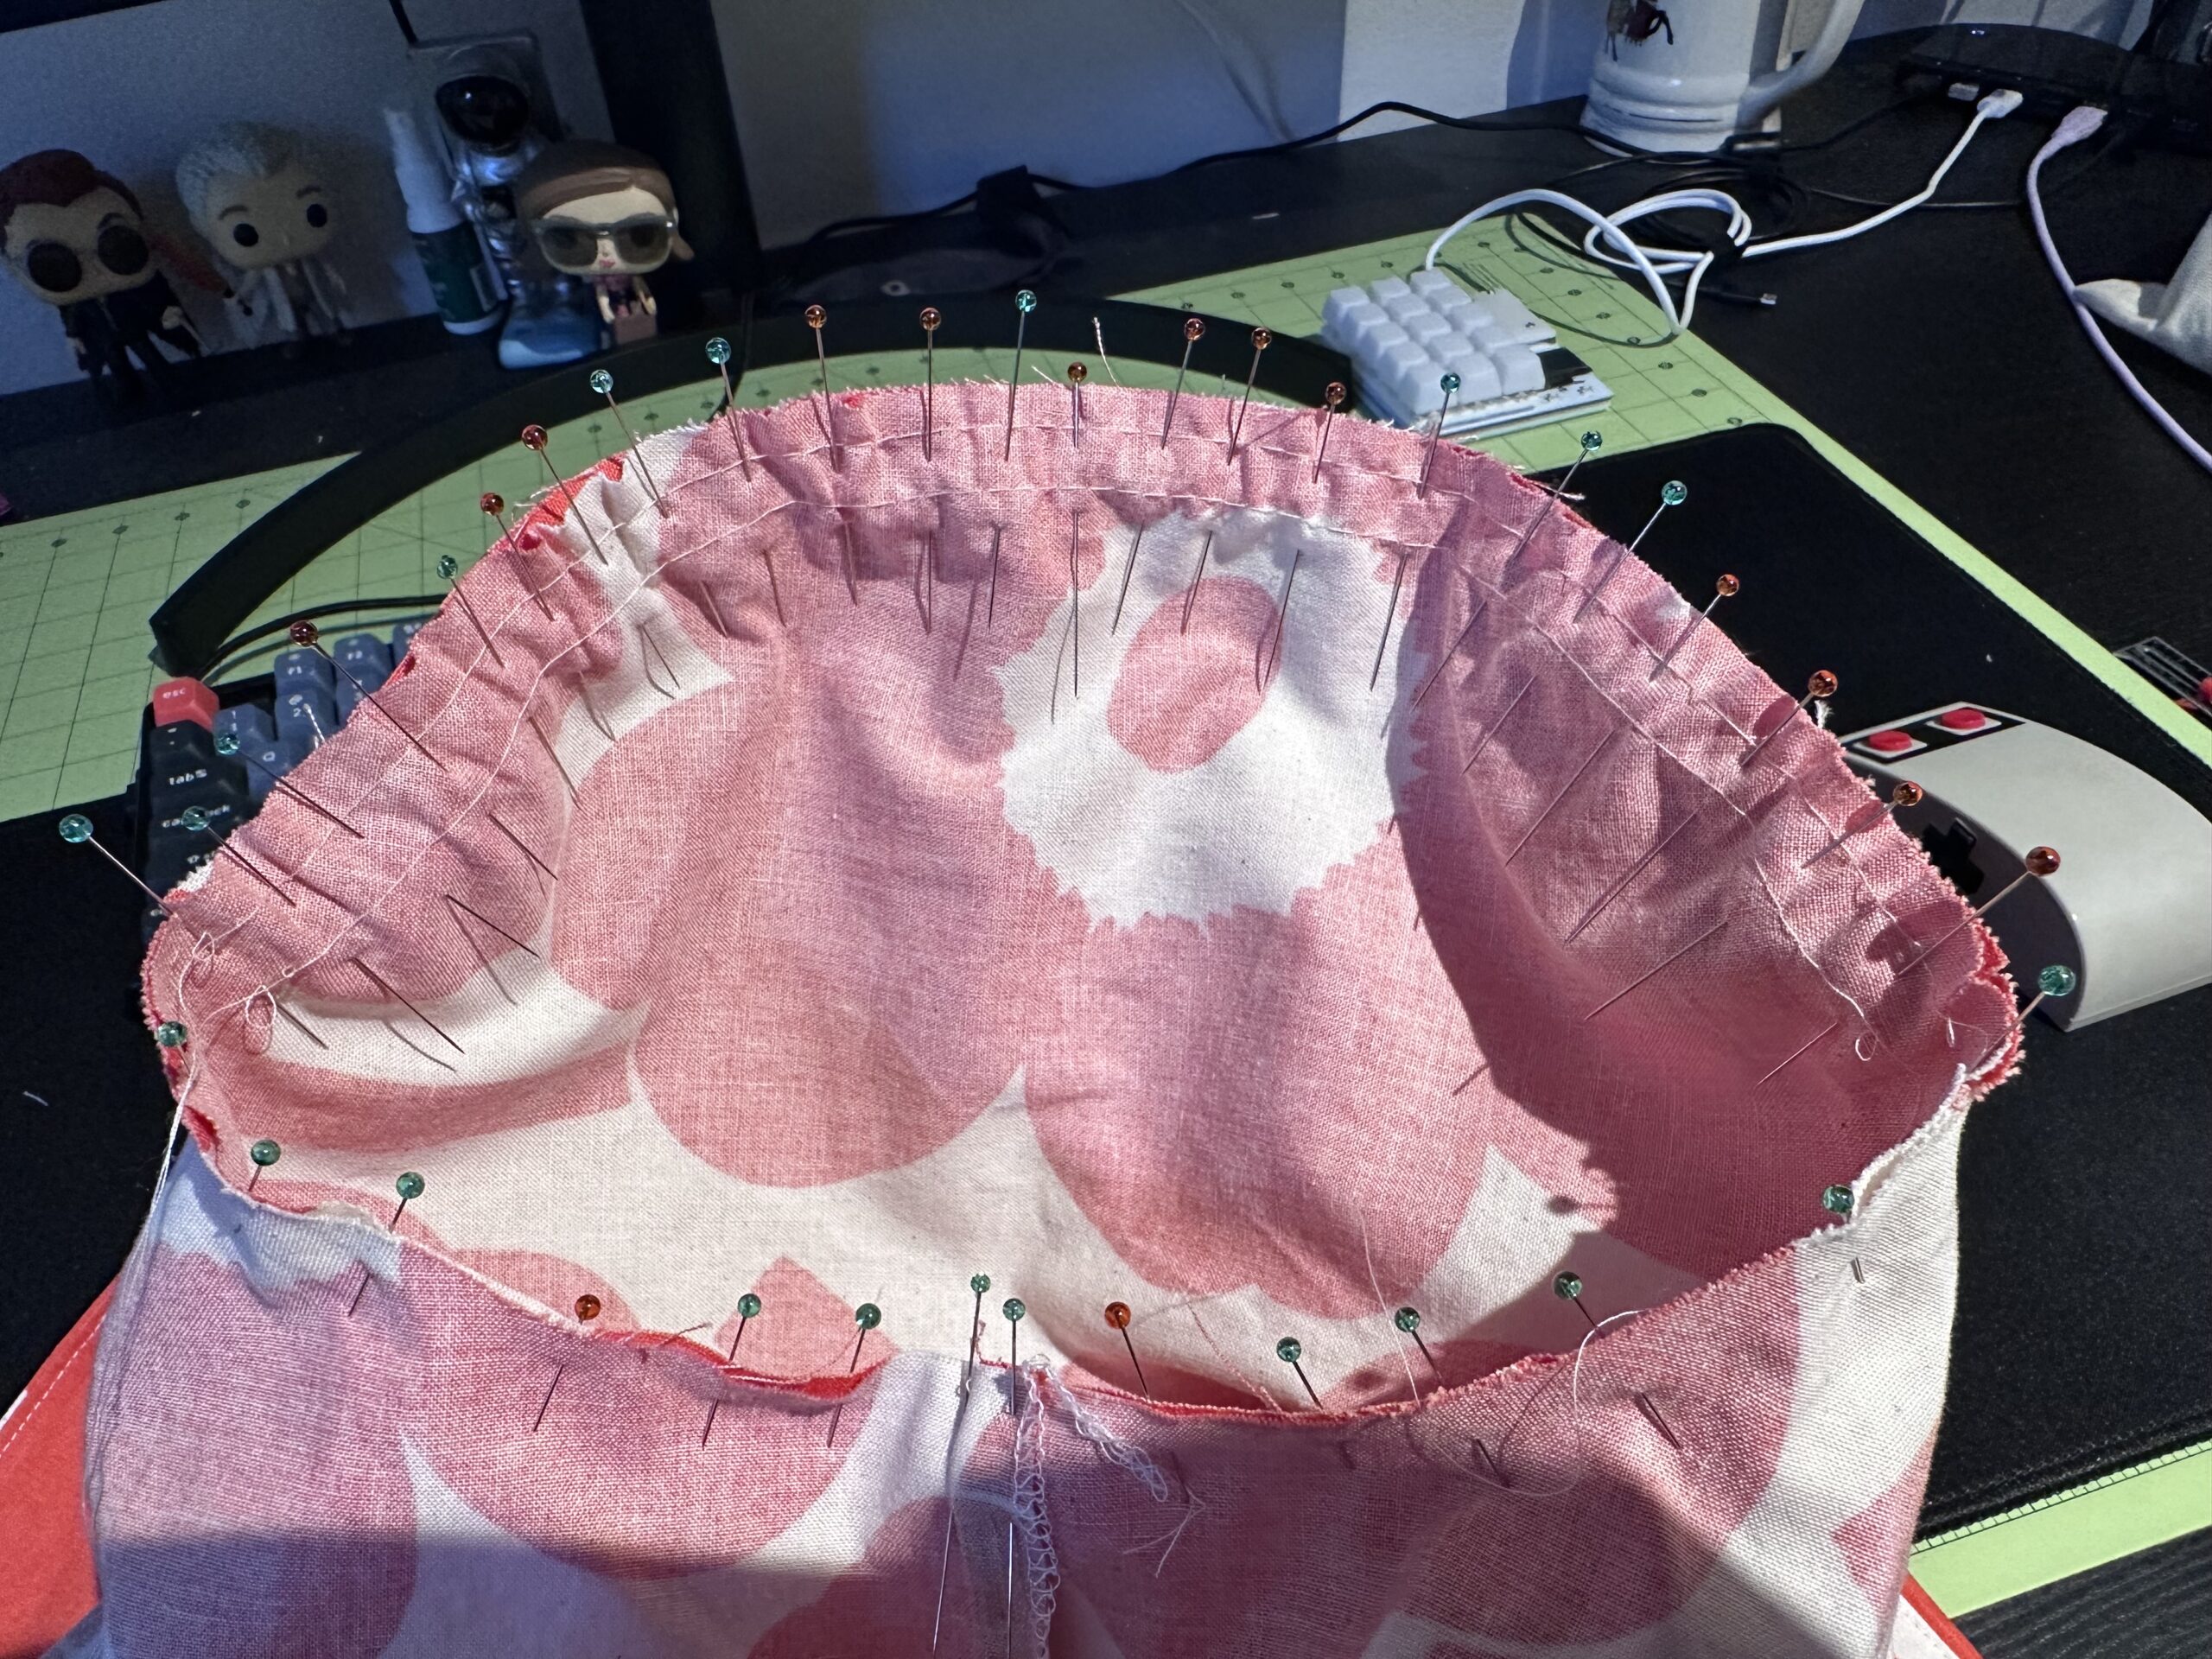
Marimekko Shirt
I’m certainly getting my money’s worth out of this fabric, aren’t I? I had just enough left to cut out another Arkie Shirt. I’ve gone down a body size on this one, and I’ve raised the break point an inch. I’m really pleased with how it’s turning out! This is the third one of these I’ve sewn, and each one has gotten better.
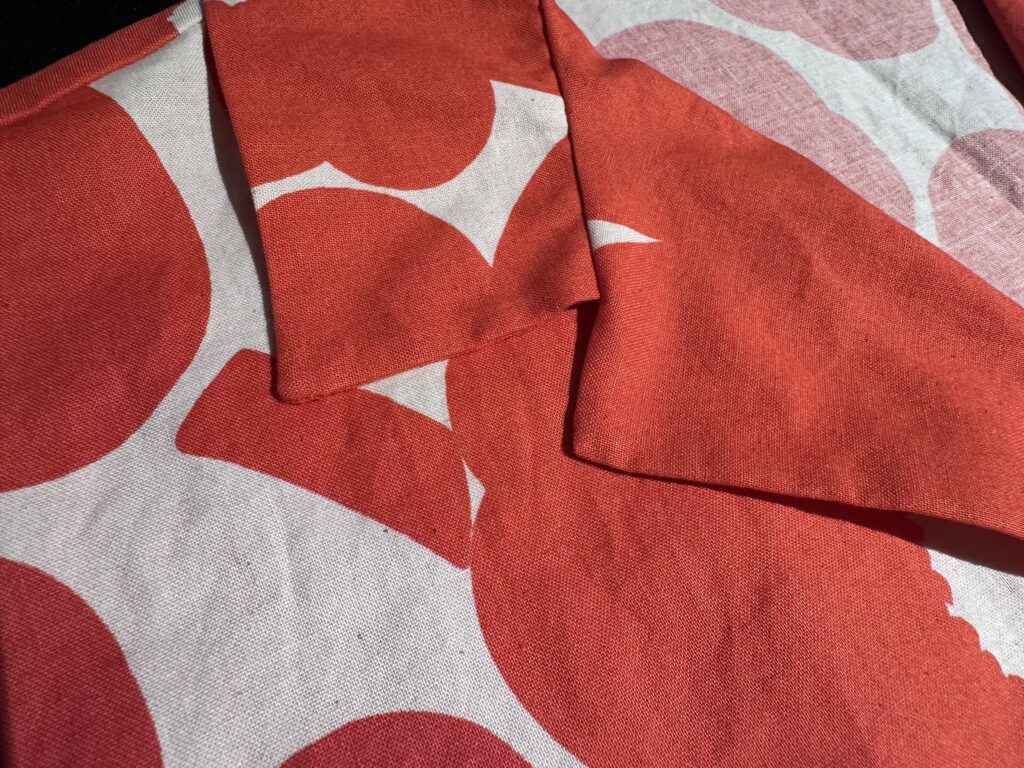
I also experimented with the tweezer method of turning out the collar on this one. It’s definitely sharper than the ones I’ve done in the past. Next time I’ll try the thread method…
-

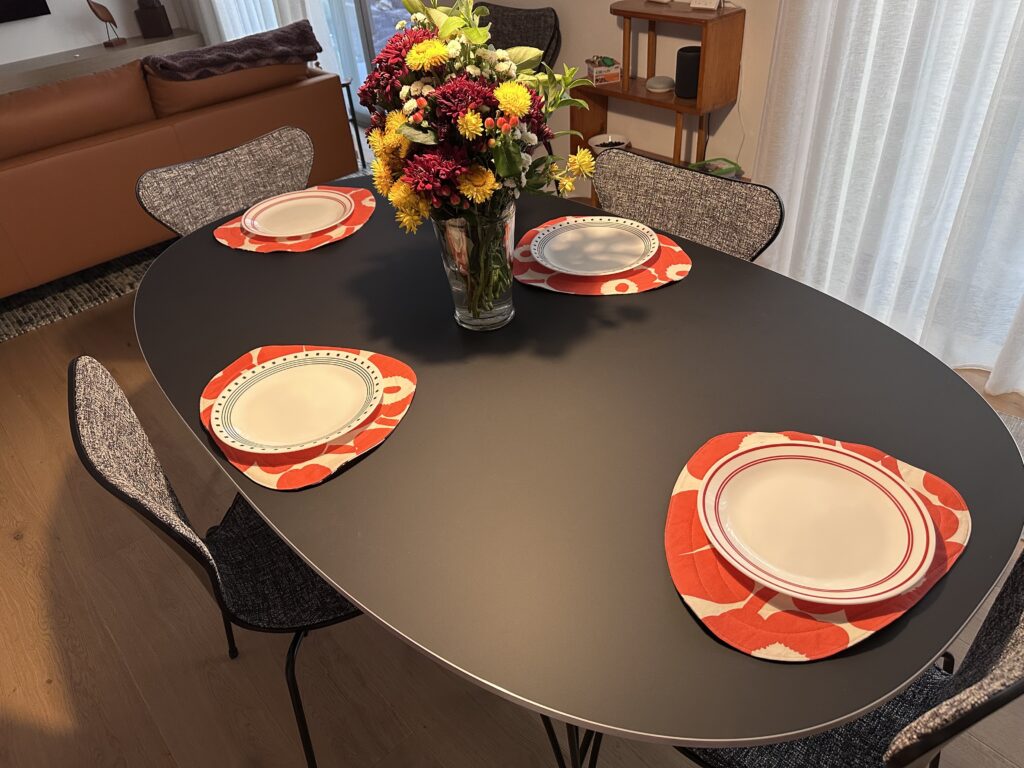
Marimekko placemats
I decided a few days ago that we needed new placemats to help protect our lovely new dining room table. I considered buying some, but I couldn’t find any that I liked that weren’t hideously expensive. (The cheapest Marimekko one is $36!) However, I do still have plenty of fabric left over from making the sofa cushions. Why not make my own?
I started by prototyping different shapes. I wanted something organic and asymmetrical, so I used some cardboard to try out a few different options. (I put a plate on top for sizing.)

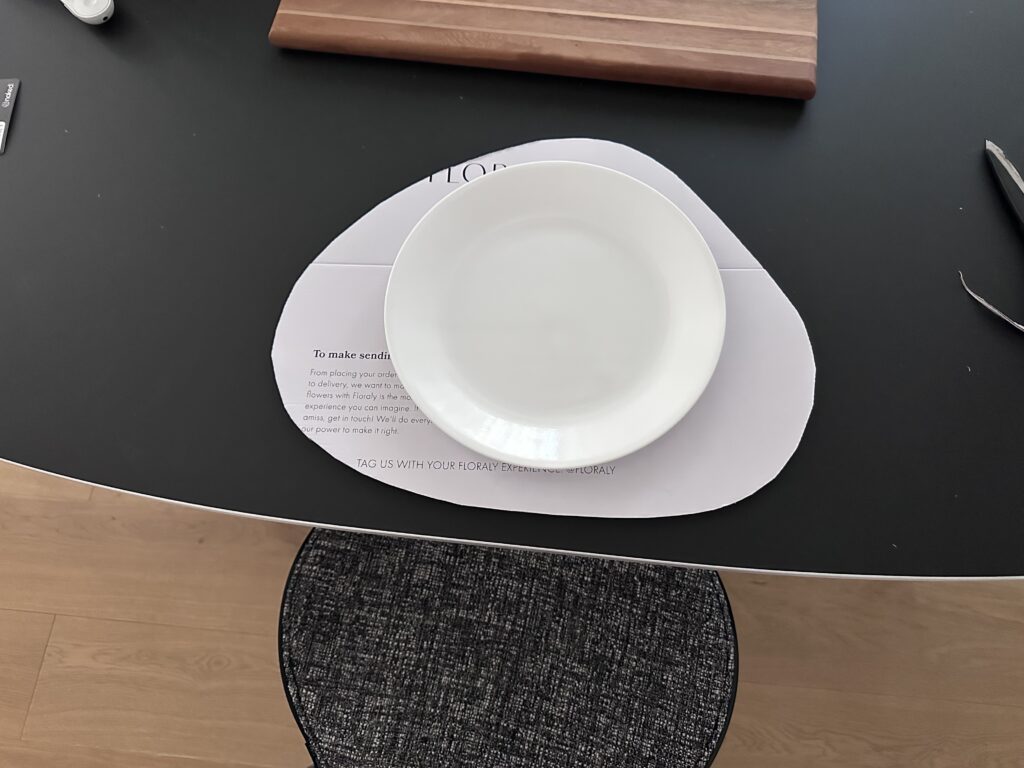
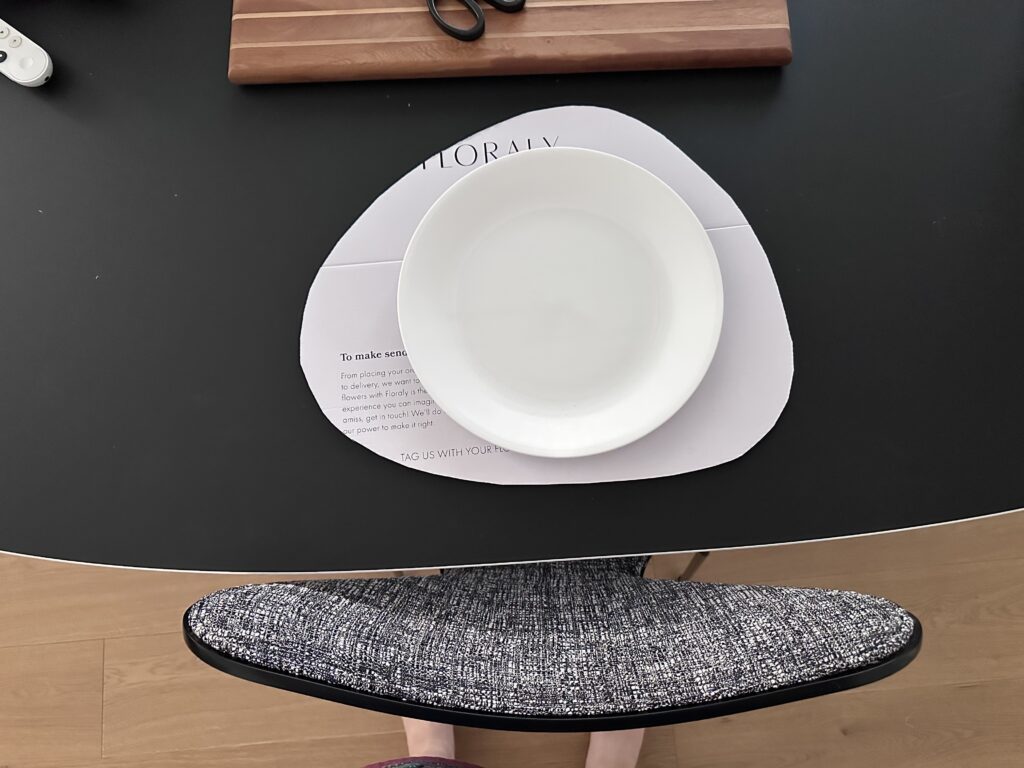
The first was deemed by the Snook “too egg-like.” (I agreed.) So I tried a few rounded triangles and ended up with option #3.
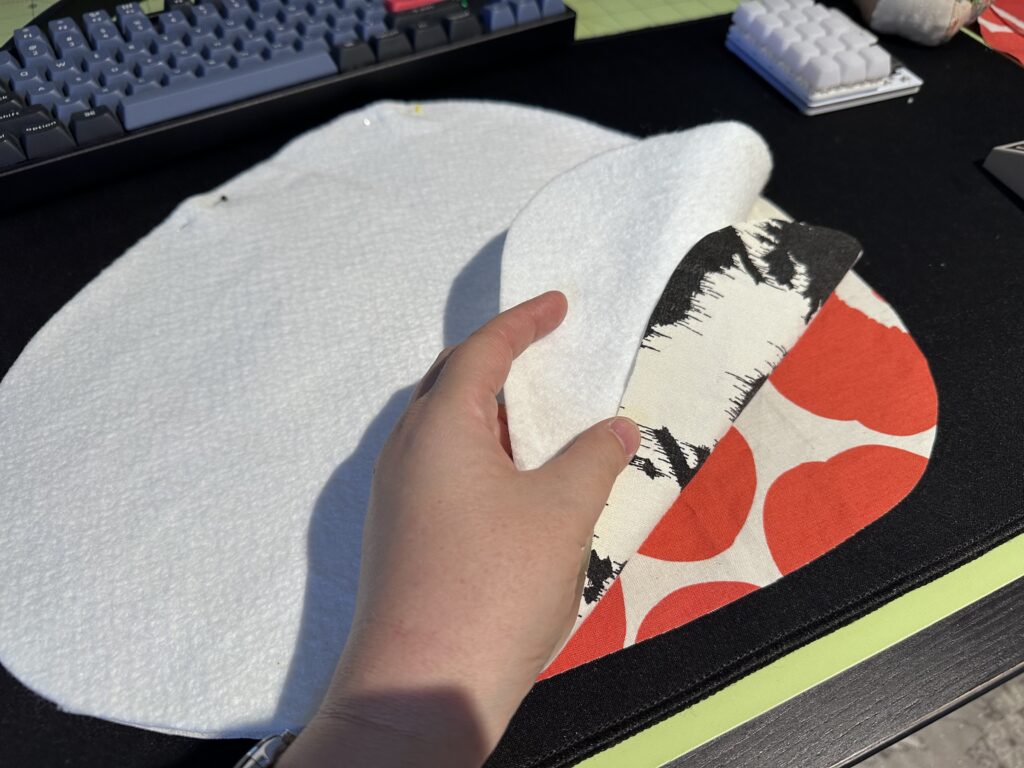
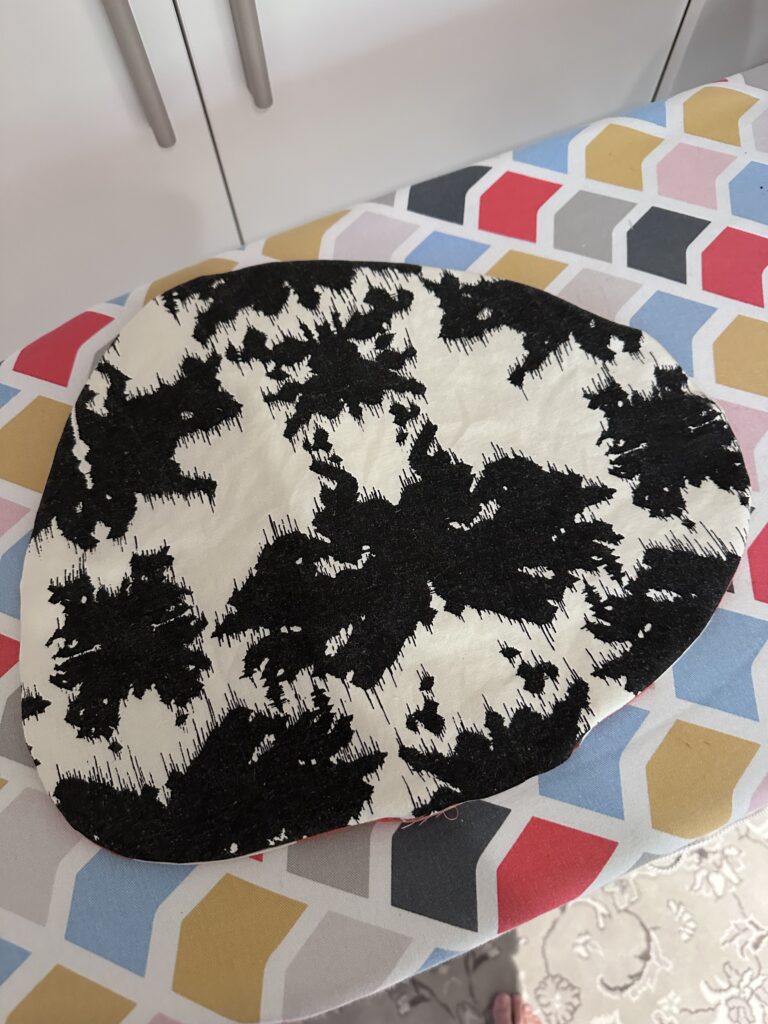
I decided I wanted the placemats to be reversible, so I found a suitable backing fabric from my stash. I used my template to cut out 6 red front pieces, 6 black back pieces (with the template reversed!), and 6 pieces of thin cotton quilt batting (left over from making Baby Taos’s quilt).
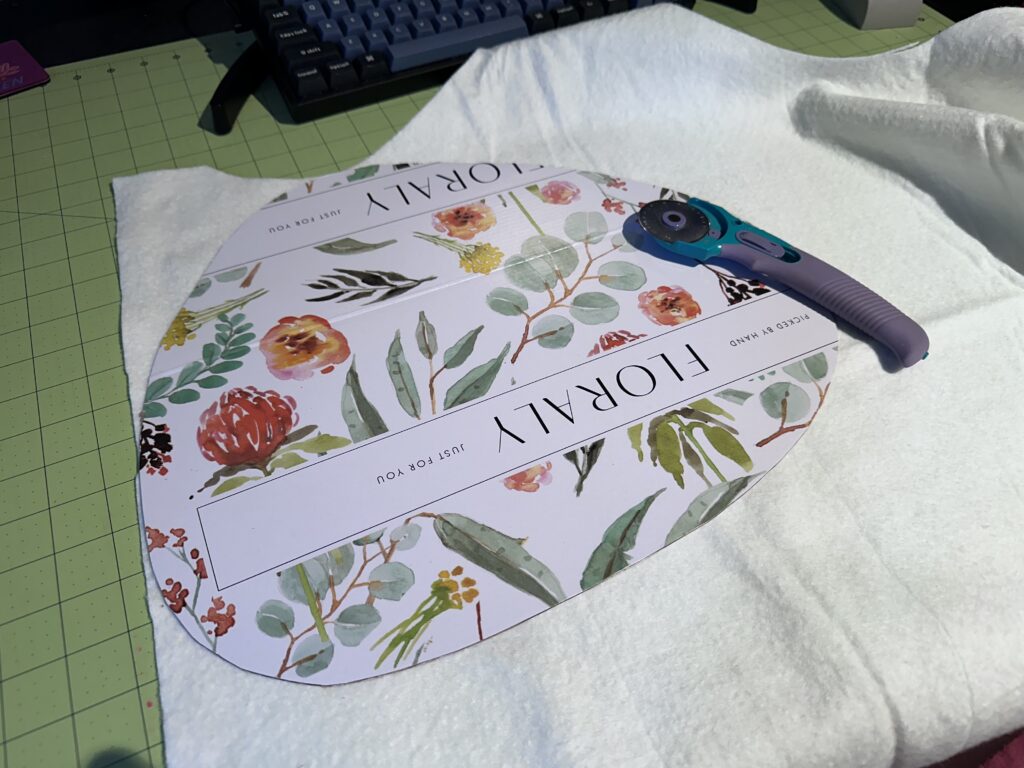
Here are the pieces all set for sewing. The backing fabric is called “Psycat” by Rhynie Cawood, handprinted by Sydney’s Publisher Textiles. I picked up a remnant many years ago and I love how it looks like a Rorschach test.
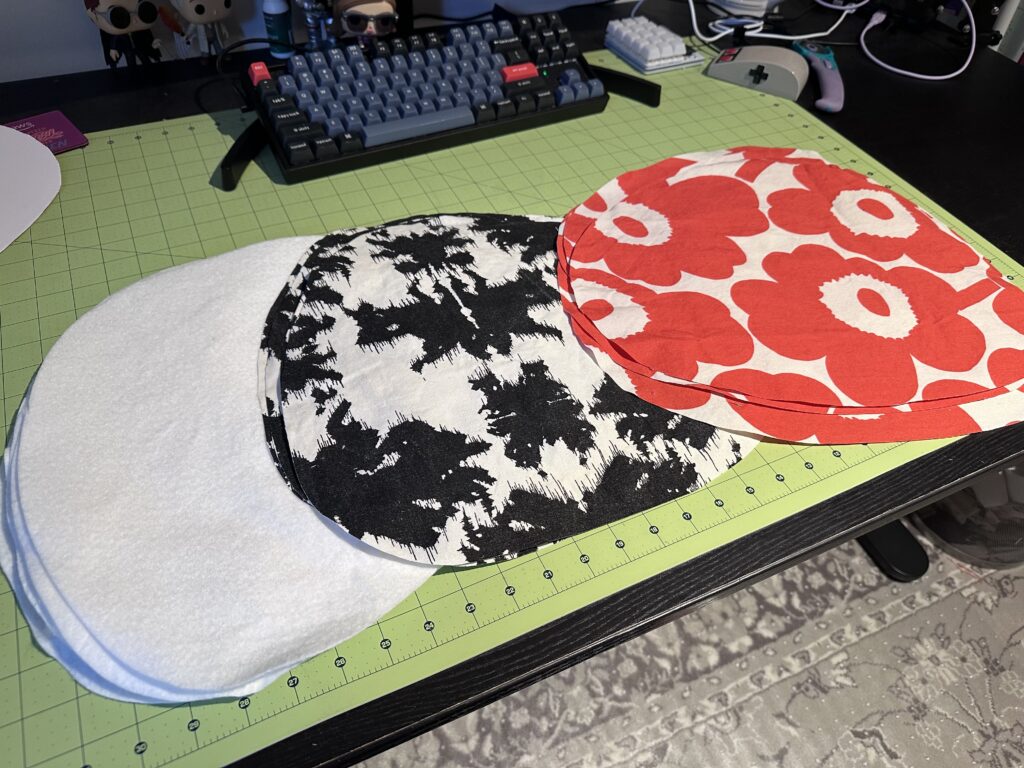
To assemble, I laid down a red piece face up, then a black piece face down, and then the batting. I pinned them all together.
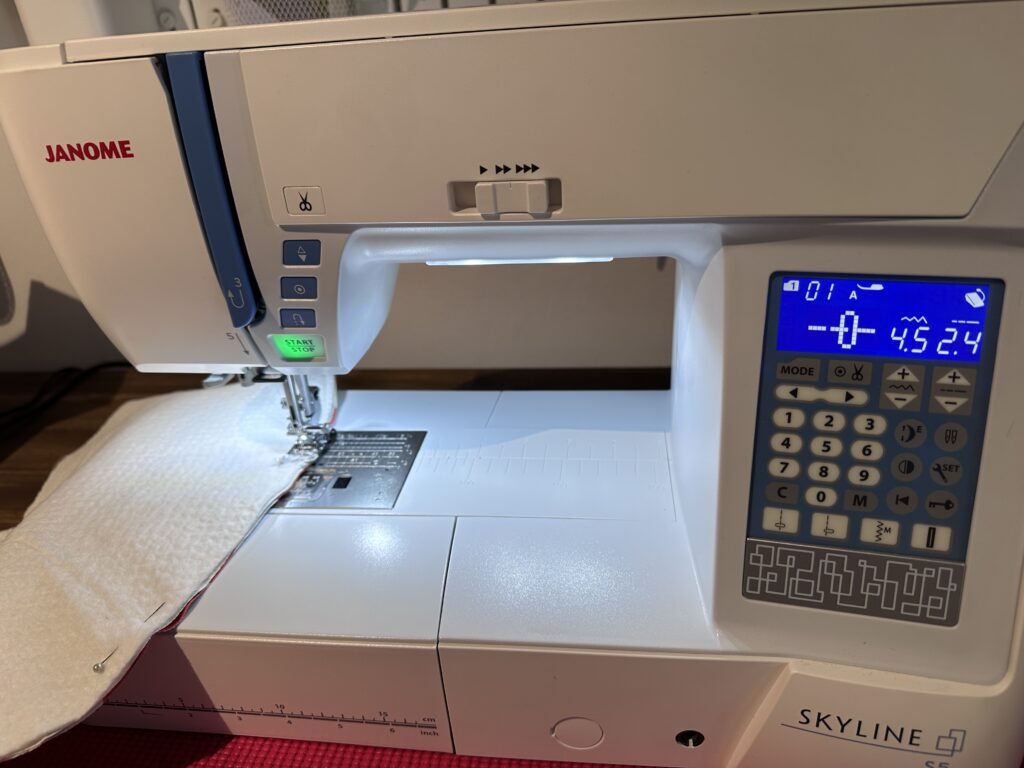
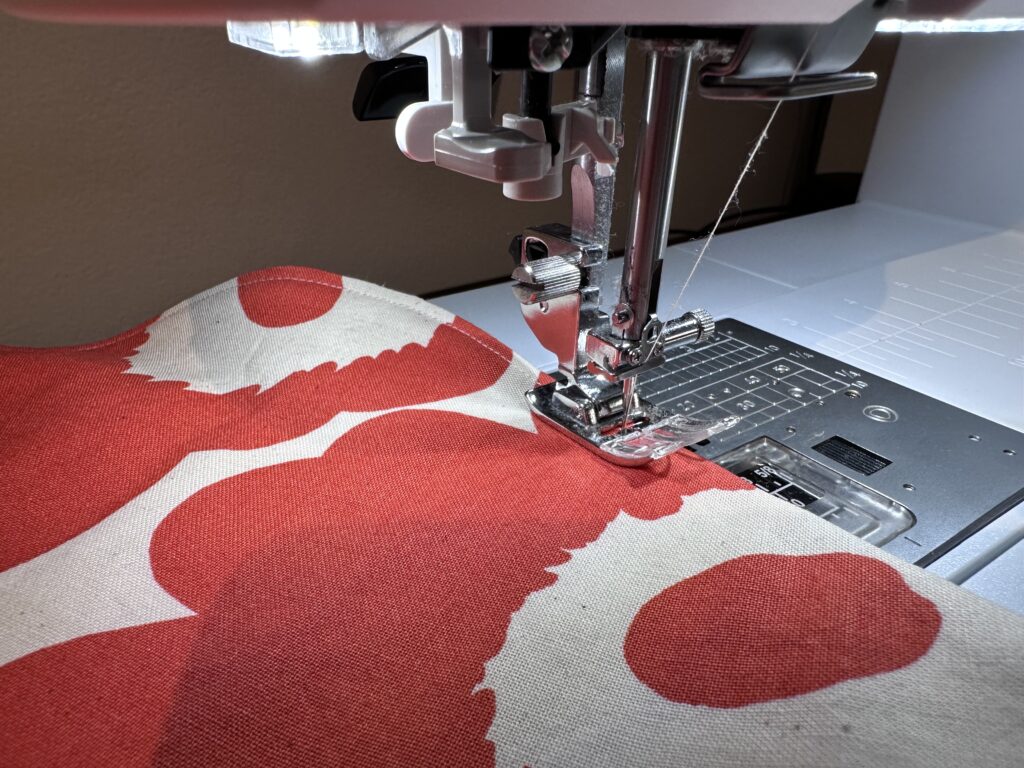
I sewed them together with a 1/4″ seam allowance, leaving a couple inches at the bottom open so I could turn them out.
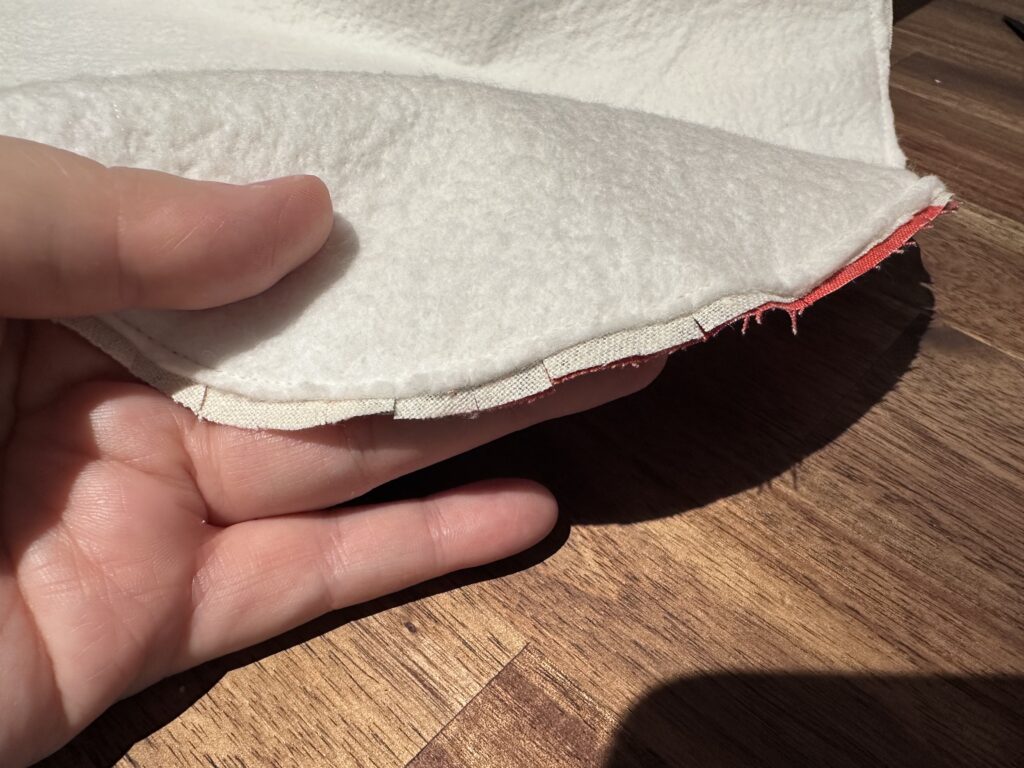
Then I trimmed down the quilt batting to avoid the edges being too thick. I also clipped the curves, which basically meant going around the whole thing since it was all curves.
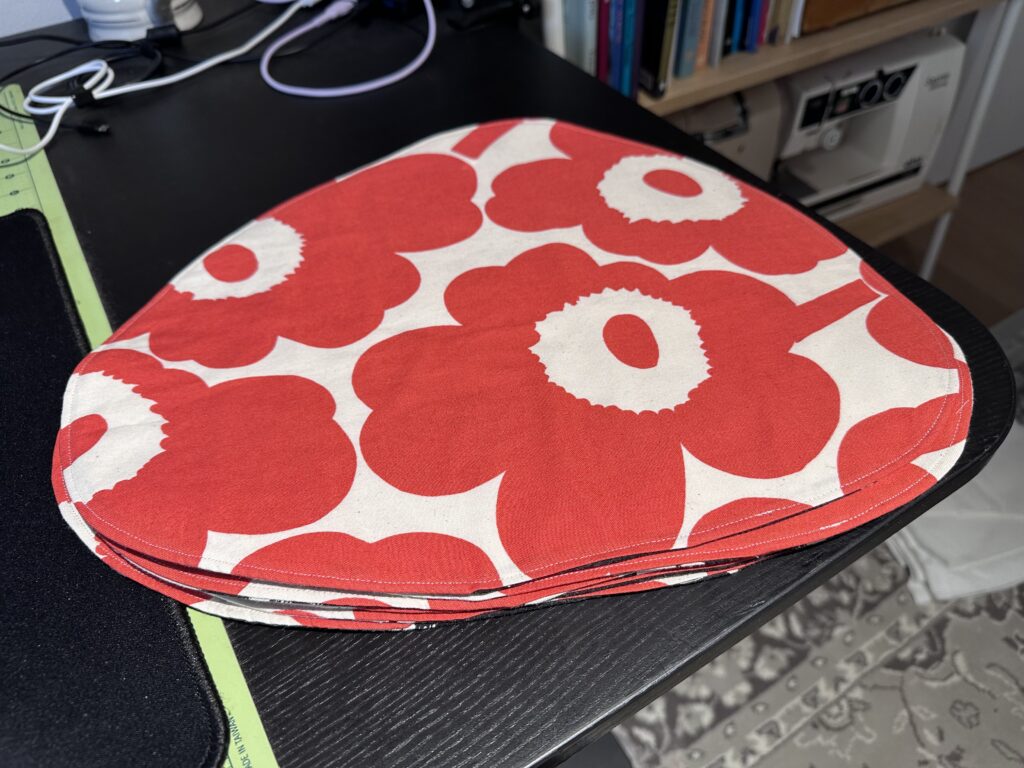
Then I used the opening to turn each placemat right-side out.
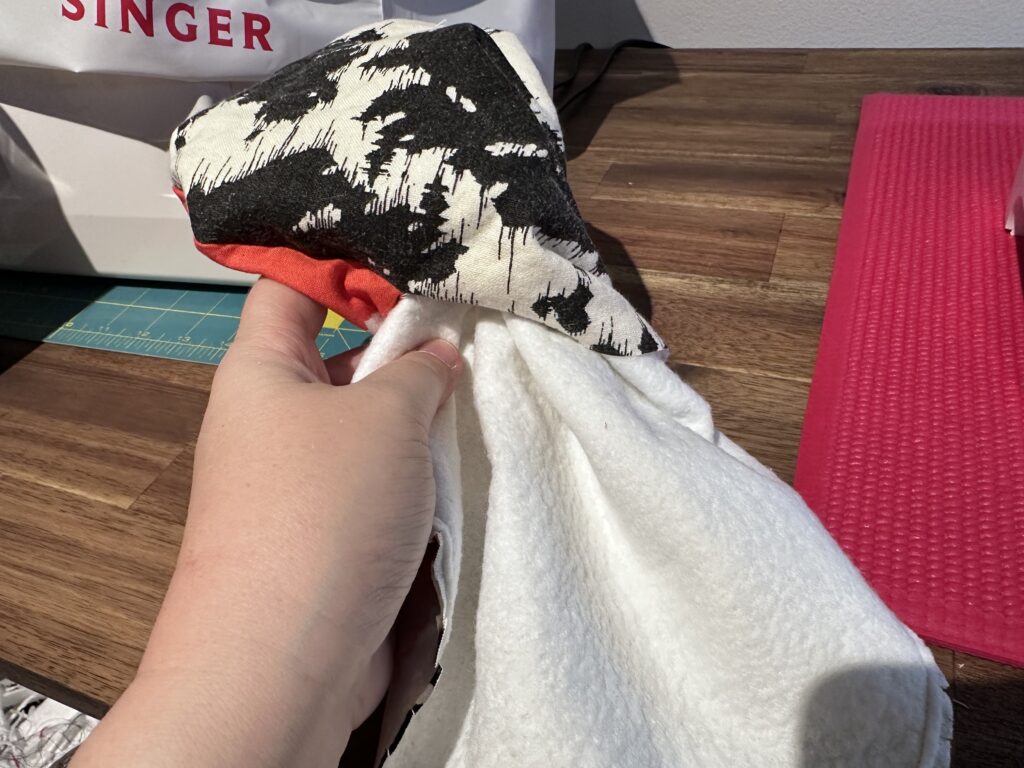
I spent some time making sure all the seams were fully pushed out, and I gave each placemat a good ironing. You can see there the opening at the bottom where I turned it out.
I folded in the seam allowances at the opening and hit that with the steam iron. Then I top-stitched all the way around each placemat at 1/8″, both for decoration and to close off the opening.
Pretty quickly I had a completed stack of six placemats!
Now it was time to decide on the quilting. I decided that the best options were either a spiral or a grid, so I mocked up a rough idea and sent it to a few friends for thoughts. Everyone voted for spiral.
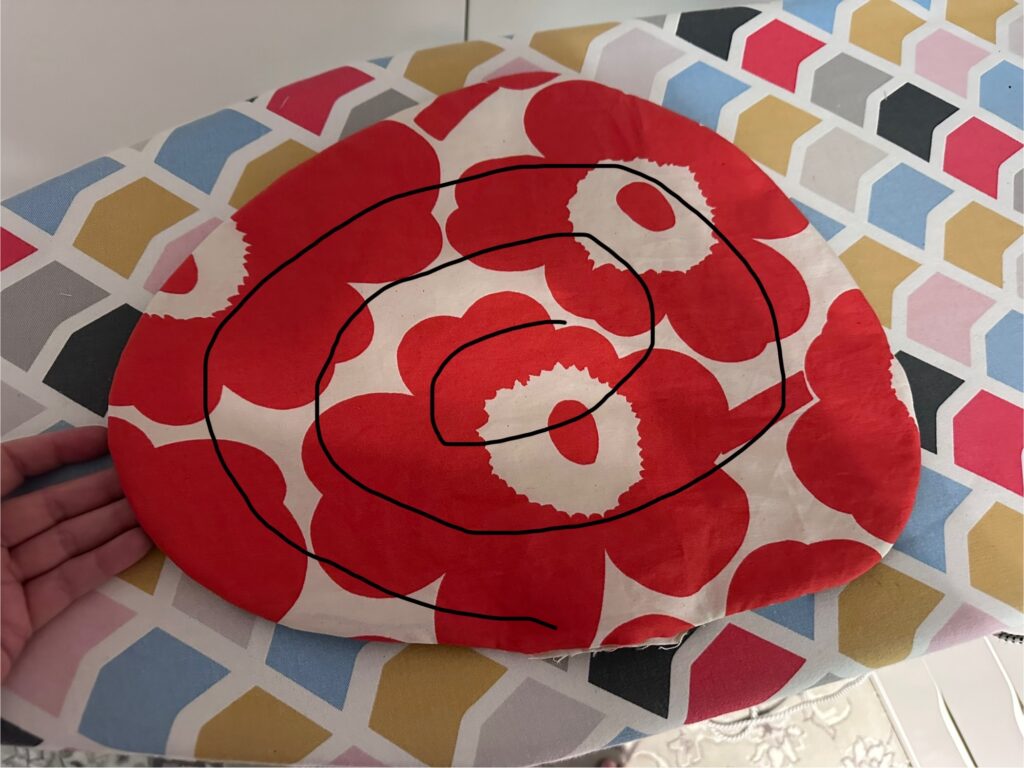

I set up the walking foot for my sewing machine, as well as the “quilting attachment” – an adjustable metal bar that sticks out that you can use to sew parallel lines. I used it to ensure the first few spirals were roughly 1″ apart.

Once I got to the middle, I was basically free-handing it and just turning the placemat around and around. I LOVE how it turned out! It was really fun too. I blasted through the remaining placemats to finish the project off.
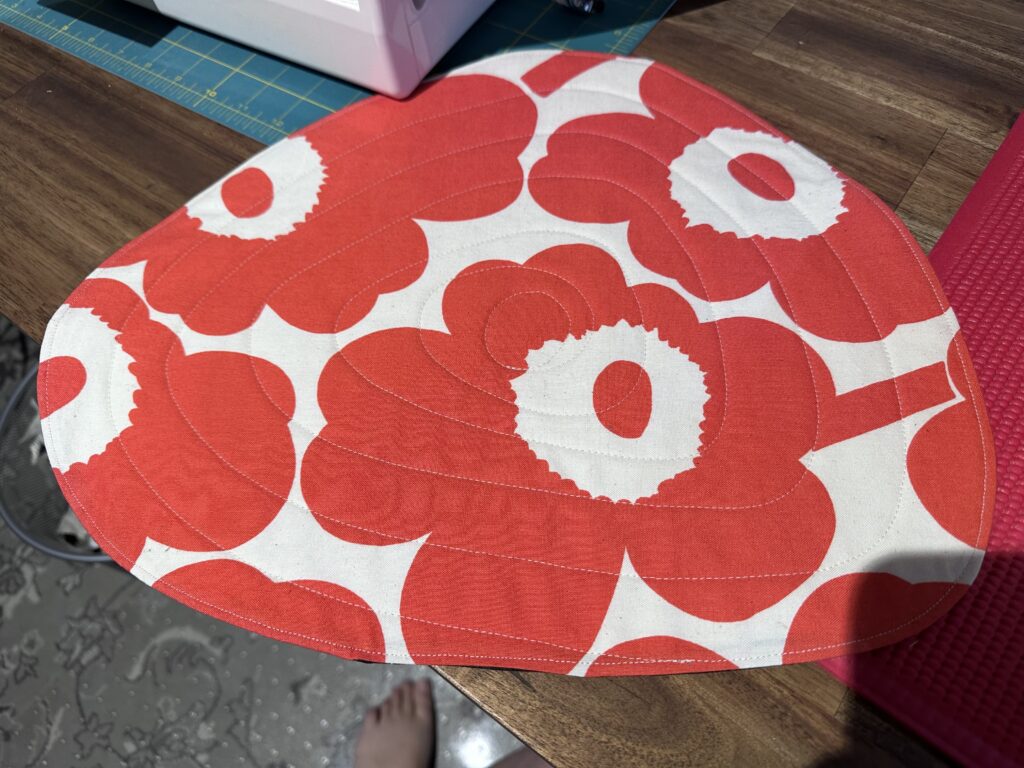
I’ve got a can of Scotchguard around here somewhere so I’ll probably hit them with that to make them a bit more stain-resistant. Don’t they look great on the table?