Tag: sewing

  • Marimekko placemats

    Marimekko placemats

    I decided a few days ago that we needed new placemats to help protect our lovely new dining room table. I considered buying some, but I couldn’t find any that I liked that weren’t hideously expensive. (The cheapest Marimekko one is $36!) However, I do still have plenty of fabric left over from making the sofa cushions. Why not make my own?

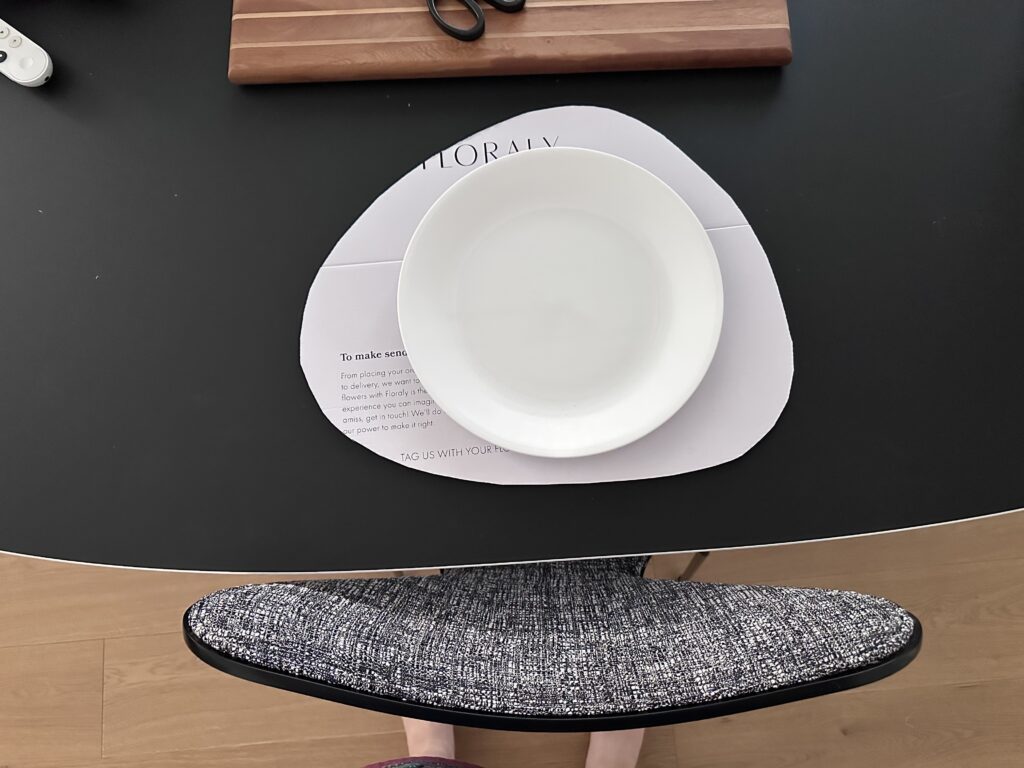
    I started by prototyping different shapes. I wanted something organic and asymmetrical, so I used some cardboard to try out a few different options. (I put a plate on top for sizing.)
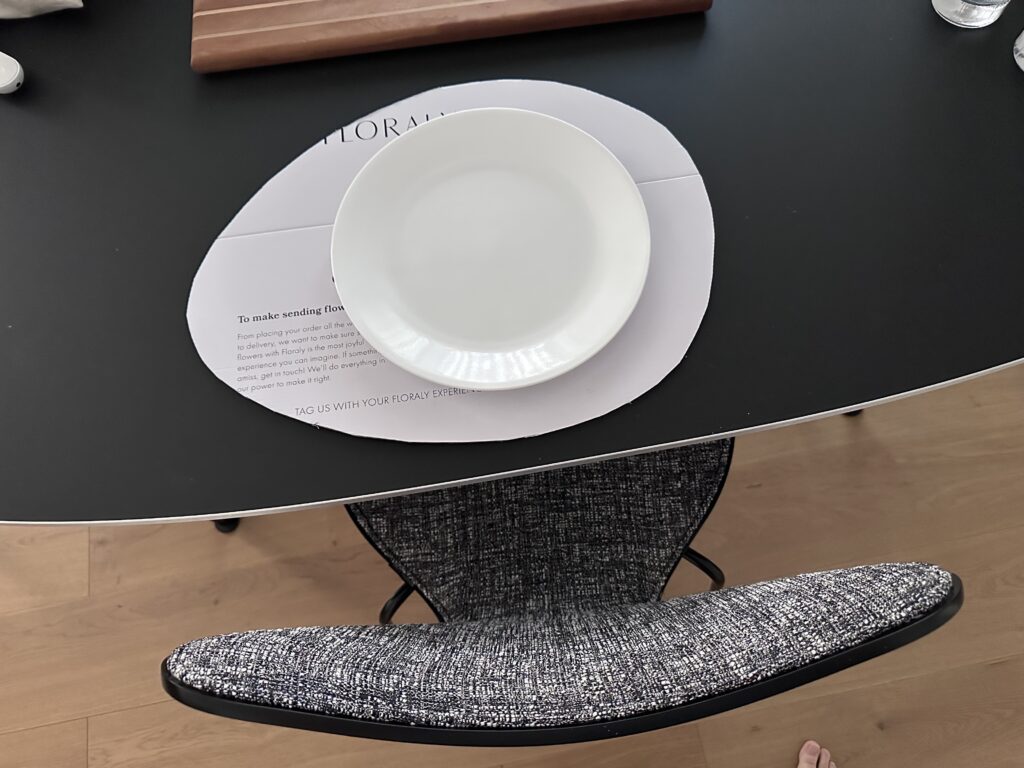
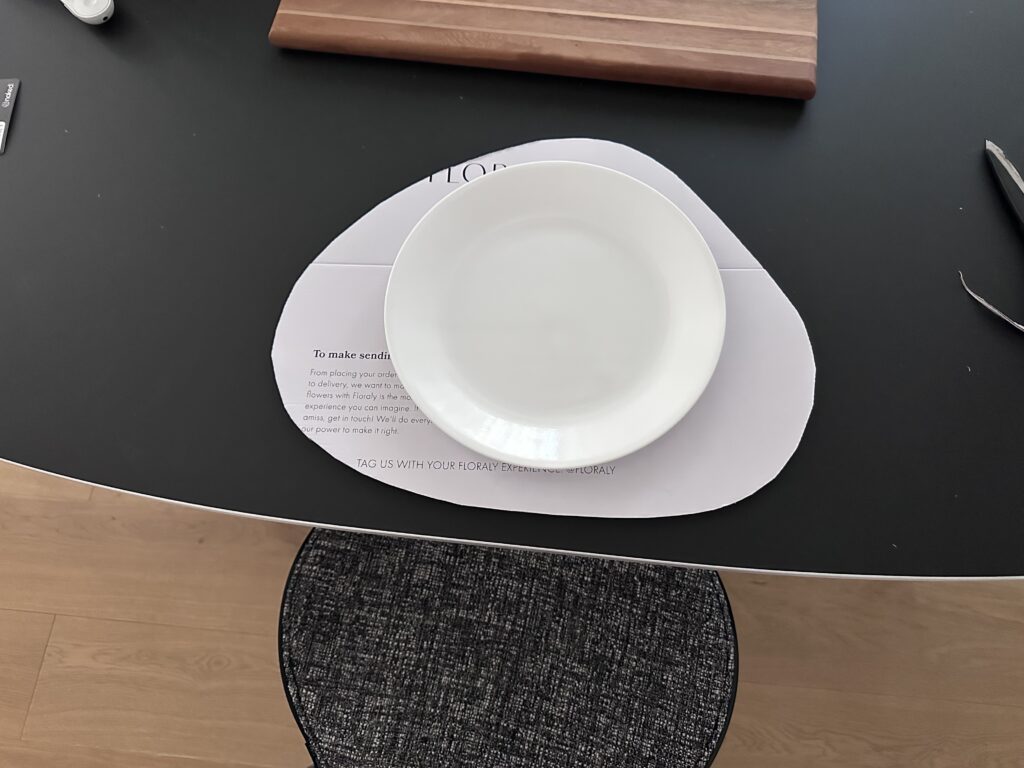
    The first was deemed by the Snook “too egg-like.” (I agreed.) So I tried a few rounded triangles and ended up with option #3.

    I decided I wanted the placemats to be reversible, so I found a suitable backing fabric from my stash. I used my template to cut out 6 red front pieces, 6 black back pieces (with the template reversed!), and 6 pieces of thin cotton quilt batting (left over from making Baby Taos’s quilt).
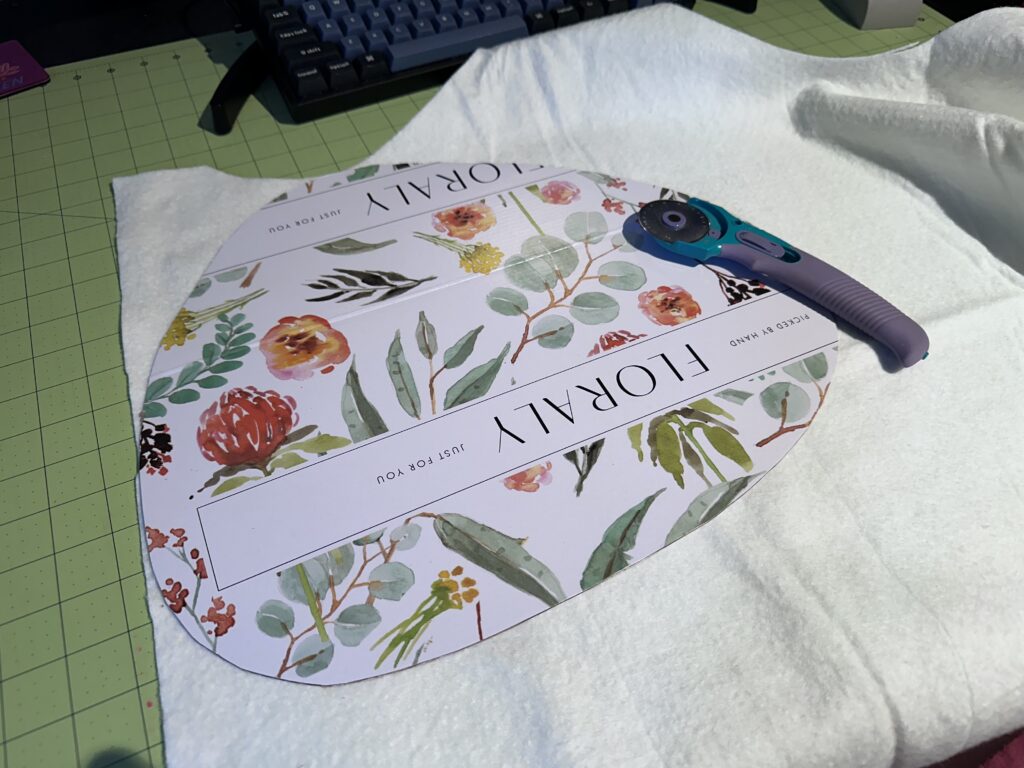
    Cutting the quilt batting

    Here are the pieces all set for sewing. The backing fabric is called “Psycat” by Rhynie Cawood, handprinted by Sydney’s Publisher Textiles. I picked up a remnant many years ago and I love how it looks like a Rorschach test.
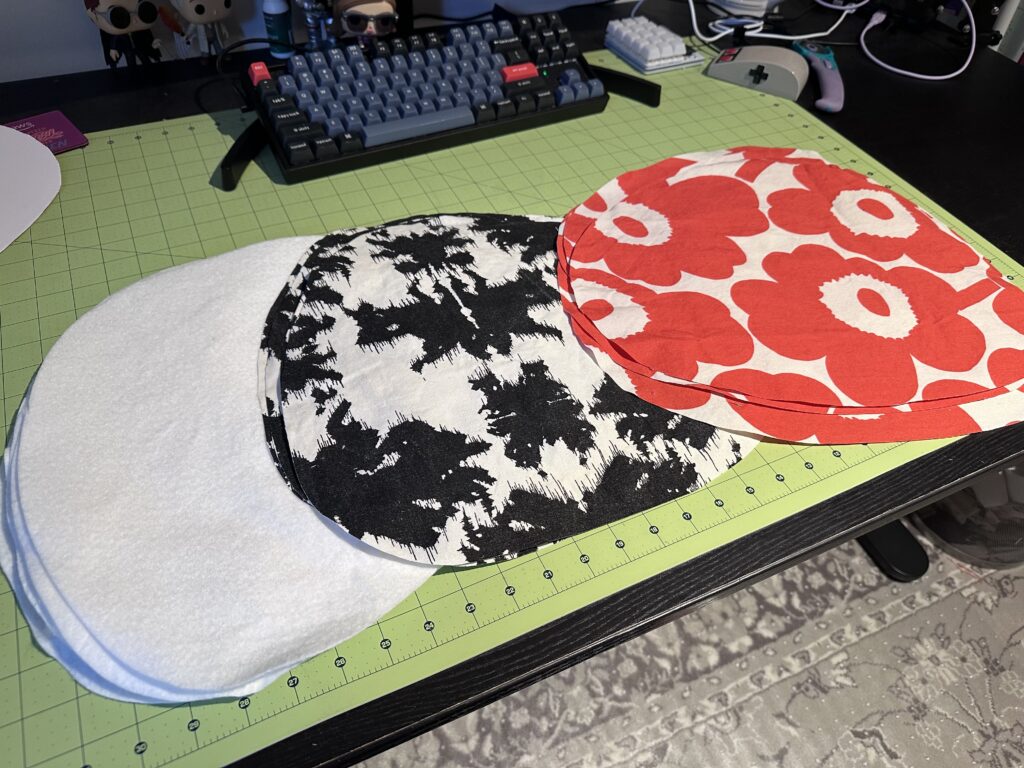
    Cut pieces

    To assemble, I laid down a red piece face up, then a black piece face down, and then the batting. I pinned them all together.
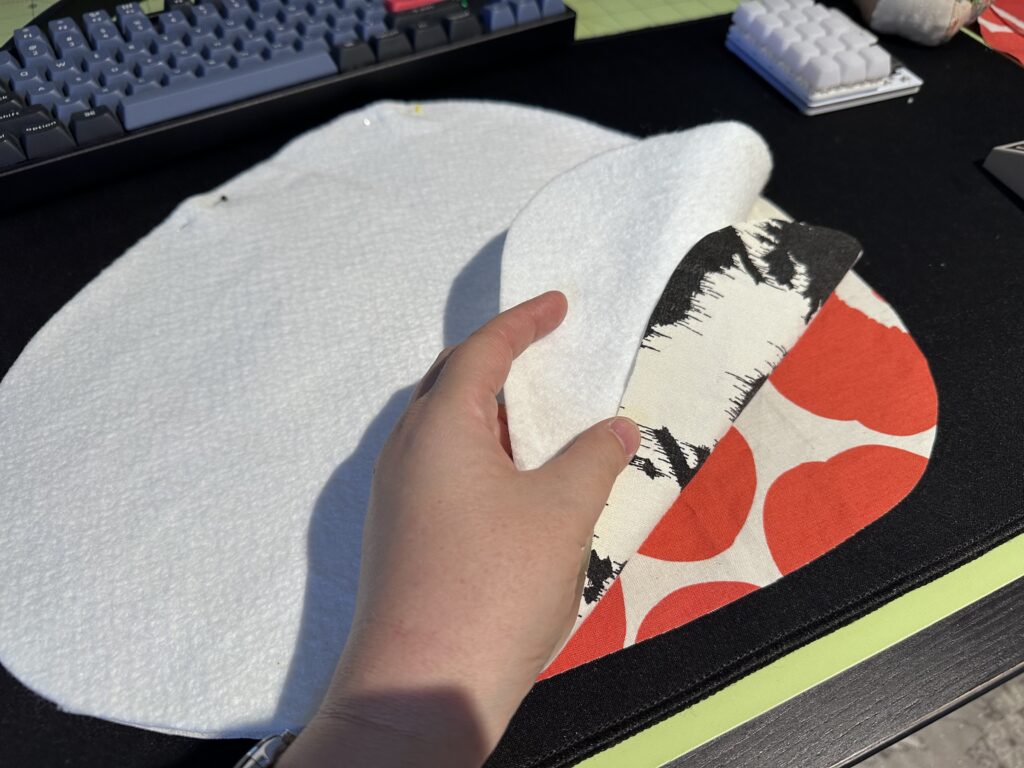
    Assembled placemat

    I sewed them together with a 1/4″ seam allowance, leaving a couple inches at the bottom open so I could turn them out.
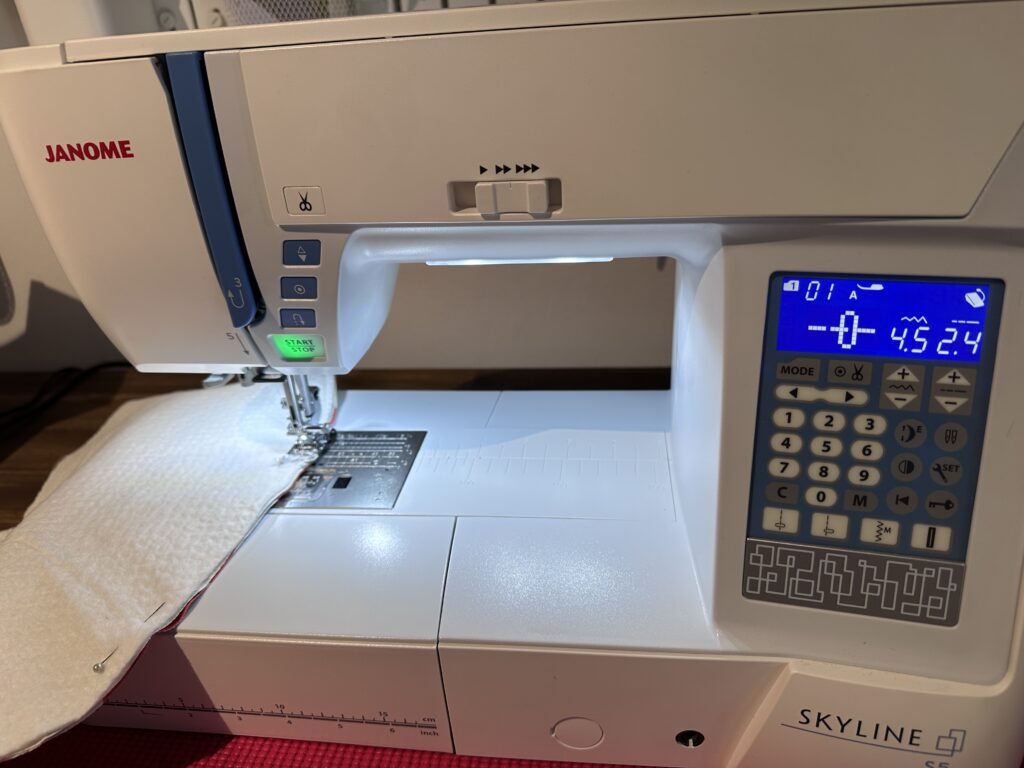
    Sewing placemats

    Then I trimmed down the quilt batting to avoid the edges being too thick. I also clipped the curves, which basically meant going around the whole thing since it was all curves.
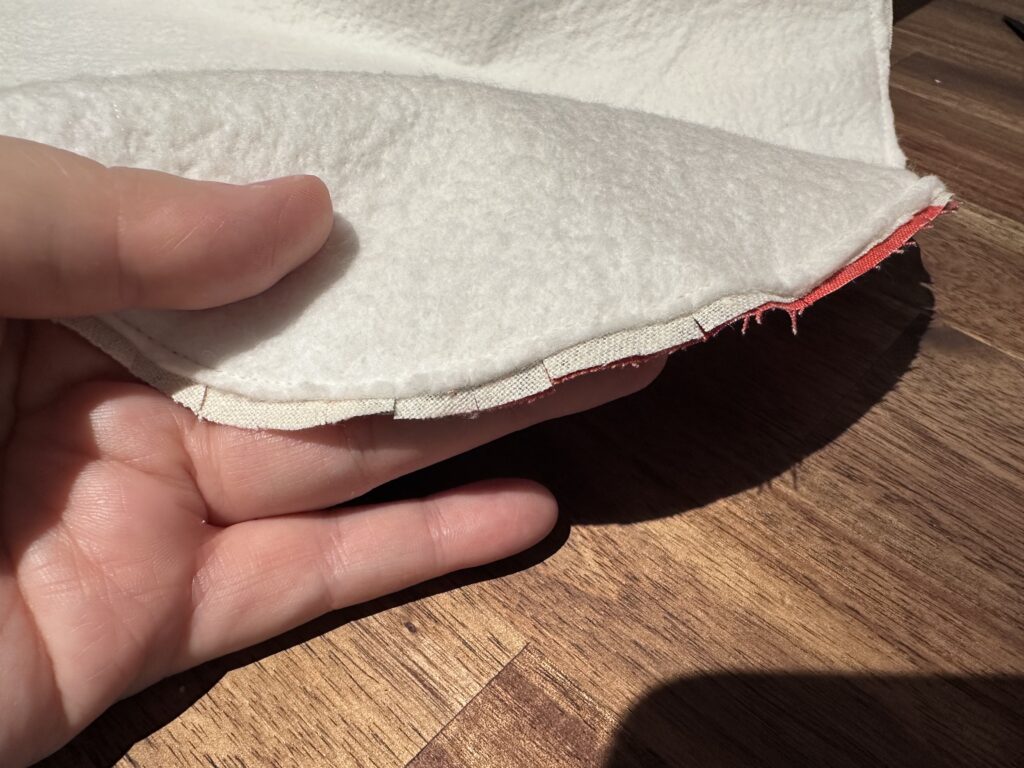
    Clipping curves

    Then I used the opening to turn each placemat right-side out.
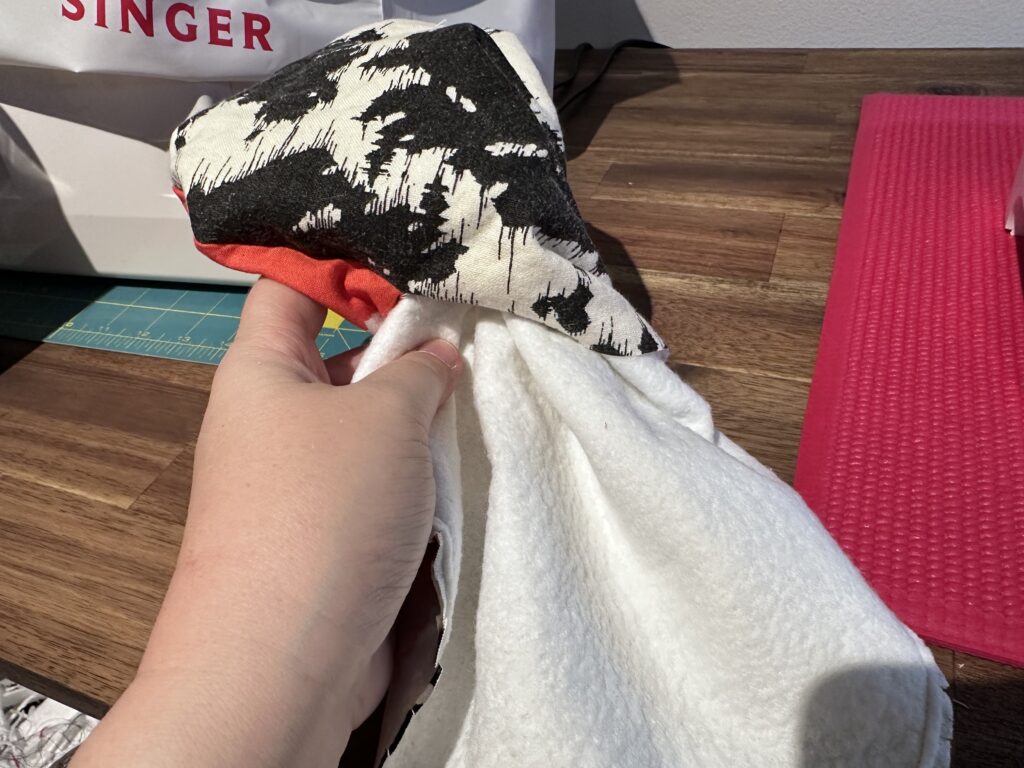
    Turning the placemats

    I spent some time making sure all the seams were fully pushed out, and I gave each placemat a good ironing. You can see there the opening at the bottom where I turned it out.
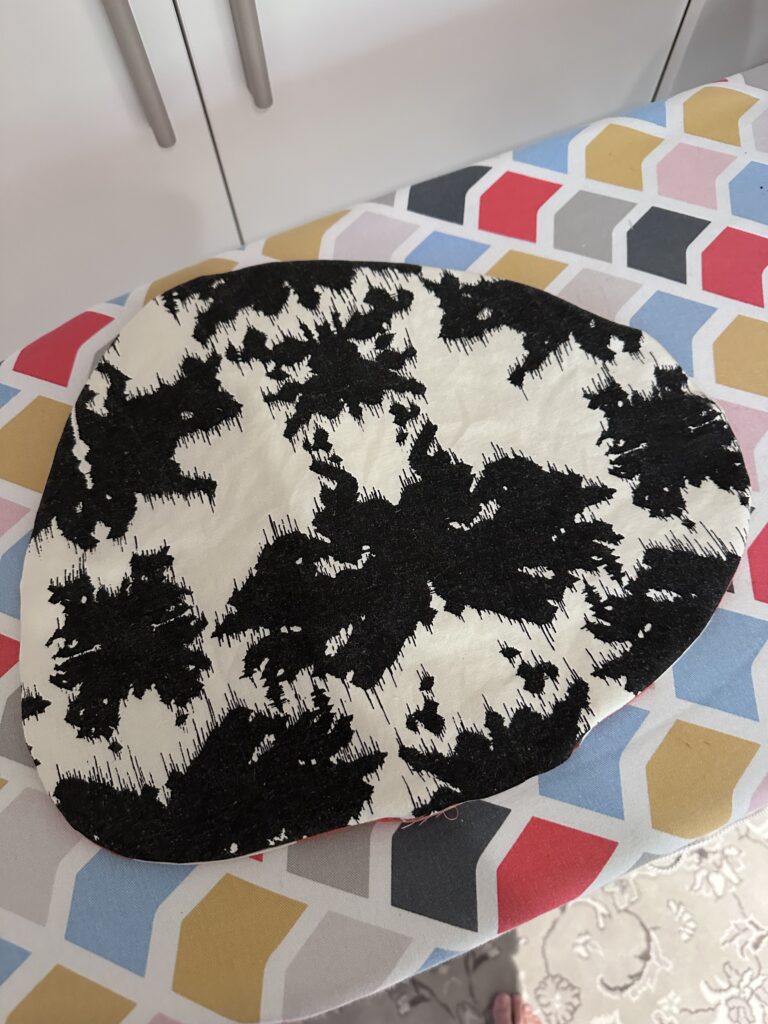
    Reverse placemat

    I folded in the seam allowances at the opening and hit that with the steam iron. Then I top-stitched all the way around each placemat at 1/8″, both for decoration and to close off the opening.
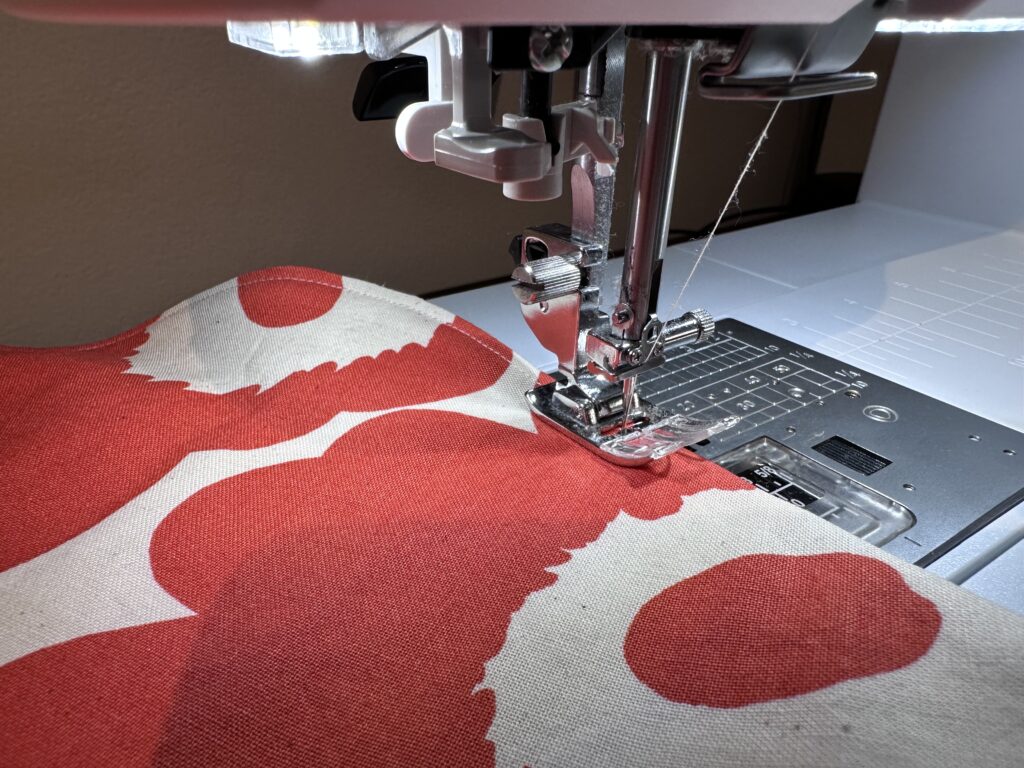
    Top stitching

    Pretty quickly I had a completed stack of six placemats!
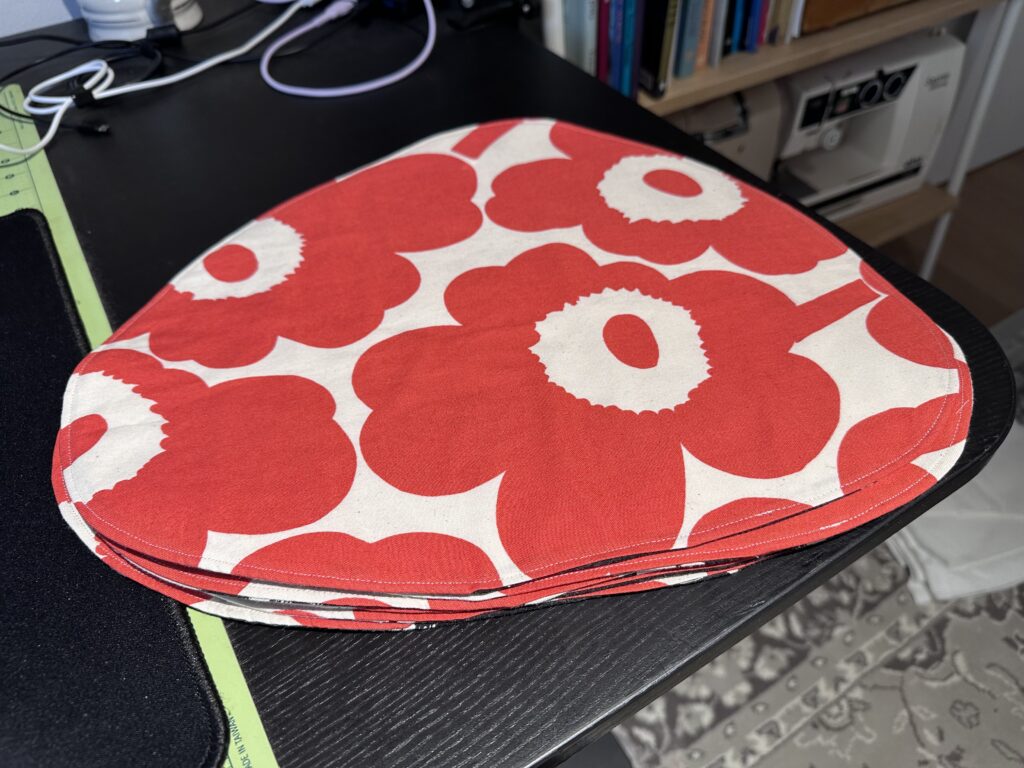
    Stack of placemats

    Now it was time to decide on the quilting. I decided that the best options were either a spiral or a grid, so I mocked up a rough idea and sent it to a few friends for thoughts. Everyone voted for spiral.
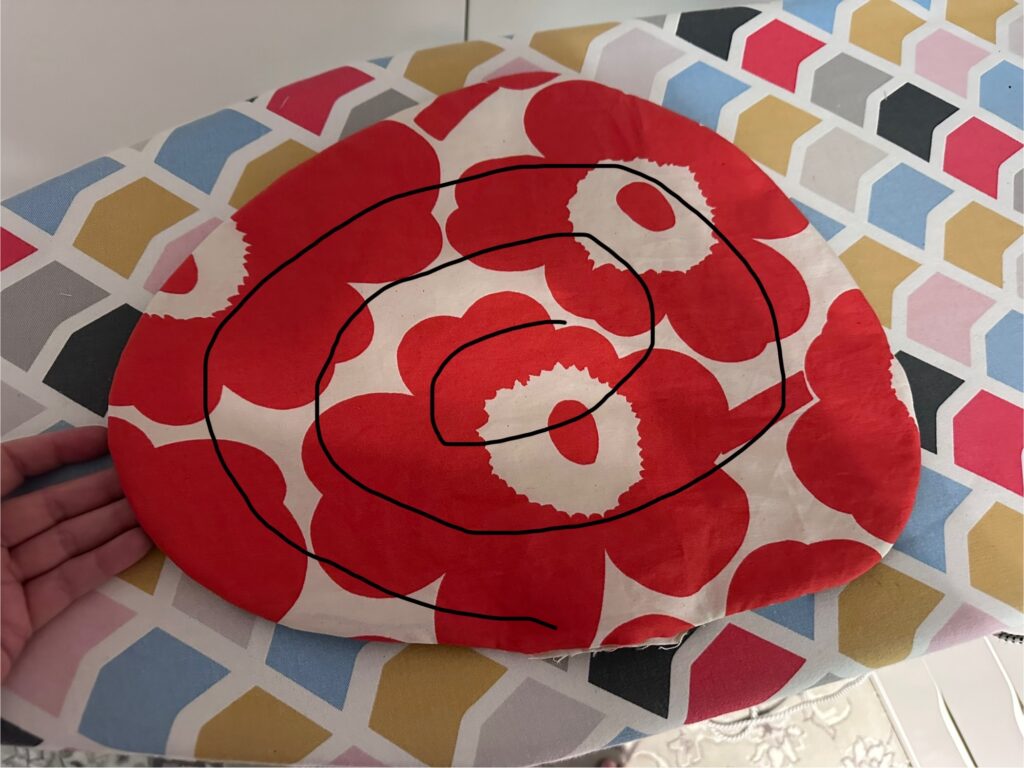
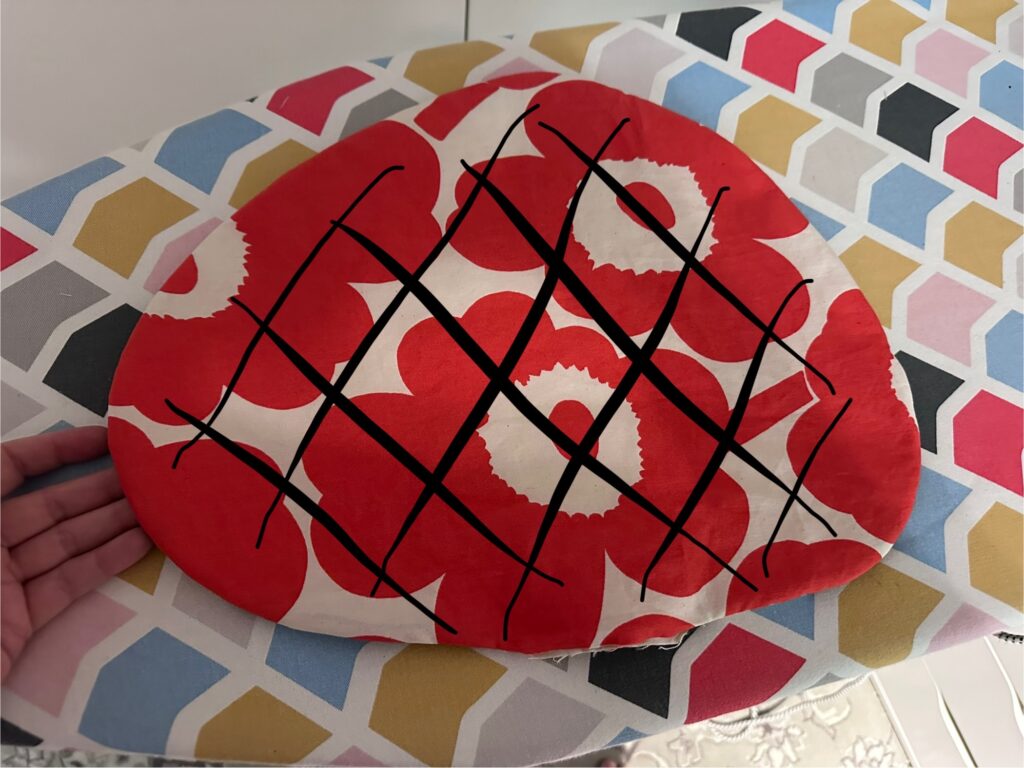
    I set up the walking foot for my sewing machine, as well as the “quilting attachment” – an adjustable metal bar that sticks out that you can use to sew parallel lines. I used it to ensure the first few spirals were roughly 1″ apart.
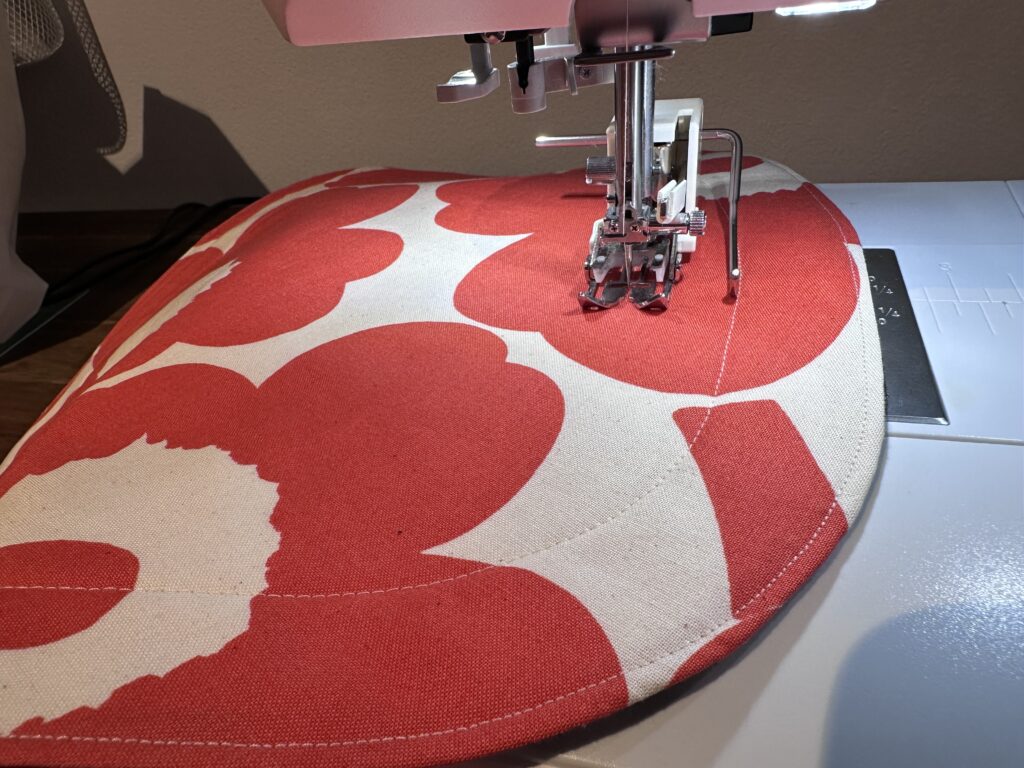
    Sewing the spiral

    Once I got to the middle, I was basically free-handing it and just turning the placemat around and around. I LOVE how it turned out! It was really fun too. I blasted through the remaining placemats to finish the project off.
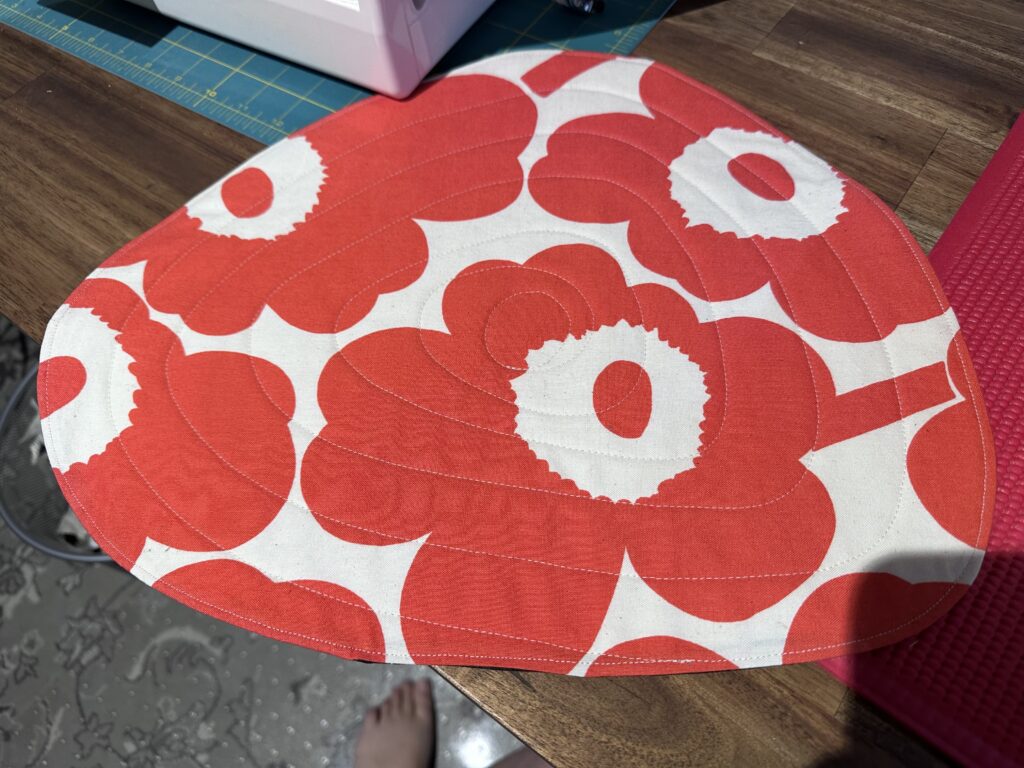
    Finished placemat

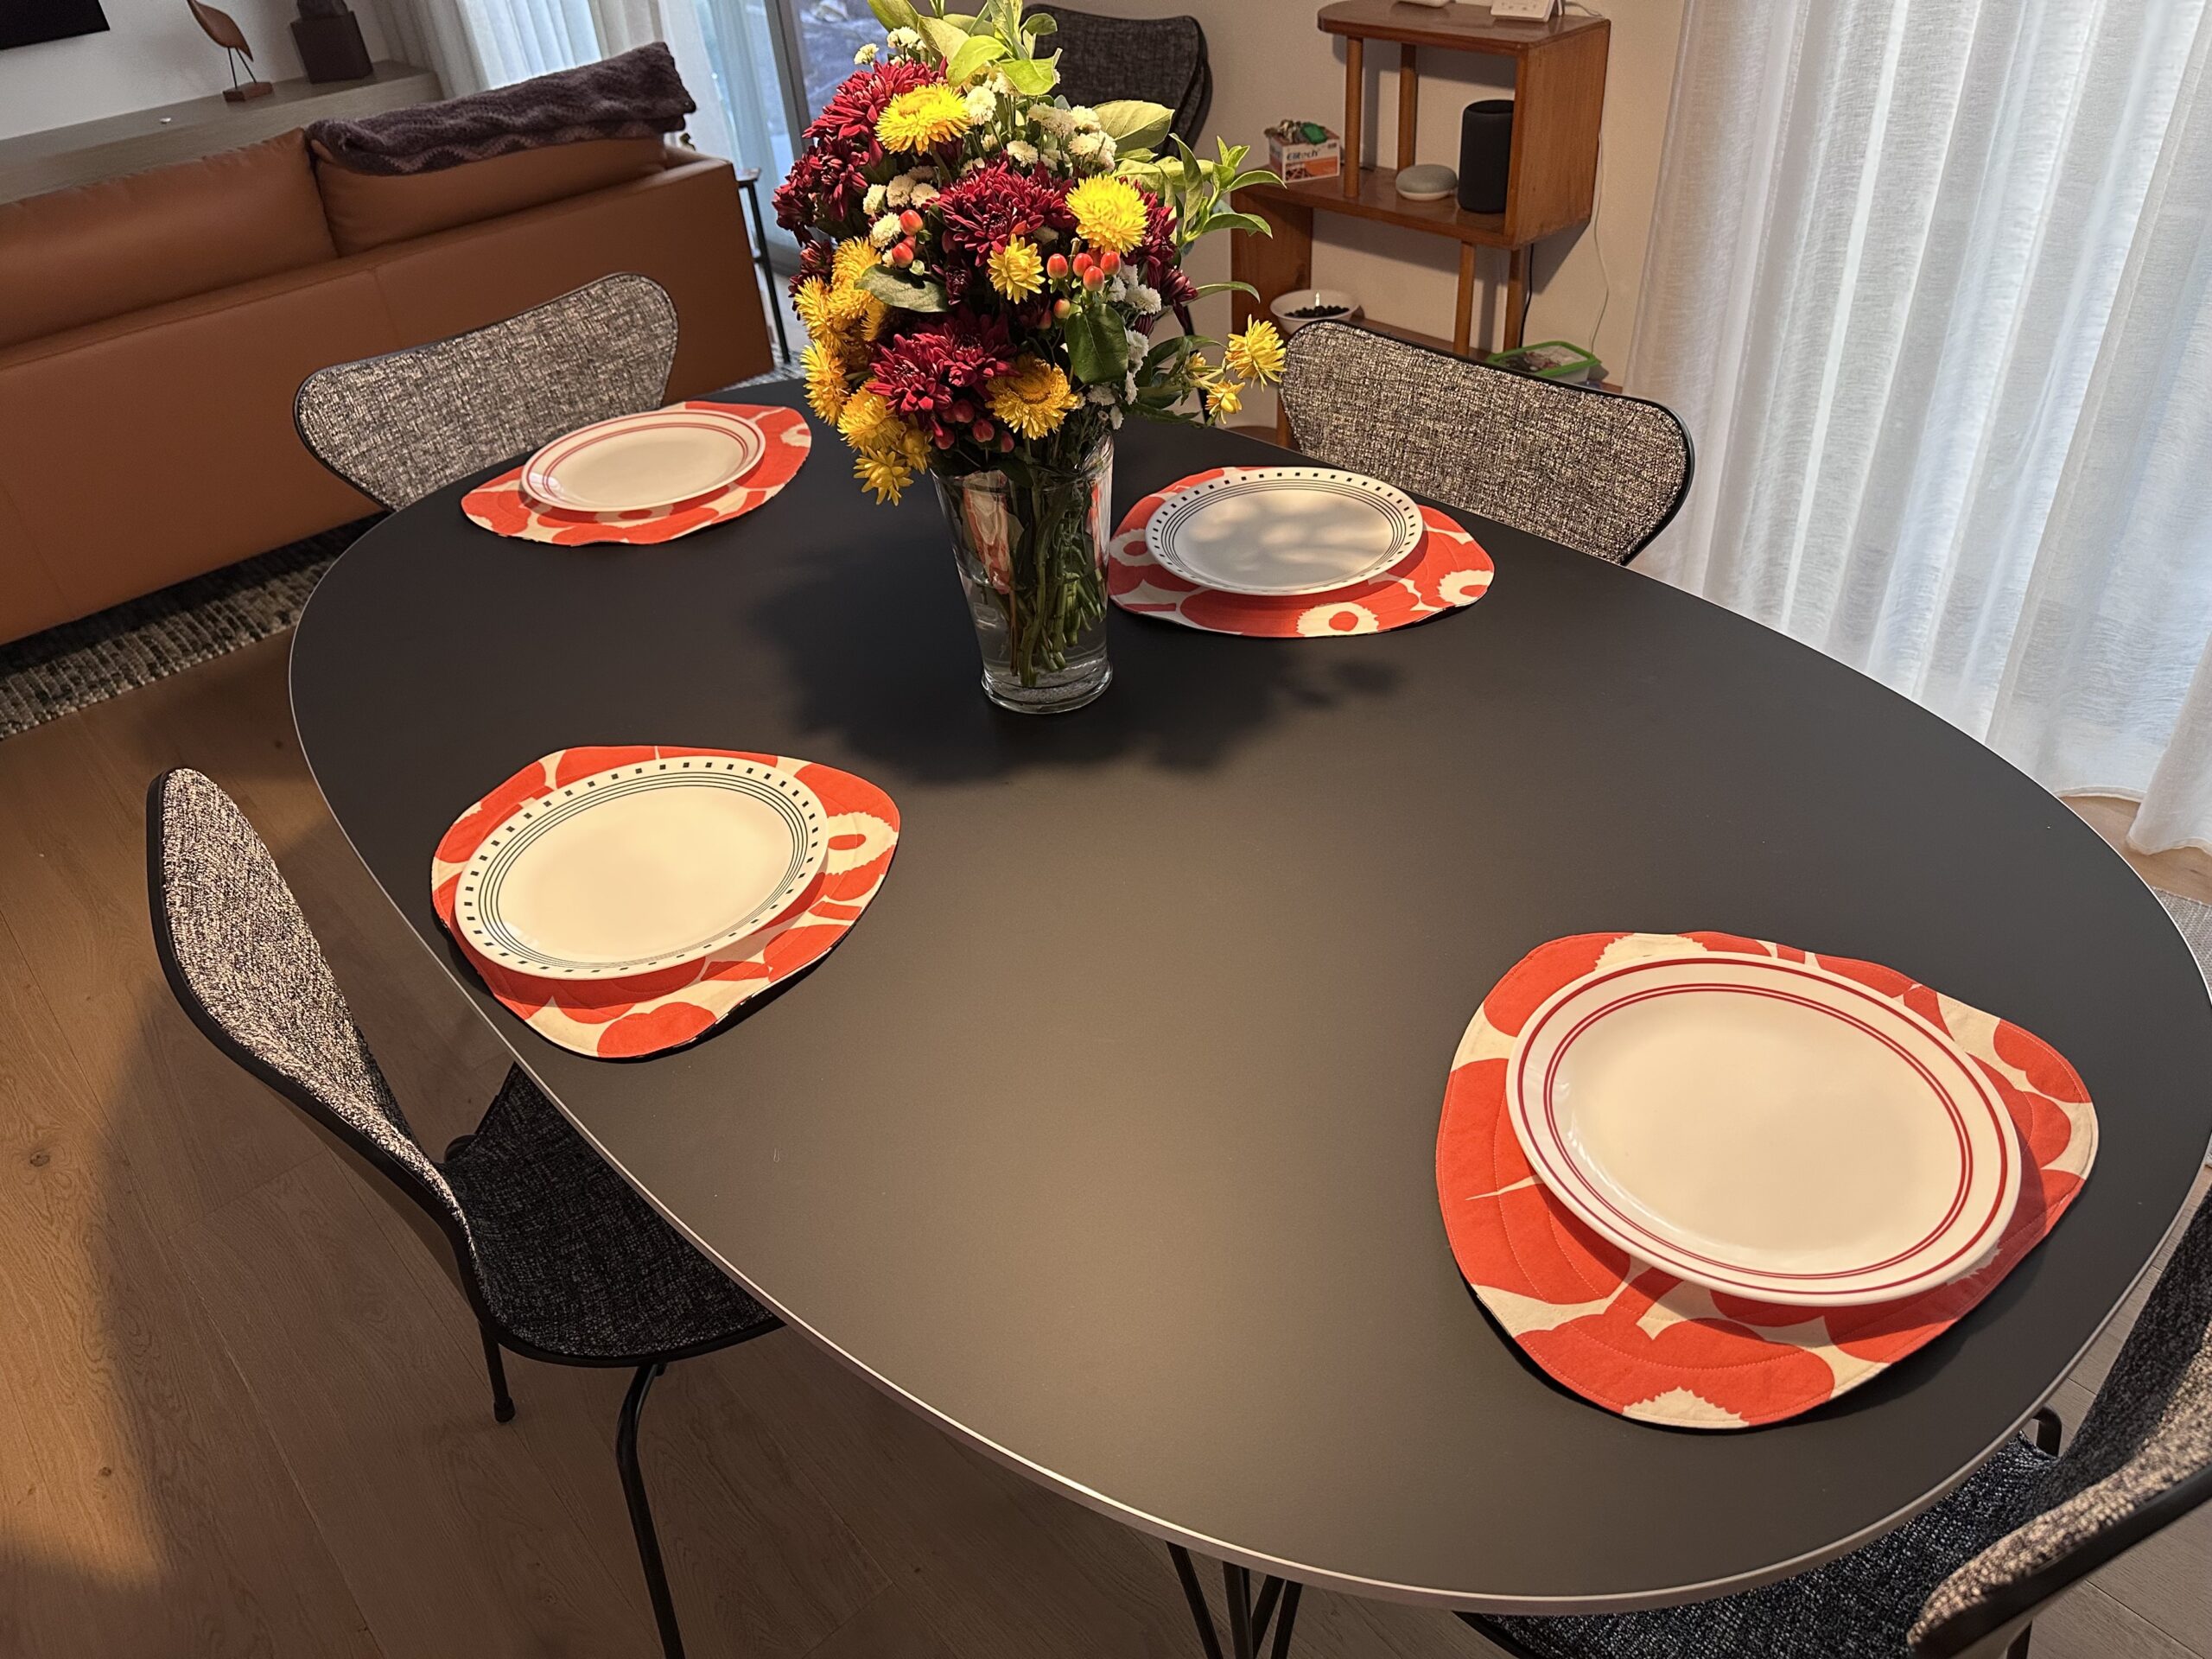
    I’ve got a can of Scotchguard around here somewhere so I’ll probably hit them with that to make them a bit more stain-resistant. Don’t they look great on the table?
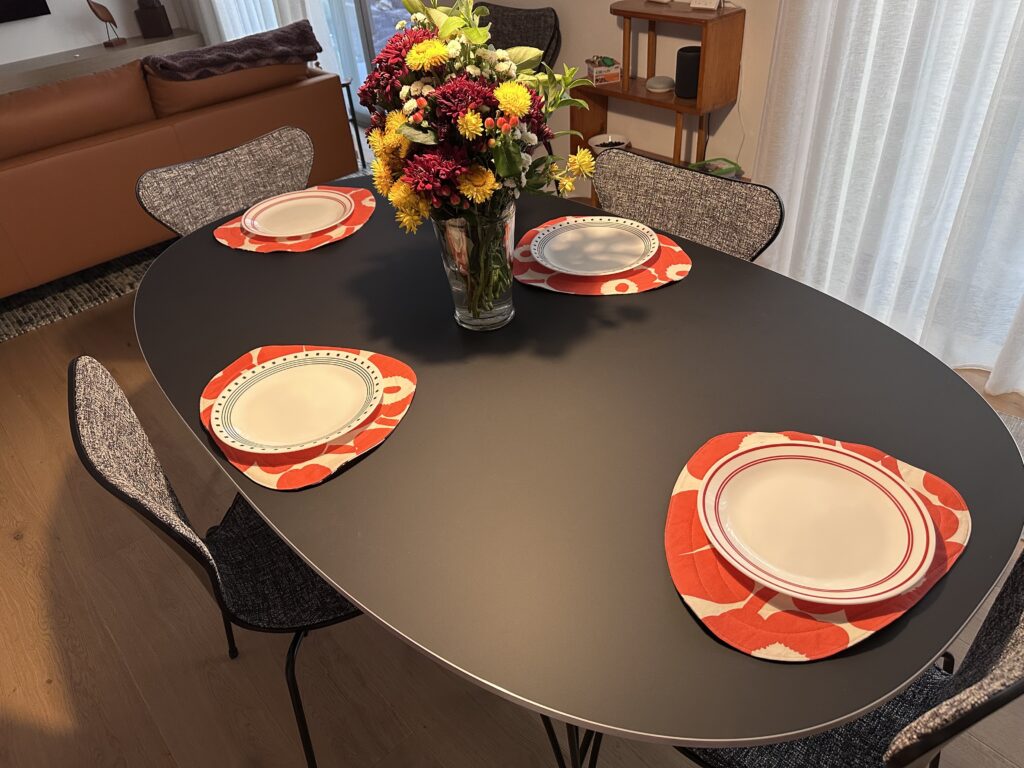
    Dining room table
  • Textile exhibition

    Queer quilts, rebellious knitting and political pants: the radical world of textiles – What a cool looking exhibition! I love those trade union flags… and the pink shorts. 😉 If you’re going to Adelaide in the next four months, I’d definitely check it out.

  • Needlepoint Cushions with Mrs. Morris

    Needlepoint Cushions with Mrs. Morris

    Eighteen years ago, Mr. Snook’s grandmother (“Kathy-Nanny”) moved into a retirement village, and I was gifted one of her many needlepoint tapestries: a tasteful nude reclining with a whippet. If you don’t know much about needlepoint, it generally involves a heavy canvas with a picture printed on it that you then embroider over with slanted stitches. Many of them are based on fine art, and Kathy-Nanny’s was titled “Venus d’aprés Titien.” (It’s clearly based on “Venus and Musician,” just with the leering musician removed.) It was in a heavy ornate frame, and while it was well-executed and beautiful work, it didn’t really… go with any of our other stuff. I put it in a closet for safekeeping and it basically sat in storage for the better part of two decades.

    A couple months ago, we moved back into the house after our extensive renovation, and I decided it was time to bring Venus back to life. Rather than hang her on the wall, I thought that turning her into a pair of cushions might be the best way to go.

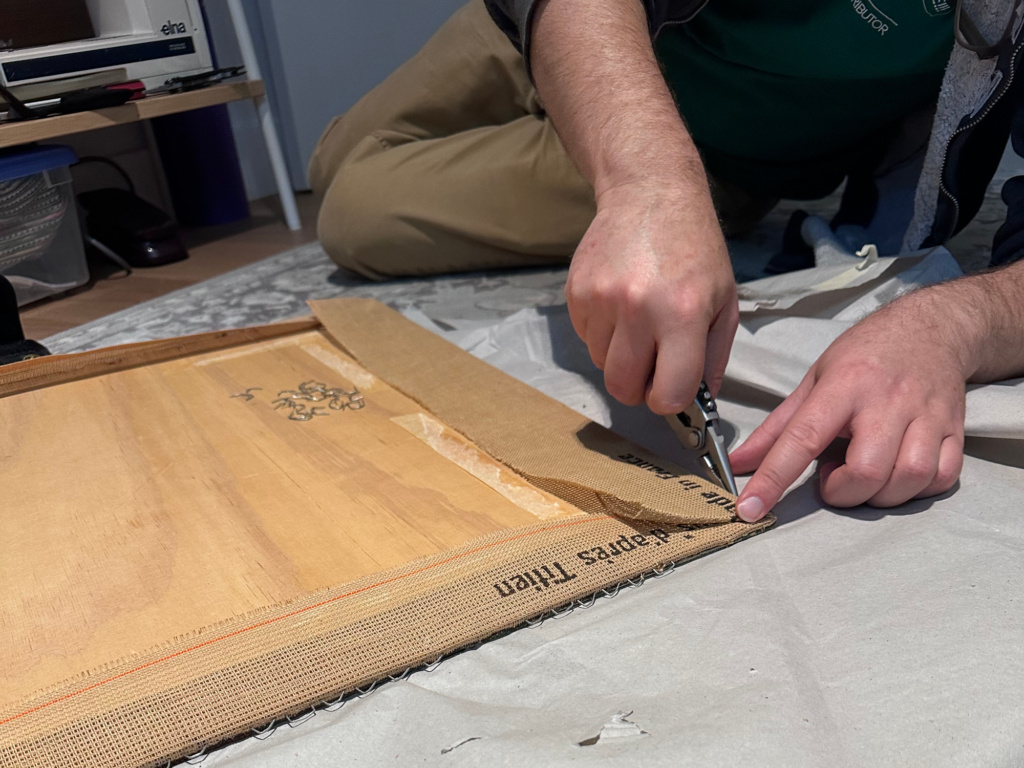
    First, I had to get her out of the frame. Underneath I found the tapestry wrapped around a piece of plywood and stapled all the way around. There were hundreds of staples, each of which had to be pulled out by hand.

    Tapestry over plywood

    Thankfully Mr. Snook helped me. The staples were really dug into the edge, so I pried them loose enough for him to grab with a pair of pliers. It was back-breaking work.

    Pulling staples

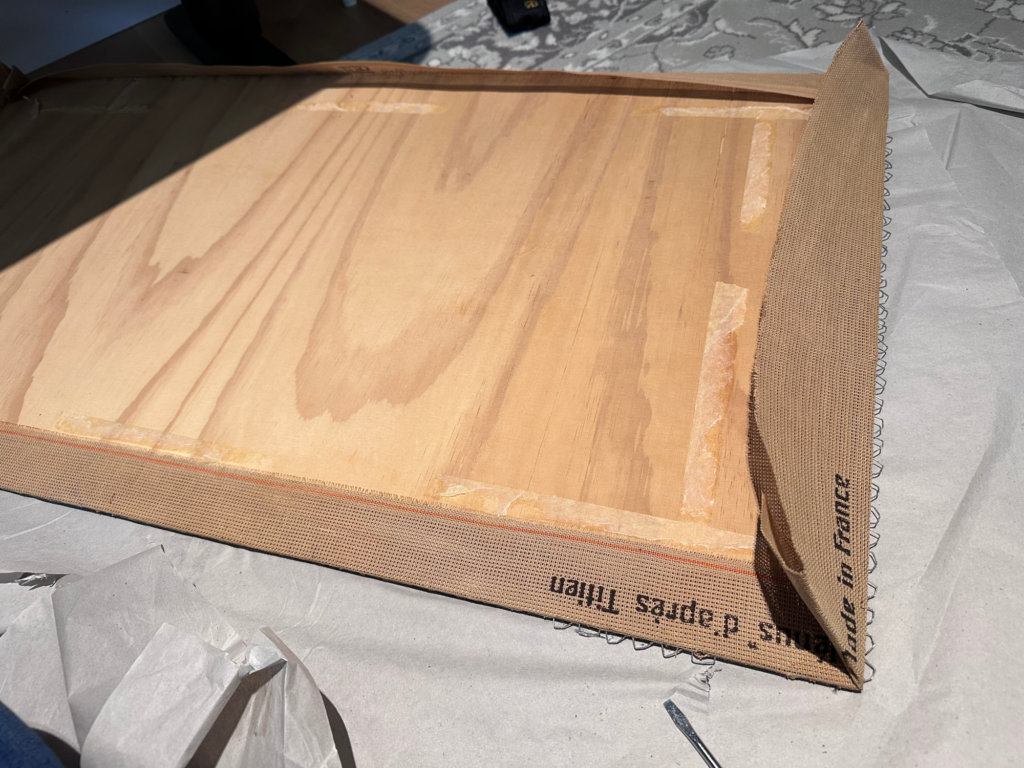
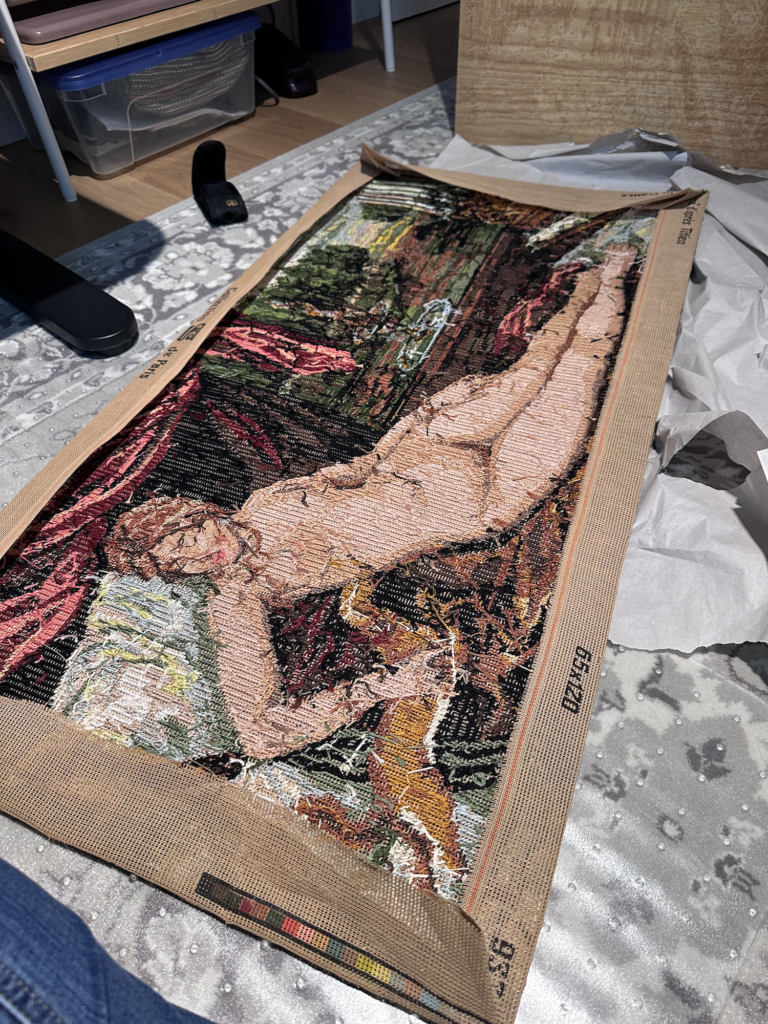
    At last we had the tapestry free of the plywood. This is what it looked like from the reverse. Even on that side, you can see what a good job she did with the stitching.

    Reverse of tapestry

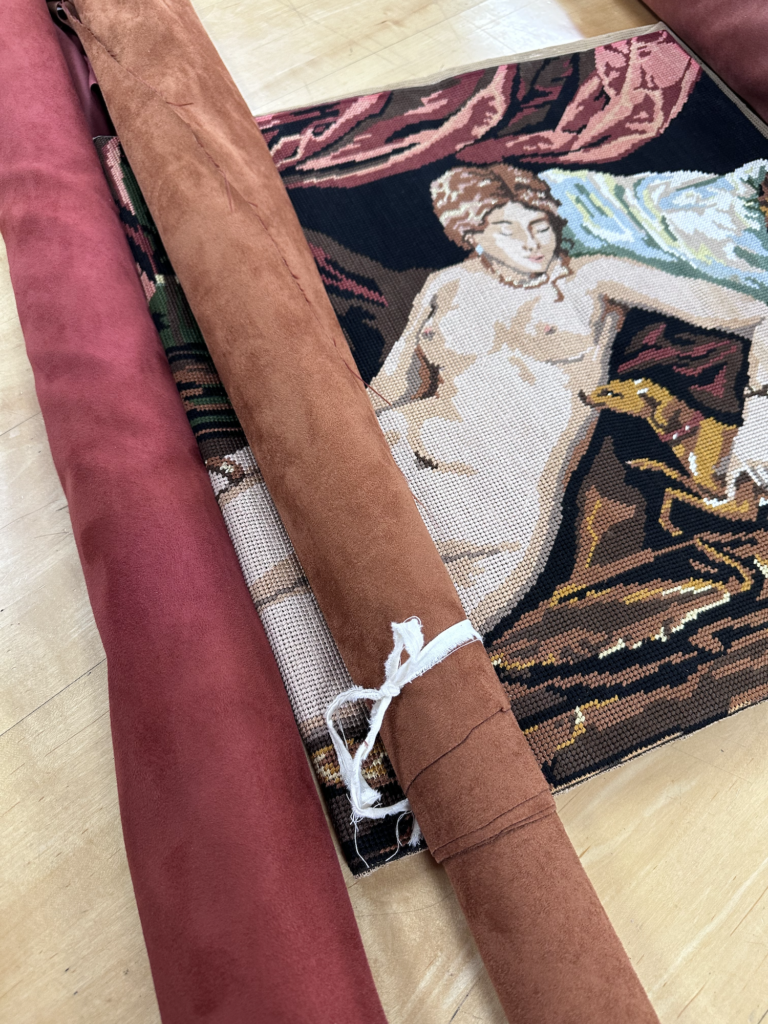
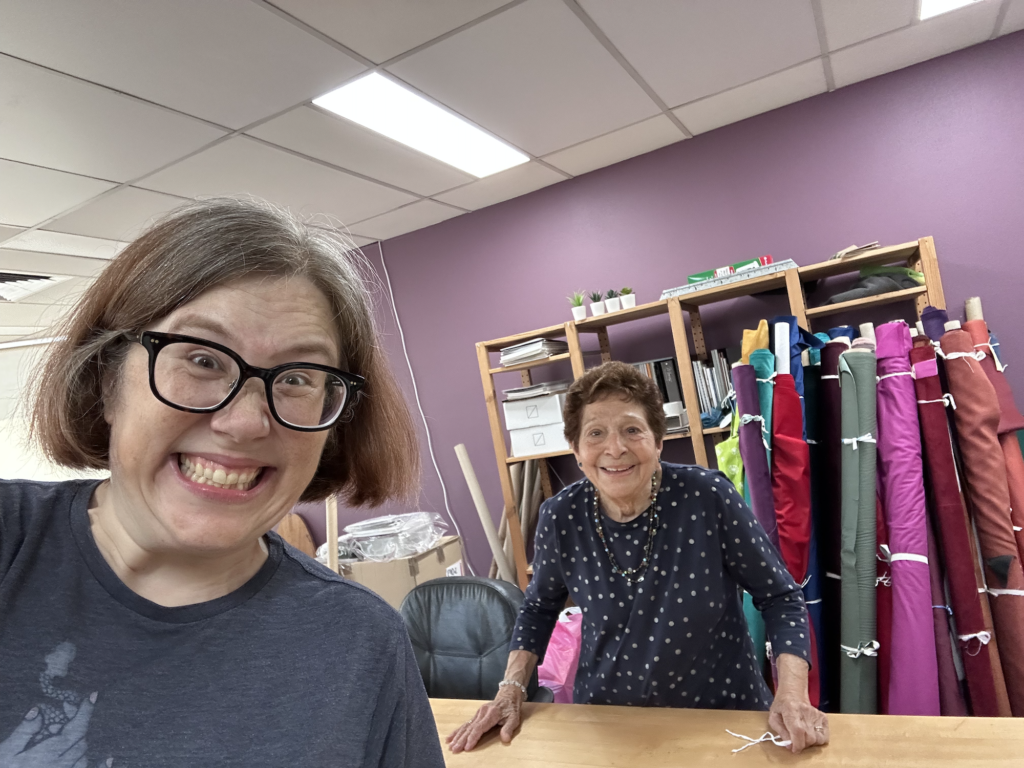
    Once I had it free, I rang up my friends at Morris & Sons. Mrs. Morris has sewn more needlepoint cushions than probably anyone in all of Australia, and she kindly offered to teach me how to do it. I met Mrs. M at her workshop, where we started by deciding on the backing fabric. We narrowed it down to these two velvets, and I decided to go with the more orangey-brown one.

    Choosing velvet colours

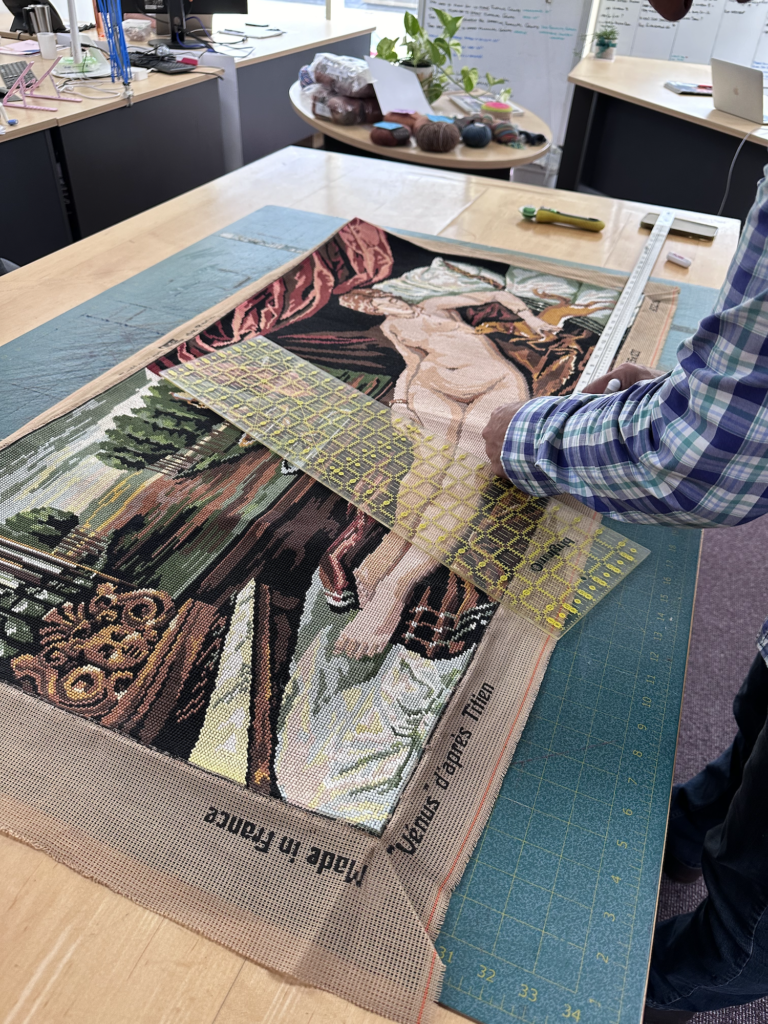
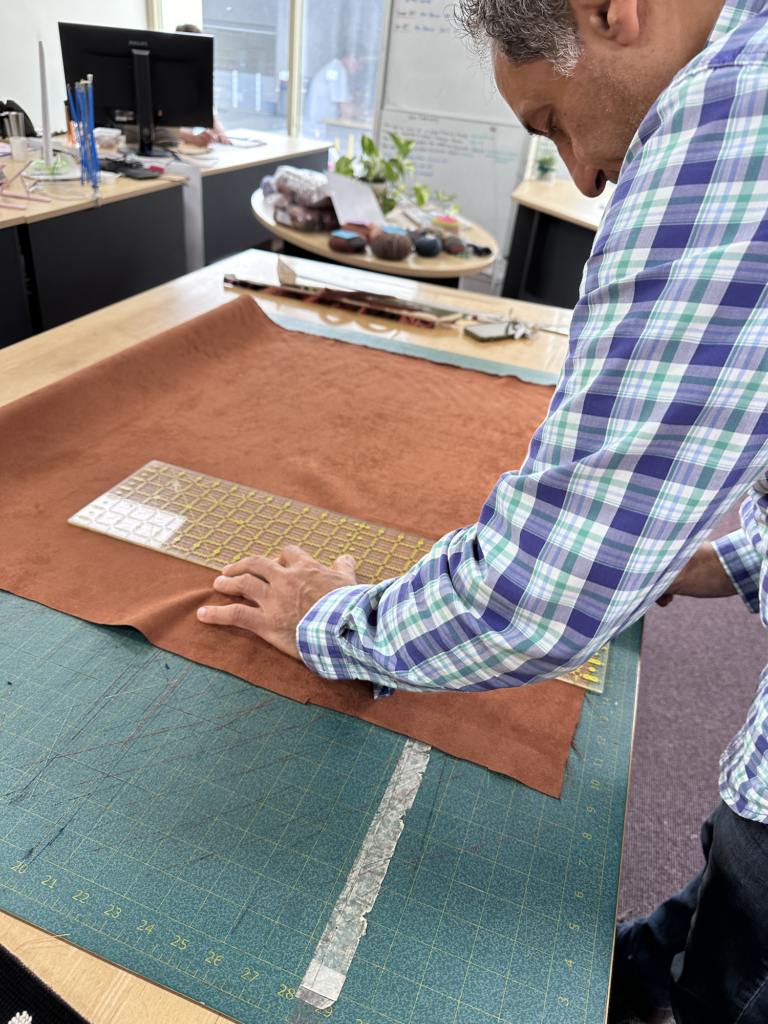
    Then her son Joseph helped me work out what size to make the cushions. We measured up and realised that if we simply sliced her in half, we’d get two very nearly square cushions out of it. They were both incredulous that I wanted to cut it in half, and Mrs. M couldn’t quite get over the fact that I’d have a cushion with just LEGS on it. But they were game for the experiment, so Joseph cut it up the middle.

    Measuring up

    Joseph also helped me cut appropriately sized pieces of the backing fabric, as well as slicing up many pieces to be used to create piping.

    Cutting the background fabric

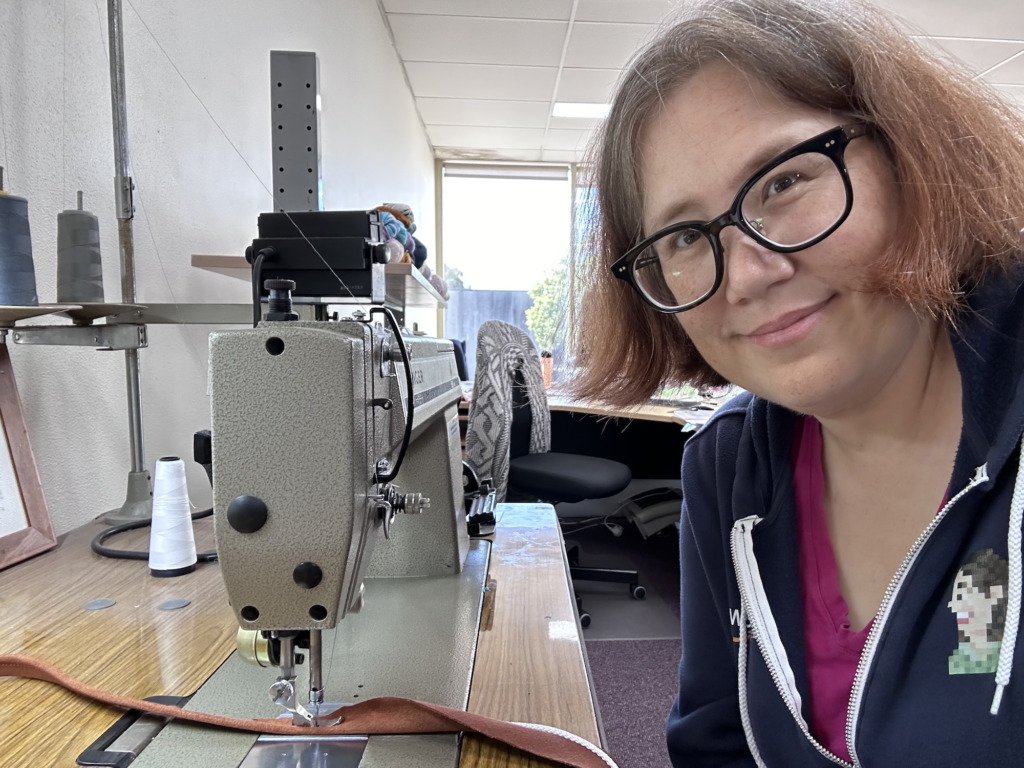
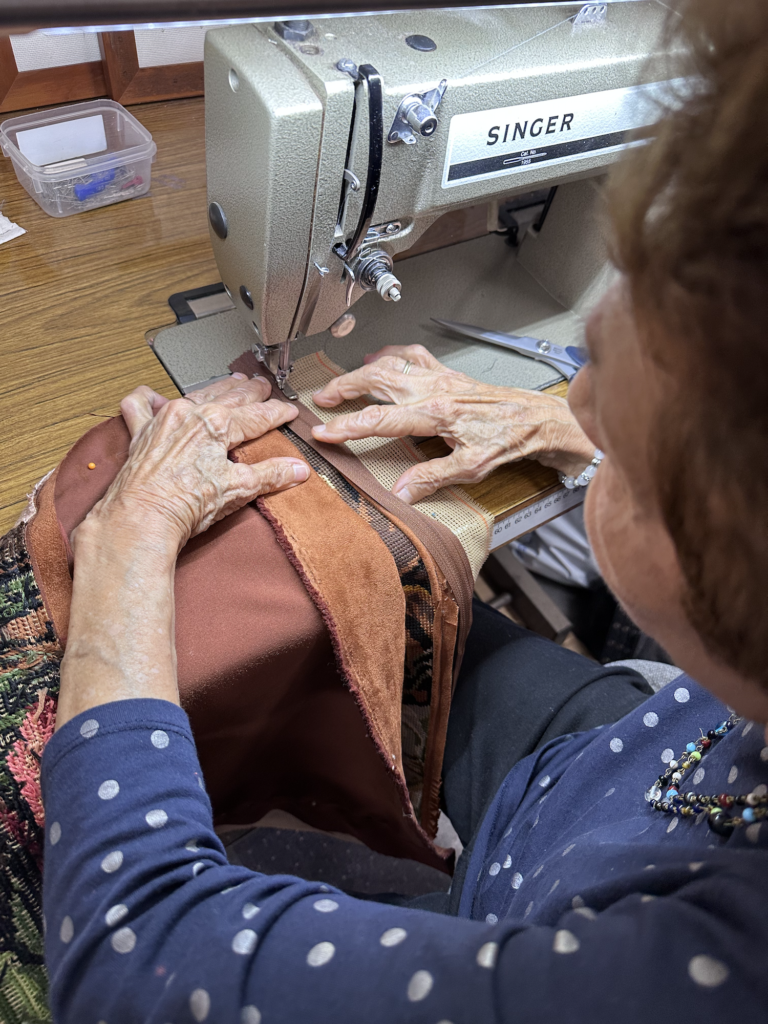
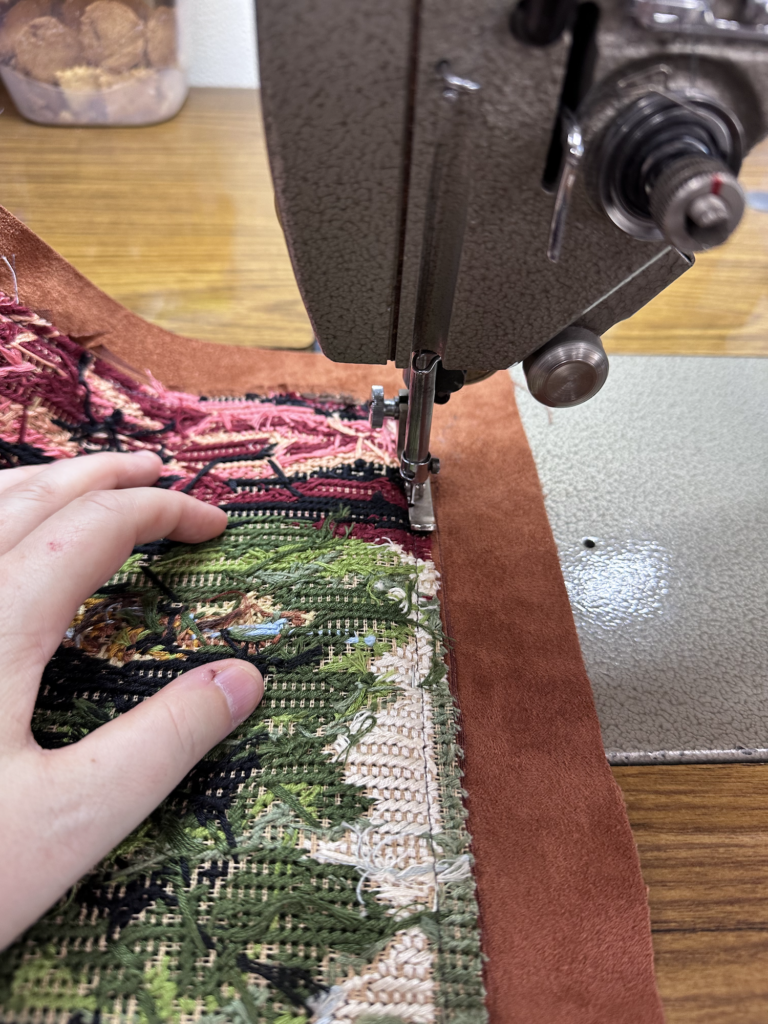
    Then the real lessons began! I don’t want to give too many of her secrets away, but at a high level: Mrs. M first showed me how to piece the strips of velvet together into one very long strip, taking care to ensure the nap always went the right direction so it didn’t look or feel odd. Then I created meters and meters of piping, wrapping the strip around a long cord and sewing it down tightly. The Morrises let me use one of their industrial Singer machines, which took a bit of practice to get the hang of. It had a large foot pedal and a knee lever for controlling the presser foot.

    Sewing piping

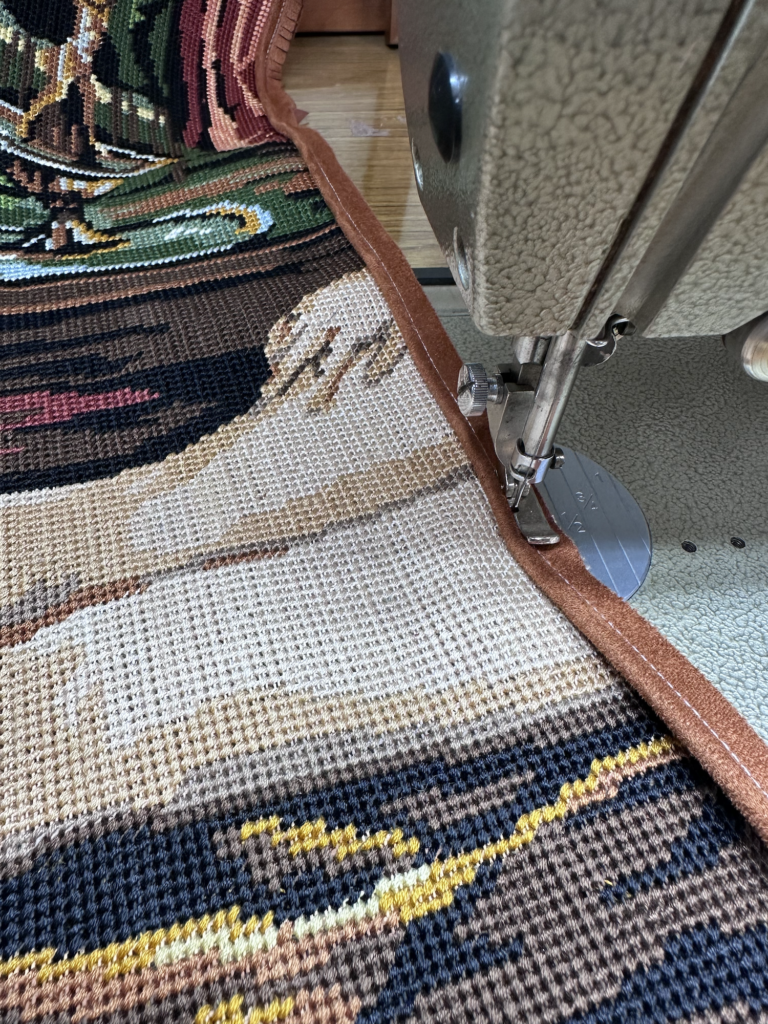
    Next Mrs. M showed me how to sew the piping down around the border of each cushion top, with some special tricks for navigating the corners and for joining the ends up neatly at the bottom.

    Attaching the piping

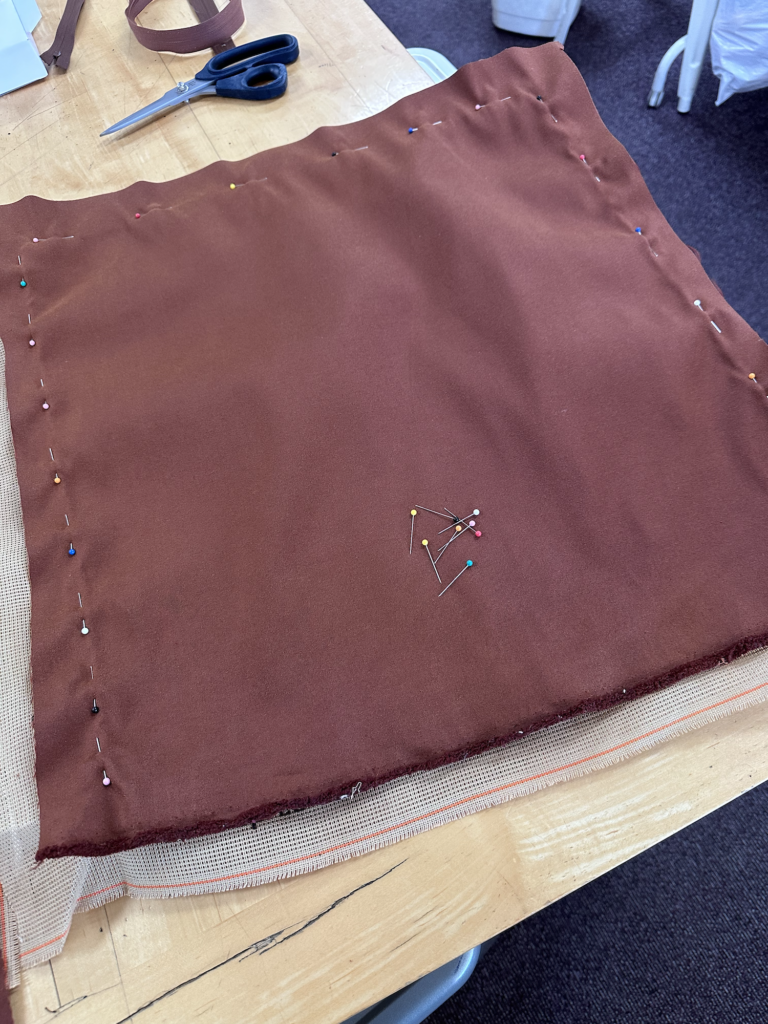
    Next I put the backing fabric onto each cushion top, face-down, and pinned it around three sides tight against the piping (leaving the bottom open).

    Pinning on the backing

    Oh no, it’s time to insert the zipper! Mrs. M is a true legend and assured me that it was going to be much easier than I feared.

    Zipper time!

    I watched her closely as she showed me her method. I took lots of photos and notes to try to capture the trickier bits!

    Mrs. M sewing a zipper

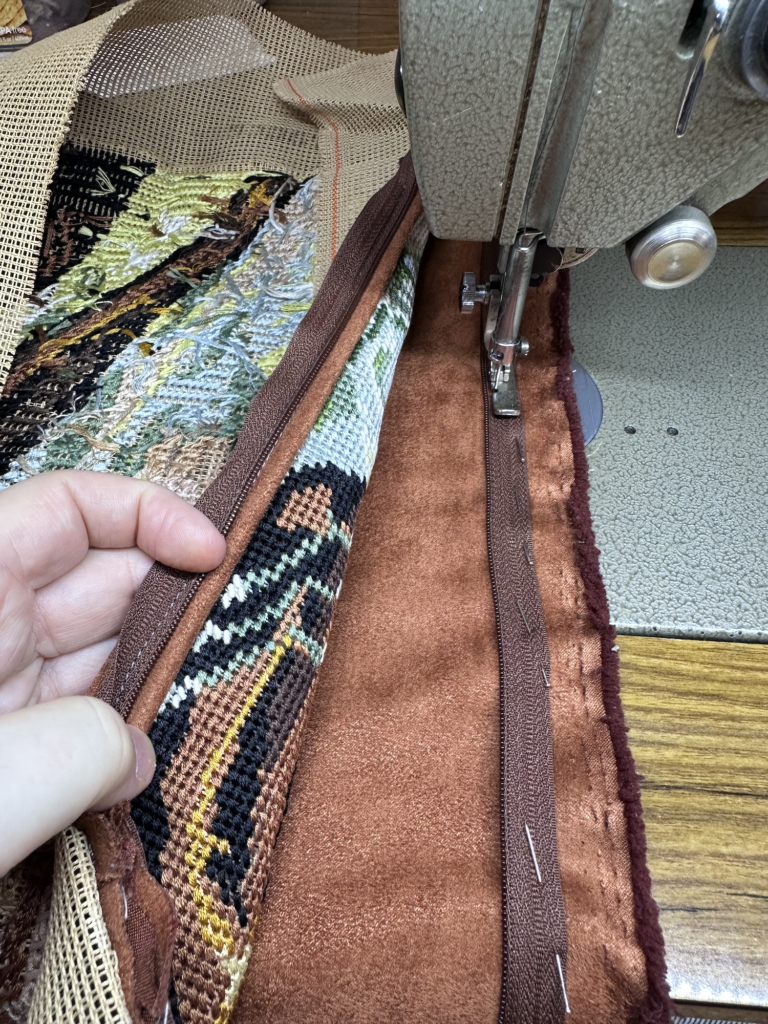
    First we sewed one side, and then the other. Hey, I was getting the hang of this!

    Sewing the zipper

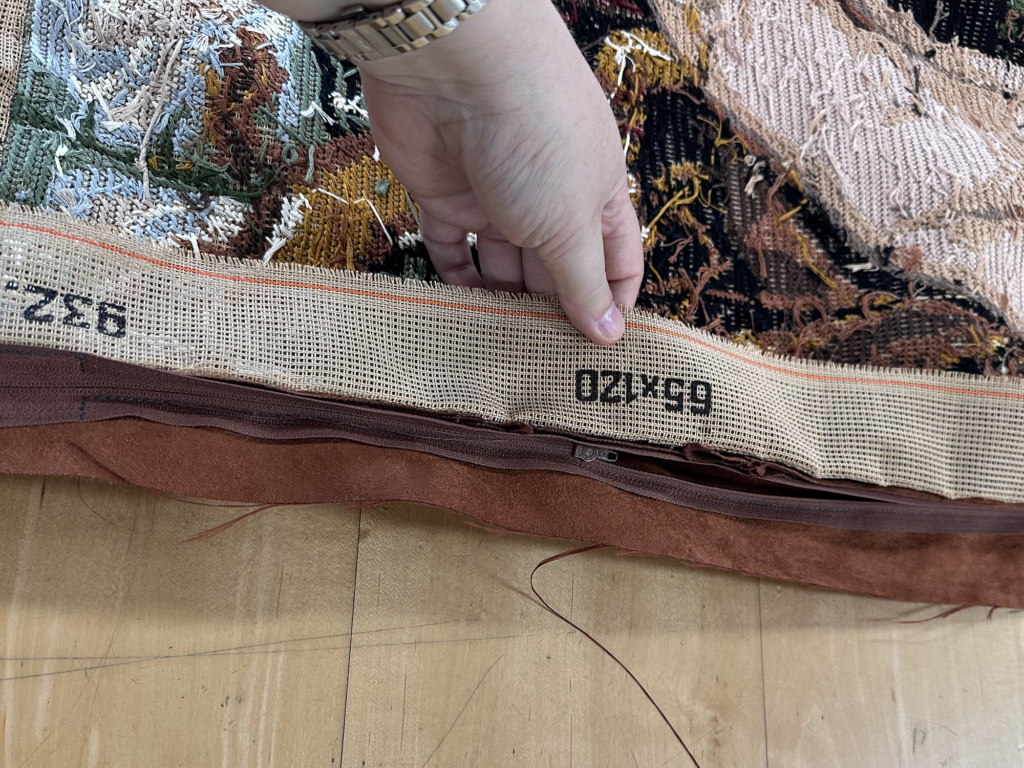
    I managed to insert both zippers without too much trouble, only having to unpick one or two bits where I got a bit too close to the zipper teeth.

    Completed zipper

    Then it was time to sew the other three sides of the cushion. The bits at each end of the zipper were the trickiest part, and I had to redo them a couple times. The rest was smooth sailing though.

    Sewing the other three sides

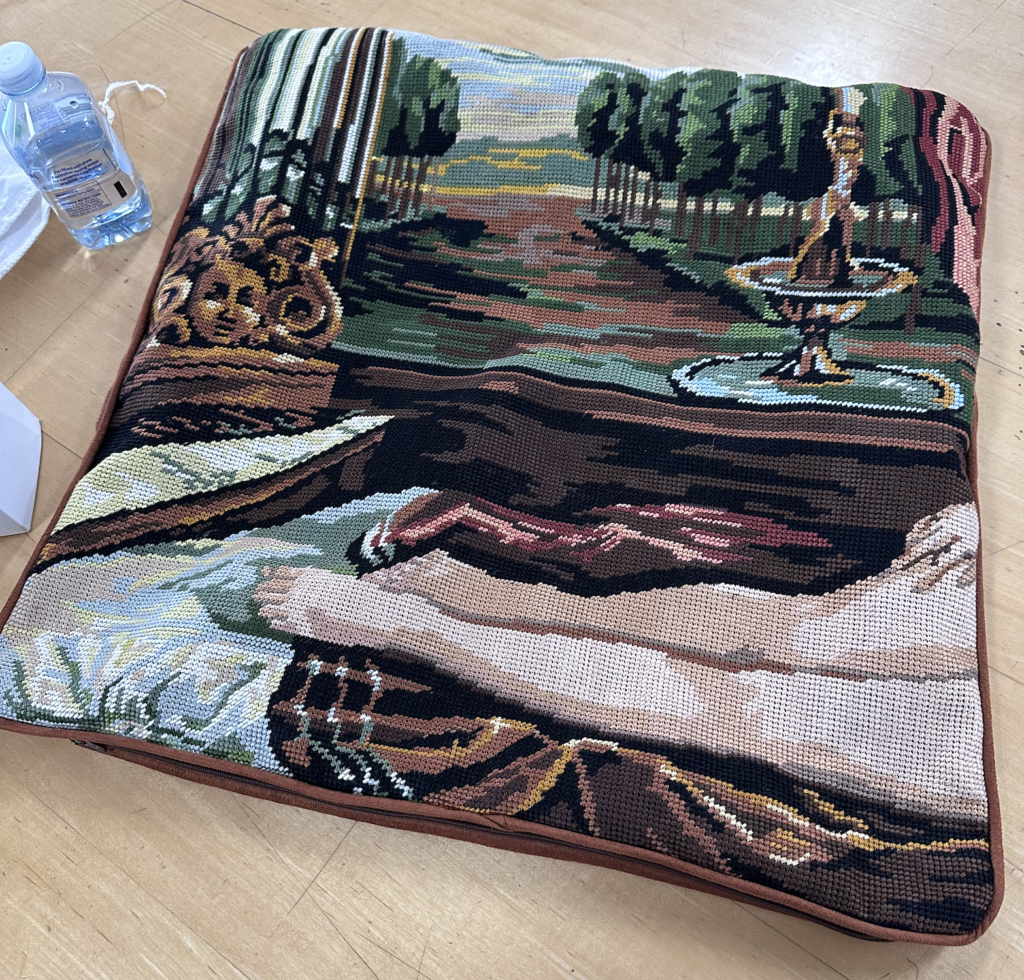
    After turning it rightside-out, I had a finished cushion cover! The legs made me smile immediately. I knew this was going to turn out even better than I’d hoped.

    Completed cushion cover

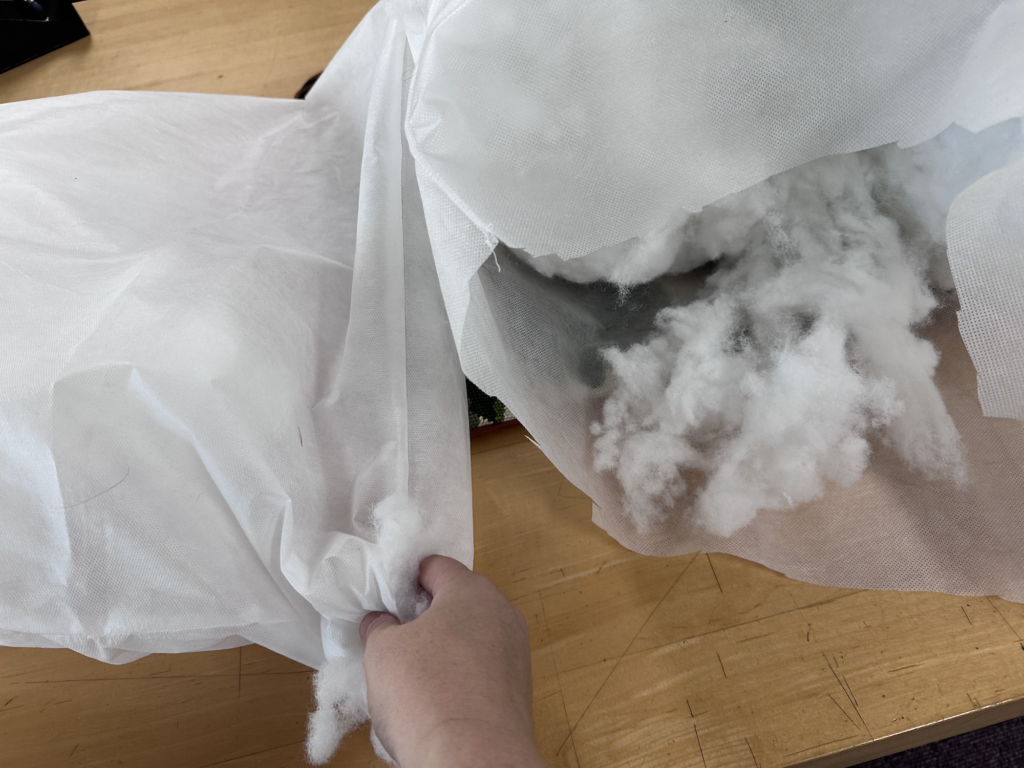
    The final step was to sew custom-sized cushion inserts. Mrs. M showed me how to gauge the correct size and how to put them together. Each one took a fair bit of stuffing! The hardest part was then sewing the openings closed when they were so full and fluffy.

    Stuffing the inserts

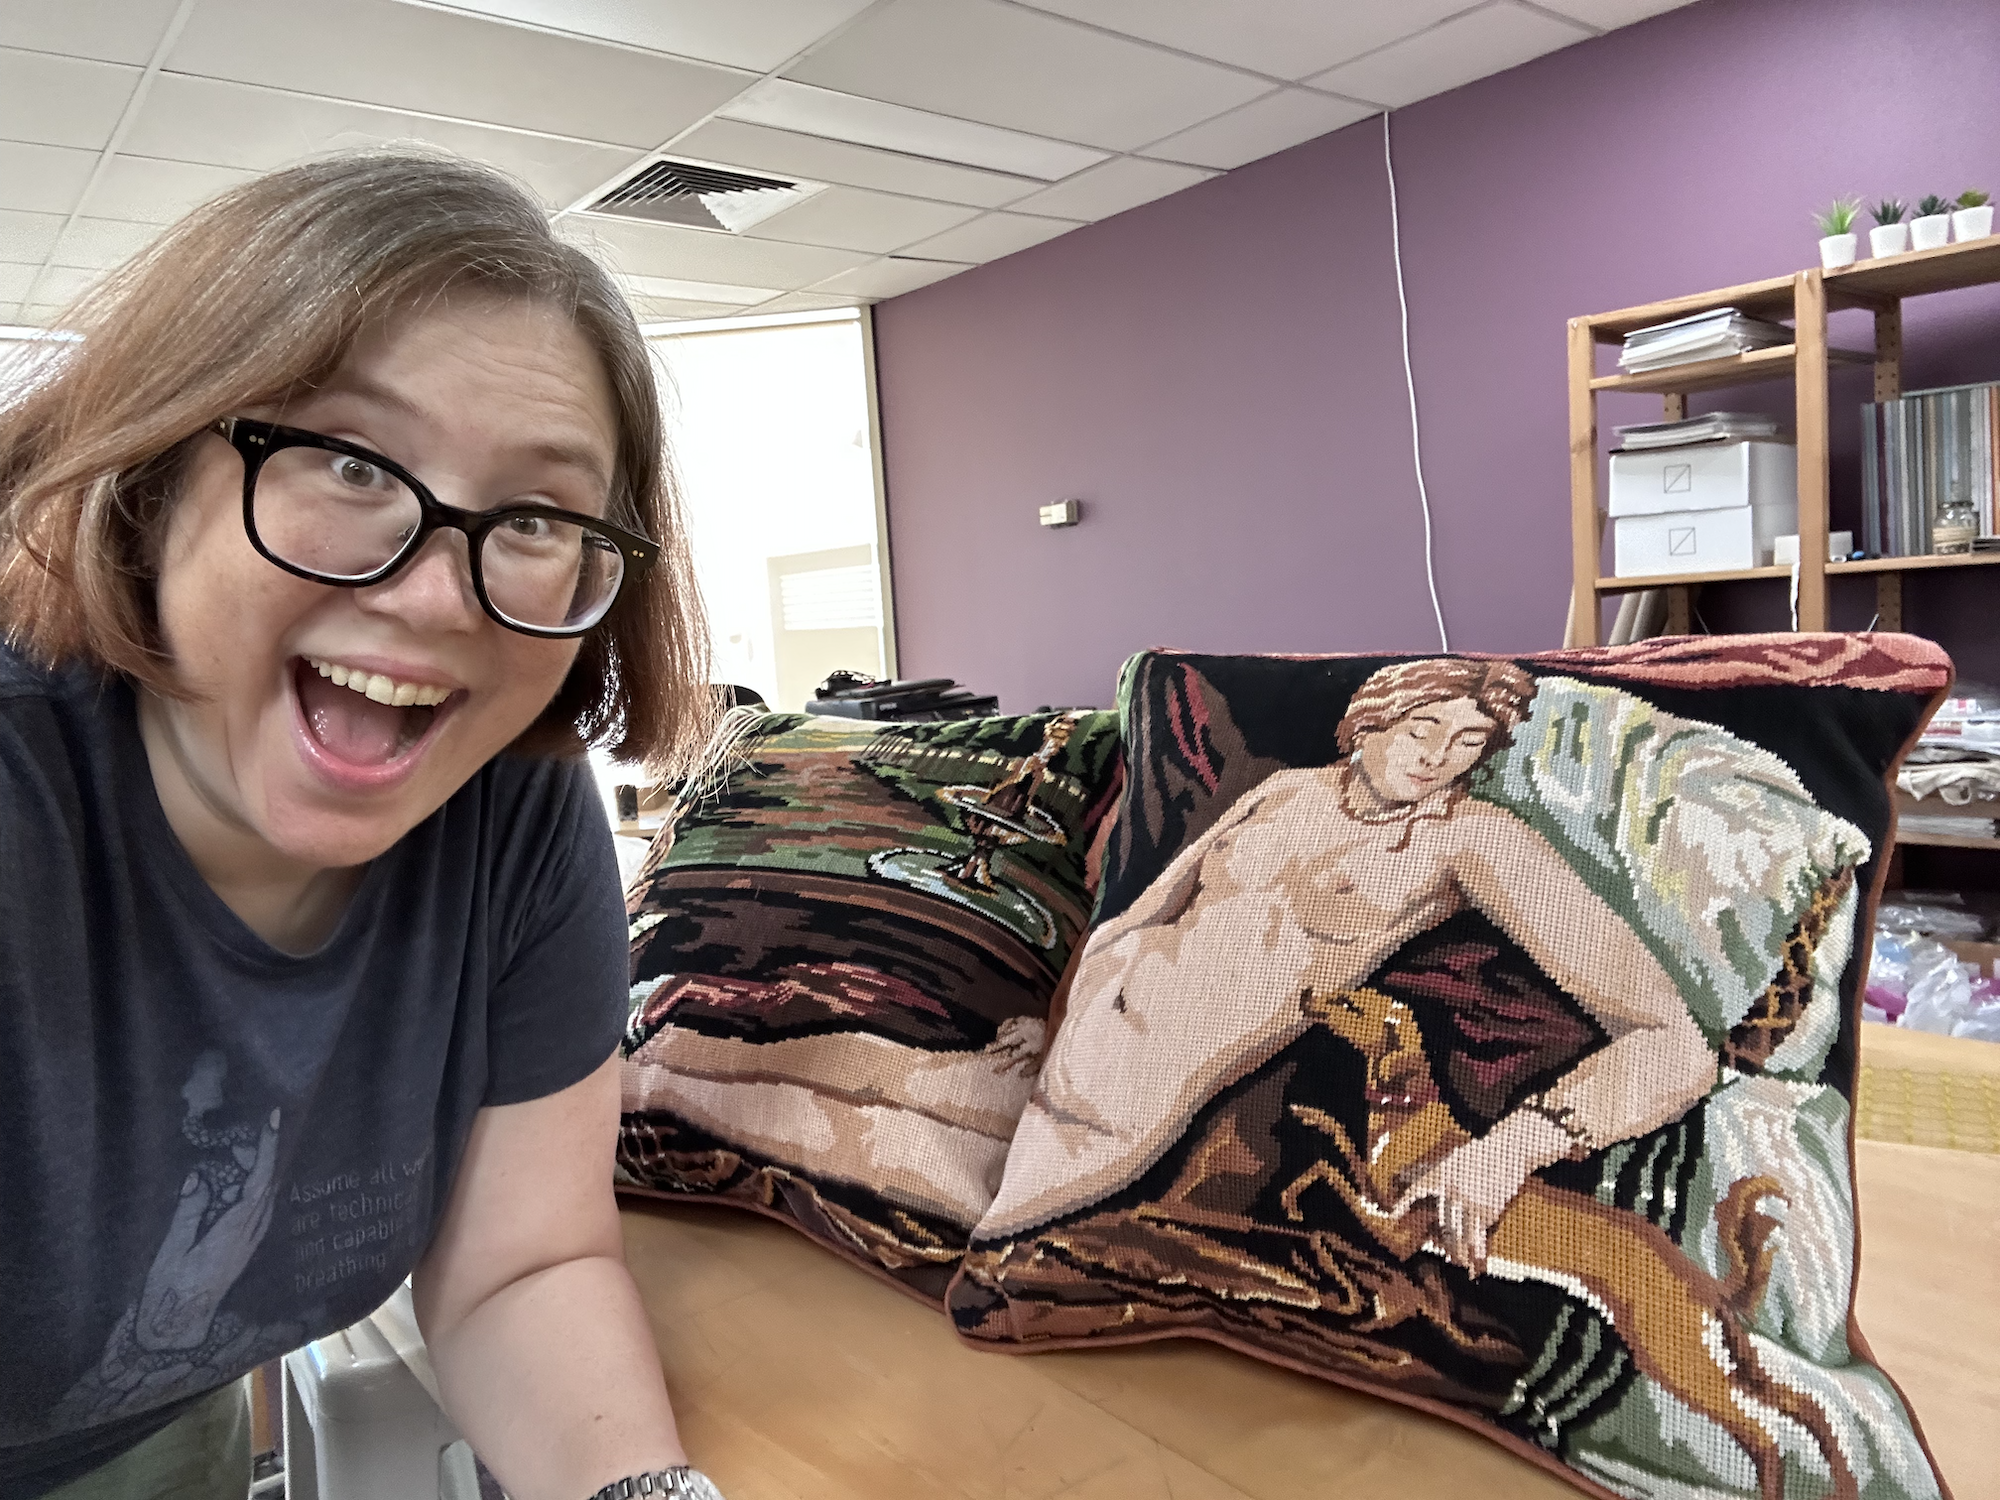
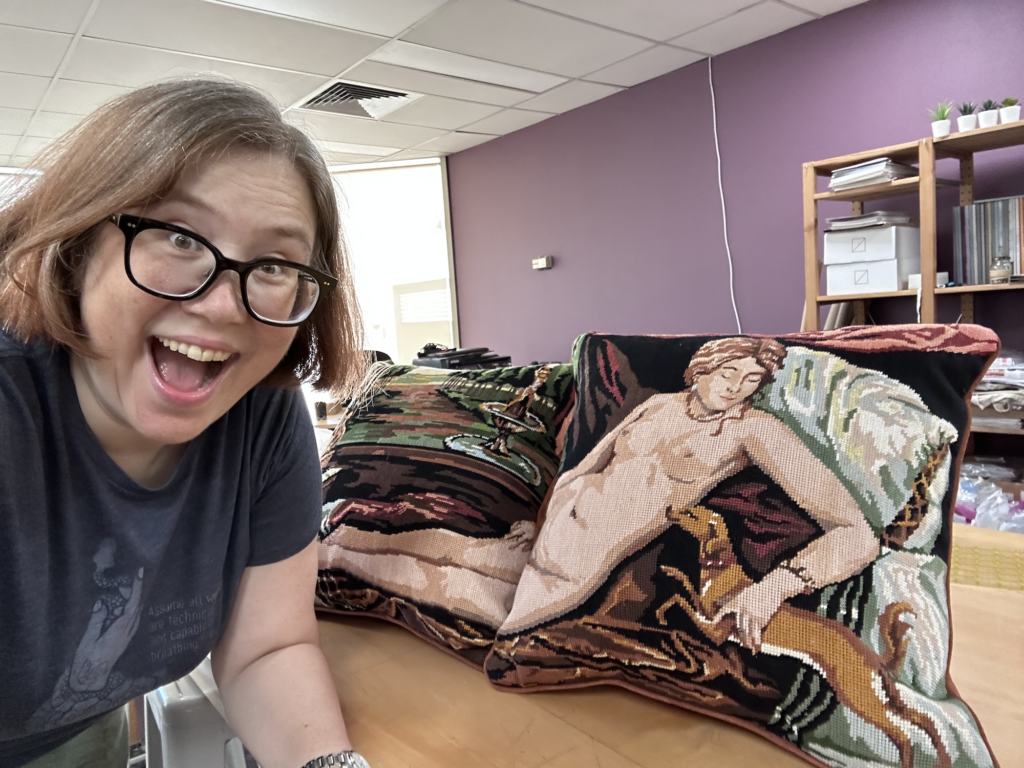
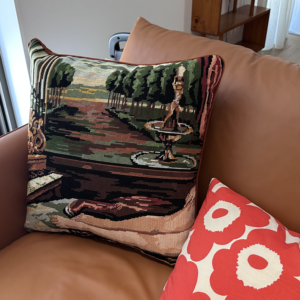
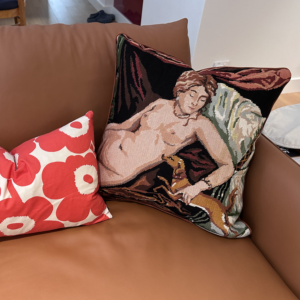
    And here are the completed cushions! As you can tell, I was pretty stoked with how they turned out. It’s still obvious that they are part of the same picture, and I only lost a tiny bit due to cutting her in half.

    Finished cushions

    While I’m sure there are other needlepoint nudie cushions in the world, these are pretty special. They look spectacular on the new couch too! They got a big thumbs up from both Rodd and his sister.

    Legs cushion  Lady cushion

    If you want to make needlepoint cushions of your own, Morris & Sons is definitely the place to start. They have everything you need including tapestry kits with canvas and threads. They also offer a professional service to make up the finished cushions for you once you’ve finished with the embroidery, which is handy if you don’t have an industrial-strength sewing machine at home.

    Thank you to Mrs. M and Joseph for all their help with these! I’m so pleased we’ve been able to keep one of Kathy-Nanny’s pieces alive in our new home. 🩷

  • Marimekko cushions for the new couch

    I’m a big fan of the Finnish design house Marimekko. They’ve been making gorgeous fabric prints and homewares for 70+ years. The only problem is that their stuff can be very, very expensive (especially here in Australia). A few months back though they had a clearance sale, and I picked up a couple meters of the iconic Unikko print cotton at 40% off. Today I decided to use it to make a couple cushions for our new couch.

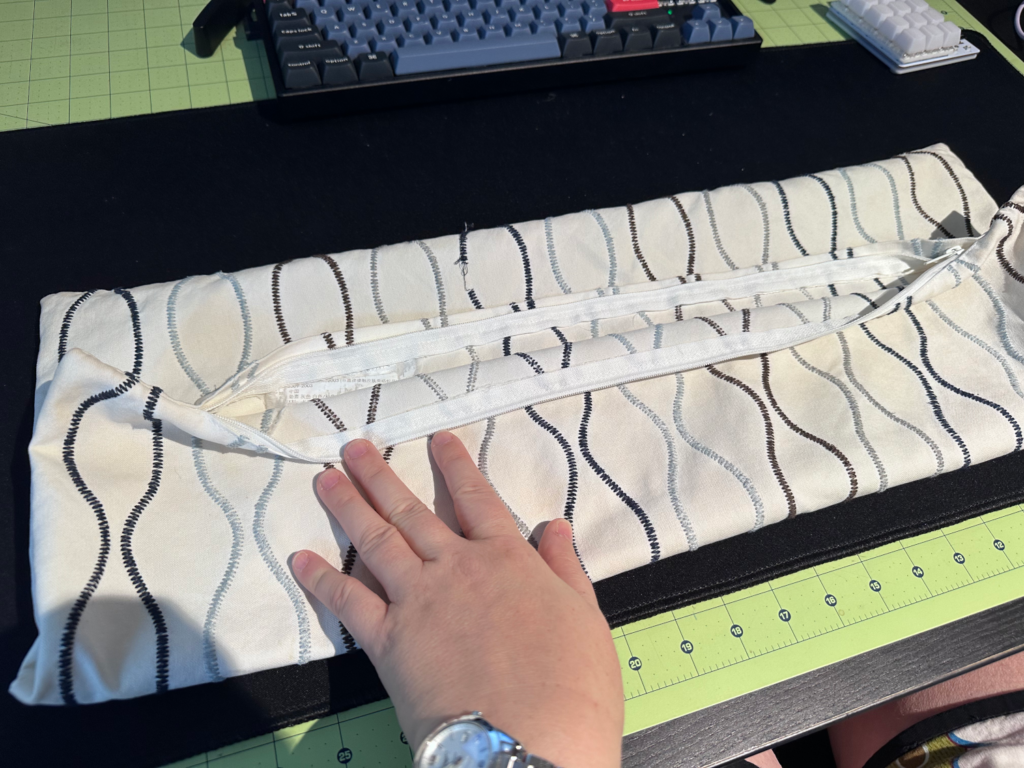
    We already had a pair of old IKEA cushions with covers that were starting to fall apart. The feather inserts were still good though, so I removed the covers to see how they were constructed. They were rectangular — 59cm/23.25″ long by 37.5cm/14.75″ wide — with a lapped zipper along the bottom edge. I decided to make the new covers a little smaller so they’d feel a bit plumper. (They’d lost a couple feathers over the years!)

    Old IKEA cushion

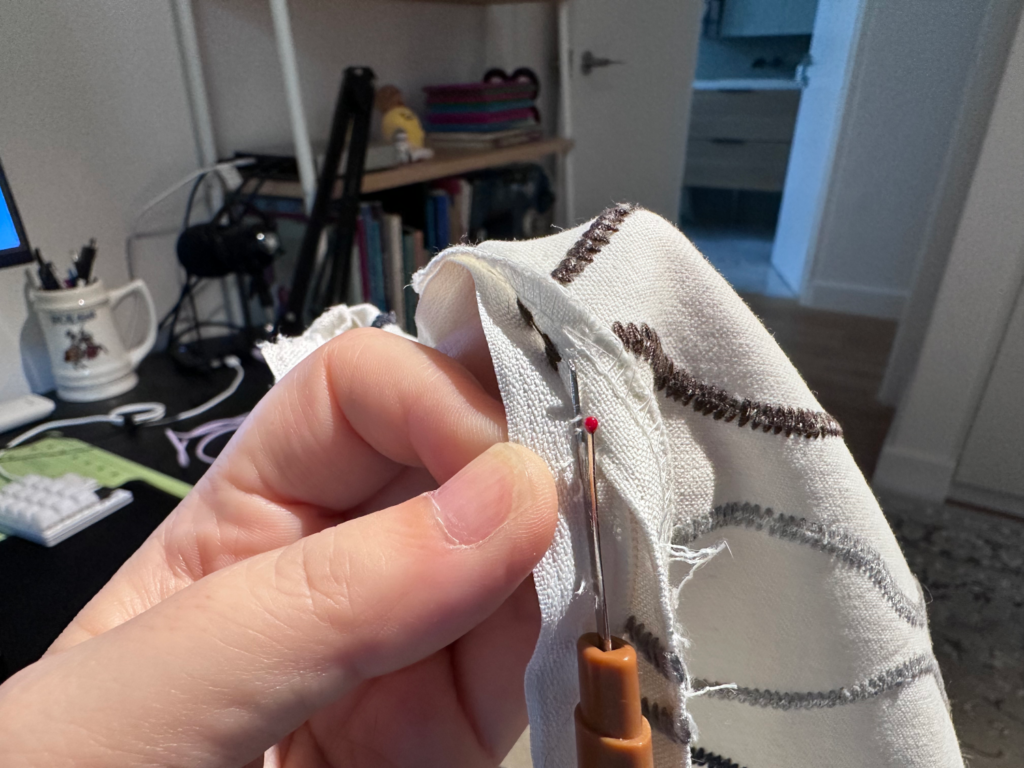
    At this point Rodd was like, “So are you going to reuse the zippers?” I realised that was an excellent suggestion, so out came the seam ripper.

    Unpicking a zip

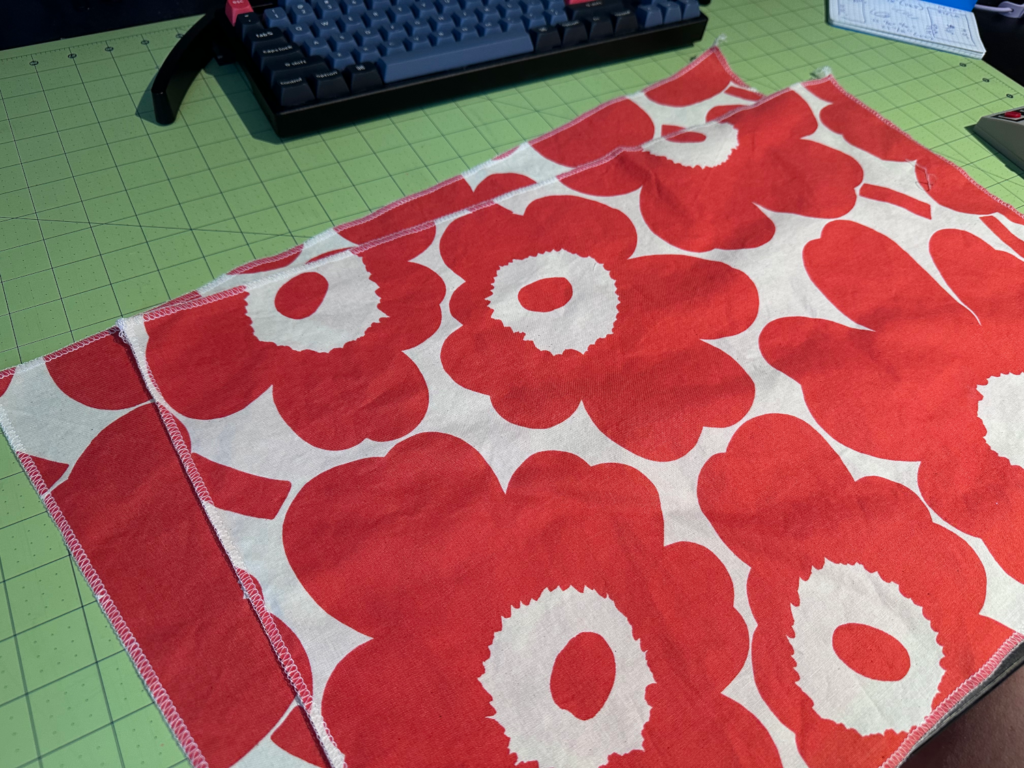
    Once I worked out what size I wanted the new covers to be, I added on a bit for seam allowance and then cut out 4 panels from my fabric. I then used my overlocker to finish all the raw edges.

    Fabric panels

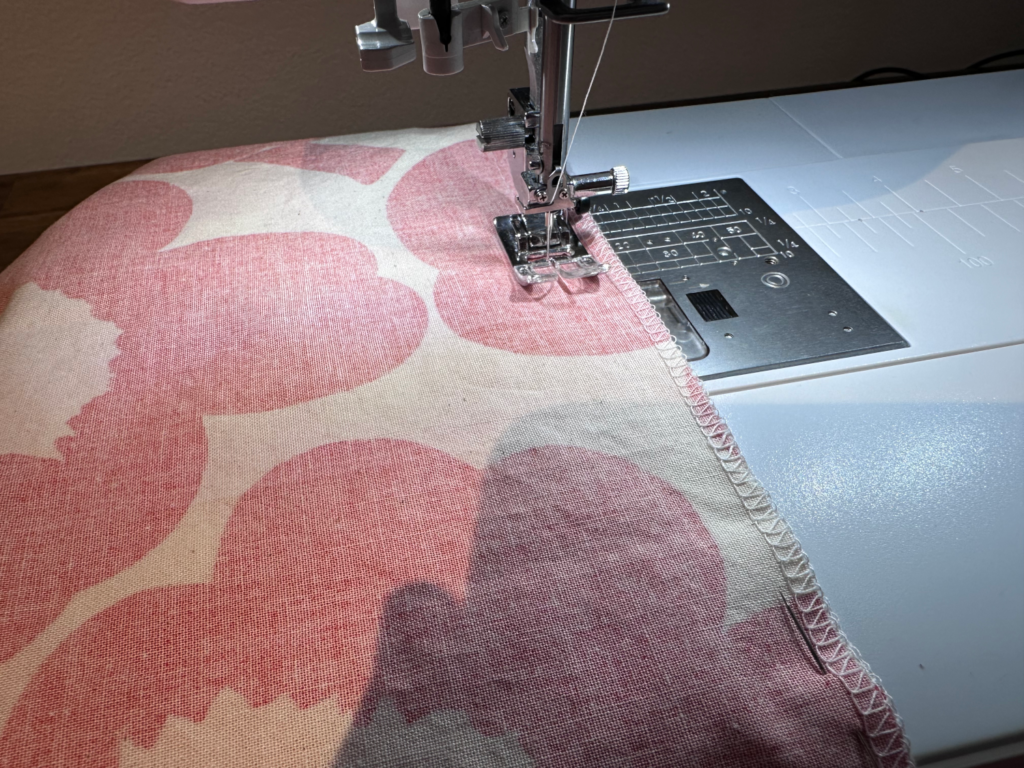
    I’ve installed a few zippers in my time but I’m by no means an expert. I found this tutorial from The Sewing Directory to be really helpful. Once I had the zipper joining two panels together, it was very simple to sew around the other three sides.

    Sewing the cushions

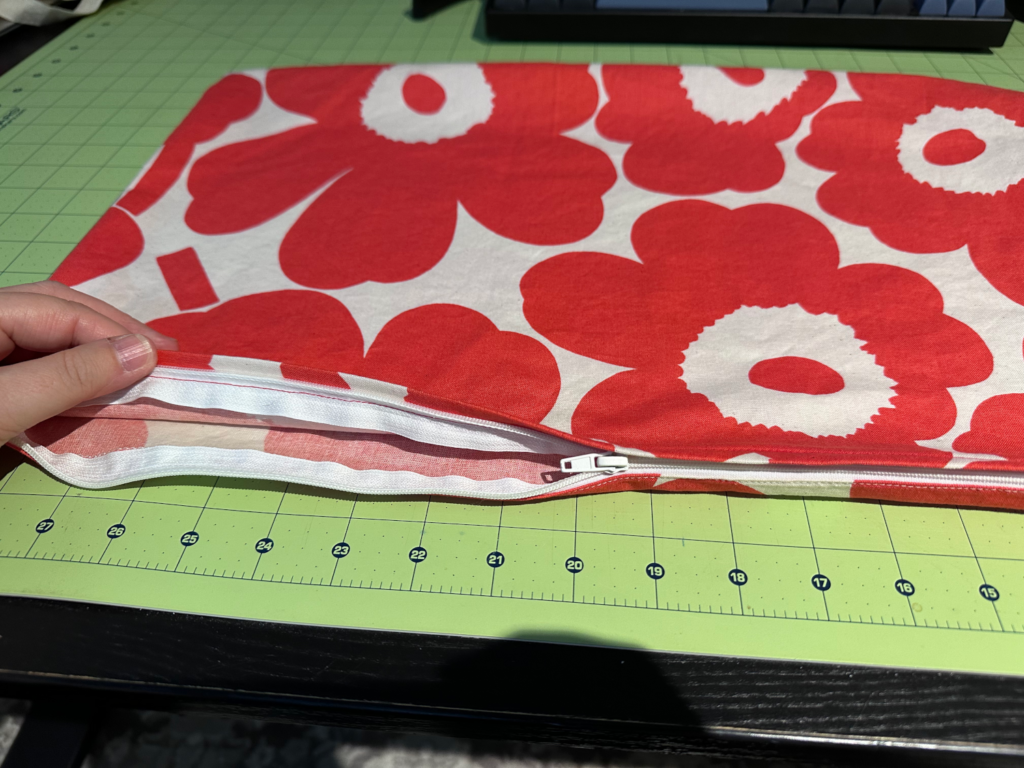
    And here’s the finished cover showing the lapped zipper! Why yes, I did sew one side of the zip with red thread and one with white, thank you for noticing. 😂

    Cushion cover with zip

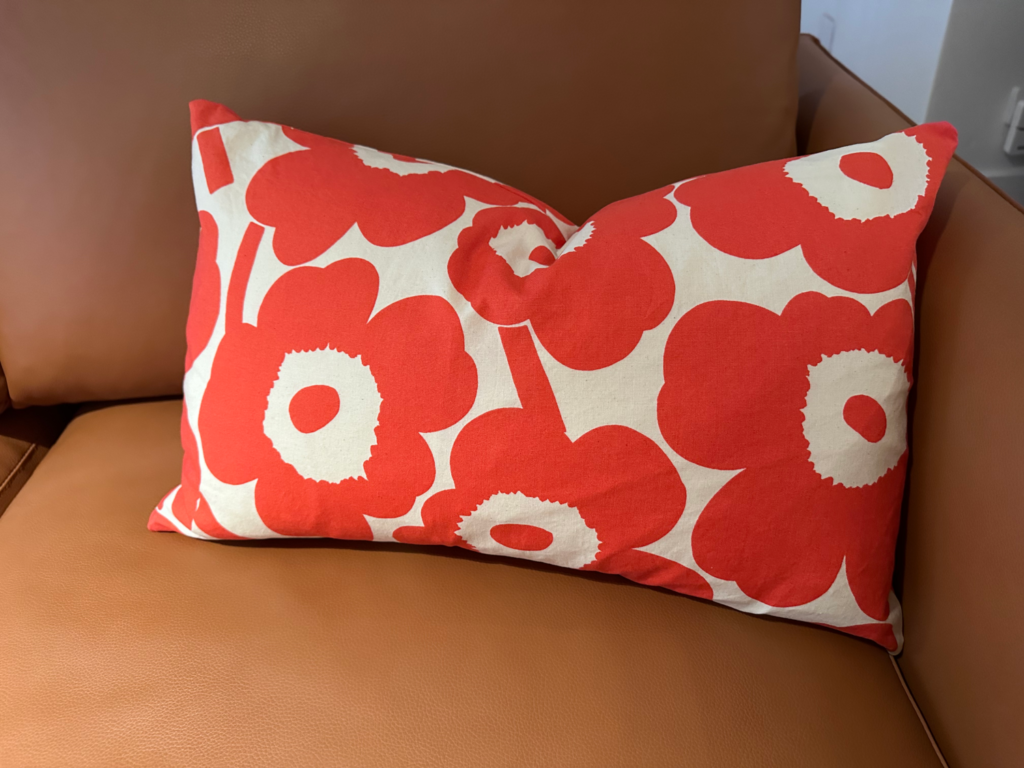
    Here’s a cushion in all its plump glory. To buy one would probably be like $90 AUD, so my version came out a fair bit cheaper. (That’s discounting my own labour though, which you should never do if you’re actually selling stuff you create!)

    Cushion

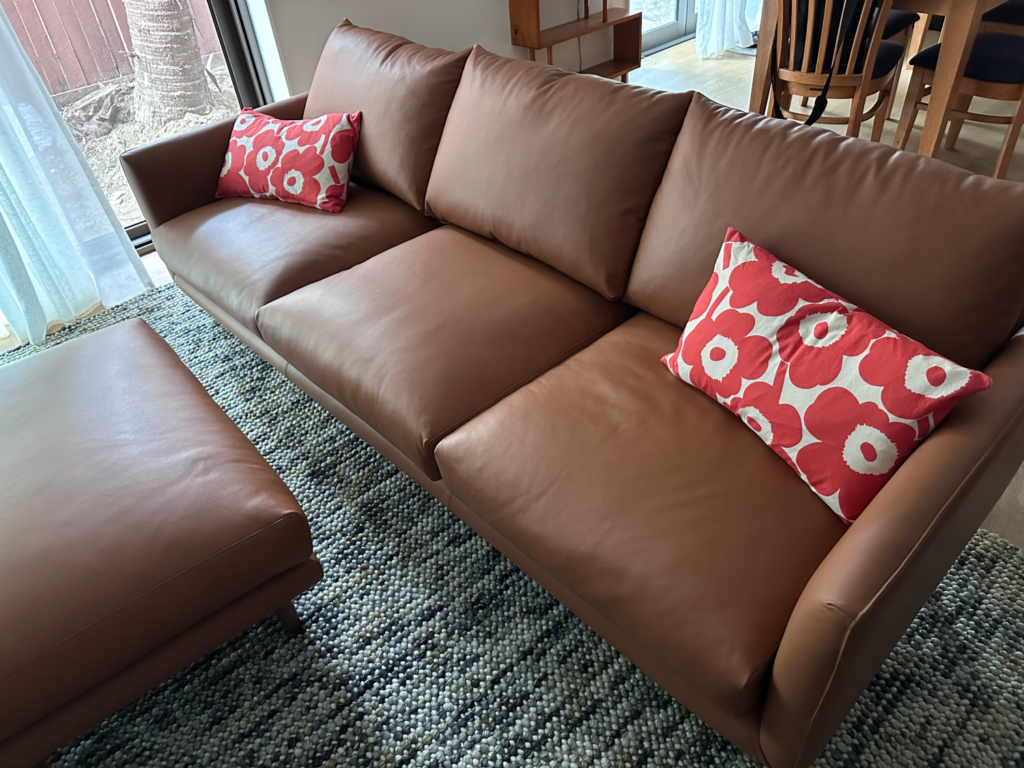
    Don’t they look lovely on the new couch? I might need to make some more…

    New couch with Marimekko cushions

  • Completed sewing project: Arkie shirt

    Completed sewing project: Arkie shirt

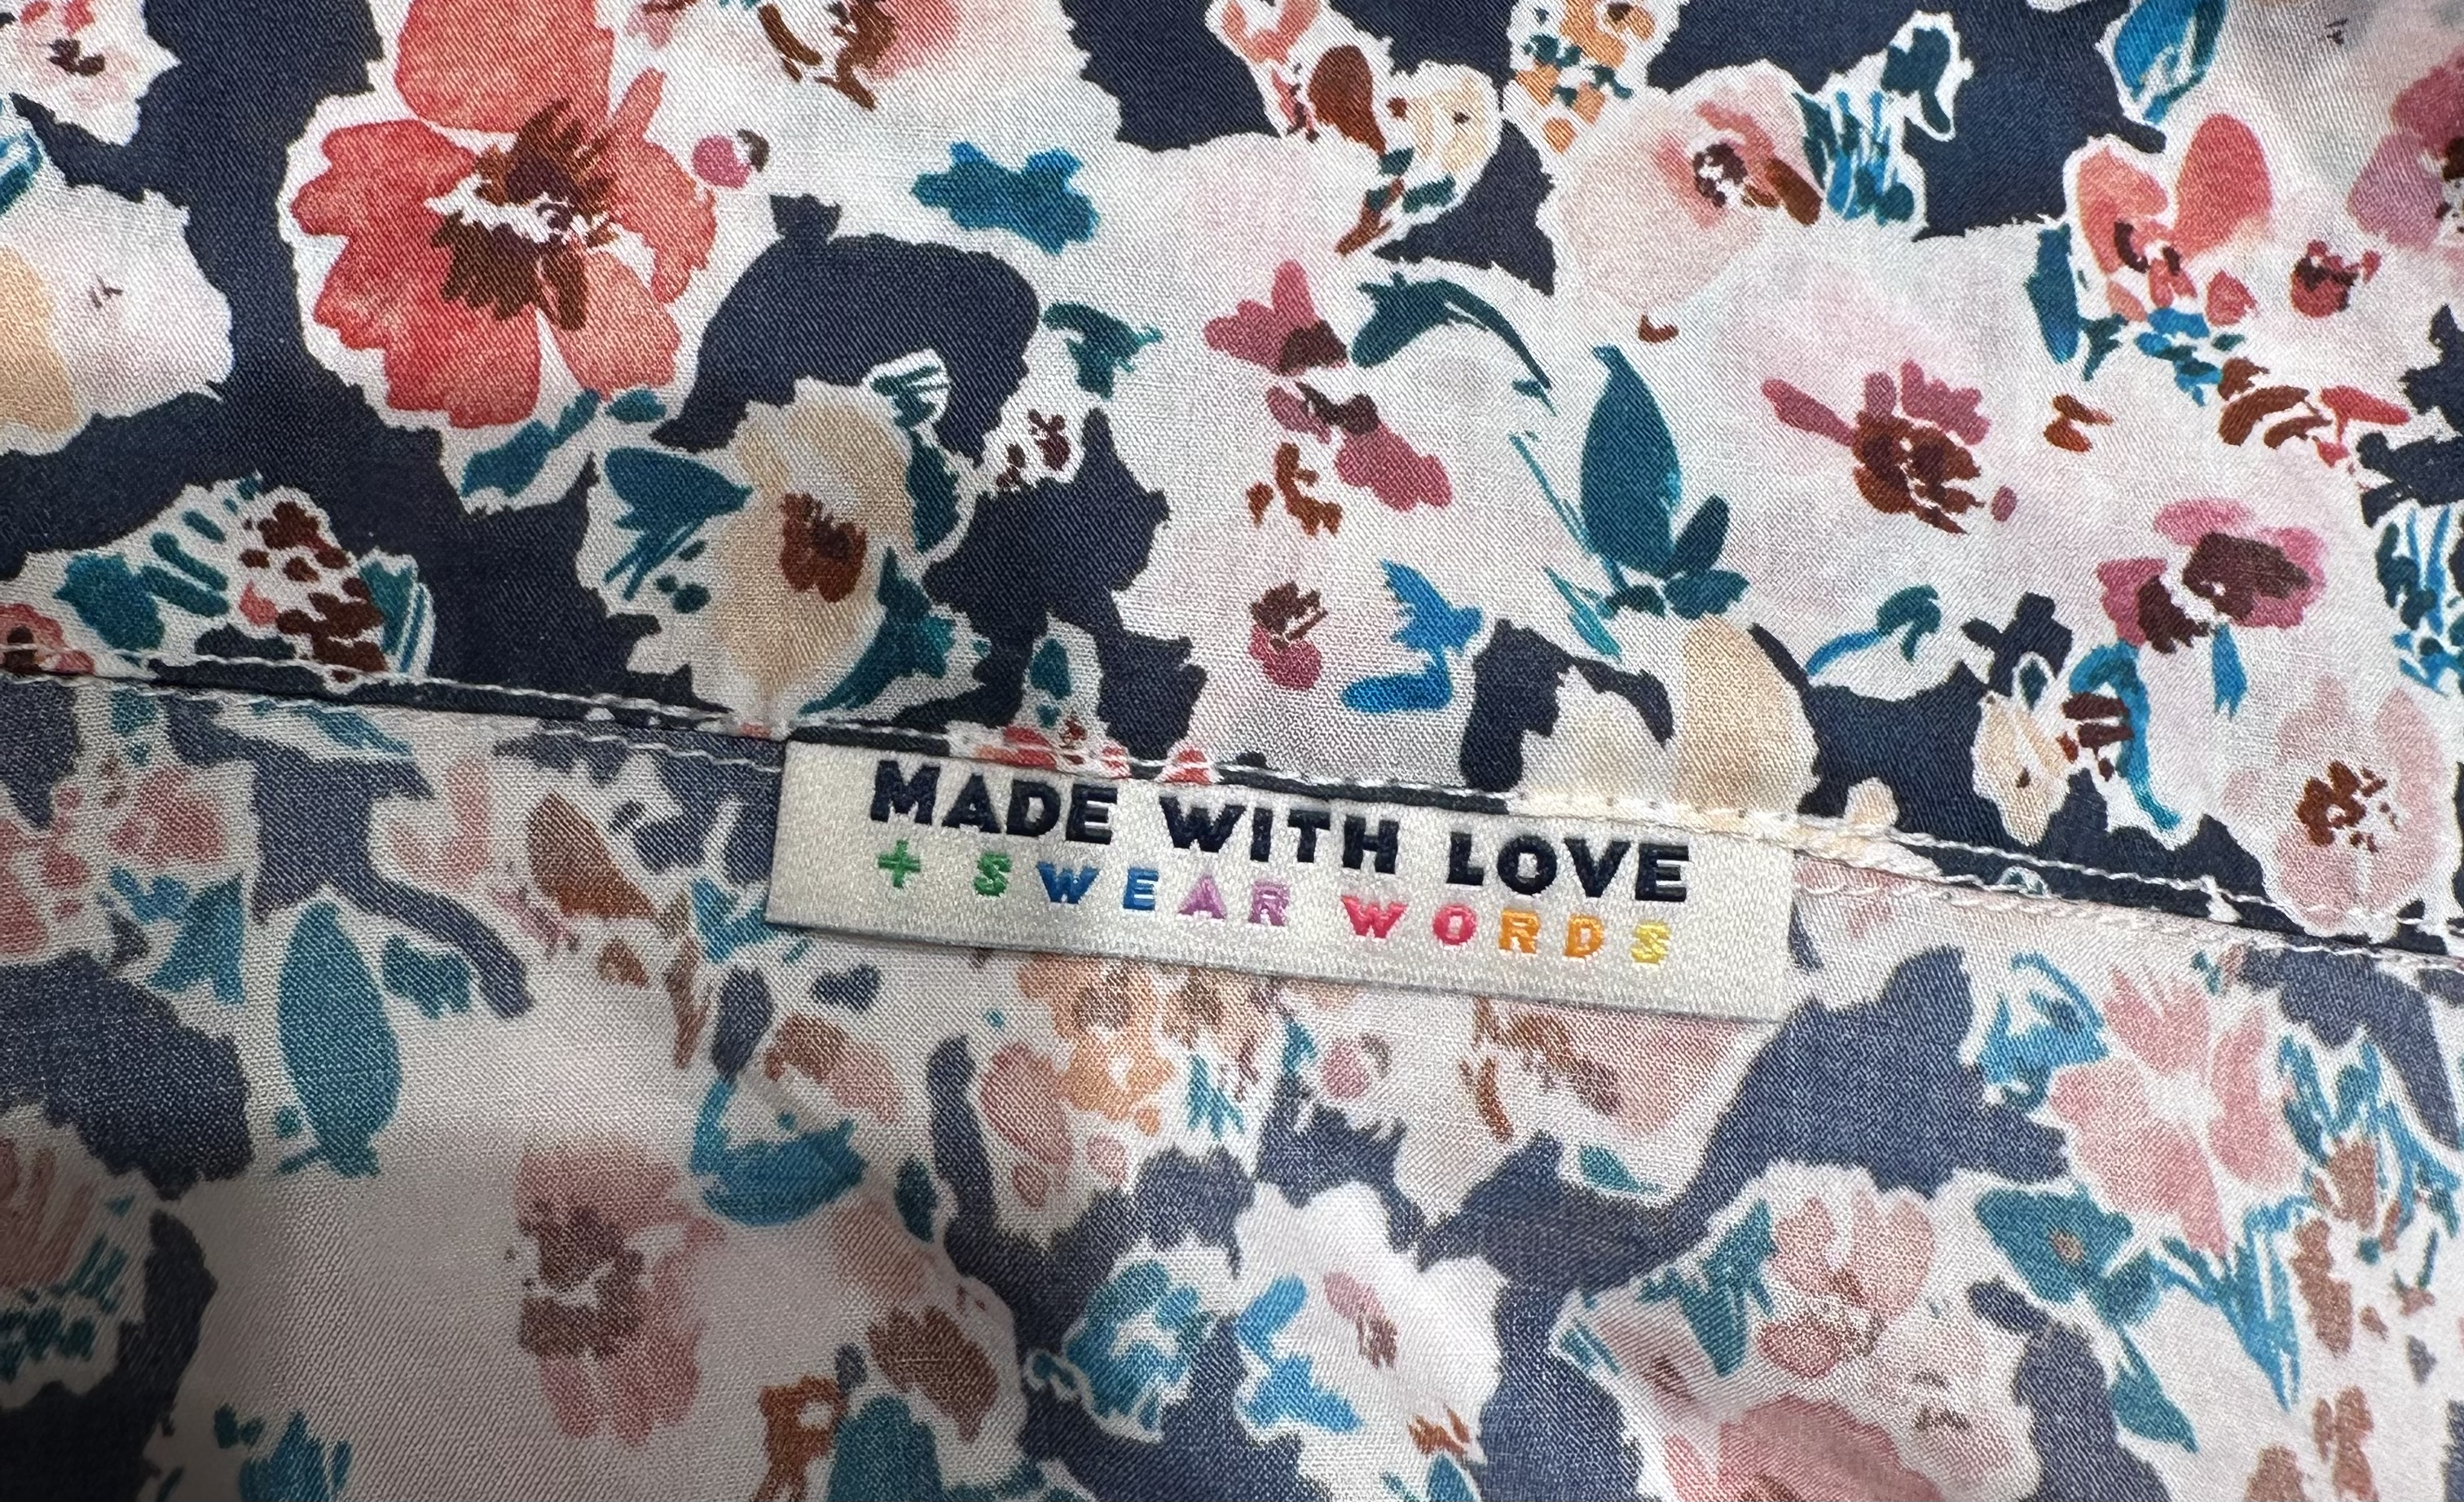
    Arkie shirtI knocked out a quick sewing pattern this week: a new Arkie shirt in some Liberty Tana Lawn I bought in Tokyo back in June. (This is the same pattern I used for the AWS Shirt last December.) I made the biggest size, but it’s fairly roomy and I think I could easily go down a size and still be fine. I think I did a decent job setting in the sleeves, even if I did use a million pins. 😂 I left off the front patch pockets, mostly because I didn’t think they’d add anything and you wouldn’t even see them with the busy print. For buttons, I just used four small pearlescent ones from my stash.

    The thing I’m proudest of though is that for once I remembered to sew in a label! I’ve had these for ages and never used them before.

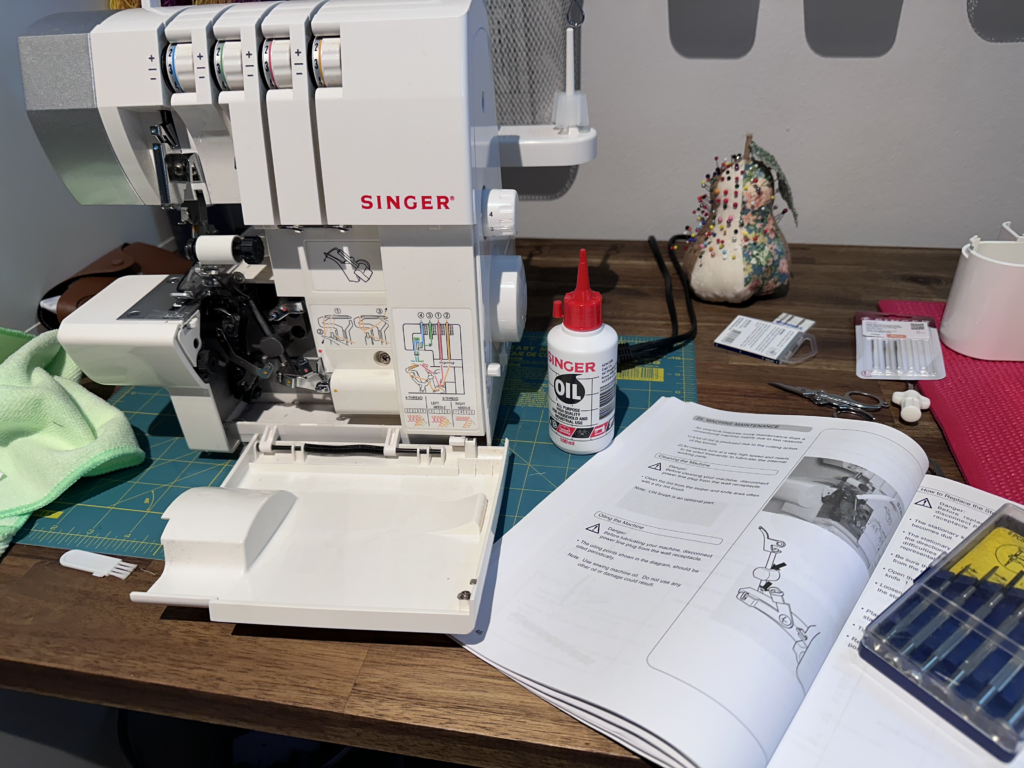
    I also realised in the course of sewing the shirt that I had never changed the needles in my overlocker. I dug out the manual, started flipping through it, and realised that I’d never actually serviced the thing ever… in nine years. Yikes. After a quick trip to Spotlight for a new bottle of oil and a packet of needles, I got to work. I unthreaded the machine, removed the old needles, cleaned out all the dust and lint, oiled her up, and then rethreaded. I discovered that using all 4 threads is probably overkill for most of my sewing, so I cut it back to 3 and just a single needle. Once I had everything put back together, she was purring like a kitten! I also cleaned out the lint on my sewing machine. I’ll have to put in a recurring task to do this more often. 😬

    Servicing the overlocker

  • Photo Post

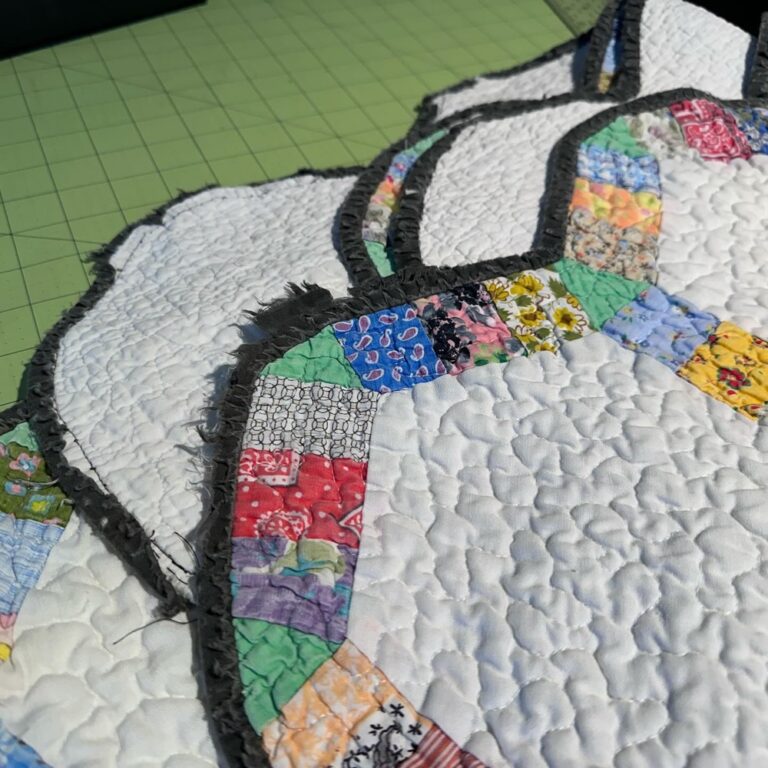
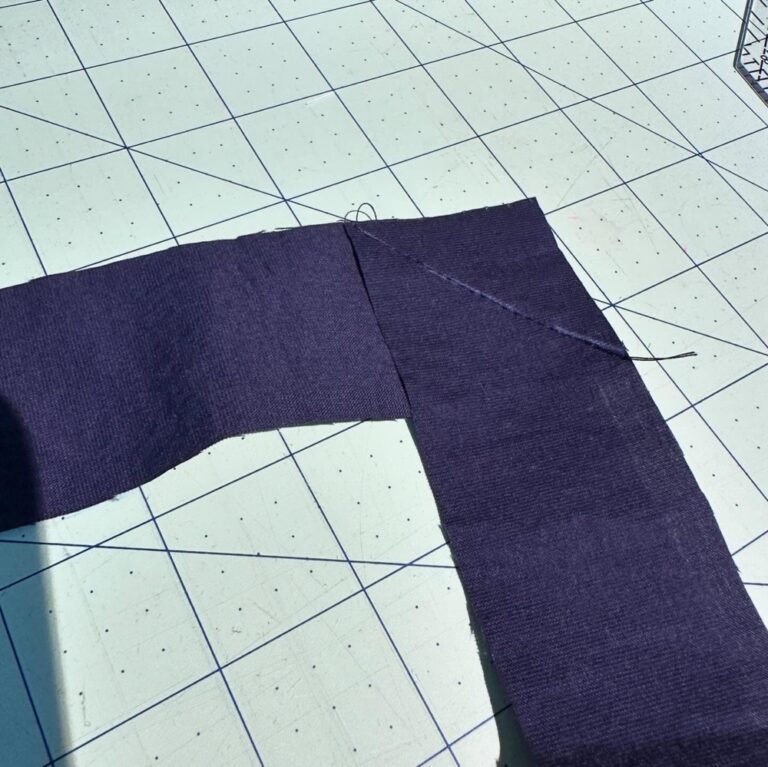
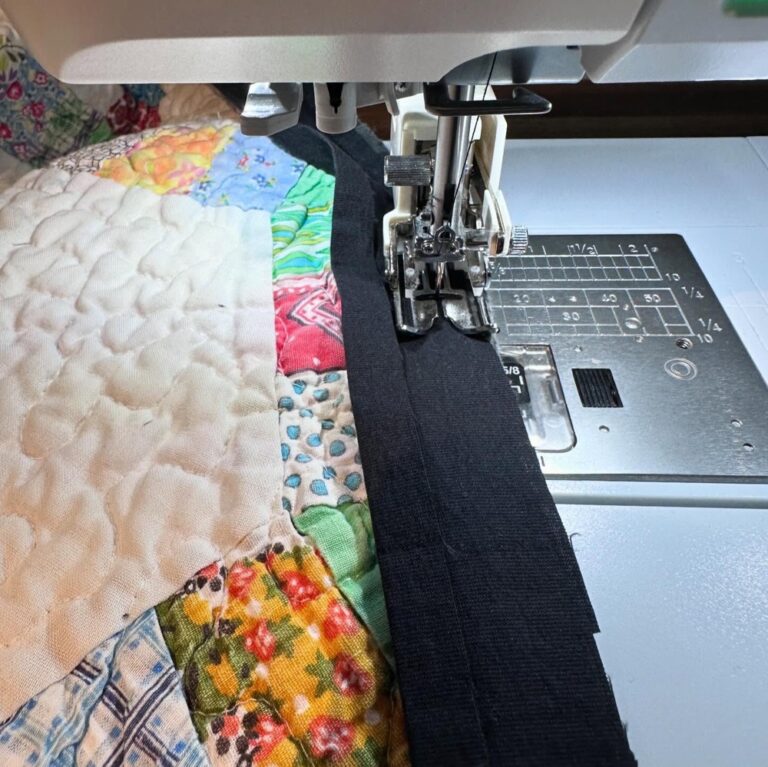
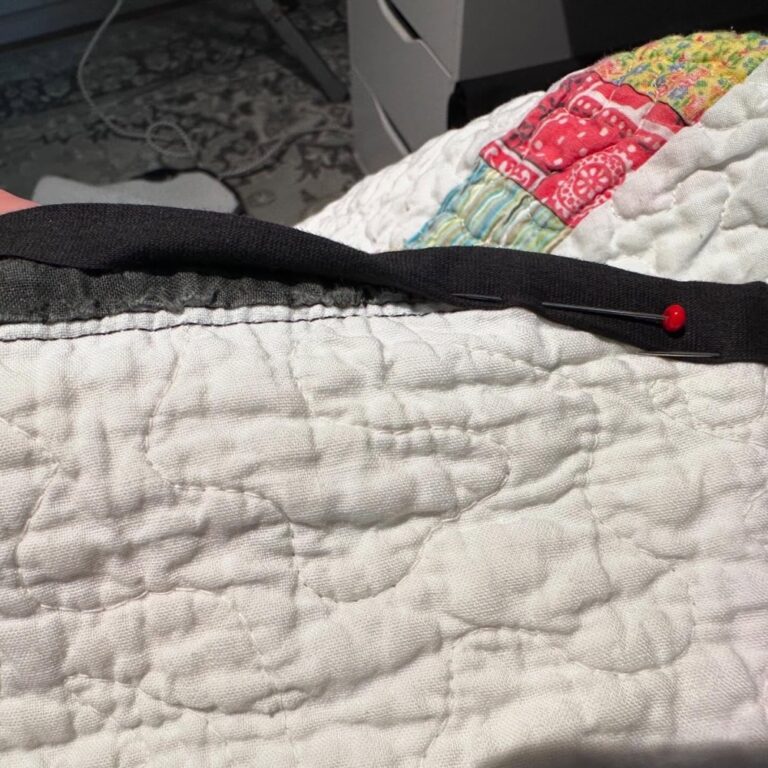
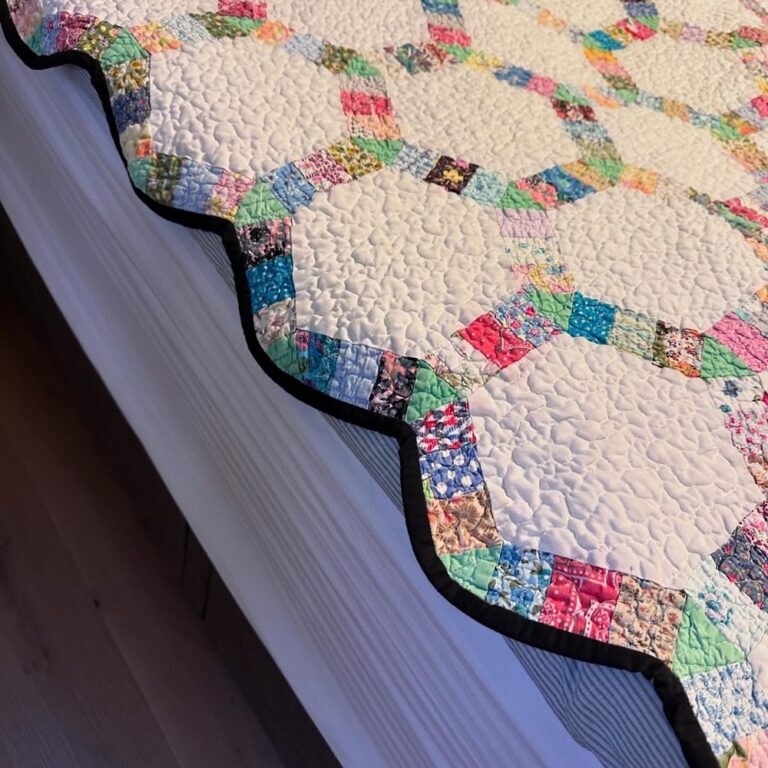
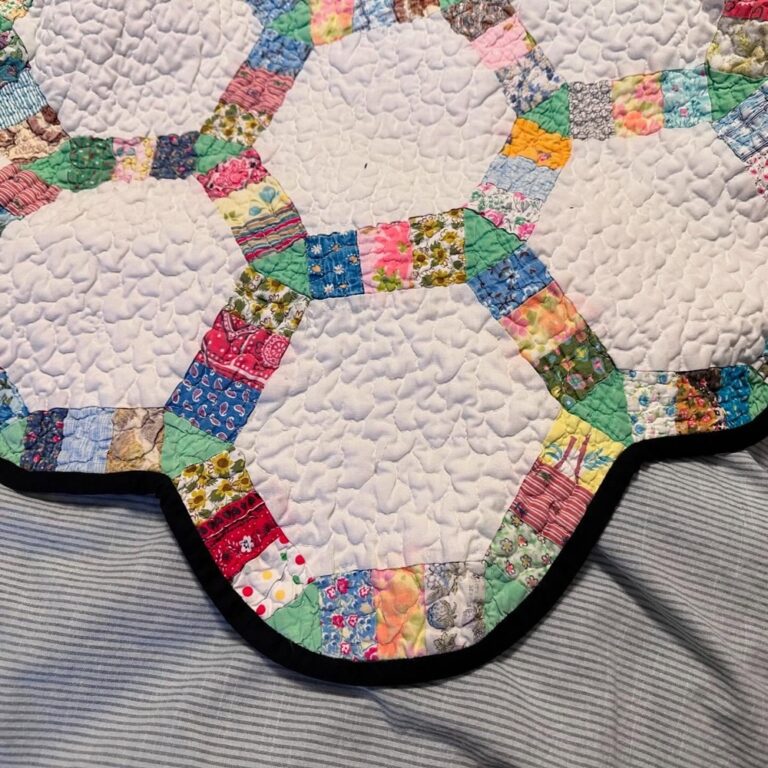
    Quilt repair complete! My Mom (@the_quiltshop_at_essenhaus) gifted us this quilt she bought at an auction many years ago, and we’ve used it so much that the binding had worn out. After many texts with Mom for advice, I just completed the repair job! I cut new strips of binding, joined them together, attached over the old binding on the front (single fold method), and then spent several hours hand-tacking it down on the back. (I know; I should have mitered the hex angles, but I was lazy and treated them as curves.) Very satisfying, and I’m glad I’ve extended the life of this lovely quilt. ❤️

    Quilt repair complete! My Mom (@the_quiltshop_at_essenhaus) gifted us this quilt she bought at an auction many years ago, and we’ve used it so much that the binding had worn out. After many texts with Mom for advice, I just completed the repair job! I cut new strips of binding, joined them together, attached over the old binding on the front (single fold method), and then spent several hours hand-tacking it down on the back. (I know; I should have mitered the hex angles, but I was lazy and treated them as curves.) Very satisfying, and I’m glad I’ve extended the life of this lovely quilt. ❤️

    Quilt repair complete! My Mom (@the_quiltshop_at_essenhaus) gifted us this quilt she bought at an auction many years ago, and we’ve used it so much that the binding had worn out. After many texts with Mom for advice, I just completed the repair job! I cut new strips of binding, joined them together, attached over the old binding on the front (single fold method), and then spent several hours hand-tacking it down on the back. (I know; I should have mitered the hex angles, but I was lazy and treated them as curves.) Very satisfying, and I’m glad I’ve extended the life of this lovely quilt. ❤️

    Quilt repair complete! My Mom (@the_quiltshop_at_essenhaus) gifted us this quilt she bought at an auction many years ago, and we’ve used it so much that the binding had worn out. After many texts with Mom for advice, I just completed the repair job! I cut new strips of binding, joined them together, attached over the old binding on the front (single fold method), and then spent several hours hand-tacking it down on the back. (I know; I should have mitered the hex angles, but I was lazy and treated them as curves.) Very satisfying, and I’m glad I’ve extended the life of this lovely quilt. ❤️

    Quilt repair complete! My Mom (@the_quiltshop_at_essenhaus) gifted us this quilt she bought at an auction many years ago, and we’ve used it so much that the binding had worn out. After many texts with Mom for advice, I just completed the repair job! I cut new strips of binding, joined them together, attached over the old binding on the front (single fold method), and then spent several hours hand-tacking it down on the back. (I know; I should have mitered the hex angles, but I was lazy and treated them as curves.) Very satisfying, and I’m glad I’ve extended the life of this lovely quilt. ❤️

    Quilt repair complete! My Mom (@the_quiltshop_at_essenhaus) gifted us this quilt she bought at an auction many years ago, and we’ve used it so much that the binding had worn out. After many texts with Mom for advice, I just completed the repair job! I cut new strips of binding, joined them together, attached over the old binding on the front (single fold method), and then spent several hours hand-tacking it down on the back. (I know; I should have mitered the hex angles, but I was lazy and treated them as curves.) Very satisfying, and I’m glad I’ve extended the life of this lovely quilt. ❤️

    Quilt repair complete! My Mom (@the_quiltshop_at_essenhaus) gifted us this quilt she bought at an auction many years ago, and we’ve used it so much that the binding had worn out. After many texts with Mom for advice, I just completed the repair job! I cut new strips of binding, joined them together, attached over the old binding on the front (single fold method), and then spent several hours hand-tacking it down on the back. (I know; I should have mitered the hex angles, but I was lazy and treated them as curves.) Very satisfying, and I’m glad I’ve extended the life of this lovely quilt. ❤️

    Quilt repair complete! My Mom (@the_quiltshop_at_essenhaus) gifted us this quilt she bought at an auction many years ago, and we’ve used it so much that the binding had worn out. After many texts with Mom for advice, I just completed the repair job! I cut new strips of binding, joined them together, attached over the old binding on the front (single fold method), and then spent several hours hand-tacking it down on the back. (I know; I should have mitered the hex angles, but I was lazy and treated them as curves.) Very satisfying, and I’m glad I’ve extended the life of this lovely quilt. ❤️

  • Smart, Sensational, Sun-Protecting (S3) Bucket Hats for Dementia Australia

    Smart, Sensational, Sun-Protecting (S3) Bucket Hats for Dementia Australia

    As you probably know if you’ve followed this blog or any of my social media accounts, back in 2018 I worked for Amazon Web Services and I had the idea to sew myself an AWS dress to wear to tech events around the world. It was so popular, my colleagues even made t-shirts and stickers! In 2023 I raised the bar with the AWS dress v2, which had matching sneakers.

    As of 2024 though, I’m retired and it seems a bit silly to hang on to these dresses. Why not turn them into something fun and raise money for an important cause? So the dresses have become 14 Smart, Sensational, Sun-Protecting (S3) Bucket Hats, and you can win one by donating to this fundraiser.
    Dementia is a terrible disease that has affected our family in recent years. It really, really sucks to watch someone you know and love just change and disappear. I’d like to help other families going through this, and hopefully even work towards a cure.

    To do that I need your help! Please make a donation to support my efforts and help me reach my goal to beat dementia. You can donate through:

    1. My Facebook fundraising page
    2. My standalone Dementia Australia fundraising page
    3. Or if neither of those options work for you, feel free to donate to a dementia-related charity in your own country*.

    All funds raised (through channels 1 and 2 above) will support the work of Dementia Australia to provide vital support services for people living with dementia, their families and carers. These services include counselling, support groups, education and training.

    For every $25 AUD* you donate, you’ll get one entry into a raffle for one of the 14 hats. I will draw the winners at random on November 1st, 2024, and I will cover postage anywhere in the world. Please make sure you are contactable if you win! You can donate as many times as you’d like but you can only win one hat, and you don’t get to choose which one you get. (They’re all the same size anyway.)

    * If you donate via option 3, please email me a screenshot of your donation and I will ensure you are entered into the draw. You’ll get 1 entry for the equivalent of $25 AUD in your own currency.

    Disclaimers: Obviously I don’t work for AWS anymore, and I don’t claim ownership over their logo or any of their service icons. The hats were made by me from the dresses I wore as part of my employment for AWS, and I won’t ever be making any more. If I can’t contact you within a week, I reserve the right to draw a new name and send the hat to somebody else.

    Thank you for your support.

    PS for the sewists: if you’re curious about the pattern I used you can download it for free here! Each hat is fully lined, which means I actually had to sew 28 hats (30 if you count the prototype I made). 😅

  • Photo Post

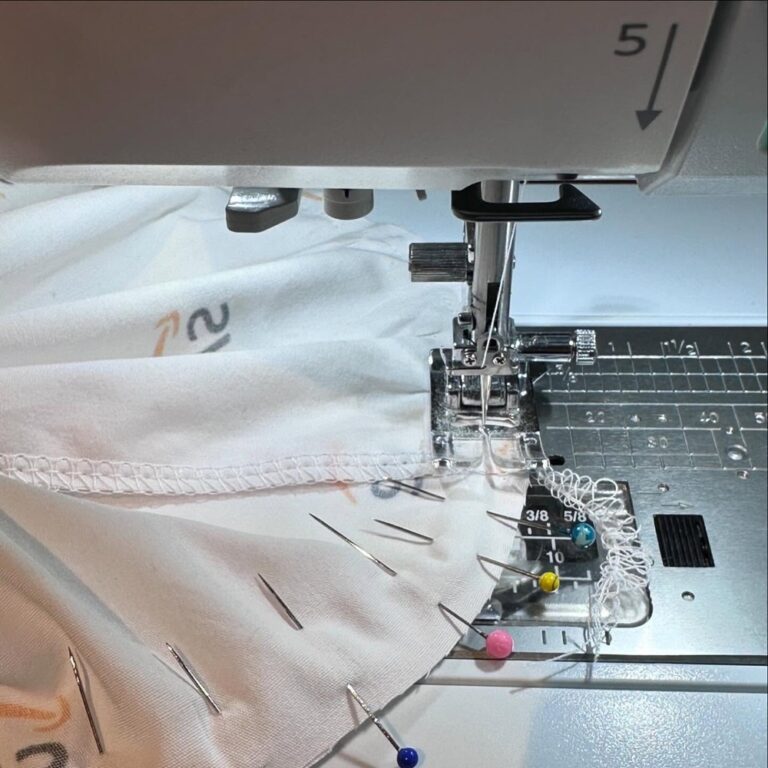
    Sewing a convex curve to a concave one always feels like magic. ✨

    Sewing a convex curve to a concave one always feels like magic. ✨

  • Photo Post

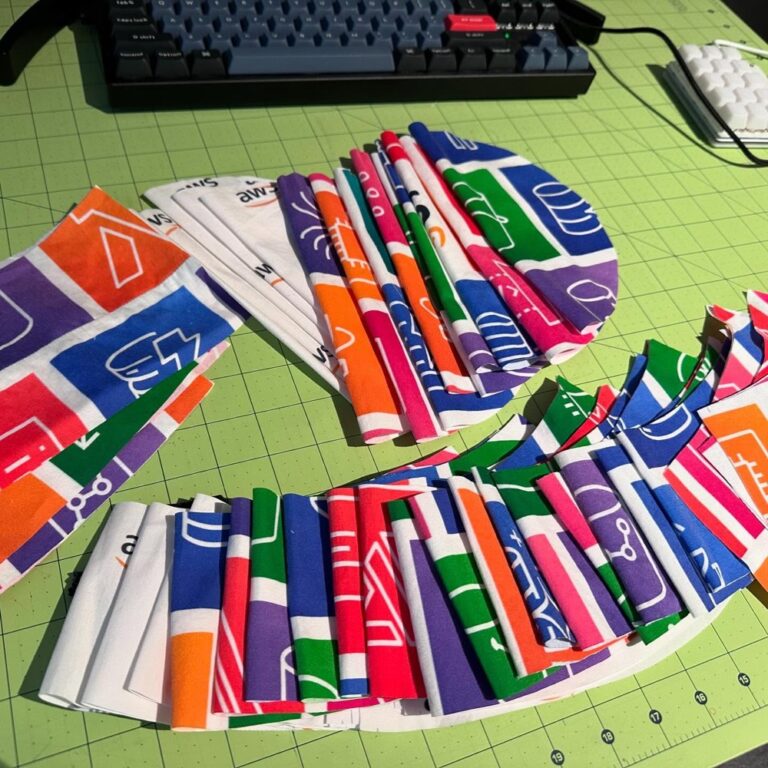
    Production line… 🪡 🧵

    Production line… 🪡 🧵

  • Photo Post

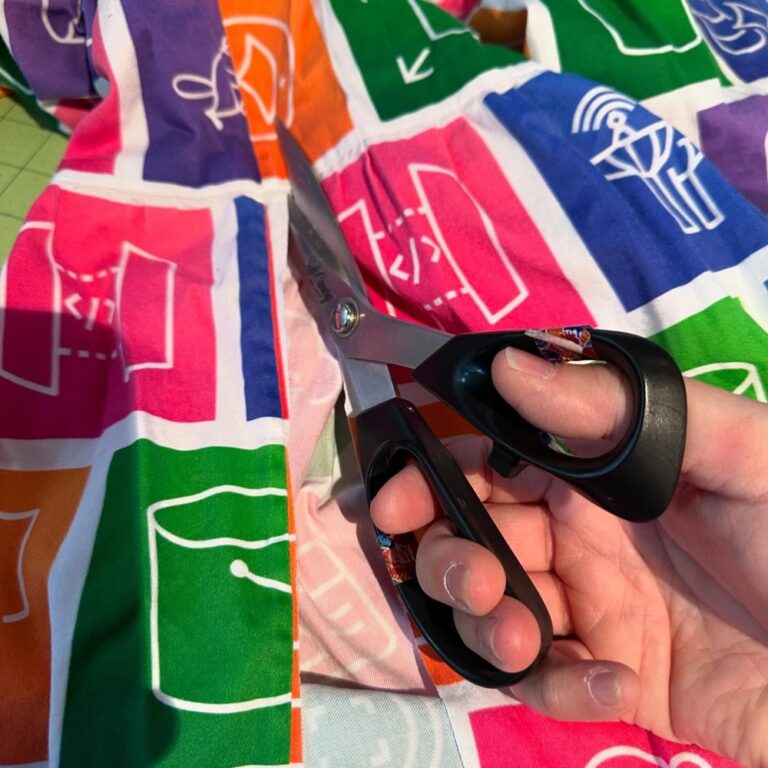
    You all thought I was kidding, didn’t you? Say goodbye to the AWS dresses! (Silver lining – you’re going to have an opportunity to own a piece…) 👗✂️🫣
    You all thought I was kidding, didn’t you? Say goodbye to the AWS dresses! (Silver lining - you’re going to have an opportunity to own a piece…) 👗✂️🫣