• I’m a big fan of the Finnish design house Marimekko. They’ve been making gorgeous fabric prints and homewares for 70+ years. The only problem is that their stuff can be very, very expensive (especially here in Australia). A few months back though they had a clearance sale, and I picked up a couple meters of the iconic Unikko print cotton at 40% off. Today I decided to use it to make a couple cushions for our new couch.

    We already had a pair of old IKEA cushions with covers that were starting to fall apart. The feather inserts were still good though, so I removed the covers to see how they were constructed. They were rectangular — 59cm/23.25″ long by 37.5cm/14.75″ wide — with a lapped zipper along the bottom edge. I decided to make the new covers a little smaller so they’d feel a bit plumper. (They’d lost a couple feathers over the years!)

    Old IKEA cushion

    At this point Rodd was like, “So are you going to reuse the zippers?” I realised that was an excellent suggestion, so out came the seam ripper.

    Unpicking a zip

    Once I worked out what size I wanted the new covers to be, I added on a bit for seam allowance and then cut out 4 panels from my fabric. I then used my overlocker to finish all the raw edges.

    Fabric panels

    I’ve installed a few zippers in my time but I’m by no means an expert. I found this tutorial from The Sewing Directory to be really helpful. Once I had the zipper joining two panels together, it was very simple to sew around the other three sides.

    Sewing the cushions

    And here’s the finished cover showing the lapped zipper! Why yes, I did sew one side of the zip with red thread and one with white, thank you for noticing. 😂

    Cushion cover with zip

    Here’s a cushion in all its plump glory. To buy one would probably be like $90 AUD, so my version came out a fair bit cheaper. (That’s discounting my own labour though, which you should never do if you’re actually selling stuff you create!)

    Cushion

    Don’t they look lovely on the new couch? I might need to make some more…

    New couch with Marimekko cushions


  • Craft Room IKEA Hack

    In 2024 we embarked on a pretty major home renovation, and once we were moved back in I spent a lot of time thinking about how I wanted to set up my office. I knew that I wanted a dedicated sewing table where I could have both my sewing machine and overlocker set up, with all my tools and supplies in easy reach. I also wanted a cutting table (preferably height adjustable), and somewhere to set up the ironing board for a sewing session. I also needed storage for my fabric and wool.

    In terms of assets I had an existing IKEA Bekant standing desk, which serves as my computer workstation but can also conveniently double as a cutting table. I have a large cutting mat that I leave on it, and I can pretty quickly clear away everything when I need to cut something big. I also have a rolling office chair. Beyond that, the room was a blank slate.

    I did a lot of googling at what others had done, and I was very inspired by this Garage Workbench DIY. I realised that the IKEA Lagkapten/Alex desk combination was a good starting point, but it had one significant drawback — durability. The Lagkapten has a honeycomb core, and apparently it will sag over time if you put a lot of weight on it. (That’s why IKEA always show a center leg on any of the longer desks.) And guess what? Sewing machines are pretty heavy. I read a lot of posts about people using “stiffening rods” and such to try to reinforce them, but eventually realised it would be a lot simpler to just use an actual wooden desktop. Bunnings make a pre-finished timber panel that I realised would work perfectly. With all that in mind, I used SmartDraw to mock up the floorpan and see how everything would fit.

    Office Floorplan

    Once I had the plan, it was time to go shopping! Protip: before you make any major IKEA purchase, check to see if you’re able to access any discounts. We learned that Macquarie Bank sell IKEA gift cards at 6% off, which was a nice savings for not much effort.

    Thankfully, we were able to find everything we needed. First step: protect the floor.

    IKEA rug

    I wanted to protect our lovely new wooden floors from the rolling wheels of my chair. This is the IKEA Vedbäk rug. It’s not real wool, but I don’t mind so much in here. We put out an underlay first to keep it from shifting around, and then unrolled the rug. I put some boards and boxes down on it overnight so help it flatten out.

    Then it was time to start assembling.

    Putting together Alex

    I started with two Alex storage units. Here they are put together and set aside. I made sure that the door openings mirrored each other. The Alex units come with a panel with pre-drilled holes that you can use as the top or the bottom, depending on how you want to set them up. Here I made sure the holes were at the bottom. (You’ll see why in a bit.)

    Assembled Alex units

    I knew that I didn’t want to just rest the desktop on the units, but instead to bolt everything together so it would be rigid. Before I put the other two Alex units together, we wisely had the idea to use one of the bases to mark out holes for pre-drilling the desktop. We also attached the base plate for the Adils leg. (While I knew my desktop would be strong enough without it, I figured it wouldn’t hurt to have it. We pushed it as far back in the center as we could.)

    Prepping the desktop

    Here you can see Rodd marking the holes for drilling. The Alex unit bases have 4 holes, and we decided to use the inner set for securing the upper units (on the top side of the desktop), and the outer set for the lower units (on the bottom side of the desktop). That way the screws had no chance of hitting each other. We lined the base up flush with the back and edge of the worktop and used a pointy screwdriver to mark the spot.

    Marking holes

    Here’s Rodd drilling one of the holes. We worked out the depth needed based on our wood screws and the depth of the Alex base plate, and he put a piece of tape on the drill bit to show him how far to go.

    Drilling

    We also had the idea to put something in between the Alex units and the desktop, to add some cushioning and to protect the desktop a bit (in case we wanted to use it for something else in the future). I’m not really sure this step was needed, to be honest. But I bought some of IKEA’s Variera drawer liners and used the Alex bases to cut out appropriately sized pieces.

    Cutting drawer liner

    Here you can see one of the drawer liner pieces, ready for final assembly.

    Drawer liner

    For the bottom supports, I went with two of the Alex drawer units. For these, I made sure that the base with the holes was on the top since we’d be screwing into the desk. I was a little worried about how well they’d stand up to the weight we’d be putting on top (desktop plus another Alex unit). IKEA don’t really seem to recommend stacking them. I decided therefore that a little extra support couldn’t hurt. We bought a couple packs of these corner braces at Bunnings…

    Corner braces

    And I screwed them into each corner on the back of the Alex drawer units.

    Reinforced corners with feet

    You can also see that we purchased Eket feet to use on the bottom units. These are adjustable, so I knew that would help to level the whole thing given that the front would be sitting on the rug. Happily, the screws for the foot base plate didn’t run into the ones for the corner braces. Here’s one of the bottom units upside down. Important note: while you can use longer screws for the outer holes since they run down into the sides, you need to use pretty short ones for the inner one to avoid breaking through the base.

    Eket foot plates

    Hopefully this will help illustrate what I mean.

    Illustrating screw depths

    And now it’s finally time to start putting the thing together! We set up the bottom two Alex units, placed the drawer liners on top, and then placed the desktop on top of that. Then I reached up from the inside with a hex key to screw in the wood screws. (These are the ones that come with the Alex and would normally be used to attach it to the Lagkapten top.) I had to first poke through the drawer liner, of course, and then it was a bit of faffing about to get the holes exactly lined up with the ones we predrilled. But eventually I managed to get them screwed in. Remember, on the bottom we secured just the two outer holes, front and back.

    Screwing the desktop to the Alex

    Here’s what we had so far. So that’s two Alex drawer units on the bottom, each with reinforced corners (on the back side) and Eket adjustable feet underneath. The desktop is screwed to the top of each from inside the top of the Alex units (using the two outer holes). There’s also an Adil adjustable leg at the center back.

    Secured desktop and bottom units

    Next it was time to stack the upper Alex units. I put down my pre-cut drawer liners and then carefully placed the upper units. Again, I had to poke through the liner and then laboriously shift things around until I had the holes exactly lined up. But eventually I was able to get each one screwed down, this time using the two inner holes.

    Screwing down the upper units

    Here it is with one upper unit attached…

    With one upper unit attached

    …and now with both upper units attached and all the drawers inserted!

    With both upper units attached

    The space in between the upper units was perfect for two of the Skådis pegboards. We first used some of the connectors to mount them directly to the desktop…

    With pegboard

    …but I realised quickly that this wasn’t ideal. There was no opening for the power cords for my sewing machines, and because the pegboard was so low I really couldn’t make full use of it. So the Snook kindly broke out his hammer drill and helped me mount the pegboards directly to the wall.

    Drilling the pegboard

    And this is my favourite thing of all. I discovered that some nice person designed a sewing thread spool holder that fits the Skådis pegboards, and which can be 3D-printed. My awesome friend Bobbie printed a dozen of them for me, which allows me to store 60 spools of thread!

    Spool holders

    And here’s the end result! Raising the pegboard makes it much more useful, and allows me to run the power cords down the back of the desktop. My sewing machine sits on a special vibration mat that it came with, and the overlocker is sitting on a spare cutting mat. I picked up a couple Eket cubes off Facebook Marketplace that I simply stacked on top of the Alex to add some additional storage for all my prettiest wool skeins. I’ve also got a ring LED light that I can turn on to add light when I’m sewing. And the ironing board can be stored and set up on the left, with a power strip down at the bottom to plug in the iron.

    Finished IKEA craft station

    I bought a bunch of the different Skådis accessories to hang and store my tools. I’ve had a lot of fun figuring out the most efficient place to put things! I also organised my circular knitting needles by size into Ziplock bags, which I then threaded onto split key rings and hung from a hook. Very tidy!

    Pegboard

    The upper right Alex unit has my fabric stash, with scraps on the bottom and project-sized pieces on top. (Not pictured are the two giant boxes of old fabric that I donated to The Sewing Basket. 😬 I’m working on hoarding less stuff, and making sure that what I have is useful.)

    Fabric stash

    On the left is my stash of knitting wool and supplies. This is the utilitarian wool, while the prettier stuff is in the Eket boxes on display. (Again, I donated a bunch of old stuff to charity.)

    Knitting stash

    For the sake of completeness, I’ll show my desk as well. It’s got a large self-healing cutting mat, and on top of that I have a large gaming pad under my keyboard, mouse, and duckyPad. My Mac Mini sits on the bookshelves next to the desk, and I’ve got a USB dock in that corner where all my stuff is plugged in. When I want to use the desk as a cutting table, I can pretty quickly shove everything back in that corner and raise the desk up to a comfortable cutting height. Depending on how big a piece I’m cutting, I may not even need to move the monitor!

    Desk

    I also managed to fit in a Svenarum shelving unit alongside my desk. I especially like how it gets thinner towards the top, which helps feel like it’s not crowding the doorway too much. This allows me to show off my vintage sewing machines (the bottom two belonged to Rodd’s grandmother and mother), as well as my craft books and some of my Roald Dahl collection.

    Bookshelves

    And here’s the finished office/craft room! In the Alex drawers, I’ve got various sewing supplies all stored on the right side (buttons, trims, zipper, tracing paper, etc). On the left is general office and crafting supplies. I’ve got two plastic floor protectors over the rug that allow me to roll my chair easily from the desk to the craft station. I’m really happy with how it’s turned out. Together with the closet, I’ve got ample storage for all my projects and everything I need is within arm’s reach.

    Finished craft room


  • This is old but I only just discovered it: an NPR interview all about EB White and his famous book Charlotte’s Web. This is one of my all-time favourite books, and I can still remember exactly where I was (the babysitter’s house before school) when I read about Charlotte’s death. I sobbed my little heart out. Apparently, so did EB White. 🩷🕷️


  • Completed sewing project: Arkie shirt

    Arkie shirtI knocked out a quick sewing pattern this week: a new Arkie shirt in some Liberty Tana Lawn I bought in Tokyo back in June. (This is the same pattern I used for the AWS Shirt last December.) I made the biggest size, but it’s fairly roomy and I think I could easily go down a size and still be fine. I think I did a decent job setting in the sleeves, even if I did use a million pins. 😂 I left off the front patch pockets, mostly because I didn’t think they’d add anything and you wouldn’t even see them with the busy print. For buttons, I just used four small pearlescent ones from my stash.

    The thing I’m proudest of though is that for once I remembered to sew in a label! I’ve had these for ages and never used them before.

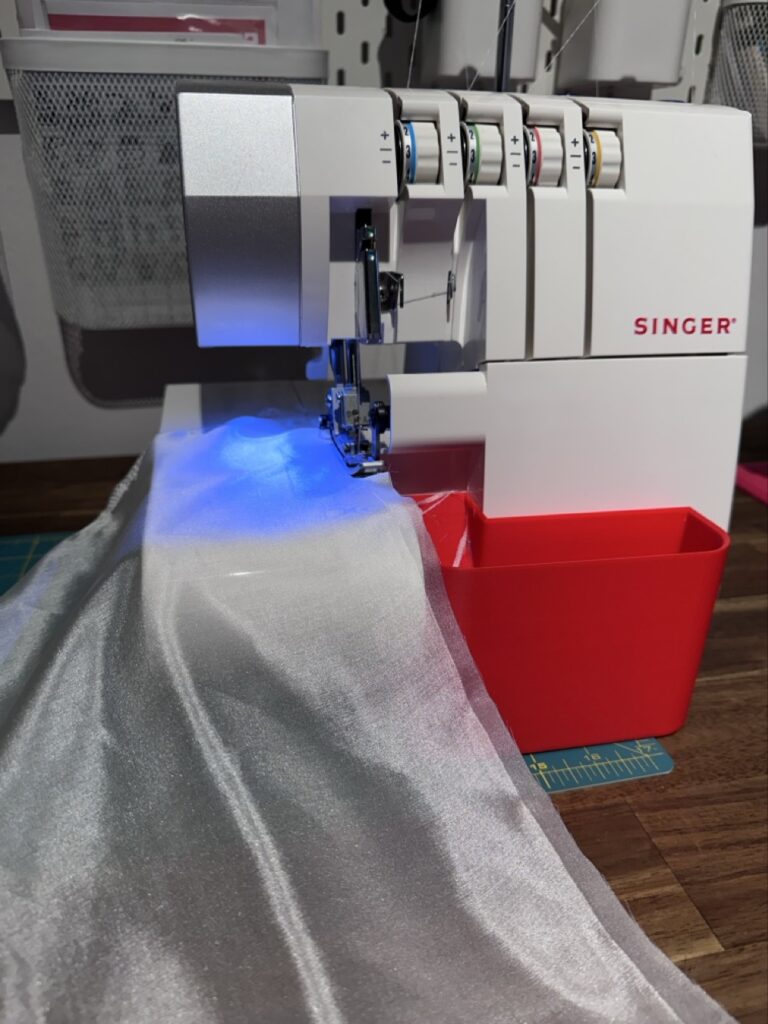
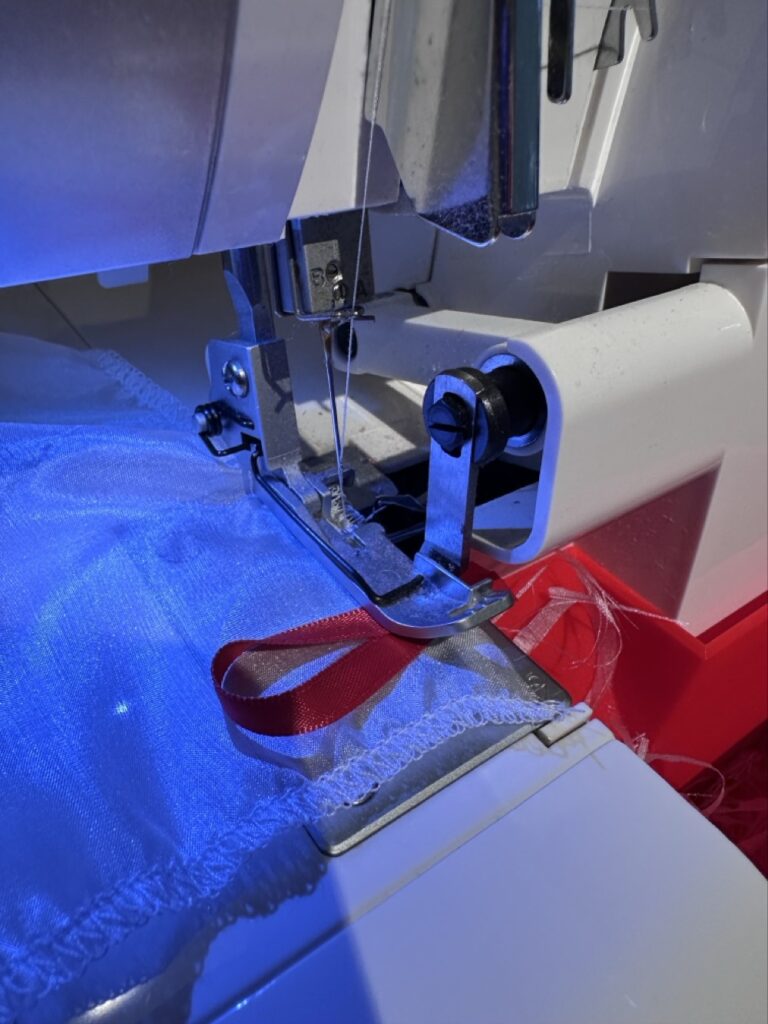
    I also realised in the course of sewing the shirt that I had never changed the needles in my overlocker. I dug out the manual, started flipping through it, and realised that I’d never actually serviced the thing ever… in nine years. Yikes. After a quick trip to Spotlight for a new bottle of oil and a packet of needles, I got to work. I unthreaded the machine, removed the old needles, cleaned out all the dust and lint, oiled her up, and then rethreaded. I discovered that using all 4 threads is probably overkill for most of my sewing, so I cut it back to 3 and just a single needle. Once I had everything put back together, she was purring like a kitten! I also cleaned out the lint on my sewing machine. I’ll have to put in a recurring task to do this more often. 😬

    Servicing the overlocker


  • Title slide for talk called

    This is a write-up of a talk I gave at the October 24, 2024 meetup of Sydney Technology Leaders. While it wasn’t recorded so this isn’t an exact transcription, I’ve written out my notes and the information I gave as best I can remember. It also builds on and expands a previous blog post I wrote, so you may want to check that out too.

    Eff-Off Money - slide 2

    For those that don’t know me, I’m a dual American-Australian citizen. I’m 47 years old, and I’m a DINK—double income, no kids. I’ve worked in the Sydney technology industry in a variety of roles for more than twenty years, but I haven’t worked a day in the last 3 months. It’s been glorious.

    Eff-Off Money - slide 3

    Before I get to the HOW, I want to first acknowledge that this is a pretty awkward thing to talk about. I’m very, very lucky. Everyone in the room tonight—unless you were digging ditches today—is very lucky. We live in a country with national healthcare, and you don’t have to worry about your kids being shot at school. We earn good wages. We are at a social gathering, eating free food and drinking free booze. The older folks in this room came of age with the Internet, and we were lucky enough to get in on the bottom floor of all of that.

    My point here is I don’t want you to think that I think that if you just follow what I did, you’ll have the same outcome. Your circumstances are your own. But I also don’t want you to think that it’s all just dumb luck, and that it’s not worth putting in the effort. My husband and I both come from families of labourers. I was never taught anything about personal finance growing up. I had a part time job from the moment I turned 14 years old. I was the first on both sides of my immediate family to go to university, which I technically only finished paying off in 2020.

    My point is that hopefully everybody, no matter their circumstances, can take something practical and useful away from this today.

    Eff-Off Money - slide 4

    You may have heard about the FIRE movement. That stands for Financial Independence, Retire Early. Let’s park the early retirement for now, as that’s not necessarily a goal for everybody. I want to spend a bit of time focusing on just the FI part—financial independence. I’ve pasted in the Wikipedia definition here, but what it really comes down to is not having to work for money. Imagine if you didn’t need the pay check from your current job. What would that get you?

    Eff-Off Money - slide 5

    It would give you agility. (I’ve tried really hard throughout this talk to put things in terms technical folks will understand!) Agility means you can change your priorities up at any time. Maybe you want to start your own business, change industries, or relocate to another country. If you aren’t reliant on that pay check, you can do that. You can even quit your job—tell your boss to eff-off, effectively—at any time, and know that you’ll be okay.

    So where does this FI concept come from?

    Eff-Off Money - slide 6

    The guy generally acknowledged as the godfather of this movement is JL Collins. His philosophy is pretty simple: “Spend less than you earn—invest the surplus—avoid debt. Do simply this and you’ll wind up rich.” He gave a talk about it at Google that’s up on YouTube, which was how Rodd found out about him. Meanwhile I started reading blogs like Get Rich Slowly and Mr. Money Mustache more than a decade ago.

    So in practical terms—how do you make FI happen?

    Eff-Off Money - slide 7

    First there’s one more caveat: this talk is based on the assumption that we live in a capitalist society. Earning, spending, and investing money involves political and ethical considerations. Every one of us has their own moral Rubicon that they won’t cross, and I completely respect that. (You are not going to hear one goddamn word from me about crypto in this talk, for instance.) But if you see all property as theft and want to dismantle the system, good for you. I will 100% sign your petition and support your right to protest. But me, I like living in a nice house and buying a new computer every couple of years and going on the occasional vacation. I accept that if and when the revolution comes, I’m going to be fairly far towards the front of the queue for the firing squad. For now, I can live with my choices.

    So the four steps I’ve outlined here are Tracking, Budgeting, Investing, and then possibly Retirement.

    Let’s start with Tracking. How much do you spend on groceries every year? How about electricity? Dining out at restaurants? Buying clothes? You probably have a rough idea – but do you have DATA?

    Eff-Off Money - slide 8

    For each of the steps, I’ve compared them to an analogous AWS Well-Architected pillar. For Tracking, I’ve gone with Operational Excellence because it’s all about monitoring your running systems and processes, and defining standards for your daily operations.

    Way back in 2007 Rodd and I started to think about buying a house, and we used a mortgage broker to help us work out what we could afford. We didn’t have a lot of financial discipline, but we got very lucky and found a place that wasn’t beyond our means. We knew we needed to get a better handle on where our money was actually going. And like good nerds, we looked to technology for a solution.

    Really what we wanted was to build a data lake by logging our spending. We also wanted to create dashboards and reports to get visibility on where our money was going, and to help make things easier at tax time. We tried out a few different apps along the way, as well as shared Google spreadsheets to bring things together. Nowadays many banks allow you to categorise transactions, but you might have multiple accounts. So for us, having a standalone app was important, and we needed one that works for both iOS and Android. We considered automation for pulling in bank transactions but ultimately decided that the exercise and discipline of manually entering transactions would be good for us, and it only takes 15-20min a week.

    Eff-Off Money - slide 9

    Ultimately the solution we went with is You Need a Budget and we’ve been using it for more than a decade. They have a blog and YouTube channel where they shared a lot of content around financial education and getting out of debt. It does cost money though, but we’ve found it to be well worth it. I’ve included a referral link if you want to get a free trial.

    Eff-Off Money - slide 10

    This is how I know exactly how much money we’ve spent on groceries each month. It’s really easy to create reports or search through the logs to see what you’re spending. (Note: I showed the real graphs during the talk, but for the blog I’ve blurred out the actual numbers for privacy.)

    Once you get some data and visibility on where your money is actually going, it’s time to actually get insights from it. What targets should you be aiming for? What do you need to increase or reduce? That’s where Budgeting comes in.

    Eff-Off Money - slide 11

    The Budgeting step is analogous to Performance Efficiency and Cost Optimisation. It’s all about making sure that everything is right-sized and cost effective.

    First and foremost, think about how you can scale up your income as much as possible. Look, maybe you don’t ever want to work for a FAANG company. That’s understandable. But if there’s a way you could double your income NOW—and put that extra money to work—that’s going to make a massive step towards FI. Maybe you could move to a new role, or pick up some on-call shifts.

    Next, you want to scale down your expenses. This doesn’t necessarily mean living on lentils, but think about where you could cut things without making a big difference to your life. For us, that means flying Economy class. We cook a lot and make coffee at home. Our pets were rescues. Our furniture has always been IKEA or Facebook Marketplace. We generally subscribe to 2-3 streaming services at a time rather than all of them, and we rotate them around.

    I’d also like to suggest trading CAPEX for OPEX wherever you can. This means not buying a thing when you only need it every now and then, but instead just paying for use. We don’t own a car. Instead we’re members of GoGet and we simply rent one whenever we need it. In addition to saving money, it also means we can rent out our carspace and earn some extra cash. (Granted, this is heavily dependent on where you live and whether public transport/car share are available.)

    When we started out, we had no idea what our target level of savings should be. Do you know that according to the Australian Bureau of Statistics, personal savings in Australia averaged 9.29% from 1959 until 2024, reaching an all time high of 24.10% in the second quarter of 2020 (because it was Covid lockdown and nobody was going anywhere or spending money). Right now, it’s sitting at 0.6%. Ouch.

    Eff-Off Money - slide 12

    If you’re just starting out, one useful model you can use is the Balanced Money Formula. I learned about this from the Get Rich Slowly blog, but it comes from a book written by Senator Elizabeth Warren and Amelia Warren Tyagi. It’s a simpler alternative to having a really detailed budget. You may also see it referenced as the “50/30/20 rule.” The idea is that no more than 50% of your income (ideally, more like 35%) should go to Needs – these are things you have to have, like housing, food, transportation, medicine, insurance, etc. And you want to save at least 20% of your income, leaving 30% for Wants.

    We used YNAB to roll our spending up to these categories and found out that in 2010, we were at 52% Needs, 13% Wants, and 34% Savings. Not bad!

    This is a very simple model, but it can be useful to get you going. As a first goal, having at least 3 months of expenses in the bank as an emergency fund is recommended. But this model is about achieving “balance”; it won’t necessarily get you to Financial Independence.

    For that, you’re going to need to be more aggressive.

    Eff-Off Money - slide 13

    This screenshot is from the Mr. Money Mustache blog and his famous post “The Shockingly Simple Math Behind Early Retirement.” In it he says that your time to reach retirement depends on only one factor: your savings rate, as a percentage of your take-home pay. To illustrate this:

    • At 100% spending, you can never retire unless someone else is doing the saving for you (like superannuation or wealthy parents).
    • At 0% spending (like someone else is paying all your expenses), you can retire right now.

    In between, there’s a graph… but the interesting thing is that it’s not linear. Because once you start investing your money, it starts earning money itself. It snowballs. So the graph ends up curved. This is a long post and I highly recommend you read it, and it includes a chart that I’ve pasted in here. If you want to be really aggressive about FI, Mr. Money Mustache reckons that if you can save 50% of your income, you can achieve FI in 16 years. And in truth, that’s pretty much about how long it took for us.

    But you don’t just stick it in the bank in a savings account! You have to put it to work. And that brings us to Investing.

    Eff-Off Money - slide 14

    BUT FIRST – A MASSIVE DISCLAIMER.

    Eff-Off Money - slide 15

    I am not a financial advisor. Rodd is not a financial advisor. I actually looked it up, and to be a financial advisor in NSW where we live, you have to do a degree and pass a certification. We’ve done neither of those. This is not investment advice. I am simply telling you what we learned from our research, and what we’ve done in our own financial independence journey.

    Eff-Off Money - slide 16

    I have likened Investing to the Reliability pillar, because it’s all about ensuring reliability and availability of your future financial resources.

    For us, we started by focusing on paying off our mortgage as quickly as possible. We have a Mortgage Offset account and have reached the point where it equals the outstanding balance, and it simply deducts every month. This is a contentious topic in FI circles, because some folks think you’re better off investing that money in something that brings a higher return. We’re fairly risk averse though, and we preferred knowing that we were never at risk of missing a mortgage payment due to a market downturn.

    Next, we were fortunate to work for employers that regularly awarded us shares through Employee Share Schemes. I knew a lot of folks at AWS who proudly told me that they had never sold a share. We did the opposite of that. Every time we vested shares, we sold them. The reasoning is simple: if both your current income and your retirement savings are tied up in the same company, what happens if there’s a downturn? You’re at risk of being laid off, as well as your retirement fund value going down. You’ve literally got a single point of failure. Instead we immediately sold the shares and invested them in low-fee index funds, which basically track the performance of the market as a whole. (Historically the stock market has seen 8-10% growth over the past century, on average.)

    Because I’m a dual citizen and we have future goals of supporting family in the US, we have also spread our investments across multiple markets. There are also restrictions on what financial instruments Americans can own, so some things are in my name and some are in Rodd’s. We also have interest earning accounts at a few different local banks, ensuring that we’ve got access to cash if one of them has an outage.

    And lastly, we are currently looking to engage a fixed-fee financial advisor to look over our plan and see if there’s anywhere we could optimise. (Those cross-border tax gotchas are a real pain for expats.) Many advisors will charge based on a percentage of your assets, and you don’t want that. Look for someone with a set fee instead.

    Eff-Off Money - slide 17

    Here’s some historical data showing our breakdown across Needs, Wants, and Savings over the period from 2010-2022 when Rodd retired. What’s interesting to me is that our Wants are fairly consistent, around 20% of our income. There were a few years when it was more, mostly due to renovating our kitchen and garden. The bumper years were 2016-2019, when we saved more than 50% of our income every year (and my income massively increased due to going to AWS). 2020 ended up being one of our lowest savings years, simply because of paying off my final student loans and our relocation to Germany.

    You’ll notice this is a Google spreadsheet graph. I created a couple graphs for myself that I found really motivating over the years.

    Eff-Off Money - slide 18

    One of them showed the balance in the Mortgage Offset account versus the amount outstanding. In Google Sheets you can extrapolate a trend line, and I loved seeing the intersection in the future and having a date to work towards.

    Another was for Retirement. When we started thinking this was maybe a goal, we picked a number that we thought would be a useful target and then I tracked our progress towards it. The goal number turned out to be a little lower than what we needed in reality, but it was a nice round number to aim for. Note: This isn’t your total Net Worth, but rather the value of your income-producing assets. (You don’t get income from your house; you live in it.) So while this graph wasn’t totally accurate, it still showed progress and helped indicate to us when we were getting close to FIRE.

    Eff-Off Money - slide 19

    And so at last we come to Retirement, possibly Early depending on how aggressively you’ve been saving.

    Eff-Off Money - slide 20

    The FIRE movement actually includes many different flavours of FIRE. There’s LeanFIRE, for those who want to cut their expenses to the bone right now in exchange for getting to FI as quickly as possible. These are the folks happily living on lentils now, who are happy to live on lentils forever. Then there’s FatFIRE (and ChubbyFIRE), where the goal is to save enough to be able to live luxuriously in retirement. These are the folks who want to fly Business class always. CoastFIRE is where you’ve saved enough in your retirement accounts that they are snowballing, and they will eventually grow to the target you need for retirement. So you can stop saving now, and switch to a lower-stress, lower-income job that just covers your current expenses. And lastly, there’s BaristaFIRE, where you have saved enough to retire but still work at Starbucks for their health insurance. (This one happens mostly in the US; you don’t need to do that in Australia.)

    There are various calculators and spreadsheets that will help you work out what your goal should be for any of these.

    Eff-Off Money - slide 21

    Whichever FIRE model you go for, it’s all about ensuring Security of your assets and future lifestyle. The general advice you’ll see on the financial blogs is that you should aim for 25x (25 times) your annual expenses. This assumes a 3-4% drawdown rate over 30 years. This 4% Rule basically ensures that you can draw down a steady income even in the face of inflation and economic downturns. Of course, it’s safest if you can vary your spending. If you go LeanFIRE and you’re retiring on very little income, you don’t have a lot of wiggle room. Whereas in our case, we know that if the market drops, we can cut back on eating out or overseas vacations.

    This is also where having a financial advisor can help, because you might have future goals beyond just covering your monthly expenses. Rodd and I have parents who will need support in the future, as well as nieces and nephews we’d like to help out with their education.

    Eff-Off Money - slide 22

    In 2022 we realised that we were at a point where retirement was an actual option. Rodd had a good long think about it, and in August 2022 he left Google after his 10 year anniversary there. This photo was taken on his last day. He hasn’t had a full-time job since.

    I continued on for 2 more years, with the amazing perk of having my very own househusband. This helped pad out the fund even more, and also covered the cost of the home renovation that we’re doing.

    Finally in April this year, I decided that I was burnt out and would join him. I finished up at the end of June and have been retired for nearly 4 months now.

    Eff-Off Money - slide 23

    Lastly, here are a few considerations and gotchas you should take into account if you’re thinking about retirement. A big one is that you don’t get work perks anymore! For me, that meant no more company healthcare or mobile phone plans. I had to sign up for my own. It means not being surrounded by free snacks and food at work, if you’re lucky enough to work in an office like that. It means no more branded swag. (Do you know how many AWS t-shirts and jackets I have?!) And the big one—no more racking up frequent flier miles on your employer’s dime. I have my KrisFlyer Gold status for another year, but then I know it’ll probably drop down and I’ll be sad.

    There’s also the risk of being bored, and lacking motivation or purpose. Some people love work, and they need that to fuel life. Rodd has been perfectly content in retirement, and he’s found plenty to occupy himself: getting a part-time job as a beer tour guide, volunteering, being on the apartment Strata committee, and organising our renovation. I used to think I would struggle more, being an extrovert, but I feel like the pandemic really changed my values quite a bit. I don’t necessarily feel like I need to be up on stage anymore to feel fulfilled. I have a long list of projects to do at home, and so far I’m enjoying doing them.

    You may also experience pushback from family and friends when you tell them you’re retiring. Most folks have been lovely, wishing us well or indicating that they wished they could retire too. But we’ve also run into a couple folks who just could not get their head around it—some come from a culture where you work until you’re 70 to take care of your parents and family. Others don’t understand not wanting to make as much money as possible, forever. They thought we were making a huge mistake. Not much you can do there.

    And lastly, retirement shows you how much of the world is organised around work. We flew in from overseas in September and I had to fill out Australia’s Incoming Passenger Card. And right away I hit that field that says Occupation. What do I write there now?! (I went with Consultant. That always feels safe.) Whenever you meet new people, they always ask you what you do for a living. If you register for any tech events, it’ll ask you your company and job title. And of course, it can get awkward when your friends and family have work problems or get laid off. You want to support them but worry that you’ll be annoying or they think you won’t be able to relate.

    Just stuff to think about.

    Eff-Off Money - slide 24

    Time to sum it all up. I talked about Financial Independence, and how it can give you agility no matter what your ultimate goals are. To get there, you need to first understand your spending. That means you need to start Tracking today, if you aren’t already. Once you’re Tracking you can start Budgeting, and actually being proactive with your hard-earned dollars. We talked about the Balanced Money Formula, and how ultimately FI comes down to saving as much of your income as you can. Once you’ve accumulated some savings, you need to put it to work through Investing in income-producing assets. And ultimately, if you want you can work towards early Retirement, where you can quit your job and live off your retirement savings, assuming you’ve hit your FIRE goals.

    Thanks!

    Eff-Off Money - slide 25


  • Smart, Sensational, Sun-Protecting (S3) Bucket Hats for Dementia Australia

    As you probably know if you’ve followed this blog or any of my social media accounts, back in 2018 I worked for Amazon Web Services and I had the idea to sew myself an AWS dress to wear to tech events around the world. It was so popular, my colleagues even made t-shirts and stickers! In 2023 I raised the bar with the AWS dress v2, which had matching sneakers.

    As of 2024 though, I’m retired and it seems a bit silly to hang on to these dresses. Why not turn them into something fun and raise money for an important cause? So the dresses have become 14 Smart, Sensational, Sun-Protecting (S3) Bucket Hats, and you can win one by donating to this fundraiser.

    Dementia is a terrible disease that has affected our family in recent years. It really, really sucks to watch someone you know and love just change and disappear. I’d like to help other families going through this, and hopefully even work towards a cure.

    To do that I need your help! Please make a donation to support my efforts and help me reach my goal to beat dementia. You can donate through:

    1. My Facebook fundraising page
    2. My standalone Dementia Australia fundraising page
    3. Or if neither of those options work for you, feel free to donate to a dementia-related charity in your own country*.

    All funds raised (through channels 1 and 2 above) will support the work of Dementia Australia to provide vital support services for people living with dementia, their families and carers. These services include counselling, support groups, education and training.

    For every $25 AUD* you donate, you’ll get one entry into a raffle for one of the 14 hats. I will draw the winners at random on November 1st, 2024, and I will cover postage anywhere in the world. Please make sure you are contactable if you win! You can donate as many times as you’d like but you can only win one hat, and you don’t get to choose which one you get. (They’re all the same size anyway.)

    * If you donate via option 3, please email me a screenshot of your donation and I will ensure you are entered into the draw. You’ll get 1 entry for the equivalent of $25 AUD in your own currency.

    Disclaimers: Obviously I don’t work for AWS anymore, and I don’t claim ownership over their logo or any of their service icons. The hats were made by me from the dresses I wore as part of my employment for AWS, and I won’t ever be making any more. If I can’t contact you within a week, I reserve the right to draw a new name and send the hat to somebody else.

    Thank you for your support.

    PS for the sewists: if you’re curious about the pattern I used you can download it for free here! Each hat is fully lined, which means I actually had to sew 28 hats (30 if you count the prototype I made). 😅


  • Palia on Mac

    I’ve been casually playing Palia on my Switch for the past couple months. I’d heard it described as a “cozy” game, and I’m all about the cozy. You are a human in a fantasy realm, and you build a little house and farm. You hunt; you craft things; you cook food; you go fishing. There are some quests and puzzles along the way, but you don’t have to do those if you don’t want to. Nothing attacks you, and if you do manage to kill yourself (like by falling into deep water) it just resets you right nearby with no damage. I’m enjoying it.

    Playing on the Switch has some downsides though. Eventually I noticed that in the chat, other players were sharing where special items could be found. But typing messages with a game controller is painful. It seemed like most other people were probably playing on their PCs. But I don’t have a PC. I have a Mac mini, and Palia doesn’t have a Mac client yet.

    Palia on Mac launcherBUT! Apparently this is no longer a problem these days? I found some Reddit posts where people mentioned getting it to work on Mac using Whisky, which seemed doable. Then I found this Palia on Mac launcher that handles a lot of the setup for you. I kicked it off and installed Whisky, and followed the steps to setup a “bottle.” First problem: my bottle disappeared. I’m not sure what the issue was, but I tried it several times and they’d just vanish (but I could see the folders in the Finder). Eventually I reinstalled Whisky directly (rather than going through the launcher), and I went into the Finder and deleted the extra bottles. Suddenly my original one appeared. Yay! Then I went back to the launcher to finish the setup and download the game files. Second problem: the downloads would seem to hang with, like, no visual feedback what was happening. It looked like other folks on Reddit had similar issues, and that the key was just to keep restarting the launcher and it would continue where it left off. After leaving it alone for an hour or so today, it managed to get everything and the “Run” button appeared!

    Palia on Mac

    The game looks fantastic compared to the Switch. Mac mini is a lot more powerful, obviously! I was prepared for some glitchiness, but it was really minimal. I had one crash, but otherwise everything worked really smoothly. Rodd suggested I change it to play in a window rather than full screen, as on my wide monitor it was actually making me motion sick. But I’m going to just try to get used to it, because it looks so gorgeous.

    At first I tried playing with keyboard and mouse, which took some getting used to. I just don’t have the muscle memory yet. I could see that it was really great for some things – choosing stuff from your inventory, moving around the map, chatting to other players – but for other things it felt a bit awkward. And fishing sucked – there was so much lag that I lost every fish I hooked. Eventually I hooked up a Bluetooth controller, and that gives the best of both worlds. I can run around and catch fish, but also easily switch over to the keyboard for tasks that need it.

    Anyway, if you want to try it out, you can use my “Refer a friend” code and I might get some in-game swag for it. The game is free to play, but apparently you can use real money to buy, like, funky outfits and stuff. (You don’t need to though; I haven’t paid a cent!) Let me know if you start and I’ll friend you in there!


  • duckyPadWhen I handed back my work laptop a few months ago, it occurred to me that I needed a new computer. My 2015 MacBook Air is still going strong but it’s many, many years old, and I knew it would struggle with streaming or playing games. So off I went and merrily started pricing new MacBooks when I suddenly wondered… maybe I don’t actually need a laptop?!  It was a strange feeling. But I’ve got the Air and an iPad, and it’s not like I need to do work on the road. So I ended up choosing a Mac mini M2 Pro, and so far I’m really happy* with it.

    I realised today though that I needed to update my duckyPad. Many of my shortcuts were related to work and therefore obsolete, and I also noticed that a few macros weren’t working anymore. So I downloaded the latest Mac ARM Configurator app and fired it up. Unfortunately it failed to connect to the duckyPad. Hmmm. I went through the troubleshooting and added some permissions, but that didn’t fix it. I also dug around in the official Discord to see if anybody had similar issues. I figured maybe there was some issue with the latest Macs, so my next approach was to plug it into the old MacBook Air, which still had an old version of the Configurator on it. That’s when I remembered that with the old version, you didn’t connect to the duckyPad directly but instead used an SD card reader. D’oh! As soon as I did that, it told me that my firmware was out-of-date. Makes sense.

    I went back to the Mac mini and followed the instructions for updating the firmware, which included using Brew to install a utility. That worked perfectly and I was able to then flash the firmware, and as soon as that happened I was able to directly talk to the duckyPad. Brilliant! I was able to remove all the old work macros, set up some new ones, and fix the old ones. (It turns out that I was using “HOLD” in some of them, which has since been replaced by “EMUK.”) The only challenge is that the Configurator is oddly unresponsive when you’re editing. I had to often click multiple times to get it to register or to change focus. Not sure why that is. It works; it’s just super super slow. When I was done, I hit “Save” and the new config was written to the pad.

    And incidentally – there’s a new duckyPad Pro coming! It’s got more keys, and knobs. I don’t really need it, but it looks cool.

    * My only complaint about the Mac mini is that without a Mac laptop or keyboard, I don’t have Touch ID. That gets really annoying when typing my long master password into Strongbox. I’ve seen a few folks though that have hacked a standalone Touch ID button though… A project for another time. 🙂


  • This word means the tendency to forget names. This is something I’ve struggled with a LOT in recent years. I’m not sure what the cause is: the fact that my jobs at YOW and AWS meant meeting so many people? Did I get long Covid? Or is it one of the many joys of perimenopause? Or maybe it’s just getting older… At any rate, it’s incredibly frustrating to be able to picture someone or something, to know you know the name, and just not be able to grasp it.


  • I’ve been on a real gaming tear this year. Back in January I wrote about Dave the Diver and Unpacking, and I thought I’d mention a few more Nintendo Switch games that I’ve been playing lately and really enjoyed:

    • Yoku’s Island Express – Rodd found this one recommended on Reddit for people who like no-stress platformers. You play a little bug postman who pushes a ball around an island, and it’s like a platformer crossed with pinball, two things I LOVE. The artwork and world building is really cool too.
    • Steamworld Dig 2 – Another fun platformer where you play a little robot exploring a (mostly) underground world, digging minerals and trying to solve a mystery. There were one or two places were I got stuck and had to look up how to solve something, but I managed to defeat the end boss today all on my own. Good times!
    • Palia – Anybody else playing this? I literally just rolled a character tonight. I’ve heard good things about it…

    We also spent some time playing Breath of the Wild (a friend lent it to me) and I can see why it won so many awards. It just wasn’t for me, though. I struggled with all the different mechanics, and every time I picked it up I had to relearn how to do everything. There was just too much. I like something a bit more casual and low stress. If you’ve got recommendations, please share them!