• Darlow Pants

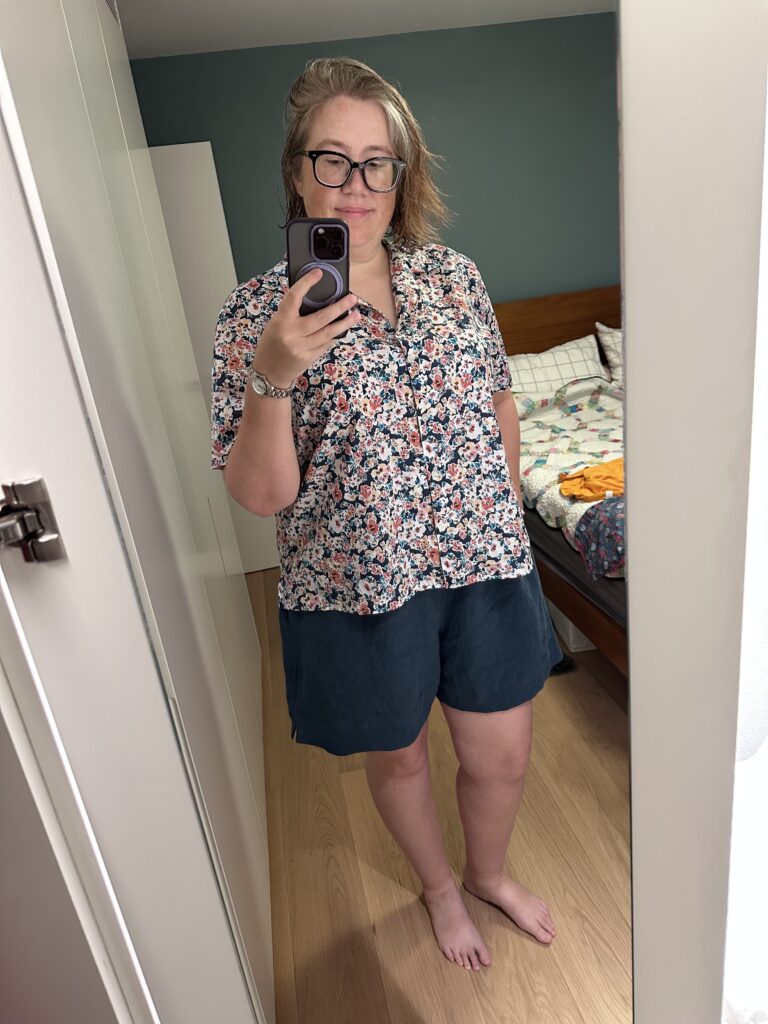
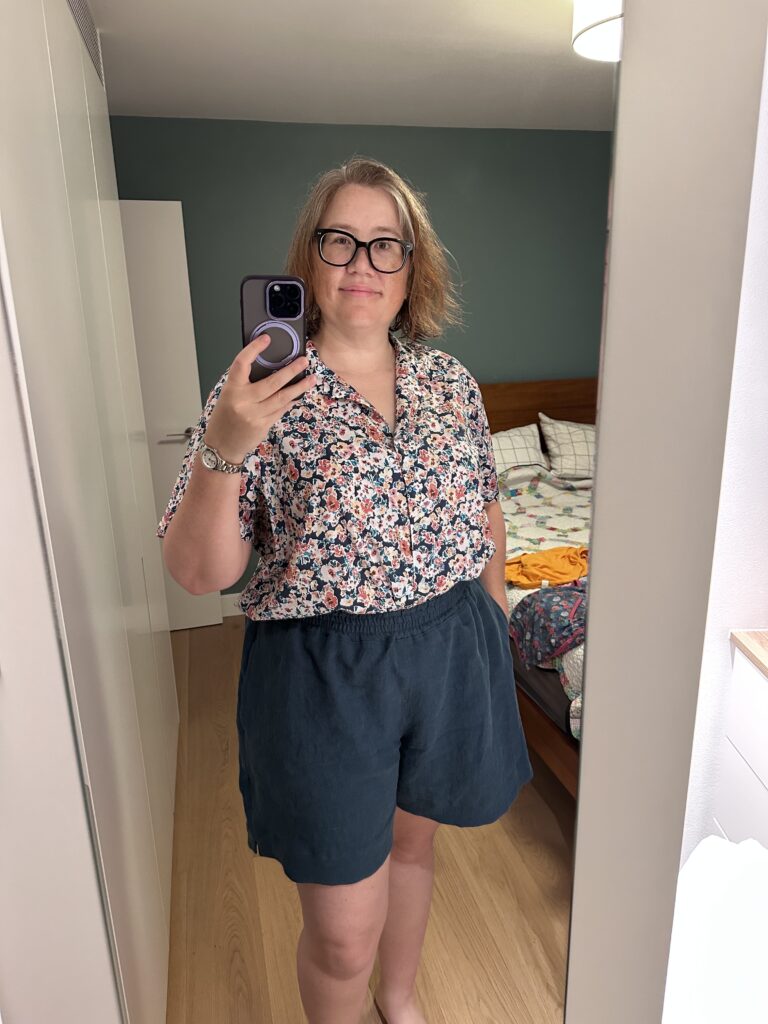
    I sewed pants! 👖

    For a really long time, trousers have been my Mount Everest as a sewist. I’ve sewed lots of dresses, shirts, and even shorts, but never a pair of actual trousers. I made a valiant but cursed attempt last year at a muslin for the Moji pants by Seamwork before accepting that a drawstring waist was never going to work with my shape…

    Then a few months back I started to see the Darlow pants from In the Folds popping up in my Instagram feed. “No way,” I thought. Those curving seams?! These aren’t straight up-and-down pants; they have multiple curvy pieces that swoop around the legs and create volume. It seemed like jumping several levels of difficulty. The style was also slouchier and baggier than what I normally wear. But then I clicked on the #darlowpants hashtag, and I was able to see them on different body types and in different materials, and I started to think, “…maybe??”

    I bought the pattern. Back in Australia I’d purchased several meters of a soft drill-type fabric for future pants — I never remember to write down the fabric I buy — and I’d shipped it all the way here. It seemed a shame to let it go to waste. Why not give it a go?

    I decided to go with View B, which is the less voluminous version and has less pattern pieces. I cut a straight Size I and printed out all the pattern pieces and assembled. Just as I was about to lay out my fabric for cutting, I realised there was one crucial modification I needed to make right from the start – lengthening the legs! The pattern is drafted for someone 5’7”, and I’m 5’10”. So I added three inches at all of the length/shorten lines. This isn’t as straightforward as on normal pants, as the curving lines mean you have to redraw some curves and then “walk the seams” to ensure they still line up. (Thankfully the designer has provided a Fit Kit which walks you through several common modifications.)

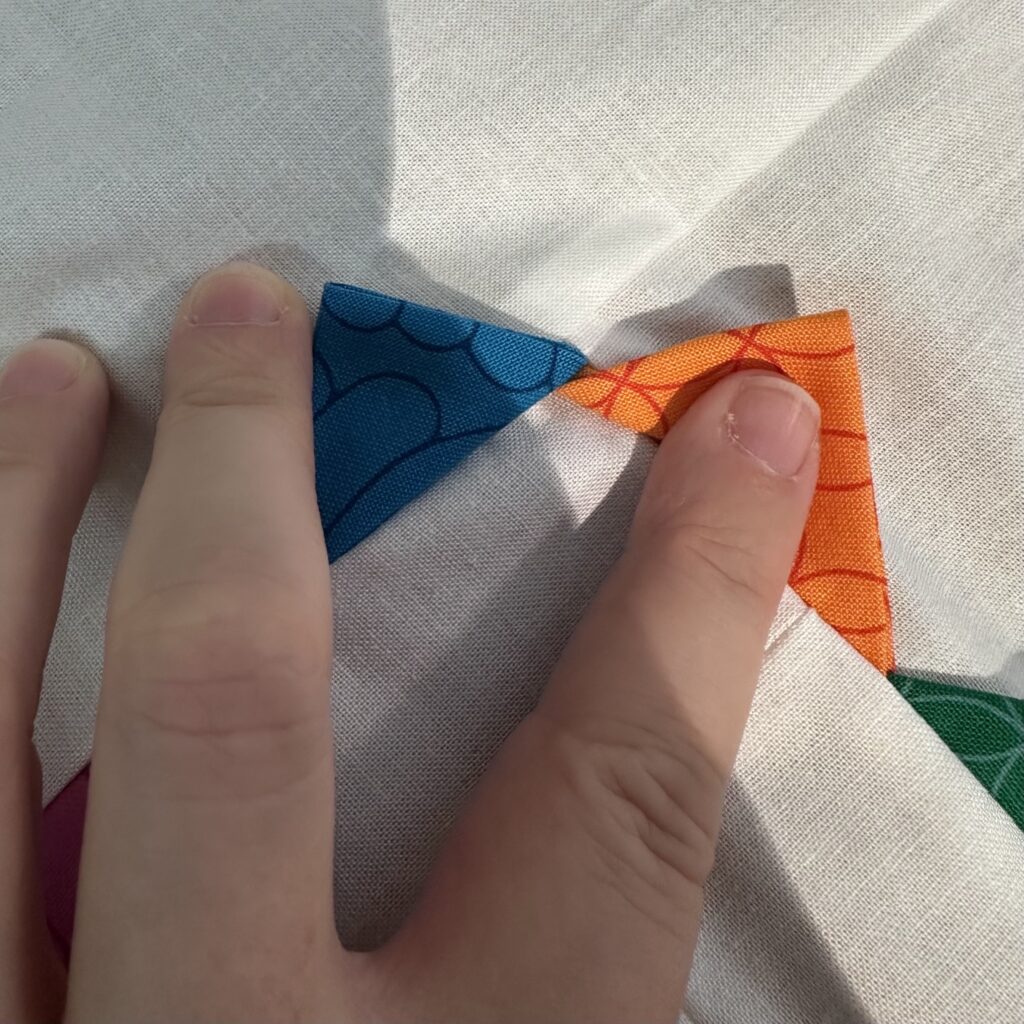
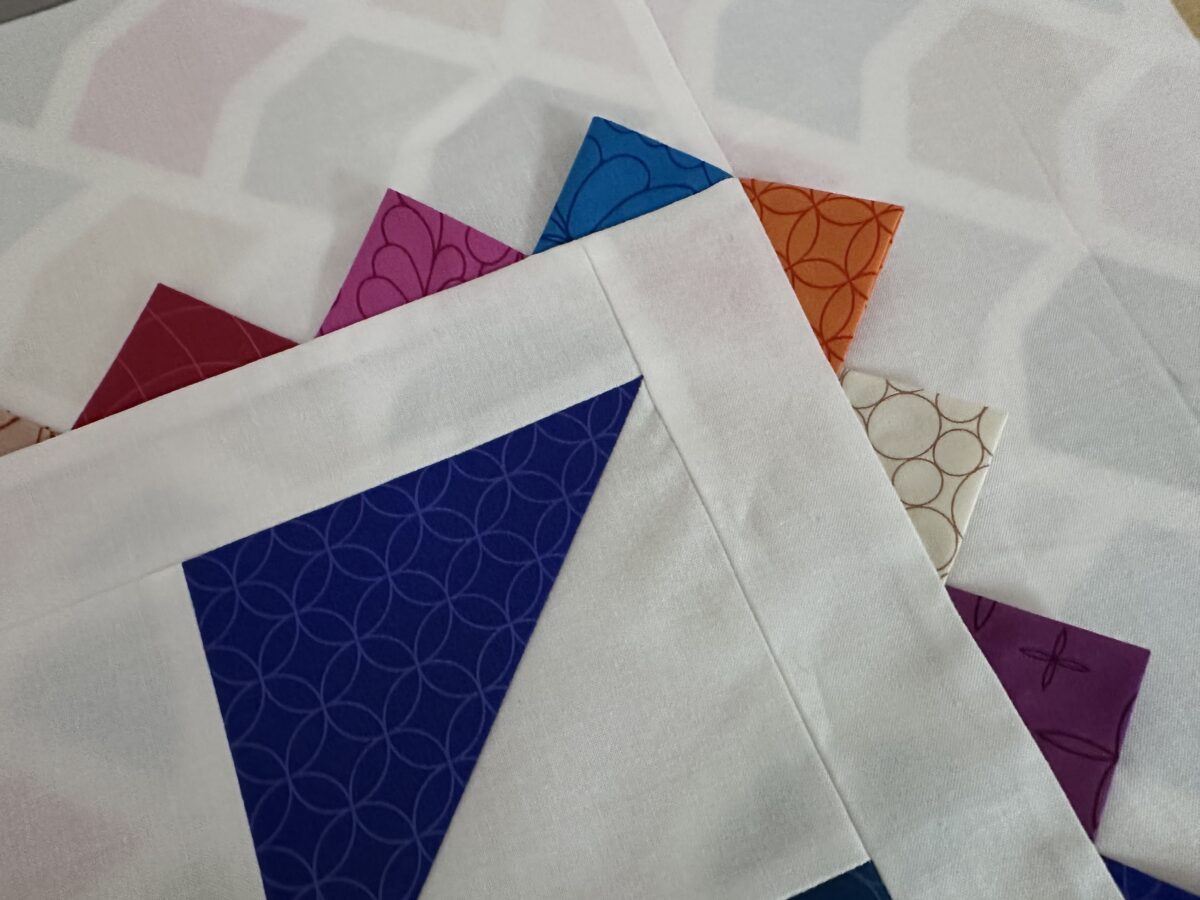
    Finally it was time to cut the fabric and start sewing! The first thing you assemble are the back panels, and I had a lot of fun using my special overlocker foot and stitch to finish the raw edges. Once the panels are sewn, you then create the rear welt pockets. I decided to make them a design feature by using some scraps of paisley fabric. The pattern instructions are pretty straightforward and suggest several places where you should hand-baste just to keep everything all lined up. Everything went well until I got to Step 23, when I got confused and just couldn’t figure out how to secure the welt. I ended up emailing the designer, who helpfully sent me a video that explained everything. The key is that Piece 17 (the pocket lining) needs to be folded up under the back panel and out of the way for Step 23. Then you’re meant to fold the welt on Piece 18 and then sew along it. If you look at the photo here, you can just see a line of white stitching at the bottom of each welt. That’s where I did it WRONG. Mine isn’t securing anything; it’s actually meant to go through both layers of the paisley fabric. Oh well – I’ll get it right on the next pair! (Note: the bodgy red stitching along the top is just hand-basting to keep the pocket flat while you assemble the rest of the pants.)

    Welt Pockets

    The rest of the pants assembly was pretty easy – even those big curvy bits! – and you end up inserting nice deep pockets into the side seams. Then it was time to insert the zip. I’ve sewn zippers before, but only side-seam ones. I decided that I really wanted a quality metal zip rather than futzing about with crappy nylon ones. I made a pilgrimage to a local haberdasher – which was amazing – and got everything I needed. I was nervous about inserting it, but the instructions were great and again had you baste things together to keep everything lined up. And guess what? IT LOOKS LIKE A REAL PROFESSIONAL ZIP!

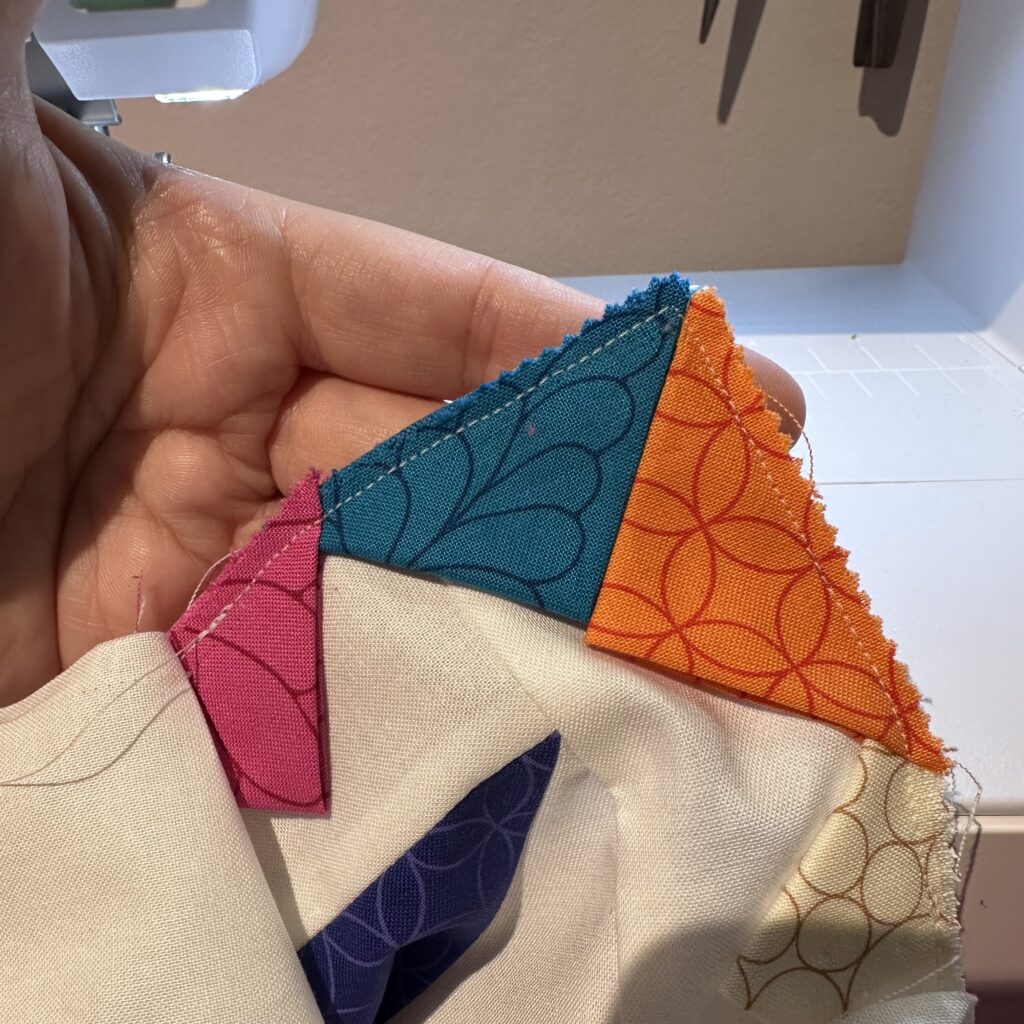
    The waistband assembly was pretty simple. You have the option of binding the inside edge with bias binding or enclosing it within the waistband. I had some leftover binding from a previous project so I went with that, and it actually makes it look really nice. Then I just needed to add a buttonhole, sew on a button, and also sew on a trouser hook for the tab. Here’s what it looks like on the inside…

    Inside out waist

    And here are the welt pockets from the inside as well.

    Welt Pockets

    The final step was to finish and sew on the hem facings to the legs. And then they were DONE!

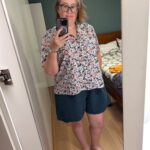
    As a wearable muslin, I’m pretty happy with these! I think the three inches I added to the length was just right. There are definitely some fitting issues remaining though. You can’t tell in the photo, but I think I actually need to go down a size in the waist (but leave the size through the hip) – they’re actually quite loose around my middle. (And since there are no belt loops, you can’t really cinch it up.) I also think I need to add a bit more room to the seat, possibly by extending the back crotch point. But still – entirely wearable PANTS! I’m looking forward to making the next pair even better. 🙂


  • Wolfie! A Trip to Salzburg

    It’s summer in Deutschland, and now that we’ve had our first vaccine shot, we feel a bit more comfortable travelling again. Two weeks ago we headed out of Munich for the first time since the Zugspitze last year. And where did we go? Salzburg, Austria.

    On the trainWe actually started the day with a Covid Schnelltest at our local shopping center. Austria has lifted a lot of its restrictions, but we knew that it was important to have a negative test result. By the time we got to the Hauptbahnhof (central train station) 20min later, the results were in our email inboxes. Protip: Bavaria offers a special discount ticket called the Bayern Ticket, which lets you ride regional trains and most public transport through Bavaria. It also gets you to Salzburg, which is about two hours from Munich. The weather forecast was for clouds, but it was a beautiful sunny day as we headed southeast towards the mountains, whizzing through idyllic German villages and rolling green fields…

    First glimpse of SalzburgWe crossed the Salzach River and got our first glimpse of the Festung Hohensalzburg (“High Salzburg Fortress”) atop the Festungsberg as we pulled into our destination. I had planned some activities based on this blog post, including booking tickets up to the castle. We had a few hours to kill though, so we started by walking to the Altstadt along the river. We crossed over at the Marko-Feingold-Steg, a pedestrian bridge decorated by visitors with thousands of padlocks.

    Snookums on the Marko-Feingold-StegWe headed to Getreidegasse (“Grain Lane”), a busy shopping street in the heart of the old town. It’s narrow and historic and super charming, even despite the fact that many of the shops were the same as you’d see in any major city. It was also surprisingly busy, and I found myself feeling a little wary of all the unmasked folks! (It’s been a long lockdown. 🙁)

    GetreidegasseIt was lunchtime and we were hungry, so we headed to the Zipfer Bierhaus. We got a table out the back in University Square and enjoyed a couple plates of sausages along with some local Austrian brew…

    Zipfer BierhausOur next stop was back on Getreidegasse – Mozarts Geburtshaus (Mozart’s birthplace). It was fairly empty at the time, and we enjoyed wandering the rooms and  learning a bit more about his life and his family. Did you know that Mozart’s sister Maria Anna (nicknamed “Nannerl” by the family) was also a musical child prodigy, but because she was a girl, she eventually had to stop touring and performing? (I found myself feeling so angry on her behalf.) I was also surprised to see that pianos in Mozart’s day had the black and white keys reversed!

    Mozarts GeburtshausWe ended the tour in the gift shop, of course, where I bought a cool lenticular magnet to add to our collection. They had a TV set up showing scenes from Amadeus, and I confessed to the Snook that I’d never seen it. That was going to have to be rectified, I decided…

    Mozarts GeburtshausAnd then it was time to head up to the fortress! We caught the Festungsbahn (funicular) up to the top and were greeted with stunning views across the city to the mountains beyond.

    View from Festung HohensalzburgThe day was turning out pretty hot, so we headed into the Zeughaus (Armory) Museum to cool off and learn about medieval weaponry. They had a lot of interactive exhibits, including a kiosk where you could picture yourself as a knight. The Snook also enjoyed creating virtual gunpowder and seeing how far he could fire a cannon.

    The real highlight of the Festung is the view over the city. How stunning is this? This is why we came to Europe. ❤️

    Me and Snookums It really was quite hot though. 😅 We were also getting tired from all the walking so we caught a quick rest in the shade.

    Catching some shadeOur tickets also included access to the Prince’s Chambers, the richly appointed staterooms installed by Prince-Archbishop Leonhard von Keutschach. My favourite part was the Golden Hall, with its 17m-long beam, carved columns, and decorated ceiling.

    Golden HallAnd from every window, an amazing view…

    MountainsWe were really flagging by this point, so we caught the funicular back down to the Altstadt. In need of refreshment, we headed to the nearby Stiegl-Keller where I was delighted to sample their Grapefruit Radler in the rooftop biergarten. What a way to end the day!

    Stiegl-KellerWe walked back to the Hauptbahnhof and caught the return train to Munich, exhausted and happy. What a perfect day! Can’t wait to do more exploring over the next few months…

    OH! And the first thing we did back in Munich? Watch Amadeus, of course. I loved it. ❤️


  • duckyPad

    I’ve been a Twitch streamer for six months now. Isn’t that weird? I’ve noticed that a lot of the really fancy streamers use an elgato Stream Deck as part of their setup. This is essentially a “macropad” – a little programmable keyboard that you can set up so that clicking a button kicks off a series of actions. People use them for adding sounds and graphics to their streams, replying to comments, even controlling lighting and cameras. They’re not cheap though, and as much as I coveted one, I didn’t think I’d use it enough to justify the expense.

    Then somehow I found out about the duckyPad. This is an Open Source “do-it-yourself” mechanical macropad, and all up the components come to about half the cost of the Stream Deck. It has a very simple little scripting language you use to program each key, and it has a little screen that shows what each one does. You can have 32 different “profiles” (set of 15 keys), which means up to 480 different key actions. And it also lights up! I decided to order one and explore what I could do with it.

    Here’s what it looks like straight from the box if you order the standard components:

    duckyPad unassembled

    Putting it together was actually very simple following the instructions in the Assembly Guide. Man, those tiny 2mm standoffs are awfully small though, even for my hands! The only difficulty I had was getting the keyboard switches inserted. They required a little more pressure than I expected, and I was really paranoid that I’d break one or bend one of the pins. As it turns out, when I had the thing together and turned it on, one of the keys was indeed dead. I pulled it off and saw that, yep, I’d bent one of the pins flat. Luckily the Snook whipped out a pair of pliers and managed to straighten it out, and once reinserted it worked fine. So yeah, the instructions say over and over to be careful for bent pins, and now I understand why!

    duckyPad

    The duckyPad comes pre-programmed with a couple different profiles, but most of them were Windows-specific. I installed the Configurator app and used the provided USB card reader to plug in the SD card. Then I was able to start creating new profiles and scripts.

    duckyPad configurator

    The duckyPad is literally just sending off key presses, just like you’re typing on your normal keyboard. So anything you can do via keyboard shortcut, you can trigger with the duckyPad. The critical thing for Mac users is invoking Spotlight with “COMMAND SPACE”. That’s what you use to open apps and change focus. I also found that often the duckyPad is too fast and I needed to insert a DELAY before subsequent key presses (like between opening the browser and typing in a URL).

    One annoyance is that some apps’ keyboard shortcuts only work while the app is in focus. If you’re using Windows, there’s an “Auto-switcher app” that will automatically switch profiles based on which app is foregrounded. There’s currently no Mac version (someone is working on it), so I’ve found it helpful to have a dedicated key that switches focus back to the desired app (especially when presenting or streaming).

    I’ve spent a few weeks now tweaking and refining my setup, and I keep finding new things to automate. With some of these, I just cannot remember the keyboard shortcut so having a button helps. With others, I’m finding that I already have the muscle memory for the keyboard shortcut so I may not need the macro. The ones that get the most use by far are volume control (much better than the stupid Touchbar on my Mac) and the “mute” shortcut (used to invoke Mutify and turn on/off my microphone), so I’ve reproduced those as the bottom row of keys across multiple profiles.  But read on to see what I’ve got so far…

    And if you have any suggestions for things to add, please let me know!

    (more…)


  • My first ever GPS art!

    The AWS Summit EMEA is coming up next week, and a few of my colleagues created funny videos to drum up excitement. Seb documented his preparations…

    As did Darko, but a bit more retro. 🙂

    https://twitter.com/darkosubotica/status/1392165193753448456

    Isa did a super cute one with her pupper Jago, a “Solutions Barkitecht”. 😂

    https://twitter.com/isahuerga/status/1395301974317338625

    My first impulse was to do something similar for mine, but of course include myself surrounded by knitting projects. But the more I thought about it, the more boring that felt. I knew I really needed to raise the level of creativity.

    Teaser video plan

    And then I had a flash of inspiration – GPS art! This is where you run/walk/cycle a particular path and the GPS path in your tracking app draws a picture. What if I could cycle my way across the AWS logo?? I immediately started searching for an app, hoping there was a way to automatically plan out a route. But guess what? Tech has not cracked this particular problem yet. My only option was to do it the hard way.

    I opened up Google Maps and realised immediately I was going to have a problem. Munich is an old city, and it doesn’t have a nice rectangular grid for its streets. It’s also got the Altstadt (the medieval city center) and a river running right through it, all of which really limited my options. I decided to focus on looking for something suitable for the smile part. It probably took me half an hour to find a nice big curving bit to the south-east. I used the drawing tools in Google’s “My Maps” to draw on the map and plot out the rest of the logo. Not too bad! All I needed then was to join it up into an actual cycling map that I could follow.

    For that I used Strava, which I’ve been using to track my cycling for a few years. It has a feature where you can create your own Routes and it will help plot out the path. I ended up creating it as a “walking” route because that gave me finer-grained control over which streets I could take. (When you select “cycling,” it will push you towards cycleways – which is normally great, but for this I was willing to forego that.) It turns out this caused me one slight issue, which I’ll get to shortly. But pretty quickly I had my route, as well as an estimated distance – 21.8km. Yikes! And that didn’t even include getting from the start/finish to my house. I knew this was going to take me a couple hours to complete.

    On the day of the ride, I had the Snook film me getting ready. I filled up my hydration backpack and wore my new padded cycling pants. Then I was off! I have a mount for my iPhone on the handlebars, which allows me to easily see the map as well as film footage of both the road and my face as I’m riding. Everything went pretty well, until…

    Yeah. My route had me turning left… onto that bridge way above my head. There were stairs, but at that point I was in no state to drag my bike up there. This is the downside to using a walking route! So I had to improvise a bit, going down a side-street and walking my bike along a path to get back onto the route.

    The only other mishap was a wrong turn at the base of the second point on the “w”, which I thankfully caught quickly. Unfortunately Strava doesn’t allow you to remove points afterwards, but it was small enough that it doesn’t really detract. On the upside, I also discovered that when you “pause” tracking on Strava and then “un-pause,” it will draw a straight line between those points. I realised I could use this strategically to create diagonals and smooth out some of the rougher bits along the “s”.

    As I got back to the house, I messaged the Snook to come out and meet me so he could film one final bit of me arriving and saying “I’m getting ready for the AWS Summit. Are you?” I was pretty puffed at that point, and the hydration pack was completely empty. 😅

    So here’s the final cycling workout!

    Then I used iMovie to cut together all the footage I’d created, along with a final screenshot of the map. I was really pleased with it and sent it to a few folks. One of them loved it and was really enthusiastic, but the other reactions were muted. It was only when I probed them further that I realised they didn’t get it! They weren’t seeing the logo at all. Once I pointed it out they could see it, but without that context it just looked like I was riding around Munich aimlessly for no reason. 😂 So I had to do a lot of explaining, including for the lovely marketing folks who cut together the final version with music and graphics.

    Anyway, here it is! My first ever attempt at GPS art. And if you’d like to attend the AWS Summit next week (it’s free!), you can register here: https://amzn.to/3fbS1wA.


  • Geimpft!

    The Corona situation has been improving in Germany, mainly because the vaccination rate has been steadily increasing. Supply seems to have increased and we even hit 1M vaccinations in a single day! Here in Bavaria the situation is even better. While the big Immunisation Centers are still adhering to strict prioritisation, the local government recently announced that GPs could administer the vaccine regardless of priority groups. We’re at about 40% of the population with one shot, and 13% fully immunised. And thankfully, the Snook and I can now count ourselves among that 40%!

    We were able to get appointments at MVZ Laim through the Doctolib app. The Snook had seen on Reddit that some folks were managing to get appointments there, and he started checking the app periodically. When appointments appeared for Saturday, he jumped on it. Then we debated whether to go through with it or cancel. MVZ were only offering AstraZeneca with a 12-week wait for the second shot (putting us into August for full immunisation). If we cancelled and got an mRNA vaccine, we’d be able to get the second shot sooner. Ultimately we decided it was better to have some protection now rather than risk waiting any longer.

    At MVZ there was a steady stream of people in for their vaccinations. We checked in and were happy to find that the staff swiftly switched to English once they heard our accents. We were asked if we’d brought our safety waivers (acknowledging the risk of the AZ shot), which we had. Then we were directed into a waiting room. After a few minutes, the doctor called Rodd but realised we were together and brought me in as well. We had forgotten to bring our “Impfung Ausweis” (vaccination card), which is a little yellow book where your doctor records all your vaccinations. He instead gave us a form that recorded our first shots and made us promise to bring the Ausweis next time. Then he swiftly gave us the shots in our left arms and directed us to another waiting room for 15 minutes in case we had any adverse reactions. Then we were allowed to head home.

    I honestly teared up a bit when he gave me the shot. I haven’t been particularly worried about myself through the pandemic; it was more the thought of how much human ingenuity and hard work and sacrifice had gone into this massive effort around the world. SCIENCE, YEAH! Humanity is amazing. ❤️

    For that first day, I didn’t really have any side effects other than perhaps a mild headache. By the evening though, the Snook was responding as he does to any viral infection: fever and chills to the point of teeth chattering. During the night my usual response kicked in, with a fever, muscle aches, and my arm getting very sore. We both spent the next day resting and hydrating. Now on Day 2 we’re feeling better, but both of us still have slightly elevated temperatures. Our arms are still sore.

    Still worth it.


  • Let’s make Flammkuchen!

    A German dish that we really enjoy is Flammkuchen, which is essentially an Alsatian pizza. It’s a common thing you can buy in Biergartens, but you can also make it at home pretty easily!

    Flammkuchen ingredients

    Here are the ingredients you need: pre-made Flammkuchen dough (or you can make your own using this recipe), pesto, crème fraîche, mozzarella, cherry tomatoes, and beer. (Well, actually the beer is just for the chef! 🍺)

    Crème fraîche and pesto

    The first step is to mix up the crème fraîche and pesto in a bowl…

    Flammkuchen dough

    Here’s the flammkuchen dough unrolled out on the baking tray. It’s rectangular, but you can also make them circular if you’re making your own. The dough comes on baking paper, so you can just bake it right on that.

    Flammkuchen dough with sauce

    Then you spread the crème fraîche and pesto all over the dough.

    Adding cheese

    Next you add the mozzarella. The one I like comes in a single lump and I just tear it up and scatter it around.

    Cherry tomatoes

    Lastly, you add the cherry tomatoes and then season with salt and pepper. Obviously you could put other ingredients on there too – little bacon lardons are pretty popular! Then the whole thing goes in a hot oven for like 15 minutes.

    Flammkuchen

    And here’s the finished Flammkuchen! 🍕🍺


  • April Cycling Update

    We were still getting snow flurries at the start of April, but as the weeks went by the weather finally started to warm up. I decided it was time to get my butt in gear and make up some ground towards my cycling goal.

    On Easter Sunday I went for  16.7km (10.4mi) ride to the Englischer Garten and back home along the Isar.


    There were so many people in the park for the holiday. I was delighted to pass a little old guy playing the accordion and managed to record a bit as I passed…

    https://twitter.com/web_goddess/status/1378736763829620745?s=20

    I don’t think I’ll ever get tired of the blues and greens of Germany. It’s such a different landscape to back home in Australia! I found this public artwork along the Isar that was a bit of a platform sticking out over the river that you could venture inside.

    A few weeks later I went on another long 20km ride to Olympiapark. The Snook and I had ridden there last November, but this was my first time venturing on my own.

    I really like the particular style they used for the structures at the park. Wikipedia says, “The eye-catching tensile structure that covers much of the park was designed by German architect and engineer Frei Otto with Günther Behnisch.” Nice job Frei and Günther!

    Olympic Stadium

    I also made a point of visiting the Memorial to the 1972 Olympic Games Massacre. To my surprise, the memorial was only formally opened four years ago in 2017. Unfortunately it appeared to be under renovation, and I couldn’t get any closer than this. The Jewish Museum of Munich has a nice depiction of what it normally looks like

    Memorial

    I left Olympia Park and rode past BMW World, which is evidently the most visited tourist attraction in all of Bavaria. Then I rode through Luitpold Park, which features another giant “hill” created by rubble piled up from WWII bombing attacks on the city. Looks like it would be great for sledding down in winter! I stopped for a photo by the obelisk at one end of the park.

    A couple days later I did a quick 10km loop along the Isar and back…

    The highlight was crossing the Thalkirchner Brücke on the way home and discovering the local kayak club out practicing!

    Last weekend I finally gave in and started my Strava subscription trial, which gave me access to routes other people have added. One of them looked pretty fun, a big loop around Nymphenburg Palace and through some suburbs that were new to me. It ended up being another 20km ride!

    We went to Nymphenburg Palace last September but just explored the gardens. This route took me way around the back side of the grounds along the palace wall. Here I am crossing the canal on a little bridge, and you can just see the Palace way, way off in the distance!

    Nymphenburg Palace in the distance

    I’ve been experimenting with taking some photos while I’m riding. My iPhone mount works fine pointing up, but it does cover a little bit of the camera lens when looking forward. Still, you can see the castle wall there and lots of other people out enjoying the sun.

    While riding back through the city towards home, I was delighted to see an honest-to-goodness Goggomobil pass me. The thing looked like a museum piece! Fortunately it got stuck at a stoplight so I was able to pull over and take a quick selfie for the Snook…

    Goggomobil

    Can you tell it was a warm day? I took a bottle of water with me (that’s why I’m wearing a backpack), but I actually finished it long before I got home. I realised that hydration was definitely going to be a limiting factor on these rides, so I ordered myself a backpack with water bladder off Amazon.de.

    Hydration backpack

    This baby holds 2 liters and has a nozzle that clips over my shoulder, so I don’t even have to stop. I was excited to try it out on my longest ride yet. The Snook had told me recently about Komoot, which is another site where you can find recommended riding, running, and hiking routes. I found a route, filled up my backpack, and headed out today for a 30km ride…

    The weather was cool and cloudy, but there wasn’t any rain forecast until the evening so I figured I’d better get out there. I first rode back to Nymphenburg but then turned northwest and meandered through Durchblickpark. “Durchblick” refers to a glance or a view, and apparently the park is so named because you’d have originally been able to see all the way across it from Nymphenburg Palace to my first destination – Schloß Blutenburg, a nearly 600-year-old castle on the banks of the river Würm.

    Durchblickpark

    See? You can just spot the castle a looooong way in the distance. Eventually I got there and parked my bike so I could look around. The courtyard was open, and took some photos of the apple trees in bloom and the decorated chapel. There was a biergarten outside along the water that was open for takeaway, and there were families enjoying lunch among the flowers.

    I was only about a third of the way into my journey at that point, so I hopped back on my bike and continued along the Würm…

    Würm

    As with all German rivers, it’s charming AF.

    Soon I left the city behind – I literally passed the sign marking the borders of Munich! – and found myself riding through fields.

    Olympiaturm in the distance

    If you zoom way in, you can see the Olympiaturm way, way off in the distance!

    Pretty soon the fields started to smell strongly, and I wondered if they’d just been fertilised. But then I solved the mystery! We’d been wondering where all the organic food waste goes, and today I found it: a giant “Kompostwerk” just outside of town. (Speaking as someone who grew up in a rural area, I much prefer the smell of compost to manure!)

    Compost!

    My end destination – well, the point where I turned around to head home – was the Langwieder Lake District. I rode under the Autobahn and headed out along the narrow strip of land between the Langwieder See and the Lußsee, and eventually I came to a little pebbly “beach”. I stopped for a bit to drink some water, eat some trail mix, and send an update to the Snook. It’s a far cry from Aussie beaches, but it seems like it would be nice on a sunny day. I was surprised to learn just now that this whole area was man-made, and the lakes are actually dug out gravel pits from the building of various highways! I’ll have to bring the Snook back here one of these days…

    Beach at the Lußsee

    And then at last it was time to head home. My legs were feeling pretty tired, as was my bum. (Note to self: look into padded cycling shorts!) I also started to get nervous that my phone battery was going to run out, so I tried to keep the screen off most of the time. My feet and lower legs started to feel a little crampy too. When I was about 5km from the house, I realised I’d missed a turn to get into a cycling path and stopped to do a U-turn. As I slowed to turn and head back the other direction, I turned the wheel too far and was slow getting my foot under me, so… I stacked it! Fell right over. 😂 Only a few scratches, and of course my dented pride. It was bound to happen eventually.

    Stacked it!

    I was really running on fumes by the time I got back to our neighbourhood, and I was so tired I walked my bike up over the Donnersbergerbrücke. I definitely think I tested my limits today, both my fitness and my iPhone battery!

    Strava goal status

    So that’s the current goal status: 204km for the year, which is 127.4km behind where I need to be to hit 1000km for 2021. I racked up a lot of miles in April though, so if I can keep it up, I reckon I might be able to catch up by the time we get to Summer! 🚴‍♀️


  • Let’s make Rouladen!

    When you’re living the expat life, I don’t see a lot of point in only eating the things you did back home. If you didn’t want to try new things, what was the point of leaving in the first place? When I did a semester in London in college, I remember one girl would only eat from American fast food restaurants, and I was livid that she took a spot from someone that would have appreciated the experience more. I swore that would never be me. So when we got to Germany, I spent some time researching classic German dishes that we could try to recreate.

    Rouladen was one of the first*, and I’ve made them several times since. They’re rolled up beef parcels with bacon, onions, mustard, and pickles. Um, YUM. After my first attempt, I bought special Rouladennadeln, little metal skewers you can use to secure the rolls without having to tie them with string. I figured I’d document in case you’d like to try it yourself!

    Ingredients

    I’ve used a few different recipes I found online, but the most recent was this one from Edeka (our local supermarket). In addition to the beef (more of that in a second), the main ingredients are mustard, pickles, onions, sliced streaky bacon (I used this thin smoked ham), carrot, parsnip (or “parsley root”), leeks (I subbed in some very chunky green onions), and celery (mine is defrosting as the Snook likes to freeze pre-chopped baggies of it).

    Rouladen

    Here’s the beef itself. My understanding is that it’s slices of topside or silverside. Pretty much every German meat counter has a hunk of beef sitting there marked “Rouladen” and the butcher will happily slice off bits for you. My local store actually has pre-sliced bits wrapped up in cellophane, so I grabbed four of them. They were so large that I actually sliced them in half, into 8. If your slices are thick you can pound them thinner, but these were close enough to the recipe’s 0.5cm that I didn’t bother.

    Prepping the Rouladen

    You start by spreading some mustard on each of the pieces of beef, then sprinkling with salt and pepper. Then you layer on the bacon, onions, and pickle. Technically this recipe wants you to slice the onion, but I misread and minced mine as a previous recipe had had me do. I think I’ll try the slicing next time, as I’m guessing it’s easier to keep the onion inside when you roll them up. For the pickle I sliced each one into quarters. Another recipe also had me used thin carrot sticks too, but this one left them out.

    Rouladennaden

    Those are my Rouladennadeln (roulade needles). Fun, huh? Time to roll up the Rouladen.

    Rolled up Rouladen

    Look, I’m obviously not a 70-year-old Bavarian Grandmother who’s been doing this her whole life, but I’m pretty proud of this, okay? 😊 You can also tie them up with kitchen string, or use toothpicks to secure. (That’s what I did the first time, but it’s hard to keep the toothpicks from breaking.)

    Prepping veg

    Now to prep the veg. Everything is chopped up into little bits.

    Browning the Rouladen

    Now it’s time to brown the Rouladen in some oil. I used our cast-iron casserole, but you could also just use a big pot. I only did a few at a time and tried to let them get a nice bit of crust.

    Cooking the veg

    Once you’ve browned the meat and set it aside, you dump all the veg in the pot and cook it until it softens.

    Final ingredients

    You need a few final ingredients: tomato paste, red wine, and beef stock. You add the tomato paste to the veg and cook for a bit, then deglaze with the wine. Then you stir in the stock.

    Sauce

    Nice rich sauce for our Rouladen!

    Meat back in the pot

    The Rouladen go back into the pot, and the whole thing simmers with a lid on for 45-60 minutes at low heat.

    Cooking down the sauce

    When the Rouladen are done cooking, you pull them out and place them in the oven to keep warm. Then you strain the veg out of the sauce (and chuck it away!), and let it boil down a little to thicken.

    Adding butter

    And because “hey, why the hell not, we’re in Germany!”, you further thicken the sauce by whisking in 100g of cold butter cubes. Hells yeah.

    Finished Rouladen

    Now you can put the Rouladen back in the sauce before serving. I also pulled out the Rouladennadeln at this point.

    Rouladen

    And that’s it! Traditional German Rouladen.** We served it with steamed carrots and a bit of mashed potato (which had some leftover cabbage mixed in). Very tasty!

    * Funny story: I happily announced in a team meeting after my first attempt at this that I’d made “Rolladen” and everybody started laughing. Rolladen are… Venetian blinds. Yeah, don’t mix up the terms. 😂

    ** I’m sure this is one of those things where there are a million regional variations, so if you’re upset that mine didn’t adhere to your family’s tradition, send me a recipe and I’ll try yours out!


  • As always, I like to use the Oscar Contest as a way to try to learn something new. This year I decided to build it using AWS Amplify, a set of tools and services that can be used to quickly build and host mobile and web apps across a range of frameworks. I’ve somehow managed to avoid touching React, so I figured I might as well use that too. Here’s the basic architecture I went with:

    Contest architecture

    I figured it might be fun to walk you through the process I used in case you’d like to try something similar. The first step (if you haven’t already) is to install the AWS CLI and Amplify CLI and get them configured with your AWS account credentials. Then I created the basic React project using this command:

    npx create-react-app oscars2021

    That will download a bunch of stuff and set up the basic project files for you.

    You can then switch into that directory and start the app to verify it’s working.

    cd oscars2021
npm start

    Running React app

    Now it’s time to hook your project up to Amplify, using this command:

    amplify init

    A wizard will walk you through setting up various parameters for your app, including your preferred code editor and the type of app you’re building. Here’s what I selected:

    Amplify configuration

    This will initialise your project in the cloud and set up some resources for you.

    Now it’s time to add storage, which in my case meant an Amazon DynamoDB table. This is where I’d be storing each entry as it came in.

    amplify add storage

    This will again kick off a wizard that will walk you through some configuration options. I selected “NoSQL Database” and then set up the columns that I wanted in the table.

    Database config

    I also selected “id” as the partition key, with no sort key, no secondary indexes, and no Lambda trigger.

    More DB config

    The next step is to add the API and Lambda function that will actually record the user’s entry. This is done with the command:

    amplify add api

    Again, a wizard will walk you through configuration. I created a REST API with the path “/entry” and created a new Lambda function using the Serverless ExpressJS template. I also gave the function permission to Create and Read from the storage (aka DynamoDB table) we just set up. I didn’t restrict access to the API, as I want anyone to be able to enter.

    API configuration

    Time to actually update the Lambda function! I went into my preferred code editor (Atom) and opened the project. The function is located in “amplify/backend/function/oscarsfunction/src/app.js”. There are some commented example methods that I deleted and replaced with the code below. This adds the AWS SDK (so I can save to DynamoDB), a method for generating random IDs, and the actual post method to save the entry. (You can download this code from my Github project here.)

    Function code

    The next step is to use Amplify to push the newly created backend storage, API, and function to the cloud! You can do this with the command:

    amplify push

    Amplify will ask you to confirm which resources you’re deploying, and then it will start the process using AWS CloudFormation. This can take a little while.

    Amplify push

    If you make any changes to the function code later, remember to push the changes to Amplify so they are uploaded to AWS! In the meantime, it’s time to install some dependencies I need for the form frontend.

    npm install aws-amplify @aws-amplify/ui-react
npm install bootstrap
npm install react-bootstrap

    Once all that’s done, you can finally edit the form! The actual React app lives in “src/App.js”. I won’t go through everything I did (you can check the code out yourself), but basically I made sure to include Amplify (so the frontend can talk to the backend) as well as React Bootstrap. I also tweaked the CSS and added a couple images. Each time you save a change, the app will recompile and update in your running browser window. I also opened the “public/index.html” file and changed the title and description of the page.

    Form code

    You can also test out the form in the browser to ensure it’s working. When I opened the AWS Console and looked in DynamoDB, I could see entries being saved correctly into the dev environment table. 🎉

    The final step is to deploy the frontend, and Amplify makes this pretty easy too. I created a new repo at Github and then pushed my code to it.

    Github create repo

    Then I went to the AWS Amplify console and clicked on my app. If you click on the “Frontend environments” tab, you’re presented with a range of options for hosting your app.

    Frontend hosting

    I clicked the one for Github and then went through the process of granting access to my Github account. Then I selected the repo I’d just created with the code for my app, and left the branch set to “master.” On the next screen, I left checked the option to “Deploy updates to backend resources with your frontend on every code commit” and created a new “prod” environment as the target. I also had to create a new IAM role for the deployment process. Once you save and deploy, Amplify will grab your code from Github, run the build script and any tests you’ve configured, and deploy the resources into your account. The build for my app takes less than 4 minutes to complete.

    Completed deployment

    The beauty of the CI/CD pipeline is that whenever I modify the code and push it to Github, the whole process will kick off automatically! The Amplify console also gives me the URL to the hosted app, which is where you can enter the contest. When I check DynamoDB now, I can see entries coming through to the prod environment table. When the contest is finished, I can shut down and remove all the app resources by simply running this command:

    amplify delete

    If you’d like to try out Amplify yourself, I can recommend a couple resources. The AWS website has a very simple, step-by-step tutorial to Build a Basic Web Application that you can work through, but it doesn’t include React or the CI/CD part. If you want to copy what I did, check out my colleague Marcia’s YouTube videos  on  building a Contact form with React and automating your CI/CD deployments, which gave me the basics of everything I needed to build the contest entry form. Thanks Marcia!


  • Ew, David.

    The thirteenth (semi-)annual Web-Goddess Oscar Contest has officially launched! 🎉 And this year you can win everyone’s favourite family – the Roses of Schitt’s Creek.

    Rose Family Sock Monkeys

    No, I know they don’t have anything to do with movies. But honestly, I didn’t see many of the nominated films last year, and Schitt’s Creek brought me the most joy of pretty much any media. So that’s what I went with, and that’s what you win if you predict the most Oscar winners!

    Go here to read the rules and ENTER! Contest has now closed!

    More details on the monkeys:

    • David Rose’s outfit features a custom knit black sweater with embroidered white lightning bolts, as well as custom knit designer sneakers. The sneakers were based off the Little Converse pattern, while the sweater was made up entirely by me. He’s also wearing a pair of black framed spectacles (intended for an American Girl doll!).
    • Alexis Rose’s outfit is based off her iconic “A Little Bit Alexis” performance, including a dusty pink minidress and knee-high boots. She’s also got her iconic A necklace.
    • Johnny Rose is wearing a bespoke tailored suit, sewn by me from a pattern intended for American Girl dolls. (No joke – I paid $10 for it. 😳) He’s also got felt eyebrows for the perfect Eugene Levy touch.
    • Moira Rose is wearing an avant garde tunic dress made by me from sheer sequinned fabric and designer high heeled boots. She also has matching feather glitter earrings. And what would Moira be without her girls? You get four different wigs (attached with Velcro) to complete the whole wig wall scene.

    If you want Steve, Patrick, or any of the other Schitt’s Creek residents to recreate the scene, that’s all on you. 😂

    So go ahead and enter! The 2021 Academy Awards happen on Sunday, April 25th (California time), which is like 2am here. So I’ll cut off entries a few hours beforehand when I go to bed, and you’ll have to wait until I get up in the morning to find out who won!

    Web-Goddess Oscar Contest Sock Monkey History

    Eighteen years ago (good grief!), I thought it would be fun to run a contest and give away a sock monkey. I then kept that up for 10 years running, and you can see the history of my creations below. These days I only do it when the inspiration strikes…

    2021 – Schitt’s Creek Sock Monkeys
    2019 – Freddie Monkcury
    2013 – The Avenger Monkeys
    2012 – The Monkey with the Dragon Tattoo
    2011 – Black Swan and White Swan ballerina monkeys
    2010 – Sparkly Emo Vampire Sockmonkey playset
    2009 – Batman and Joker monkeys
    2008 – Striking Writer Monkey
    2007 – Trio of Dream Monkeys
    2006 – Gay Sock Monkey Cowboys
    2005 – Soctopus
    2004 – Plain sockmonkey
    2003 – Oscar the Sock Monkey