Minecraft Socks

Minecraft SocksI think these socks win the prize for the longest time from start to finish, and they probably also set a record for the number of times I frogged and restarted! My initial cast-on was way back in April 2021 – back when I was still livestreaming my knitting – and I finally handed them over to the Snook yesterday.

The yarn is Drover Self-Striping from Colagirl Collective that I bought from Convent & Chapel many years ago. I can’t find any record of the colorway name or number, but the lime/grey/black reminded me of Minecraft. My original plan was to do the Undulating Rib socks, but I realised after casting on that it was fighting with the self-striping. So eventually I frogged them and started over. I settled on a simple broken-rib pattern, which gave a sort of pixelation effect and kept me from being too bored. :

Row 1: *K2, P2* repeat to end
Row 2 & 4: Knit
Row 3: *P2, K2* repeat to end

I knitted them toe-up with a circular needle (using the Magic Loop technique). Normally I prefer to knit both at the same time, but the wool was pre-balled and I had no way to access the other end. That meant I had to knit them one-at-a-time, and of course I lost my notes during the long gap after finishing the first one. It was only really an issue on the heel, which I decided to knit using a traditional gusset and heel flap (but in reverse). I suspect that my numbers are slightly different on the two of them, but I was already knitting these as fairly baggy house socks so I figure a few stitches either way doesn’t really matter.

The Snook was pretty happy to receive these, as the weather has turned decidedly Autumnal and the floors are feeling a bit cool in the mornings!

Minecraft Socks

The Roald Dahl rewrite kerfuffle

Over at RoaldDahlFans.com, I finally wrote down my thoughts about the whole rewrite controversy over the past couple weeks. I was quoted in the Telegraph article that broke the story, and it was honestly a little scary to get pulled into a culture war. For the record, I don’t support the changes, but only because they let Dahl off the hook for his indefensible and wrong attitudes. Dude wasn’t a saint, and if society has evolved past his racism and misogyny, let’s leave his books in the past where they belong.

The Great Fruit and Veg Experiment – and app!

Photo by Iñigo De la Maza on Unsplash

A few months back, I read an article about how to be healthier that suggested you should eat 30 different plants (fruits and veg) a week. It’s not just about the vitamins you get from the food itself, but also about encouraging a healthy gut biome. “Holy moly,” I said. “I reckon 30 in a week would be tough.” Rodd was hyperbolic in his skepticism. “I don’t think there are 30 different plants in the world!” he joked.

I kept seeing this advice over and over though, along with shocking stats like this one from a recent Guardian article:

Of the 6,000 plant species humans have eaten over time, the world now mostly grows and consumes only nine, of which just three – rice, wheat and maize – provide about 50% of all calories humans consume. Add potato, barley, palm oil, soy and sugar to the mix, and you have 75% of all the calories.

Well, this simply wouldn’t do. I made a New Year’s Resolution to start tracking the variety of plants I eat each week, and I began jotting them down in a Note on my phone. I set a few rules: the item has to be relatively unprocessed (no counting cocoa beans in a chocolate bar!), and there needs to be a decent mouthful of it (no tiny amounts of spices). To my surprise, getting 30 a week wasn’t as hard as I feared.

A few things have helped. We’ve begun getting a box delivered from Box Fresh each week, which includes a wide variety of fruit and veg. So far we’ve been happy with the quality, though it does mean you have to plan your meals and eat at home so you get through it all. I’ve also been making a point of going into the office a couple days each week, and there’s always fruit there for a healthy snack. Overall we’ve been a lot more aware about getting variety, and I’ve consciously chosen options (like salad for lunch) that maximise my chance of getting new items for my weekly tally.

Fruit and Veg appI’ve also moved on from the simple Note for tracking, and I’ve built myself a pretty spiffy app that uses a Google Form to collect data in a spreadsheet. That sheet automatically keeps track of the overall variety and the breakdown per week. It also creates the chart you see above, which should continue to update throughout the year as I add more items.

So far this year I’ve eaten 79 different plants, and here’s a peek at the ones I’ve eaten most frequently:

Plants I’ve eaten every week this year: Cabbage, Coffee, Lettuce, Rice, Tomatoes. (I’ve lumped all lettuce into one category, but I’ve actually had several different varieties in there.)

Plants I’ve had nearly every week this year: Avocado, Capsicum, Carrot, Coriander, Cucumber, Potatoes, Red onion

Let me know if you’re interested in setting up something similar for yourself! I’d be happy to share my Sheet with you so you can set up your own tracking form.

Architectural dreaming

One of the things we promised ourselves when we left for Germany was that when we got back, we’d finally renovate and redecorate the house. We did up the kitchen in 2012, of course, and then the garden in 2013-2014 and the en suite bathroom in 2016. Before we left in 2020, we replaced the carpeting in our offices and the ceiling lights. But the rest of the interior is basically the same as when we moved in, and all our furniture was mostly cheap IKEA stuff we’d accumulated over the years. We saw the move as the opportunity to get rid of a lot of things, and to start to invest in actual interior design and “grown-up” furniture. We also have a few structural things we want to do, like refresh the main bathroom, redo the closets, pull down the ceiling cornice (if we can), and change the window treatments.

So of course, I’ve started a Pinterest board. Rodd’s sister also brought us a giant stack of design magazines.

Design magazines

Here’s the thing – we both really like mid-century design. We’ve got a couple pieces that we know we want to keep: our bed, our vintage sideboard, Rodd’s Grandma’s cupboards and my rocking chair (both of which can be seen here), and these funky little shelves. We’ve also got some art for the walls. But other than that, everything else can go. We’ve set an arbitrary rule that we’re allowed IKEA things in the bedrooms and offices, but not in the main part of the house.

I find myself scrolling through endless photos of mid-century shelving systems and conversation pits. (Did you know the conversation pit “is back”?) We spent hours today watching Architectural Digest videos on YouTube. But I don’t want to just create a pastiche of the Miller house, you know? I think it also needs to be more modern and us, and of course we’re limited by the concrete box floorplan that already exists.

If you know of a good Sydney based interior designer, please let me know. We’ve put out feelers to a few, but always looking for more recommendations!

PS – We did visit the Miller house back in 2019, and it’s amazing. (Rodd really, really wants that wall of built-in shelves.) If you’re into that type of thing, highly recommend you visit Columbus, Indiana and watch the excellent John Cho film

Us at the Miller House

How we kept our Australian mobile numbers

Rodd and I have both had the same Australian mobile/cell phone numbers for more than twenty years, and we didn’t want to lose them when we moved to Germany. After investigating a few different options, Rodd set us up on a Hosted PBX plan with Aussie company MBit. We both ported our mobile numbers to them, and for $11/month the numbers remained active the entire time we were gone. Any SMSes we received were delivered to email, and they came through quickly enough that we could use them for two-factor authentication. (That was one of our main requirements.) We were also able to receive voicemails, which came through on email as attachments.

Note: I’m not sure if MBit are still advertising this service, so if you’re looking to do something similar, you might want to talk to them directly.

When we returned to Australia last month, we both needed to get new mobile plans so we could then port our old numbers to them. I figured this would be simple, but I ended up running into a few issues with mine that I thought I’d document for posterity’s sake.

My employer covers my mobile cost (up to a cap) so I decided I’d upgrade my phone at the same time I got my plan. I don’t change my phone that often, and I’d had an iPhone 11 for a couple years at this point. After doing some research, I decided on an iPhone 14 Pro 512GB on a plan from Telstra. I went to the Telstra shop at Broadway the first weekend we were back but they were out of the 14 Pros. The guy told me that he thought the Apple Store might have them though, so I headed up there.

Happily, the Apple Store had some in stock (in purple; I didn’t care) and they started the process of signing me up for my Telstra plan at the same time. We ran into some issues with my Telstra customer ID – I’ve had various Telstra plans over the last twenty years, and I was in their system multiple times. I ended up going back and forth between the Telstra shop and Apple to sort it out, but eventually we got there. The solution involved me reinstalling the My Telstra app on my phone and using my old login for it, and then creating an ID from that.

Then as the final step of doing the order, the Apple Store guy asked if I wanted to use an existing number. I said yes. He went through the porting steps, and was a bit confused because he didn’t recognise MBit. Then he asked for my account number. We didn’t actually have this, and MBit had closed for the holidays. So here’s what I should have done: walked away and started the purchase again once I had that info. Instead the Apple Store guy told me we could still set it up with a new number, and then I could call Telstra once I had the MBit account number to switch it over. Reader, I believed him. He set up the plan with a brand new number, and I walked out of the Store with my new iPhone.

Back at home, I transferred everything from my old iPhone to my new one. That process worked really well, and other than logging into some apps again, it was completely seamless. I didn’t bother to tell anybody about the new number, because I’d only have it for a few days, right?

A few days after Christmas, MBit were able to provide us with our account numbers. Rodd went with a simple pre-paid Boost plan and bought a SIM at the supermarket, and he was able to port his number without issue.

I called Telstra and explained what I wanted to do, and ran into an immediate roadblock. Telstra’s systems will allow you to port a number ONLY during the initial plan setup. Once you are on a plan, it’s impossible to port a number to it. The customer support person told me that I’d have to pay out the entire contract (LOL NO), so I resigned myself to just having to change to the new number. Then right before we hung up, they said:

There’s no option for us to port in your number to an existing mobile service however, you can request to change the number to an old one.

You just need to contact our voice team at 132200 and they will be the one who will process it for you.

Intriguing. I called them the next day and after fighting through different levels of menus and waiting on hold for a while, I got through to a nice bloke in Brisbane. He confirmed that yes, you can change the number associated with a plan, but only if that number has already been ported to Telstra. He therefore came up with the solution – I’d have to sign up for another plan and port my old number to Telstra as part of that setup. Once it was active, they could do the switch between the two plans. Then we’d cancel the new extraneous plan, and he kindly offered to refund any charges associated with that new plan.

It was complicated but my only option. So he went through the whole process of setting up my new plan (the cheapest post-paid we could do over the phone) and I gave him the info to port my old number to it. Then a few days later, I got a delivery with the SIM card. I had to put that into the phone to activate it, and within a few minutes of doing that, I got a notification that my old number was active on it. I had Rodd send me an SMS to test that it was working. Success! So now we just needed to swap the numbers.

I put the SIM for the new number back in and called Telstra again. This time got a nice guy in Perth. It took him a while to understand the whole convoluted plan, but we got there. (If you are in a similar situation, make sure you write down the reference number each time you call.) He explained that to change the number on a Telstra plan, the number you’re swapping in has to be in their archive pool. When you deactivate a number in Telstra, they put it into an archive pool for six months in case you want to claim it back. So the next step was to deactivate the new plan with my old number, which he did. He then went to do the change, but the system wouldn’t let him immediately apply my old number. He tried a few different things, but ultimately we decided that we needed to wait while systems updated to show that my old number was available to be applied.

That meant I had to call back again the next day. This time I got a nice lady in Brisbane. I again walked her through the whole saga. She then went to do the changeover, and to both of our surprise, it worked pretty much instantly. I didn’t have to change SIMs; my phone just automatically changed it to show the old desired mobile number. Success! She then applied the refund for the extraneous plan.

Sidenote: I really can’t fault Telstra at all through this process. The guy in the shop was a bit clueless, but the folks on phone support were knowledgeable and helpful. I did have to wait probably 20+ minutes each time I called, but it was worth it. They do try to punt you out to using the support chat in the mobile app, and I tried that the first time. However, the support agent I got did not understand my issue at all and I gave up quickly. It was definitely worth the time to get an actual human being on the line.

Right, so everything should be hunky-dory, right? Not so fast, friend. Even though my SIM had updated and I could receive calls and SMSes on my old number, I noticed that iMessage and FaceTime were still picking up the (now deactivated) new Aussie number. It took me several days to figure out how to solve this problem. I went through all the usual voodoo you find by googling: I turned the phone on and off; I took the SIM out and put it back in; I turned iMessage and FaceTime on and off multiple times too. I went into my iCloud settings and made sure the old number was showing there. Nothing worked. No matter what I did, I could not get my old number to appear as an option in Send & Receive. It would show my German number (which presumably had synced from my old phone) and the new Aussie number, but never my old Aussie number.

iMessage settings

Today in desperation I asked on Mastodon…

Mastodon screenshot

And @randolph@app.net came through! It turns out there are two places in System Preferences where you need to update your number – “Name, Phone Numbers, and Email” AND “My Number.” I had only done the first, mostly because it’s the first option you get when you search for “Num” in the System Preferences.

System Preferencees

Once I updated “My Number,” I turned off iMessage and FaceTime once more. Then I put the phone into Airplane mode and powered it down. I waited a few minutes and turned it on again. I took it out of Airplane mode and turned on iMessage. And it picked up the new number! I was finally able to select it for both services. 😅

So thanks to Telstra and thanks to Randolph for solving my dilemma. I’ve got my old number back, and nobody needs to update their Address Book. Woohoooooo! 🙌

Keychron K8 Pro and a physical mute microphone button

My home office in Sydney is still empty, but I’ve set up a workspace at the dining room table in the meantime. One of the Christmas presents I bought myself is a mechanical-switch keyboard. I’ve been wanting one for ages, and then I read this CNN Underscored rating guide that covered a lot of the best. I decided I didn’t need a full-sized keyboard as I’ve got my duckyPad I can use for a numpad. Based on the guide – and what’s available in Australia, and what I wanted to spend – I ended up getting a Keychron K8 Pro with aluminum frame, RGB backlight, and blue Gateron switches. (MSY has it for $179 AUD and had it ready for pickup in 3 days. The guy there was like, “I didn’t even realise we sold Keychron stuff!”) It’s pretty sweet.

Keychron K8 Pro keyboard

The first thing I noticed when I picked up the box was that it was heavy. This thing is seriously sturdy, which is great because I have been known to pound on keyboards. The K8 Pro can be used either wirelessly with Bluetooth or plugged in via USB. (I expect I will mainly use it plugged in, but it’s nice to have the option.) It comes with the Mac keys installed already, but they provide the corresponding Windows keys along with the tools to swap if you need to. I haven’t gone down the custom keycaps route yet, but believe me, I am tempted. (Why are so many of them white though? I remember back when I had a Mac keyboard with white keys it was a constant struggle to keep them from looking grimy.)

I plugged in and started typing. And friends, the blue Gateron switches in this thing are gloriously clicky. I’m probably giving Rodd a migraine, but I love it. Everything feels very solid, including the space bar. Then I noticed there are a couple special keys in the upper-right corner…

Keychron K8 Pro special keys

With the default Mac layout, the little “crop” icon invokes a partial screenshot (i.e. the same thing you get by hitting Shift-Command-4). I’d long since built up the muscle memory for the shortcut, but since I usually move my right hand for it anyway, I reckon I could switch to the button.

The middle button has a microphone on it, and I got excited thinking it was a physical mute-microphone button. Instead though it invokes Siri or Spotlight search (i.e. Command-Space), which is disappointing. I never really use Siri, and it’s much faster to just use the shortcut for Spotlight. Park that for a second.

The third button has a lightbulb on it, and it controls the RGB lighting effects on the keyboard. When you click it, it cycles through the different options. If you hold down the Fn key while you click it, it turns them off/on. Okay, useful.

Back to that microphone button. One of the best things about a keyboard like this is that it’s completely customisable. I decided to remap that key to become a mute microphone toggle. Of course, Apple still doesn’t have an OS-wide shortcut to mute the microphone, which means you have to get creative. Previously I used Mutify to create a shortcut for the duckyPad, but I decided to see if I could do it without installing anything new on my machine. It took me lots of trial and error, but I’ve finally got it working! Here’s how I did it.

The first thing you need to do is set up a Quick Action using Automator. This extremely thorough article will walk you through every step of the process, including how to test that the integration is working. I decided on Shift-Command-0 for my shortcut, as I don’t use any of the apps that use that one. I tested it out, and I could see that it was working! But there was one problem. There’s no feedback when you invoke it, so it’s hard to remember whether you’ve engaged it or not. (Mutify had a little menubar icon that would turn red.) Then I realised I could use system notifications for that purpose…

Mute notification

Here’s the AppleScript I ended up using in Automator:

on getMicrophoneVolume()
     input volume of (get volume settings)
end getMicrophoneVolume
on disableMicrophone()
     set volume input volume 0
     display notification "Microphone has been muted." with title "Mute Hotkey"
end disableMicrophone
on enableMicrophone()
     set volume input volume 100
     display notification "Microphone has been unmuted." with title "Mute Hotkey"
end enableMicrophone

if getMicrophoneVolume() is greater than 0 then
     disableMicrophone()
else
     enableMicrophone()
end if

Then go to your Notifications & Settings pane in System Preferences and check that Script Editor is set to Allow Notifications.

Notifications & Focus pane

If you leave the style set to Banners, they will show briefly and then disappear. I decided it was more useful to change them to Alerts, which will remain on the screen until dismissed. That way I can tell at a glance whether my microphone is “hot” or not. The notifications end up stacking up in a little pile, and you can dismiss them all at once when you want to clean them up. (I might play with the wording a little bit to make it even more obvious what the current state is.)

Stacked notifications

So now you’ve got a system-wide shortcut that will turn your microphone input off and on. If you’ve got a configurable keyboard, you can then map that shortcut to a single key press. For the Keychron K8 Pro, there are a couple ways to do that but the easiest way is to use VIA, an open source keyboard configurator. I had to go to caniusevia.com in a browser (important note – has to be Chrome due to the extensions required) and click the “Start Now” button. (You need to be plugged in for this, not using Bluetooth.)

VIA home page

You’ll then click the Authorize Device button, and an alert will appear asking you to confirm which device you want to connect to.

Authorise keyboard

This is where I came unstuck the first few times, because I’d do that and then… nothing would happen. Then I realised I needed to RTFM. Keychron’s key mappings haven’t been approved by VIA yet, so you have to add them manually. This isn’t as scary as it sounds. I went back to the Keychron K8 Pro product page and scrolled down to “Get the keymap working on VIA.” Then I clicked the button to “Download K8 Pro ANSI RGB keymap JSON file” and unzipped the download.

Keychron’s instructions are written for the desktop version of the VIA app, but as far as I can tell it works exactly the same in the browser. So head back to Chrome, click on Settings, and tick the option to “Show Design tab.”

Show Design tab

Then click on the Design tab, and you’ll see a place to upload that JSON you just downloaded. You’ll also want to make sure the “Use V2 definitions (deprecated)” option is ticked.

Upload your JSON file

If it worked, the screen will update to show a keyboard.

Keyboard screen in VIA

Now switch over to the Configure tab and you should see your actual keyboard layout. The “Layers” refer to different configurations, and the Mac configuration is Layer 0 by default. (You may need to switch to Layer 1 for Windows.) Click on the Macros link in the upper-left.

Managing Macros

Macros allow you to type multiple key presses at the same time, so that’s where we’re going to save our shortcut. I put mine in Macro 0, but you may want to use another number if you’ve already got some in there. For each key, you’ll enter the appropriate alias from the documentation. Here’s what mine ended up being for Shift-Command-0.

{KC_LSFT,KC_LGUI,KC_0}

Note that the keys are separated with commas, and I’ve wrapped the whole thing in curly braces. Make sure you click the Save button once your shortcut is in there. Now click back on Keymap in the upper left.

Keymap

This is where you’ll actually map your new Macro to the appropriate keypress. (Protip: take a screenshot before you do anything else. You’ll see why in a minute.) In the upper part of the screen, click with your mouse on the key that you’d like to remap. It will start blinking slowly. (You can see mine in the upper-right.) Then on the bottom part of the screen, click the Macro option and then select whichever one corresponds to the Macro you created in the previous step. I chose M0, which is why the keymap changed from “Siri” to “M0” on that key.

And that’s it. It’s active pretty much instantly, so you should be able to try it out right away. You can also use the Key Tester tab; when you click the key on your keyboard, it will light up what you’ve mapped it to. Now here’s the warning: once you click an option on the bottom part of the screen to map a key, the selected blinking key will move to the next one on the upper keyboard. It’s really easy to not notice this, and to click another option on the bottom part (like if you accidentally hit the wrong one). This means you might be merrily going along and remapping heaps of keys without noticing. (I’ve done it a couple times already.) So just be careful! That’s why I suggested a screenshot, so you can repair any damage if you accidentally remap a key and can’t remember what it was before.

The really awesome thing about keyboards like this is that the configuration is saved on the keyboard. It’s not tied to the particular laptop, like if you configured it with an app. You can plug it into other computers and it will still work. Really cool, huh? There are lots of other configuration options in there, including changing the lighting and invoking specific OS features. I’ve really only scratched the surface.

So yay! I’ve got a very clicky keyboard and a physical button to mute the microphone across all apps, along with a visual reminder of the current state. If you have any suggestions or want to share how you’ve modded your Keychron, please get in touch.

Braiding your yarn ends for fairisle

Huh. I just learned a new knitting technique from Reddit, of all places! Rather than weaving in all the ends from your fairisle colour changes, you leave them long and then you essentially French braid them down the seam on the inside.

What the video doesn’t show is what happens at the end. Presumably you have some length of braid from your last few changes, and you… what? Put a rubber band on the end and have it hanging outside your sleeve? 😂 I’m guessing it’s something like: “fold it back on itself and weave the last few bits back into the braid,” but it’s annoying that they didn’t cover that bit.

Sydney, we’re home ❤️
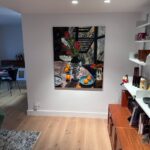
It’s the last day of 2022, and we’ve been home in Australia for two weeks now. It feels… truly surreal.

For the last month or so in Europe, I kept having conversations with people who either A) didn’t realise we were moving back to Australia or B) thought we’d already left. For the record, the plan when we moved to Munich back in 2020 was always to return in a couple years. I had a vague idea that it would likely be in 2023, and that’s the time frame we shared with our German landlord, our Australian tenant, and my manager at AWS.

Things suddenly got real in January 2022 when my manager asked me to call him. It turns out that my buddy who headed up the AWS Developer Relations team in Asia-Pacific had decided to resign and go work for a startup. My manager wanted to know if I was interested in the role. On one hand, it was a promotion of sorts, and it would be the #1 role I’d have wanted if I was moving back. But on the other hand, this was way ahead of schedule. I also knew that if I didn’t go for it, they’d hire someone else and that role wouldn’t be available when I eventually did move. I asked my manager if it would be possible to do the role remotely for the rest of the year, and he said it was as long as I was willing to deal with the timezones. I interviewed for the role, got it, and officially took it on in April 2022. For the last 8 months I’ve been managing a team of Developer Advocates in Asia-Pacific from Germany, which has meant being on calls at 6am and late into the evening.

We left the timeline vague as long as we could. We knew we wanted to experience Oktoberfest and as many Christmas markets as possible, and I wasn’t sure yet whether I’d need to go to AWS re:Invent in November. Then the Snook resigned from his job at Google and finished up at the end of August (after 10 years!), which meant he only had a couple months to stay in the country legally on his visa. Our tenant Kelly let us know that she wanted to go visit family in Perth for Christmas, which meant that we’d need to arrange someone to look after Petey. Honestly, that made everything a lot simpler. On October 1st, we gave notice that we’d be out before the end of the year and we booked our flights for December 14th.

In early November Rodd started organising for the furniture shipment and we had to decide what to keep or get rid of. We quickly decided not to keep the giant TV that we’d shipped from Australia, and I sold it to an Amazonian. We also sold off our gaming chairs, my IKEA desk, the Sodastream, my bike, and a bunch of other houseware items we didn’t need in Sydney. We also donated a bunch of old clothes that we hadn’t worn in ages to charity.

Selling the TV

We got back from our trip to Paris and Luxembourg exactly two weeks before our return flight to Sydney. There was so much to do! We made a “punch list” of sorts to make sure we didn’t forget anything.

Punch list

We used the same shippers we had two years earlier – OSS – and they were scheduled to arrive one week before we left. We set out all our suitcases and started filling them with the things we knew we wanted to carry back to Australia.

Suitcases

Then we started pulling together everything that would get shipped back. The challenge was that we had rented our place furnished, so we had to make sure we didn’t inadvertently ship back anything that belonged with the house. (Thankfully the Snook had taken very detailed photos of every drawer and cupboard when we moved in, which helped a lot!) Everything we were shipping from the kitchen went onto the dining room table, along with the coffee machine, grinder, and KitchenAid.

Kitchen stuff

We also had designated areas upstairs and downstairs so the movers would know exactly what to take.

Rodd also turned off the server and packed it up with the other things from his office, including his standing desk.

Office stuff

The movers turned up on time and got to work packing it all up in boxes. They were finished within a few hours and carted it all away. It was only about five cubic meters in the end. It will eventually be loaded into a shared shipping container in Rotterdam and then begin the long journey back to Sydney. The normal estimate is up to 20 weeks, so we’re not going to see that stuff for a while!

Boxes

To my delight, two days later it began to snow in Munich. It was like the city wanted to give us the perfect send-off.

Snow in Munich

My old team in Europe hosted a fun goodbye session with a special trivia quiz themed all around me. They even got Rodd to help them out with some questions! The highlight was definitely the one about Rodd’s favourite type of nut, to which one of the answer options was “Deez.” 😂

Kris trivia

On our last weekend, we had one last Weisswurst Frühstück at the Augustiner Bräustuben. It’s an odd feeling, knowing that you are doing something for the very last time. I felt really emotional.

Weisswurst Frühstück

We went into the city to do some final shopping. Rodd was very keen to buy himself a Janker before we left. This is the traditional collarless Bavarian jacket. We went to several different shops trying them on before he found the perfect one in Lodenfrey. It’s a grey-green linen, which we figured he’d get more wear from in Australia.

Janker

It was snowing very prettily in the city, and we took the opportunity to enjoy the Christkindlmarkt one last time.

Snowing in Munich

We took the U-bahn to Poccistrasse and walked across the Theresienwiese. It was snowy and foggy, so much that you couldn’t see the far end. It felt like another world. Hard to believe a few months earlier it had been heaving with millions of people at Oktoberfest.

Theresienwiese

Our last few days in Munich were a flurry of cleaning and packing, with occasional breaks to look at the snow outside. We cleaned out the fridge and cupboards, and I returned my work laptop and some office furniture I’d borrowed. I gave the rest of our liquor to my colleague Viktor. We rehung our landlord’s artwork and restored the place the way we’d found it. We set up mail forwarding.

Snowy back garden

And then we were ready! The suitcases were packed full and just within the weight allowance. We did a final inspection and handover of keys the night before the flight, and then headed to an airport hotel for our final evening.

Suitcases

On the 14th, we walked over to the airport and dropped off our bags. We were flying Thai Airways through Bangkok, and we’d splurged on a business class upgrade. (It was the cheapest we could find.) We were chilling in the lounge when Rodd groaned. “The weather forecast,” he said, “is not looking good.” Something about blizzard ice. 😱

We went to the gate at the nominated boarding time, but it was pretty clear we weren’t going to be getting on the airplane anytime soon. Eventually we started hearing announcements that Lufthansa were cancelling all their domestic and short-haul flights, and we saw lots of frustrated travellers lining up for rebookings. Our crew were optimistic though that the long-haul international flights would eventually make it out. After a few hours we started to see some activity from the snowplows on the tarmac.

Snowplows

Four hours after our original boarding time, they announced we could finally board the plane! Everybody cheered.

On the plane

We settled into our seats and I hit the button on my goodbye post on Instagram. The Thai business class seats were comfy but nowhere near as over-the-top as the ones on Qatar on the way there. The attendants told us that we’d be waiting a bit before the wings could be de-iced. We ended up sitting there for two hours! Eventually it was our turn for the de-icer, and then we could finally take off.

De-icing

Once we were in the air the flight was proceeding smoothly. We were a good six hours behind schedule so I knew we’d miss our connection in Bangkok, but it was out of our hands at that point. I was just hoping that we’d be still be able to stay in business class on whatever flight they got us on.

Right as they were serving dinner, one of the attendants from Economy came running into our cabin and said something frantically to another in Thai that included the word “choking” in English. Clearly a passenger was choking(!), and there was a lot of dashing about and getting first aid kits and such. At that point, I honestly expected them to announce that we’d be turning around and landing somewhere to get the guy medical attention. That didn’t happen though, and our attendant told me later that there was thankfully a doctor onboard and the passenger was okay. Eventually they brought him (in an oxygen mask) and his wife up to sit in two of the free business class seats. Phew! It felt like the universe was really trying to keep us in Europe.

As we got closer to Bangkok, we paid for wifi so we could check whether we’d been rebooked. Nothing yet. I look tired here, but I did manage to get some sleep. A lie-flat bed helps enormously, and I’m happy to report that at 5’10” (178cm) I just fit in the Thai business class seat.

Flying over Myanmar

When we deplaned in Bangkok, we immediately spotted a Thai Airways attendant holding up a sign with our names on it. She collected us and another guy who’d missed his flight as well. She explained that we were being rebooked on Qantas and helped us clear Security and get into the Lounge. We spent several hours in the Lounge waiting for our new tickets to be reissued. (The Lounge was nice enough, but I was disappointed the showers weren’t open.) Eventually we got our tickets, and as expected we’d lost our Business class seats. Not only that, but we were going to be sitting in the middle two seats of the middle block of four. 😩 But I tried to look on the bright side – the staff at Thai had done everything they could, and we were almost home!

Bangkok Lounge

Right before we boarded the Qantas flight, we got a notification on the app that our seats had changed. They moved us to a bulkhead row! Those are the seats that they reserve for people with infants, but there weren’t any on the flight so they bumped us up. That was really nice and had us feeling better about the nine-hour flight. We settled in for the final leg…

Flight to Sydney

We landed in Sydney on schedule and were through immigration and customs quickly. Before you know it, we were in a taxi heading back to town. We had actually booked two nights in a hotel, knowing that the house wouldn’t be in a state to immediately move back in.

In the taxi

We dropped off our luggage at the hotel and then headed to the house. Kelly had moved out a few days earlier but had been coming by to feed and water Petey. We found him in the closet, and thankfully he seemed to forgive us pretty quickly for leaving him.

Petey

It was honestly a little depressing to return to the house. It was in decent shape, but two years of unprecedented rain had taken a toll. There were spots of mold on the ceiling (despite Kelly cleaning it repeatedly), and everything we had put in storage was either musty (at best) or covered in mildew (at worst). We also didn’t have much furniture beyond our bed and dining room table. Kelly had left us an old couch (that Petey had torn to shreds) and a small TV with a broken remote. Rodd said exactly what I was thinking: “This feels like camping.”

We set to work unpacking and cleaning. I tackled the bedroom and the bathroom while he worked on the kitchen. The washing machine broke on the very first load, but we persevered and ordered fresh sheets from Amazon. By Saturday night, we were sleeping in our own bed again. On Sunday we were restocking the kitchen and signing up for new mobile plans.

In bed

Unfortunately by Monday it was clear that I was sick. I started to feel a lot of chest congestion, and then my nose stuffed up completely. By Wednesday I was blowing green goo and I couldn’t smell anything. Repeated Covid tests were negative, so I went in to see my GP. He reckoned it was a sinus infection and put me on antibiotics, with some codeine to help me sleep at night. That knocked me out for the rest of the week, and I couldn’t really do anything but knit. It made for a quiet and rather depressing Christmas. The only highlight was that my sense of smell came back on Christmas Day so I could celebrate appropriately:

Petey eventually left the closet and became very, very clingy. He wants to make sure we never leave him again!

Petey

I am finally on the mend, and the house is starting to come back together. The washing machine repairman came out and estimated a thousand bucks for a new motor for our 14yo machine, so we said “Stuff it” and bought a new set on Appliances Online. They delivered them two days later, hooked them up, and took the old ones away. Yay for clean laundry!

Washer and dryer

We also took advantage of the Boxing Day sales to get a new OLED 4K TV. Hooray for overly giant televisions! (He claims it’s the same size as the old one. 🤔)

Rodd was very happy to get back to his induction stovetop, and he has used it to cook me some very excellent meals over the past fortnight. We’ve made a couple trips to Coles as we begin to restock the pantry, and I’m once again blown away by the quality and variety of produce we get here in Sydney.

And finally this week I was well enough to go into the AWS office. I picked up my new laptop from IT and started tackling a backlog of emails and overdue tasks.

In the AWS office

So… we’re back, and people keep asking me what it feels like. It feels weird. It feels like we never left. It feels like if I didn’t have physical proof that we were there – mainly in the fact that our house is still missing most of its furniture – I’d think it was all a dream. We were gone for 842 days. 120 weeks. Two years, three months and change. Did it actually happen? How did it go so fast?

I’m happy to see Petey. I’m happy to see my friends and neighbours and family again. I’m happy to not struggle daily with a foreign language, and to hear the Ocker accent again. I’m happy to see the ocean, eat amazing Asian food, watch the cricket, and drink a beer that isn’t a Helles. My hair texture has already changed for the better. (Munich water is *very* hard.) Australian cafe culture breakfasts are the best in the world. These are all good things.

But it’s really hard not to miss Munich. I miss having four distinct seasons. I miss the lack of humidity. I miss riding my bike all over the city and not having to worry about an irate driver hitting me. (Sydney is not cycle friendly.) I miss living in a city that is beautifully maintained, where piles of rubbish and empty storefronts are rare. I miss cheap and convenient public transport, and high speed rail between cities. I miss frozen, bake-at-home giant pretzels. I miss not needing to drive a car, pretty much ever.

I completely realise how all that sounds. Believe me, every single European thought we were crazy for being sad about coming back. And I know – I know – how incredibly fortunate we are, no matter where we live. This is just the normal comedown you have after a fabulous vacation, except that the vacation lasted 842 days. We’ll be all right.

Don’t cry because it’s over. Smile because it happened.

Thanks to everybody who helped us out along the way. Thanks to our family and friends who supported us in the move, and to our employers who made it possible. Thanks to our European friends for welcoming us so heartily. And thanks to Kelly for looking after our place and our dear Petey Cat.

It’s nice to be home.

Together in Sydney