Continuing with our vintage cooking experiment, for the second week of January we chose what looked to be a very simple recipe: January 13 – Peach Marshmallow.

That looks pretty simple, right? Here’s the recipe:
Fill up a dozen peach halves (drained from a tin) with crushed pineapple. Top with marshmallow and grill under a slow heat until marshmallows melt a little. Serve with ice cream.
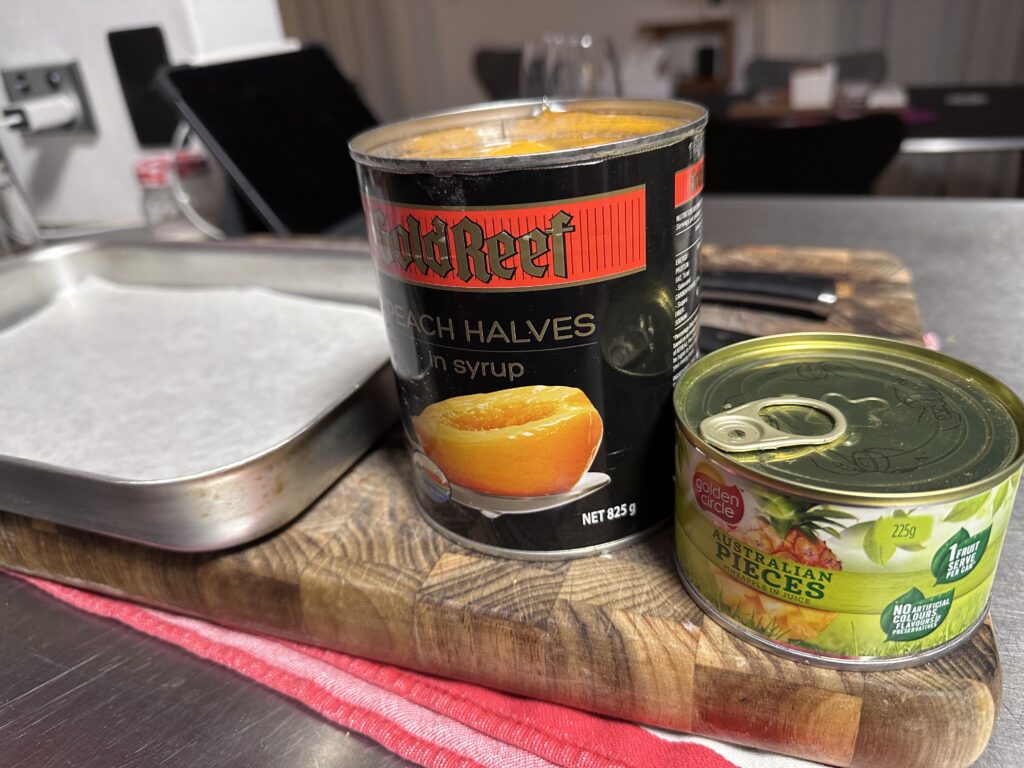
The first hurdle I ran into was actually getting canned peach halves. Most of the ones on offer in our supermarket were slices. Eventually I found one brand though…
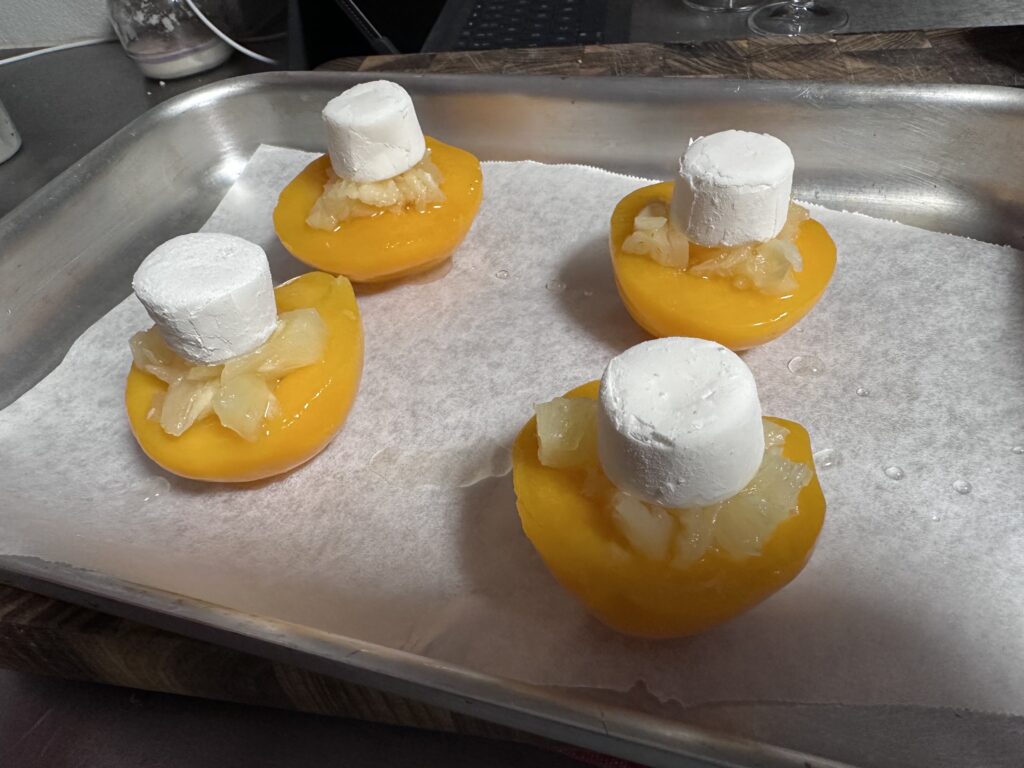
Rather than making a dozen, I just made 4 for us after dinner. I crushed some of the pineapple and filled each of the peach halves with it, then topped it with a marshmallow.
This is where I registered a concern: I went with Pascall Marshmallows because I figured they were an Aussie brand and would therefore be closest to what the recipe was asking for. Unlike American marshmallows, these are sold in the candy aisle and are intended to be eaten like sweets. They were coated in cornstarch and had almost a crunchy exterior. I had no idea how they would melt.
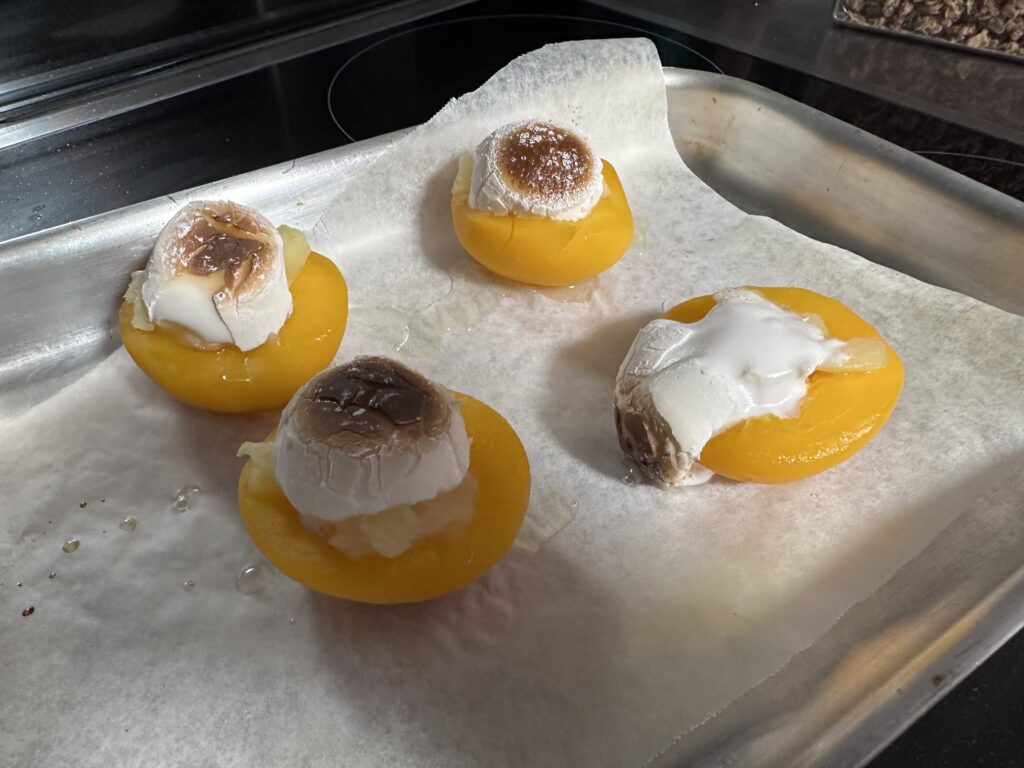
I put them into the oven with the top element turned on, but rather low on the temperature (like 170C). As you can see they did start to toast and melt a bit. I think they were in there well under 10 minutes, and I pulled them for fear they’d burn.
Here they are, served with ice cream.
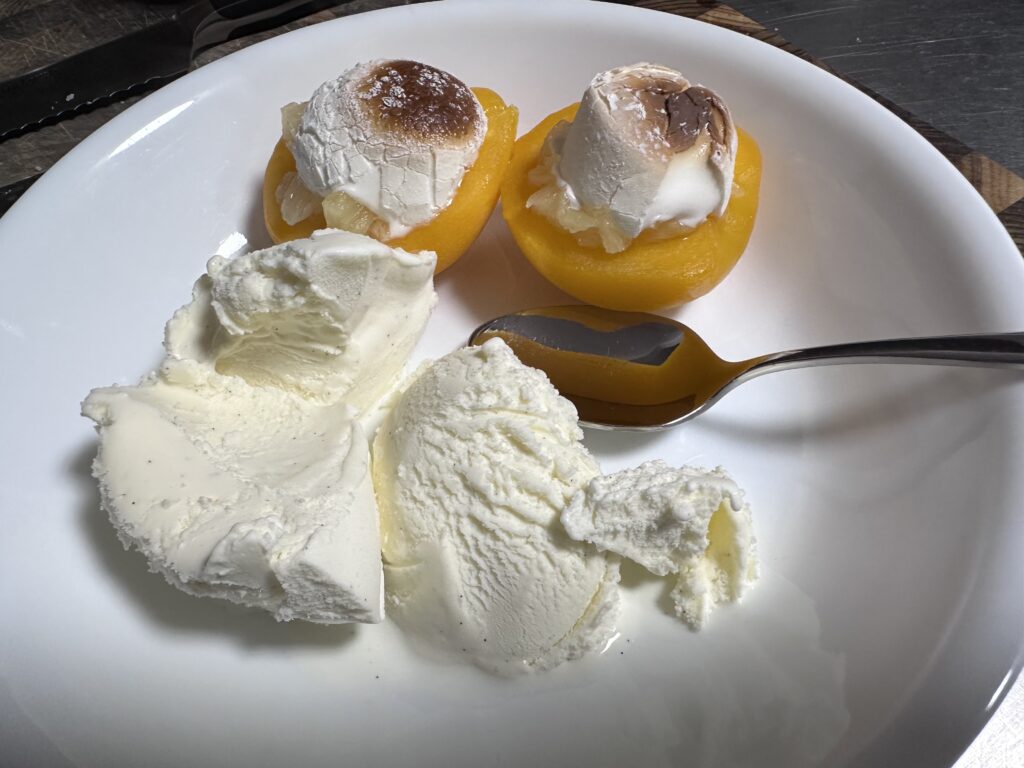
It was… okay. I mean, it’s just a peach, some pineapple, and a marshmallow. The canned peaches did get warm, but they were still pretty firm. The marshmallow was sticky and the outside was still rather crunchy, though the middle was gooey. This didn’t feel like that impressive of a dessert.
Enter the Snook.
He decided to have a go at modernising it and fancying it up. We started by doing some research on marshmallows, and after talking to some of my older friends, it looks like packaged marshmallows were not readily available here in 1965. Instead people would have been making their own using a recipe like this. “That just looks like a Swiss meringue!” he said, and got to work. He assembled his ingredients. (The plastic container has the rest of the pineapple in it.)
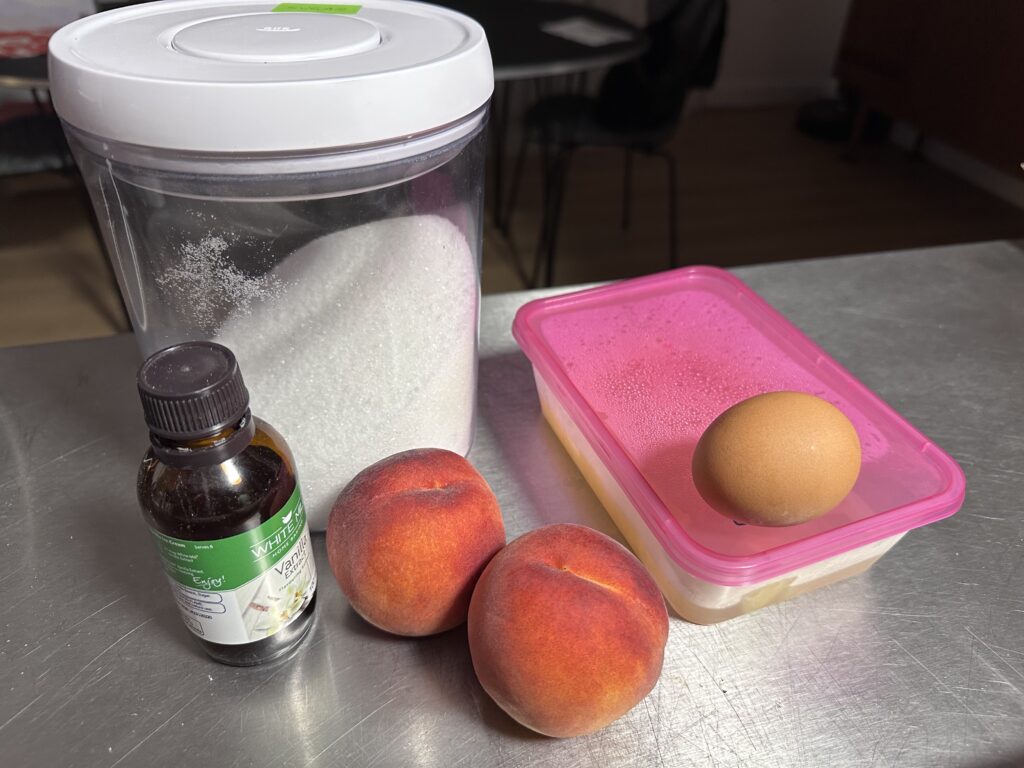
He started by separating the eggs. After some internal debate he decided to do two eggs, which he weighed and then adjusted the recipe accordingly. (He did have a bit left over though, so one egg might have been sufficient.) He didn’t bother with any cream of tartar, and he had vanilla essence rather than a bean.
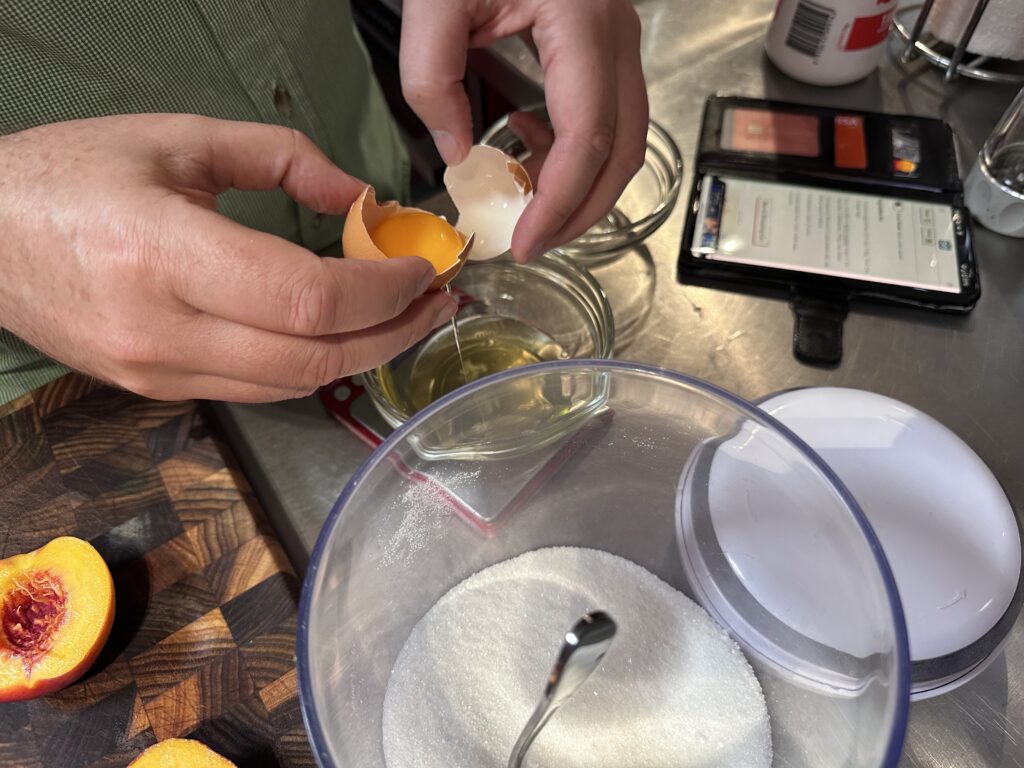
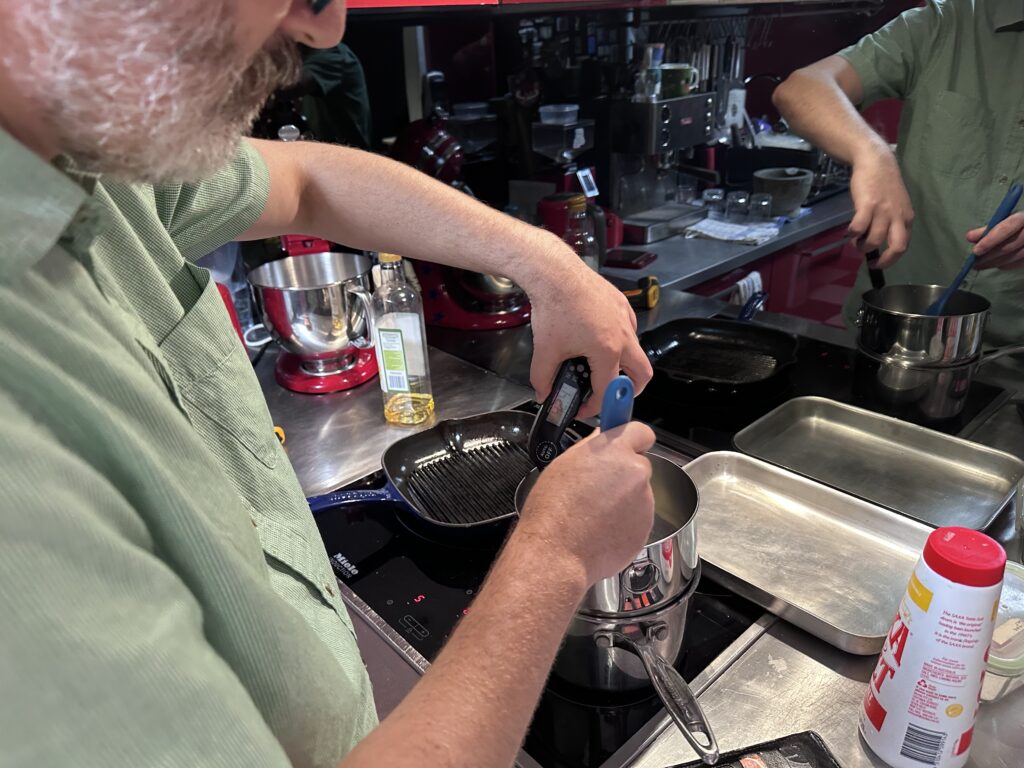
The egg whites were mixed with sugar and gently cooked over a double-boiler until they reached the required temperature.
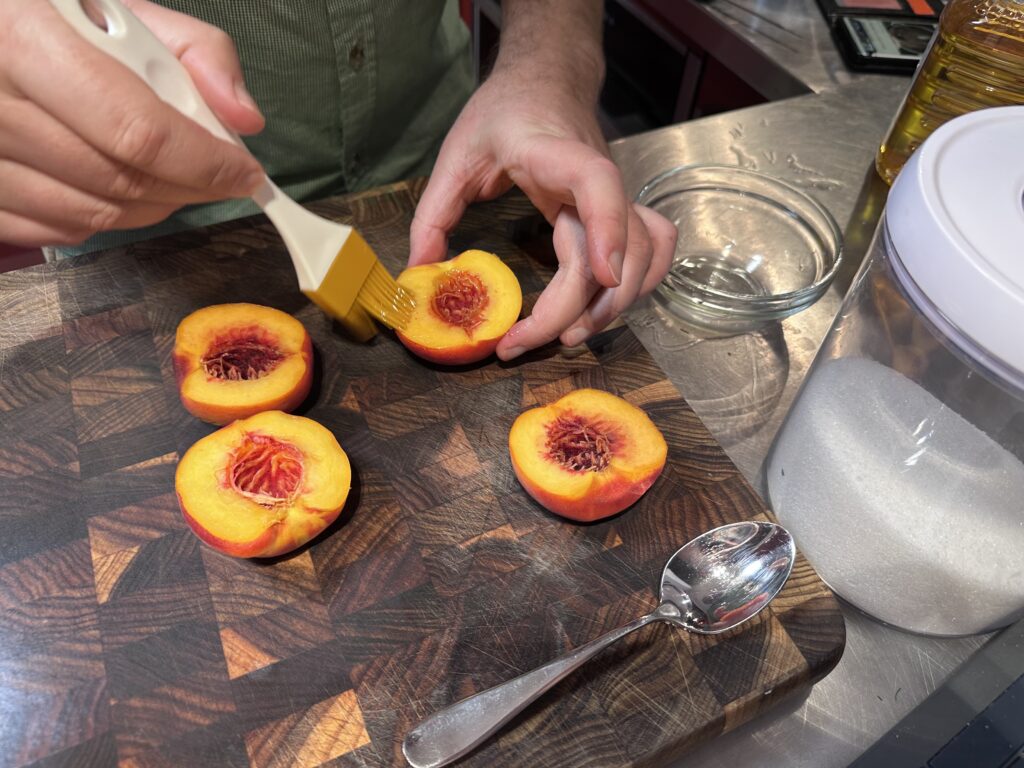
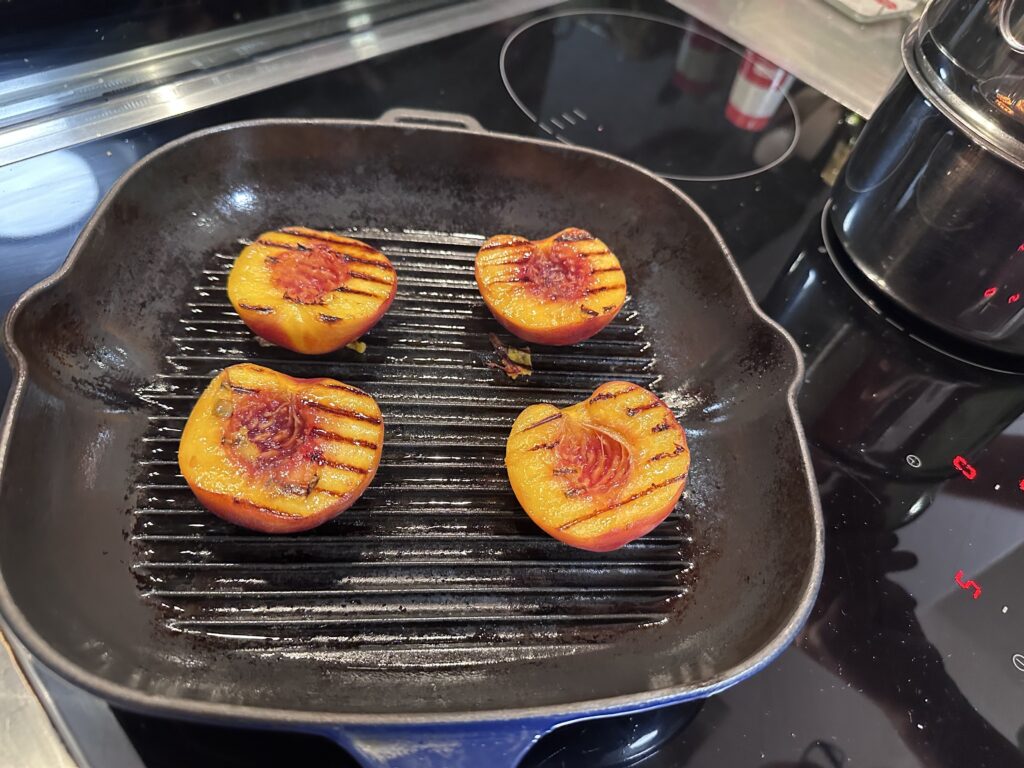
Meanwhile, he halved and pitted the fresh, ripe peaches, and he brushed them with macadamia oil. (He left the skin on.)
Then he grilled the peaches on a ridged grill pan.
Once the egg/sugar mixture was at the right temperature, he took it off the heat, added the vanilla, and began to whisk.
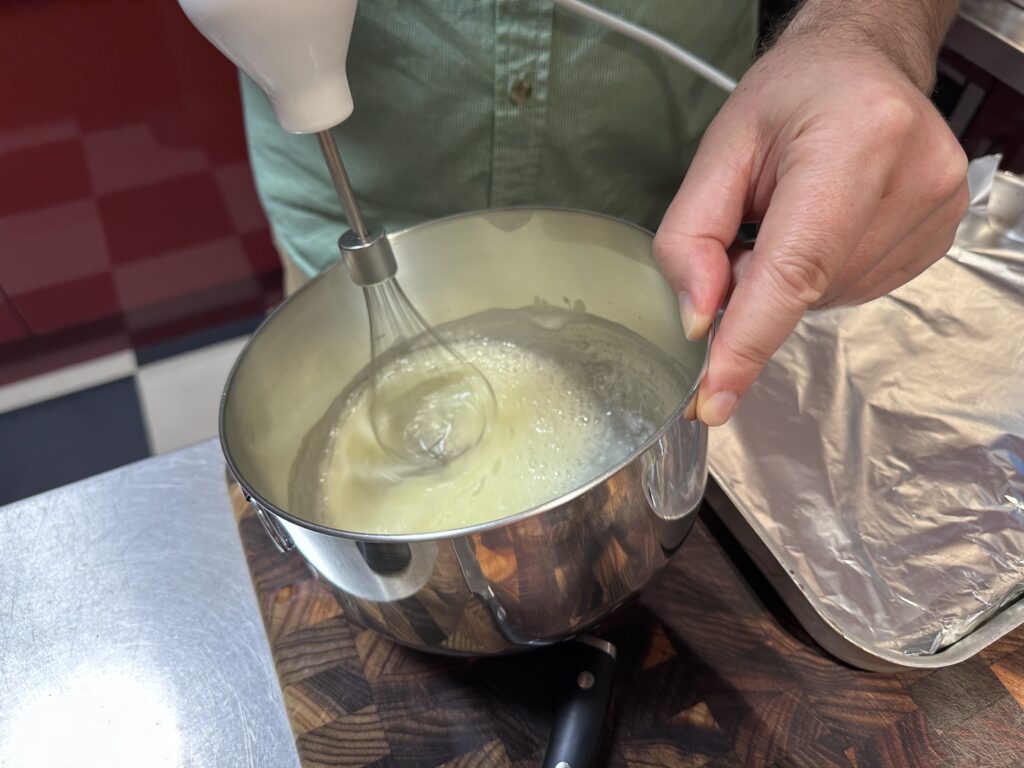
Eventually it became thick and glossy. (He thinks he might have over whipped it a bit as he was hoping for stiff peaks, but it still looked great to me!)

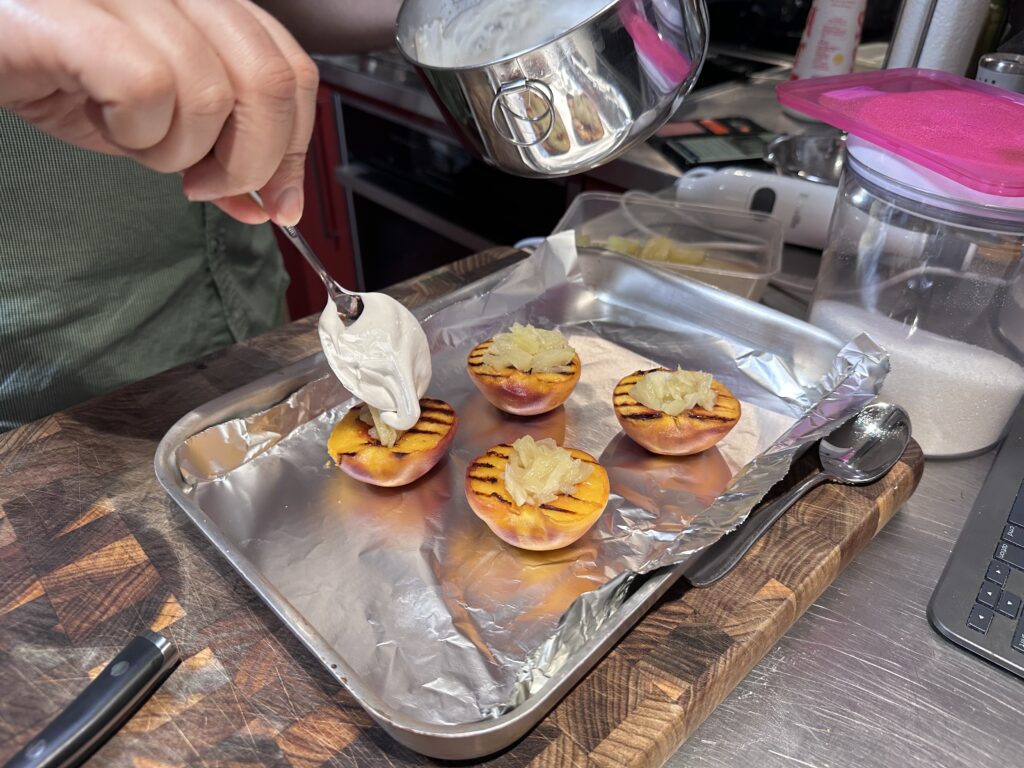
Time to assemble. He filled each grilled peach with crushed canned pineapple as before, and then added a big dollop of the Swiss meringue.
And then out came the blowtorch! 🔥 He gently toasted each one to a golden brown.
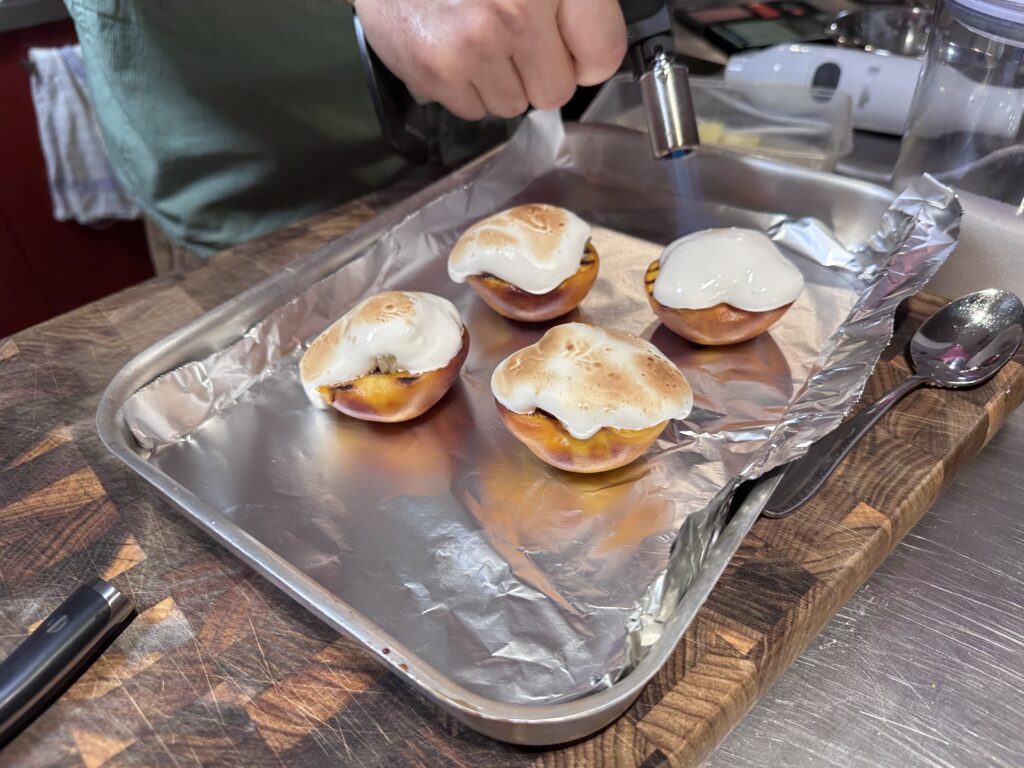
And here’s the completed (Fancy) Peach Marshmallow, again served with ice cream.
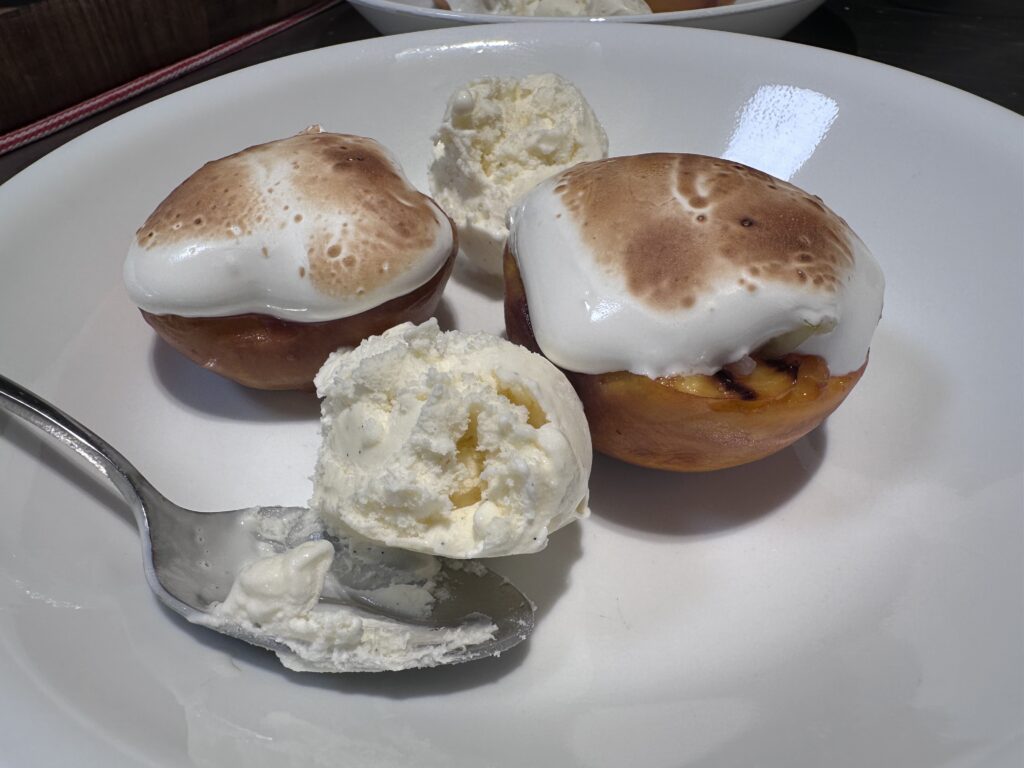
This version was SO MUCH BETTER. The ripe peach was soft with the perfect amount of bitterness from the char marks. The Swiss meringue was delicious and fluffy with that slight burnt sugar taste from toasted marshmallows. This is something you could serve to guests and rightly feel pretty proud of yourself!
Future enhancement: Rodd thinks there’s also scope to improve on the pineapple element, perhaps by adding a bit of rum or bourbon? Maybe caramelised and cooked down with some brown sugar and cinnamon? YES, PLEASE.


Woot, my knee-jerk don’t-overthink-it pub-quiz answer was Iran which seems to be [✓]. I ‘knew’ it was more populous than…